The Zungwini Mountain skirmishes took place on 20, 22 and 24 January 1879 during the Anglo-Zulu War. The mountain was a stronghold of the AbaQulusi Zulu tribe, who were reinforced by the forces of exiled Swazi prince Mbilini waMswati. The mountain lay near the proposed route of advance of a British column under Lieutenant-Colonel Evelyn Wood, one of three that marched on the Zulu capital, Ulundi, from early January. Aware that the other columns had made less progress Wood, who had halted to fortify a camp at Tinta's Kraal, decided to deal with the abaQulusi strongholds.
On 20 January a force of 104 irregular horse under Wood's subordinate, Lieutenant-Colonel Redvers Buller, carried out a reconnaissance of Zungwini Mountain. Buller captured a number of kraals before ascending the mountain where he was attacked by a force of 1,000 Zulu. Buller fought a short defensive action before withdrawing, with the Zulus in pursuit. Buller returned to Wood after making a second stand and driving off his pursuers.
The action of 20 January led Wood to order a stronger attack on the mountain, with a force under his command with regular infantry and artillery. Wood reached Zungwini on 22 January and ascended the mountain, driving off a small Zulu force and capturing livestock. The British spotted a force of 4,000 Zulu but Wood decided it was too late in the day to launch an attack. The force rested at Zungwini on 23 January and attacked on 24 January, the artillery inflicting casualties and dispersing a Zulu force before driving back the main body of Zulu. By this point Wood had received news of the defeat of the British centre column at the 22 January Battle of Isandlwana, which exposed his right flank to the main Zulu army. Wood ordered a withdrawal back to Tinta's Kraal and then to Kambula, from which he sent several raids against the abaQulusi before joining the second invasion of Zululand in June, which resulted in British victory in the war.
Prelude
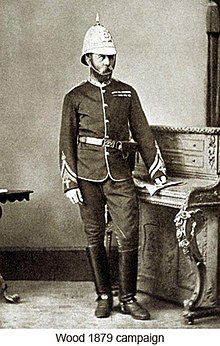
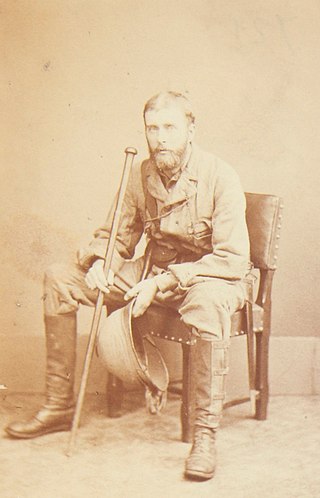
Wood c.1879
British forces invaded Zululand in January 1879, during the Anglo-Zulu War. The advance was made in three columns, a left column under Lieutenant-Colonel Evelyn Wood, a centre column under Lieutenant-General Frederic Thesiger, 2nd Baron Chelmsford and a right column under Colonel Charles Pearson. Wood was tasked with advancing into north-western Zululand.[1] He commanded a force of around 2,500 men. His fighting forces included eight companies of regular infantry from the 13th and (Wood's own) 90th Regiments of Foot, six artillery pieces from No 11 Battery, 7th Brigade, Royal Artillery and around 300 black auxiliaries known as Wood's Irregulars. Wood's column also included around 200 mounted white irregulars under Lieutenant-Colonel Redvers Buller.[2]
North-western Zululand was the province of the AbaQulusi tribe, descended from a regiment (iButho) established by King Shaka.[3] The king in 1879, Cetshwayo, ordered the abaQulusi, under their senior inDuna Msebe kaMadaka, to oppose any British advance.[1] They were to be reinforced by Swazi prince and exile Mbilini waMswati, who maintained a homestead on the flank of the hill of Hlobane.[1][4] The surrender of Mbilini was one of the terms of the British ultimatum that started the war.[5]
The abaQulusi were among the most loyal supporters of Cetshwayo and Wood expected them to put up a fierce opposition to his advance.[6] Wood considered the presence of the abaQulusi, who maintained strongholds on the flat-topped mountains of Zungwini, Hlobane and Ityenka, a threat to his supply lines and left flank and thought their defiance intimidated chiefs who might otherwise have surrendered to the British without bloodshed.[1][3][7][8] Mbilini, who took control of the abaQulusi forces and those of the Kubheka from the Ntombe valley, pursued a defensive strategy, influenced by that of the Swazi people. He evacuated the low-lying homesteads and withdrew his men and cattle to the hilltops.[5]
Wood advanced from Utrecht in the Transvaal Republic, via Balte Spruit, and entered Zululand on 7 January. His column reached Bemba's Kop on 13 January and halted there for four days. He advanced 10 miles (16km) eastwards to the Insegene River on 18 January, where a small skirmish was fought by Wood's Irregulars.[9] On 19 January the column secured the surrender of Zulu chief Tinta, who was sent back to Utrecht, and rested a day at his homestead, which they began to fortify; becoming known as Fort Tinta.[2][9] By this time Buller's irregular horse, scouting ahead of the column, had captured 600 Zulu cattle but found no significant opposition.[10] Wood was aware that the other columns were making slow progress and decided to use the time afforded to him to deal with the abaQulusi strongholds.[7]
On the morning of 20 January Buller rode out from Fort Tinta with 104 irregular horse, including men of the Frontier Light Horse, to carry out a reconnaissance of Zungwini Mountain.[1][9] Buller's force crossed the White Umfolozi River2 miles (3.2km) north of Mount Iseki.[8] He advanced to and captured Mabomba's kraal on the south-eastern spur of Zungwini.[8][1] A party of Boer irregulars, under Piet Uys, found 50 armed Zulu nearby at Seketwayo's Kraal. The Zulu fled into broken ground and were pursued by the Boers and 20 dismounted men sent by Buller. In the resulting skirmish twelve Zulu were killed and one Boer wounded by a thrown assegai. Four Zulu firearms and a number of assegai were recovered.[8]
After the skirmish Uys' men reported more Zulu present on the top of the mountain. A force under Buller ascended the slope by a cattle track to gain a view of the surrounding area but the Zulu moved to prevent his ascent.[8] Around 1,000 Zulu advanced on Buller, in their flanking horns of the buffalo formation.[1] Buller's force coalesced on a rocky knoll and fought off the central, chest, of the Zulu formation, inflicting at least eight dead on the Zulu, but were outflanked by the movement of the Zulu left wing, 300-strong, and right wing, 400-strong.[1][8] Buller ordered a withdrawal down the mountain, during which a man of the Frontier Light Horse was wounded and two others struck by spent musket balls. A horse belonging to one of the Boers was also hit.[8]
The Zulu pursued Buller as far as the White Umfolozi, with around 100 crossing the river before Buller turned his force round to drive them off. The Zulu force retreated back to the Zungwini.[1][8] The Zulus involved in the skirmish on 20 January included the abaQulusi and some of Mbilini's followers.[11] Buller wrote of the action: "I endeavoured to cross the upper plateau ... but the hill was too strongly held for us to force it". Wood did not hear about the skirmish until 7 pm when he received a note from Buller, sent during the withdrawal. Wood had recently sent 70 empty ox-drawn wagon back to Balte Spruit and was concerned for their safety, as Buller's note had been sent before he had seen off his pursuers.[7]
Wood completed his fortification of Fort Tinta on 21 January and determined to lead a stronger force to Zungwini.[11][9] Leaving only two companies of regular infantry (one each from the 13th and 90th) to guard the fort he set out at midnight on 21 January.[12][9] The horse were again led by Buller, while Wood led the advance with the 90th Regiment and his Irregulars. The 13th Regiment made up the rearguard.[13] Buller's force, with two artillery pieces, went to the western portion of the Zungwini Mountain range, Wood with the 90th and the Irregulars went to a point 3 miles (4.8km) east of Buller in the middle of the range and the remaining forces, under Colonel Gilbert of the 13th Regiment, occupied a point to the south-east of the mountain.[9]
Wood and Buller's parties converge on the summit of Zungwini at around 6 am, having met no resistance. They proceeded to the eastern slopes where they encountered and drove off a Zulu force, capturing a large quantity of livestock.[9][11] The Zulu withdrew across the Zungweni/Ityenka Nek towards Hlobane and Wood and Buller, following them, then saw a force of around 4,000 Zulu drilling on the north-western slopes of that mountain.[14][12][15] This force was mainly abaQulusi under their chieftain Msebe (who lived at Hlobane), but also a significant number of Mbilini's men.[13][16] Wood judged it too late in the day to launch an attack and he ordered his men to descend the mountain to bivouac with Gilbert's force.[9][12] After dark the men heard cannon fire from the direction of the centre column's camp at Isandlwana which Wood thought indicated an "unfavourable situation".[15] The camp had been overrun in the Battle of Isandlwana earlier that afternoon, so this sound came from a portion of the column that had been away on a reconnaissance with Chelmsford and returned to the camp that evening.[13]
With his men having been active in the field for 20 hours on 22 January Wood ordered a day of rest on 23 January, the force remaining at Gilbert's position close to Zungwini.[13][9] In the early morning of the following day Wood advanced with a strong force that included the four of the 7-pounder artillery pieces under Brevet Lieutenant-Colonel E. G. Tremlett.[1][17][15] The force had advanced 8 miles (13km) by 7.30 am reaching a point between the Zungwini and Ntendeka mountains when they encountered a party of abaQulusi Zulus running towards them.[12][11] They also came under fire from Zulu hidden in rocks on the slopes of Zungwini Mountain. Wood moved to his right to launch an attack with the 13th Regiment, the Boer irregulars and two guns leaving the 90th Light Infantry, two guns and baggage to follow. He recalled that he and Uys had to ride ahead of the men to encourage them on.[15] The artillery pieces unlimbered and opened fire, killing 50 Zulu and dispersing the remainder, who withdrew up Hlobane mountain.[12][14][11]
A cattle track to Wood's front proved to be impassable for the artillery so Wood passed around a rise on his left flank to continue the advance.[12] He came across the 90th Regiment advancing against a force of 4,000 Zulu, but having left their ammunition carts guarded only by a party of unarmed buglers who were being threatened by a force of 200 Zulu.[15] It was at this point that a messenger reached Wood, carrying news of the British defeat at Isandlwana. The man had been sent by Captain Alan Coulston Gardner, one of the few British officers to survive the battle. Gardner had escaped to Helpmekaar, Natal, but realised that Wood, whose force was just 35 miles (56km) from Isandlwana, was vulnerable to attack by the victorious Zulu. Gardner found no volunteer willing to carry a message so rode from Helpmekaar to Utrecht where he found a rider to carry the news to Wood.[12] Gardner's note explained that Chelmsford had ridden out from the camp at Isandlwana with much of the centre column, and in his absence the camp had been attacked and overrun with the loss of two artillery pieces and almost all of the men.[15]
Wood sent a message to Buller, who was with the horsemen, notifying him of the disaster and ordering his men to drive back the 200 Zulu. In the meantime Wood remonstrated with the commander of the 90th Regiment for advancing without orders. The regiment fired around two volleys before the Zulu force withdrew ahead of them. Wood ordered a pursuit, led by the Frontier Light Horse and Boers. After two hours Wood halted the men and gave them news of the defeat at Isandlwana.[15] Wood realised that the defeat meant his right flank was exposed and he could not capitalise on his successes at Zungwini.[18] He ordered the force to withdraw back to Fort Tinta.[1][2][15] Wood and Buller's victories at Zungwini had undermined local support for the abaQulusi and the war against the British; the eclipse of 22 January had also been held by the Zulu as a portent of the decline in Mbilini's power. The Zulu victory at Isandlwana countered this and persuaded the local Zulu chiefs to rally to the Zulu king.[18]
Later events
Wood and his men reached Fort Tinta on 25 January.[9] He considered the position too exposed and lacking in firewood to serve as a long-term base. Having no desire to return to Bemba's Kop or Balte Spruit in the south-west he decided to strike out westwards to Kambula.[19] Wood's men loaded up the stores left at Fort Tinta and abandoned the post on 26 January. They reached the White Umfolozi on 27 January and arrived at Khambula on 31 January, which they fortified.[20] On 28 January Wood had received orders from Chelmsford, advising him that he "must now be prepared to have the whole of the Zulu Army on [his] hands any day". Expecting an attack on his post Wood later recalled not sleeping for more than 2–3 hours at a time over the next three months, as he insisted on checking on the sentries personally.[21]
On 1 February Wood razed an abaQulusi stronghold east of Hlobane, killing six Zulu, burning 250 huts and taking 270 cattle.[21] Wood's forces continued to make such harassing attacks on the Zulu but he was embarrassed by a Zulu raid on the Transvaal settlement of Lüneburg on 10–11 February.[18] Wood afterwards sent Buller on retaliatory raids in the Intombe valley where his irregular horse were highly successful, killing 34 Zulu and recovering 375 oxen and 254 goats that the Zulu had taken from Lüneburg; British losses amounted to two of Wood's Irregulars killed.[22][23] On 12 March a British supply convoy and its escort, bound for Lüneburg, were lost in the Battle of Intombe. Again Wood responded with further retaliatory raids.[22]
Wood was approached by Hamu, a defecting Zulu chief, and agreed to send a force to the far side of Hlobane to escort Hamu's people into British-held territory. On 14 March Wood and Buller left with a force of 360 men, including some of Hamu's warriors. They reached Hamu's territory by nightfall and the following day headed back with 958 refugees, largely women and children. The camped near Zungwini on 15 March and reached Kambula on the following day.[24]
Wood became convinced that the abaQulusi and Mbilini's forces needed to be pushed out of their mountain strongholds before Chelmsford's second invasion could begin.[4] Wood lead a raid on Hlobane on 28 March that resulted in defeat as the British were cut off on the mountain top by the abaQulusi and elements of Cetshwayo's army.[14] After the survivors of Wood's force were pursued as far as Zungwini.[25] The following day the Zulu made an unsuccessful attack on Kambula.[26] The attempt cost the Zulu 2,000 dead and 1,000 seriously wounded; Wood pursued the survivors to Zungwini.[27] Chelmford's second invasion began on 31 May and Wood was assigned command of a flying column. His first action, on 5 June, was an inconclusive skirmish at Zungeni mountain. Following a steady and careful advance into Zululand the Zulu were defeated at the 4 July Battle of Ulundi and the war brought to a close.[28][29]
Related Research Articles
The Battle of Rorke's Drift, also known as the Defence of Rorke's Drift, was an engagement in the Anglo-Zulu War. The successful British defence of the mission station of Rorke's Drift, under the command of Lieutenants John Chard of the Royal Engineers and Gonville Bromhead, of the 24th Regiment of Foot began when a large contingent of Zulu warriors broke off from the main force during the final hour of the British defeat at the day-long Battle of Isandlwana on 22 January 1879, diverting 6 miles (9.7 km) to attack Rorke's Drift later that day and continuing into the following day.
The Anglo-Zulu War was fought in 1879 between the British Empire and the Zulu Kingdom. Following the passing of the British North America Act of 1867 forming a federation in Canada, Lord Carnarvon thought that a similar political effort, coupled with military campaigns, might succeed with the African Kingdoms, tribal areas and Boer republics in South Africa. In 1874, Sir Bartle Frere was sent to South Africa as High Commissioner for the British Empire to effect such plans, among the obstacles were the armed independent states of the South African Republic and the Kingdom of Zululand.
Cetshwayo kaMpande was the king of the Zulu Kingdom from 1873 to 1884 and its Commander in Chief during the Anglo-Zulu War of 1879. His name has been transliterated as Cetawayo, Cetewayo, Cetywajo and Ketchwayo. Cetshwayo consistently opposed the war and sought fruitlessly to make peace with the British, and was defeated and exiled following the Zulu defeat in the war. He was later allowed to return to Zululand, where he died in 1884.
The Battle of Isandlwana on 22 January 1879 was the first major encounter in the Anglo-Zulu War between the British Empire and the Zulu Kingdom. Eleven days after the British invaded Zululand in Southern Africa, a Zulu force of some 20,000 warriors attacked a portion of the British main column consisting of about 1,800 British, colonial and native troops with approximately 350 civilians. The Zulus were equipped mainly with the traditional assegai iron spears and cow-hide shields, but also had a number of muskets and antiquated rifles.
Frederic Augustus Thesiger, 2nd Baron Chelmsford, was a British Army officer who rose to prominence during the Anglo-Zulu War, when an expeditionary force under his command suffered a decisive defeat at the hands of a Zulu force at the Battle of Isandlwana in 1879. Despite this defeat, he was able to score several victories against the Zulus, culminating in the British victory at the Battle of Ulundi, which ended the war and partly restored his reputation in Britain.
The Battle of Kambula took place on 29 March 1879, during the Anglo-Zulu War, when a Zulu military force attacked the British camp at Kambula, having routed the mounted element of the British force at the Battle of Hlobane the day before. The battle was a decisive Zulu defeat and the Zulu warriors lost their belief in victory. The war ended after the Zulu defeat at the Battle of Ulundi on 4 July 1879.
The siege of Eshowe took place during the Anglo-Zulu War of 1879. The siege was part of a three-pronged attack on the Zulu Impis of king Cetshwayo at Ulundi. After an incursion as far as Eshowe Colonel Charles Pearson was besieged there for two months by the Zulus.
The Battle of Hlobane took place at Hlobane, near the modern town of Vryheid in KwaZulu-Natal, South Africa during the Anglo-Zulu War.
The Battle of Ulundi took place at the Zulu capital of Ulundi on 4 July 1879 and was the last major battle of the Anglo-Zulu War. The British army broke the military power of the Zulu nation by defeating the main Zulu army and immediately afterwards capturing and burning the royal kraal of oNdini.
The Battle of Gingindlovu (uMgungundlovu) was fought on 2 April 1879 between a British relief column sent to break the Siege of Eshowe and a Zulu impi of King Cetshwayo.
The Battle of Intombe was an action fought on 12 March 1879, between Zulu troops loyal to Mbilini waMswati and British soldiers and African civilian conductors, drivers and voorloopers (scouts) defending a convoy of wagons on the road from Derby to Lüneberg. The convoy straggled badly along the road due to the rains and bogged on both sides of the Intombe river, which had risen and was in spate due to the rains. Most of the wagons were laagered, somewhat haphazardly, close to the river on the Derby side with a small party and two wagons on the Lüneberg side.
AbaQulusi Local Municipality is a local municipality in Zululand in the KwaZulu-Natal province of South Africa. It is named after the AbaQulusi, a Zulu clan whose descendants live in the vicinities of Vryheid, Utrecht, eDumbe and Ngotshe. They hailed from different origins but were unified by their allegiance to local Zulu royal homesteads. Historically they were not drafted into ordinary "amabutho" regiments but rather into a royal section, and no "umnumzane" chief presented them in the Zulu king's council.
The 12 January 1879 action at Sihayo's Kraal was an early skirmish in the Anglo-Zulu War. The day after launching an invasion of Zululand, the British Lieutenant-General Lord Chelmsford led a reconnaissance in force against the kraal of Zulu Chief Sihayo kaXongo. This was intended to secure his left flank for an advance on the Zulu capital at Ulundi and as retribution against Sihayo for the incursion of his sons into the neighbouring British Colony of Natal.
The Natal Border Guard was an auxiliary force levied for the defence of the Colony of Natal during the Anglo-Zulu War of 1879. British military commander Lord Chelmsford had intended to raise a large auxiliary force to support his invasion of the Zulu Kingdom but was opposed by the civilian government of the Colony of Natal, led by its governor Henry Ernest Gascoyne Bulwer, who would have to finance the unit. Bulwer eventually allowed a smaller force to be raised with the stipulation that it not be deployed outside of Natal. This unit was to serve only on a part-time basis, receive no training and fight with the traditional weapons of spear and shield.
The Natal Native Pioneer Corps, commonly referred to as the Natal Pioneers, was a British unit of the Zulu War. Raised in November/December 1878 the unit served throughout the war of 1879 to provide engineering support to the British invasion of Zululand. Three companies were formed each comprising around 100 men and clad in old British Army uniforms. The units served at the battles of Isandlwana, Eshowe and Ulundi.
Sihayo kaXongo was a Zulu inKosi (chief). In some contemporary British documents he is referred to as Sirhayo or Sirayo. He was an inDuna (commander) of the iNdabakawombe iButho and supported Cetshwayo in the 1856 Zulu Civil War. Under Cetshwayo, Sihayo was a chief of a key territory on the border with the British Colony of Natal and had a seat on the iBandla. Sihayo was an Anglophile who wore European clothes and maintained friendly relations with trader James Rorke who lived nearby at Rorke's Drift. By 1864, Sihayo was head of the Qungebe tribe and that year agreed a new western border of the kingdom with Boer leader Marthinus Wessel Pretorius.
David Barry Moriarty was a British captain of Irish origin who was most notable for commanding the 80th Regiment of Foot during the Battle of Intombe, in which he was killed during the fighting.
The Zungeni Mountain skirmish took place on 5 June 1879 between British and Zulu forces during the Second invasion of Zululand in what is now part of South Africa. British irregular horse commanded by Colonel Redvers Buller discovered a force of 300 Zulu levies at a settlement near the Zungeni Mountain. The horsemen charged and scattered the Zulu before burning the settlement. Buller's men withdrew after coming under fire from the Zulu who had threatened to surround them.
Lt Gen Richard Thomas Glyn was a British Army officer. He joined the 82nd Regiment of Foot by purchasing an ensign's commission in 1850. Glyn served with the regiment in the Crimean War and rose in rank to captain before transferring to the 24th Regiment of Foot in 1856. He served with that regiment in the Indian Mutiny and was appointed to command it in 1872. In 1875 he accompanied the 1st battalion of the regiment on service in the Cape Colony and fought with them in the 9th Cape Frontier War of 1877–78. He was appointed a Companion of the Order of the Bath after the war.
Major-General John Cecil Russell (1839–1909) was a British cavalry officer. After a brief service with the Oxford University Rifle Volunteer Corps Russell purchased a commission in the 11th Light Dragoons in 1860. He transferred to the 10th Light Dragoons and rose to the rank of captain by purchase before transferring to the 12th Lancers in 1872. Russell served with Garnet Wolseley in the 1873–1874 Anglo-Ashanti War and was considered a member of the Wolseley ring of rising men. In 1875 he was appointed an Equerry in Waiting to Edward, Prince of Wales and became an Extra Equerry in 1878.
Morris, Donald R. (1965). The Washing of the Spears. Pen and Sword. ISBN067-1-63108-X.
Rothwell, Captain J.S. (1989). Narrative of the Field Operations Connected with the Zulu War of 1879. London: Greenhill Books. ISBN1-85367-041-3. OL8980321M– via Quartermaster General's Department, Intelligence Branch, War Office.
This page is based on this Wikipedia article Text is available under the CC BY-SA 4.0 license; additional terms may apply. Images, videos and audio are available under their respective licenses.