A resistor is a passive two-terminal electrical component that implements electrical resistance as a circuit element. In electronic circuits, resistors are used to reduce current flow, adjust signal levels, to divide voltages, bias active elements, and terminate transmission lines, among other uses. High-power resistors that can dissipate many watts of electrical power as heat, may be used as part of motor controls, in power distribution systems, or as test loads for generators. Fixed resistors have resistances that only change slightly with temperature, time or operating voltage. Variable resistors can be used to adjust circuit elements, or as sensing devices for heat, light, humidity, force, or chemical activity.
In mathematics, the infimum of a subset S of a partially ordered set T is the greatest element in T that is less than or equal to all elements of S, if such an element exists. Consequently, the term greatest lower bound is also commonly used.

In descriptive statistics, a box plot or boxplot is a method for graphically depicting groups of numerical data through their quartiles. Box plots may also have lines extending from the boxes (whiskers) indicating variability outside the upper and lower quartiles, hence the terms box-and-whisker plot and box-and-whisker diagram. Outliers may be plotted as individual points. Box plots are non-parametric: they display variation in samples of a statistical population without making any assumptions of the underlying statistical distribution. The spacings between the different parts of the box indicate the degree of dispersion (spread) and skewness in the data, and show outliers. In addition to the points themselves, they allow one to visually estimate various L-estimators, notably the interquartile range, midhinge, range, mid-range, and trimean. Box plots can be drawn either horizontally or vertically. Box plots received their name from the box in the middle.
Fluid bearings are bearings in which the load is supported by a thin layer of rapidly moving pressurized liquid or gas between the bearing surfaces. Since there is no contact between the moving parts, there is no sliding friction, allowing fluid bearings to have lower friction, wear and vibration than many other types of bearings. Thus, it is possible for some fluid bearings to have near-zero wear if operated correctly.

In mathematical analysis, the maxima and minima of a function, known collectively as extrema, are the largest and smallest value of the function, either within a given range or on the entire domain. Pierre de Fermat was one of the first mathematicians to propose a general technique, adequality, for finding the maxima and minima of functions.

Engineering tolerance is the permissible limit or limits of variation in:
- a physical dimension;
- a measured value or physical property of a material, manufactured object, system, or service;
- other measured values ;
- in engineering and safety, a physical distance or space (tolerance), as in a truck (lorry), train or boat under a bridge as well as a train in a tunnel ;
- in mechanical engineering the space between a bolt and a nut or a hole, etc.

In computer science a T-tree is a type of binary tree data structure that is used by main-memory databases, such as Datablitz, EXtremeDB, MySQL Cluster, Oracle TimesTen and MobileLite.

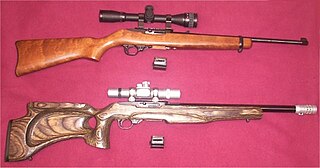
Accurizing is the process of improving the accuracy and precision of a gun.

Plasma arc welding (PAW) is an arc welding process similar to gas tungsten arc welding (GTAW). The electric arc is formed between an electrode and the workpiece. The key difference from GTAW is that in PAW, the electrode is positioned within the body of the torch, so the plasma arc is separated from the shielding gas envelope. The plasma is then forced through a fine-bore copper nozzle which constricts the arc and the plasma exits the orifice at high velocities and a temperature approaching 28,000 °C (50,000 °F) or higher.

A screw thread, often shortened to thread, is a helical structure used to convert between rotational and linear movement or force. A screw thread is a ridge wrapped around a cylinder or cone in the form of a helix, with the former being called a straight thread and the latter called a tapered thread. A screw thread is the essential feature of the screw as a simple machine and also as a threaded fastener.
An interference fit, also known as a press fit or friction fit is a form of fastening between two tight fitting mating parts that produces a joint which is held together by friction after the parts are pushed together.
The ABEC scale is an industry accepted standard for the tolerances of a ball bearing. It was developed by the Annular Bearing Engineering Committee (ABEC) of the American Bearing Manufacturers Association (ABMA). The ABEC scale is designed to provide bearing manufacturers dimensional specifications that meet the standards of precision bearings in a specified class. Manufacturers who produce equipment that require bearings must also know the dimensional tolerances to design parts that will accommodate a bearing.

Trapezoidal thread forms are screw thread profiles with trapezoidal outlines. They are the most common forms used for leadscrews. They offer high strength and ease of manufacture. They are typically found where large loads are required, as in a vise or the leadscrew of a lathe. Standardized variations include multiple-start threads, left-hand threads, and self-centering threads.
Roundness is the measure of how closely the shape of an object approaches that of a mathematically perfect circle. Roundness applies in two dimensions, such as the cross sectional circles along a cylindrical object such as a shaft or a cylindrical roller for a bearing. In geometric dimensioning and tolerancing, control of a cylinder can also include its fidelity to the longitudinal axis, yielding cylindricity. The analogue of roundness in three dimensions is sphericity.
The ISO metric screw threads are the most commonly used type of general-purpose screw thread worldwide. They were one of the first international standards agreed when the International Organization for Standardization (ISO) was set up in 1947.
Engineering fits are generally used as part of geometric dimensioning and tolerancing when a part or assembly is designed. In engineering terms, the "fit" is the clearance between two mating parts, and the size of this clearance determines whether the parts can, at one end of the spectrum, move or rotate independently from each other or, at the other end, are temporarily or permanently joined together. Engineering fits are generally described as a "shaft and hole" pairing, but are not necessarily limited to just round components. ISO is the internationally accepted standard for defining engineering fits, but ANSI is often still used in North America.
In engineering and machining, an allowance is a planned deviation between an exact dimension and a nominal or theoretical dimension, or between an intermediate-stage dimension and an intended final dimension. The unifying abstract concept is that a certain amount of difference allows for some known factor of compensation or interference. For example, an area of excess metal may be left because it is needed to complete subsequent machining. Common cases are listed below. An allowance, which is a planned deviation from an ideal, is contrasted with a tolerance, which accounts for expected but unplanned deviations.
The distinction between real value and nominal value occurs in many fields. From a philosophical viewpoint, nominal value represents an accepted condition, which is a goal or an approximation, as opposed to the real value, which is always present.
Tolerance analysis is the general term for activities related to the study of accumulated variation in mechanical parts and assemblies. Its methods may be used on other types of systems subject to accumulated variation, such as mechanical and electrical systems. Engineers analyze tolerances for the purpose of evaluating geometric dimensioning and tolerancing (GD&T). Methods include 2D tolerance stacks, 3D Monte Carlo simulations, and datum conversions.
Production drawings are complete sets of drawings that detail the manufacturing and assembly of products.


