Related Research Articles

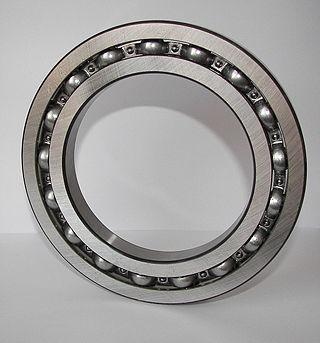
A bearing is a machine element that constrains relative motion to only the desired motion and reduces friction between moving parts. The design of the bearing may, for example, provide for free linear movement of the moving part or for free rotation around a fixed axis; or, it may prevent a motion by controlling the vectors of normal forces that bear on the moving parts. Most bearings facilitate the desired motion by minimizing friction. Bearings are classified broadly according to the type of operation, the motions allowed, or the directions of the loads (forces) applied to the parts.

A rivet is a permanent mechanical fastener. Before being installed, a rivet consists of a smooth cylindrical shaft with a head on one end. The end opposite the head is called the tail. On installation, the rivet is placed in a punched or drilled hole, and the tail is upset or bucked, so that it expands to about 1.5 times the original shaft diameter, holding the rivet in place. In other words, the pounding or pulling creates a new "head" on the tail end by smashing the "tail" material flatter, resulting in a rivet that is roughly a dumbbell shape. To distinguish between the two ends of the rivet, the original head is called the factory head and the deformed end is called the shop head or buck-tail.

Engineering tolerance is the permissible limit or limits of variation in:
- a physical dimension;
- a measured value or physical property of a material, manufactured object, system, or service;
- other measured values ;
- in engineering and safety, a physical distance or space (tolerance), as in a truck (lorry), train or boat under a bridge as well as a train in a tunnel ;
- in mechanical engineering, the space between a bolt and a nut or a hole, etc.
The Unified Thread Standard (UTS) defines a standard thread form and series—along with allowances, tolerances, and designations—for screw threads commonly used in the United States and Canada. It is the main standard for bolts, nuts, and a wide variety of other threaded fasteners used in these countries. It has the same 60° profile as the ISO metric screw thread, but the characteristic dimensions of each UTS thread were chosen as an inch fraction rather than a millimeter value. The UTS is currently controlled by ASME/ANSI in the United States.

A bolted joint is one of the most common elements in construction and machine design. It consists of a male threaded fastener that captures and joins other parts, secured with a matching female screw thread. There are two main types of bolted joint designs: tension joints and shear joints.
A reamer is a type of rotary cutting tool used in metalworking. Precision reamers are designed to enlarge the size of a previously formed hole by a small amount but with a high degree of accuracy to leave smooth sides. There are also non-precision reamers which are used for more basic enlargement of holes or for removing burrs. The process of enlarging the hole is called reaming. There are many different types of reamer and they may be designed for use as a hand tool or in a machine tool, such as a milling machine or drill press.

A treenail, also trenail, trennel, or trunnel, is a wooden peg, pin, or dowel used to fasten pieces of wood together, especially in timber frames, covered bridges, wooden shipbuilding and boat building. It is driven into a hole bored through two pieces of structural wood.

A screw thread, often shortened to thread, is a helical structure used to convert between rotational and linear movement or force. A screw thread is a ridge wrapped around a cylinder or cone in the form of a helix, with the former being called a straight thread and the latter called a tapered thread. A screw thread is the essential feature of the screw as a simple machine and also as a threaded fastener.

A machine taper is a system for securing cutting tools or toolholders in the spindle of a machine tool or power tool. A male member of conical form fits into the female socket, which has a matching taper of equal angle.
The shank is the end of a drill bit grasped by the chuck of a drill. The cutting edges of the drill bit contact the workpiece, and are connected via the shaft with the shank, which fits into the chuck. In many cases a general-purpose arrangement is used, such as a bit with cylindrical shaft and shank in a three-jaw chuck which grips a cylindrical shank tightly. Different shank and chuck combination can deliver improved performance, such as allowing higher torque, greater centering accuracy, or moving the bit independently of the chuck, with a hammer action.

In machining, boring is the process of enlarging a hole that has already been drilled by means of a single-point cutting tool, such as in boring a gun barrel or an engine cylinder. Boring is used to achieve greater accuracy of the diameter of a hole, and can be used to cut a tapered hole. Boring can be viewed as the internal-diameter counterpart to turning, which cuts external diameters.

A taper pin is a fastener used in mechanical engineering. They are steel rods with one end having a slightly larger diameter than the other.

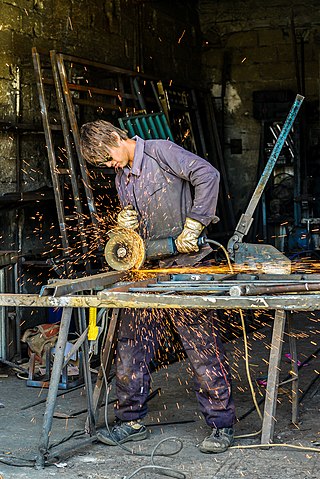
Grinding is a type of abrasive machining process which uses a grinding wheel as cutting tool.
Engineering fits are generally used as part of geometric dimensioning and tolerancing when a part or assembly is designed. In engineering terms, the "fit" is the clearance between two mating parts, and the size of this clearance determines whether the parts can, at one end of the spectrum, move or rotate independently from each other or, at the other end, are temporarily or permanently joined. Engineering fits are generally described as a "shaft and hole" pairing, but are not necessarily limited to just round components. ISO is the internationally accepted standard for defining engineering fits, but ANSI is often still used in North America.
In engineering and machining, an allowance is a planned deviation between an exact dimension and a nominal or theoretical dimension, or between an intermediate-stage dimension and an intended final dimension. The unifying abstract concept is that a certain amount of difference allows for some known factor of compensation or interference. For example, an area of excess metal may be left because it is needed to complete subsequent machining. Common cases are listed below. An allowance, which is a planned deviation from an ideal, is contrasted with a tolerance, which accounts for expected but unplanned deviations.
In mechanical engineering, a key is a machine element used to connect a rotating machine element to a shaft. The key prevents relative rotation between the two parts and may enable torque transmission. For a key to function, the shaft and rotating machine element must have a keyway and a keyseat, which is a slot and pocket in which the key fits. The whole system is called a keyed joint. A keyed joint may allow relative axial movement between the parts.

A screw and a bolt are similar types of fastener typically made of metal and characterized by a helical ridge, called a male thread.

Friction stud welding is a solid phase welding technique involving a stud or appurtenance being rotated at high speed while being forced against a substrate, generating heat by friction. The metal surfaces reach a temperature at which they flow plastically under pressure, surface impurities are expelled and a forged weld is formed.

A bolt is a form of threaded fastener with an external male thread requiring a matching pre-formed female thread such as a nut. Bolts are very closely related to screws.
Rule based DFM analysis for forging is the controlled deformation of metal into a specific shape by compressive forces. The forging process goes back to 8000 B.C. and evolved from the manual art of simple blacksmithing. Then as now, a series of compressive hammer blows performs the shaping or forging of the part. Modern forging uses machine driven impact hammers or presses that deforms the work-piece by controlled pressure.
References
- ↑ Alan O. Lebeck (1991). Principles and design of mechanical face seals. Wiley-Interscience. p. 232. ISBN 978-0-471-51533-3.
- ↑ "Press Fit Engineering and Design Calculator". www.engineersedge.com. Retrieved 2017-02-22.
- ↑ Machinery's Handbook 27th Edition
- ↑ Heinz P. Bloch (1998). Improving machinery reliability (3rd ed.). Gulf Professional Publishing. p. 216. ISBN 978-0-88415-661-1.
- ↑ "Coupling Design and Selection". Archived from the original on 2009-09-26. Retrieved 2010-01-30.