56th (East Lancashire) Light Anti-Aircraft Regiment, Royal Artillery

Last updated

56th (East Lancashire) LAA Regiment, RA
556 (East Lancashire) HAA Regiment, RA
Koning Soldaat., item 60.jpg
Cap badge of the Royal Artillery
ActiveJune 1939–10 March 1955
CountryFlag of the United Kingdom.svg  United Kingdom
Branch Flag of the British Army.svg Territorial Army
Role Anti-Aircraft Artillery
Size3 Batteries
Part of 6 AA Brigade
8th Armoured Division
X Corps
Fifth US Army
70 AA Brigade
Garrison/HQ Oswaldtwistle
Manchester
Engagements Norwegian Campaign
Alamein
North African Campaign
Operation Avalanche
Anzio
Italian Campaign
Garfagnana

The 56th (East Lancashire) Light Anti-Aircraft Regiment, Royal Artillery, (56th (EL) LAA Rgt) was a Royal Artillery (RA) air defence unit of Britain's part-time Territorial Army (TA) raised as a duplicate unit just before the outbreak of the Second World War. It served in the Norwegian Campaign and then joined 8th Armoured Division. It was sent to Egypt and participated in the Second Battle of El Alamein and the subsequent pursuit across North Africa. It then fought in the Italian Campaign, including defending the Salerno and Anzio beachheads. It often operated under US command, on one occasion in an anti-tank role. The regiment reformed as heavy AA artillery in the postwar TA and continued until 1955 when it merged with other units in Lancashire.

Contents

Origin

After the Munich Crisis Britain's part-time Territorial Army was rapidly doubled in size. In June 1939 the Burnley-based 52nd (East Lancashire) Light Anti-Aircraft Regiment, Royal Artillery (itself only recently converted to the light anti-aircraft (LAA) role from a field artillery regiment) formed a duplicate regiment, 56th Light Anti-Aircraft Regiment. This consisted of Regimental Headquarters (RHQ) at Oswaldtwistle and 166–168 LAA Batteries. [1] [2]

At this stage LAA units were armed with Light machine guns (AALMGs), usually old Lewis guns, but the new Bofors 40 mm gun was on order. [3]

Second World War

Mobilisation

In June 1939, as the regiment was forming, the international situation worsened and a partial mobilisation of the TA units in Anti-Aircraft Command was begun. In a process known as 'couverture', each AA unit did a month's tour of duty in rotation to man selected AA gun and searchlight positions. The whole of AA Command was fully mobilised on 24 August ahead of the declaration of war. [4] 56th LAA Regiment mobilised in Western Command but was not yet assigned to any formation. [5] During October 1939 the regiment underwent training at Tuxford and Hatfield in Yorkshire, where it came under the command of 39 AA Brigade. [6]

Norway

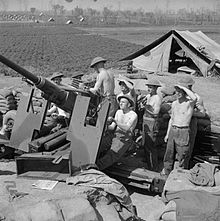
Bofors gun and crew at Harstad, 14 May 1930. The British Army in Norway April - June 1940 N182.jpg
Bofors gun and crew at Harstad, 14 May 1930.

Germany invaded Norway on 9 April 1940, and British and French forces launched a hastily planned and badly-executed operation to intervene. Because the bulk of Britain's Regular Army had already deployed to France, most of the troops available for the Norwegian Campaign were part-time soldiers of the TA. The main Allied objective was the port of Narvik. After the German naval forces there had been destroyed, a base was established on the island of Harstad just outside Narvikfjord, with an AA allocation of light (LAA) and heavy (HAA) guns under the command of 6 AA Brigade. 56th LAA Regiment was preparing to be deployed to France with the British Expeditionary Force (BEF), but despite its relative lack of training and its deficiencies in men and equipment, it was hurriedly sent to Norway as part of this force. [7] [8]

While the main land force was en route to Narvik, the British Government diverted two infantry brigades to land at Namsos and Åndalsnes, north and south of Trondheim respectively. 166 LAA Battery of 56th LAA Rgt was allocated to 146 (1st West Riding) Brigade ('Mauriceforce') going to Namsos and 168/56 LAA Bty went with 148 (North Midland) Bde ('Sickleforce') to Åndalsnes. Meanwhile, RHQ and 167/56 LAA Bty continued as planned to join 6 AA Bde at Harstad. [7] [8] [9] [10] [11]

Åndalsnes

Sickleforce embarked on the Royal Navy cruisers Arethusa and Galatea and a large transport ship at Rosyth on 14 April expecting to go to Namsos. It was then diverted to Åndalsnes, where the transport could not be used, so part of the force was transshipped to two other cruisers, Carlisle and Curacoa and two destroyers. However, the transhipment was done hurriedly under blackout conditions and important stores were left behind, including the No 3 Predictors for 168 LAA Bty's Bofors guns. The convoy sailed at 07.00 on 17 April and the first flight of Sickleforce began landing at Åndalsnes about midnight on 18 April. The accompanying Troop of 168 LAA Bty got its Bofors guns smartly ashore on 19 April, and the rest of the battery arrived with the second flight (board the cruisers Galatea, Glasgow and Sheffield ) on 21 April. Sickleforce quickly secured its first objective, the railway junction at Dombås, and prepared to turn north towards Trondheim. However, at the urging of the Norwegians 148 Bde was diverted south to support the Norwegian troops fighting at Lillehammer, coming under air attack from the Luftwaffe as they went forward. Unable to operate in the snow off the roads the British troops were soon in trouble. 15 Brigade arrived at Åndalsnes to reinforce Sickleforce on 23 April and advanced with a troop of 168 LAA Bty as far as Otta where it met the survivors of 148 Bde and became engaged in bitter fighting on 25 April. 168 LAA Battery got three of its Bofors into action, bringing down three enemy aircraft before one of the guns received a direct hit, killing or wounding all of its detachment. As Sickleforce and the Norwegians were forced back, the Luftwaffe delivered strong harassing attacks, singling out the Bofors guns on the exposed mountain slopes. However, 15 Bde managed to break contact and 168 LAA Bty extracted four Bofors to be sent back to Åndalsnes while the men began a long march through deep snow. Åndalsnes had also been under heavy air attack from above the range of the few Bofors there. The War Office ordered the evacuation of Åndalsnes, which took place by night on 30 April, aboard the cruisers Arethusa, Galatea, Sheffield and Southampton . 168 LAA Battery was taken back to Scapa Flow. [7] [10] [12] [13]

Namsos

146 Bde at Namsos was allocated 166 LAA Bty among other AA units, but large ships could not berth at the docks and the French AA guns could not be landed for almost a week. The first Bofors troop (without predictors) did not arrive until 26 April, by which time the infantry who had moved towards Trondheim had been subjected to strong enemy attacks, which included artillery and aircraft, and had been pushed back. Namsos itself had been under heavy air attack since 20 April. The Bofors guns went forward and were at once attacked by low-level and dive-bombers; two guns got away, the rest were knocked out. Namsos too was evacuated the day after Åndalsnes. [7] [13] [14]

Narvik

For the main attack on Narvik, AA guns were landed at Harstad, an island base just outside Narvikfjord with an anchorage, and at an airstrip at Skånland on the opposite coast (which never became fit for use). An existing airfield at Bardufoss at a remote site on the mainland was cleared for fighters, with a small supply port at Sørreisa. Initial AA defence for Bardufoss was to be provided by 3 LAA Bty, who had to blast packed ice clear before the guns could be emplaced. By 9 May, 3 LAA Bty had its HQ and two guns at Harstad, two guns at Skånstad, two struggling up the mountains to Bardufoss, and a troop of four fighting dive-bomber attacks on the French at Gratangen – a total spread of 80 miles of land and water. 56th LAA Regiment then arrived with 10 Bofors guns of 167 LAA Bty, and RHQ took over command of 3 LAA Bty. 167 LAA Battery was assigned to defend Sorreisa, but defence of Tromsø was later added to the force's commitments, and four guns were sent there, the British Army's most northerly deployment at that time. All land movements had to be carried our along steep narrow roads banked with 6 feet (1.8 m) of snow, and the Bofors required two gun tractors in tandem to get up some of the mountain roads, such as the route to Bardufoss. [7] [10] [15] [16]

The final Allied attack on Narvik began on 27 May, launched by French, Polish and Norwegian troops, supported by British artillery. However, immediately after its capture, orders were received to destroy the port and evacuate the force to the UK. (The BEF was simultaneously being evacuated from Dunkirk.) To cover the evacuation, AA units were ordered to maintain maximum activity and especially to prevent reconnaissance overflights. At the same time, 6 AA Bde was ordered by London to recover its 3.7-inch and 40 mm guns as a matter of priority. This was done by progressively thinning out defences. The Bodo force was evacuated at night by naval destroyers after a 100-plus German air raid destroyed the town and airstrip: all equipment there had to be abandoned. However, 6 AA Bde was able to assemble 22 Bofors and five HAA guns from the outlying positions at Harstad, with a number of predictors and heightfinders. 6 AA Brigade ended all AA defence on 6 June and by 8 June the British troops had embarked with their surviving equipment and the convoy sailed for the UK, still under air attack. [7] [16] [17]

Home defence

8th Armoured Division's formation sign. 8ArmDiv.png
8th Armoured Division's formation sign.

The returning AA units were rapidly reinforced, re-equipped where possible, and redeployed for future integration into existing defence plans. 56th LAA Regiment went to Dunfermline where it re-equipped with Bofors guns. [18] Then on 24 January 1941 the regiment joined 8th Support Group in the recently formed 8th Armoured Division. Support Groups at the time consisted of a brigade of mobile field, anti-tank (A/T) and LAA artillery together with lorried infantry, intended to support the armoured brigades of the division. The LAA regiment was equipped with towed Bofors guns. [19] [20]

The division trained for operations, first in Northern Command, then in Southern Command, and finally in South-Eastern Command. [21] On 7 February 1942 56th LAA Rgt was authorised to use the same 'East Lancashire' subtitle as its parent unit. [1]

North Africa

8th Armoured Division embarked for the Middle East on 7 May 1942 and landed in Egypt on 7 July. It arrived to find that the support group concept had been scrapped in Middle East Forces, and from 23 July 1942 56th (EL) LAA Rgt came directly under the divisional RA. The division never got its motor infantry brigade, and soon after arrival its armoured brigades were stripped away to act independently, each accompanied by a battery from 56th (EL) LAA Rgt. The divisional HQ RA was then designated 'Hammerforce' on 18 October, consisting once more of the field, A/T and LAA regiments, and assigned a role under 1st Armoured Division for the Second Battle of El Alamein. With one troop also detached to protect X Corps' HQ, 56th (EL) LAA Rgt had few of its 48 Bofors guns under its direct command, being distributed as follows: [19] [21] [22] [23] [24] [25]

Alamein

Careful consideration was given to AA defence during the build-up for Alamein. Instead of being deployed in circles round vulnerable points (VPs), the LAA guns were sited on the attackers' likely lines of approach; opening fire would not give away the presence of a likely target, and numerous dummy and alternative positions were prepared. Within the divisions the control of LAA batteries was decentralised to brigade level, and a feature of the assault planning was the integration of the LAA guns into ground fire tasks in support of infantry and armour. When the initial artillery bombardment for Operation Lightfoot began on the night of 23 October, LAA batteries switched from defending the assembly areas to firing Tracer ammunition to mark the attacking units' boundaries in the dust and darkness. This was important because the armoured divisions were restricted to the lanes they could clear through the extensive minefields, which also held up 23 Armoured Bde with the infantry divisions. Neither 1st nor 10th Armoured divisions were able to break out beyond the minefield by dawn as planned. Over the following nights the attacking formations inched their way forward. The Desert Air Force (DAF) had air superiority and there was little enemy air activity on X and XXX Corps' fronts during daylight, but on the night of 24/25 October German aircraft bombed 10th Armoured Division and disorganised 24 Armoured Bde's advance. Next day the division was held up by enemy tanks and A/T guns and was withdrawn to reorganise, with 24 Armoured Bde joining 1st Armoured Division. While Eighth Army reorganised for a resumption of the attack (Operation Supercharge), it drove off a number of ground and air counter-attacks. Launched on 1/2 November, Supercharge achieved the desired breakout, and the armoured divisions began the pursuit, reaching Mersa Matruh and Sidi Barrani by 8 November, the Halfaya Pass by 11 November, and Tobruk by 13 November. [26] [27]

Pursuit to Tripoli

A Bofors crew watches the sky after a Stuka raid during Eighth Army's advance to Tripoli, 29 January 1943. The British Army in North Africa 1943 E21873.jpg
A Bofors crew watches the sky after a Stuka raid during Eighth Army's advance to Tripoli, 29 January 1943.

8th Armoured Division clearly had no future as a fighting formation, and 56th (EL) LAA Rgt formally left it on 6 November; the division was disbanded on 1 January 1943. [21] 168 LAA Battery returned from its attachment to 23 Armoured Bde on 17 November. [22] The regiment was now assigned to army and corps level tasks. [28] At this time LAA btys were in the process of converting to the new establishment of 18 x Bofors per battery (ie three 6-gun troops). [29] As Eighth Army and the DAF advanced rapidly across Cyrenaica, the AA units spread out behind, defending the captured ports and landing grounds (LGs), and the lengthening lines of communication. X Corps reached El Agheila on the far side of Cyrenaica and halted there, while XXX Corps continued the pursuit towards Tripoli, followed by 2 AA Bde 'leap-frogging' its units forward. By January 1943, RHQ and 168 LAA Bty (11 x Bofors) of 56th (EL) LAA Rgt were with X Corps HQ near El Agheila, while 166 and 167 Btys were under 2 AA Bde assigned to tasks with XXX Corps. Tripoli fell to Eighth Army on 23 January. [27] [29] [30]

After the capture of Tripoli 56th (EL) LAA Rgt passed to the command of 12 AA Bde. The role of this formation was to move up behind Eighth Army's advance and defend the DAF's LGs as they came into use, with batteries working under the command of the DAF tactical wing to which they were allocated. The brigade developed an efficient system of providing rolling support for the DAF's tactical wings as they made long shifts forwards to maintain contact with the advancing army. This involved the RAF, Royal Engineers (RE) airfield construction teams, and local ground defence units as well as the AA units; all were represented in the joint reconnaissance parties that followed closely behind the leading battalions. They selected new sites for landing strips or renovated old ones, maintaining radio contact through RAF or RA channels with the main body so that movement orders could be passed to the following AA batteries. Movement was usually by leap-frogging from previously occupied LGs, though sometimes an AA battery was waiting in a hidden concentration area ready to move forward. RAF transport aircraft flew ground staff, equipment and battery staffs to the new locations. Within a few hours the AA positions were manned and the fighter squadrons would arrive. 12 AA Brigade had 20–30 separate convoys moving on any given day, and it was providing cover for six RAF wings and one US Army Air Force (USAAF) Group, and also manning dummy airstrips, compete with flare-paths, aircraft, flash simulators and people. [27] [31]

Italy

Salerno

X Corps' formation sign X Corps.png
X Corps' formation sign

After the North African Campaign ended with the capture of Tunis in May 1943, 56th (EL) LAA Rgt was once again acting as X Corps' LAA regiment. [28] [32] X Corps was not employed in the Allied invasion of Sicily, but trained for the subsequent assault landings at Salerno on the Italian mainland (Operation Avalanche). It had the task of capturing the Port of Salerno and Montecorvino Airfield, then turning north to capture Naples. The landings on 9 September were difficult, but a beachhead was successfully achieved. The first major hitch occurred when Montecorvino Airfield was not captured in the first rush, and continued to be fought over for the next four days. Even then the beachhead battle raged for days within 3,000 yards (2,700 m) of the shore. The divisional LAA regiments, together with 12 AA Bde, which provided the AA components of the Beach groups, were landed into this crowded space. However, a breakout was achieved on 16 September and the rest of X Corps could pour ashore. As corps LAA regiment, 56th's role now was to defend HQs, gun areas and other VPs as X Corps first captured Naples on 1 October, and then moved on to assault the German positions on the River Volturno on 12 October. The corps then had a stable period as the Allies faced the German Winter Line. [33] [34] [35]

Garigliano

In January 1944 56th (EL) LAA Rgt was still corps LAA regiment to X Corps, which was preparing for the start of operations against the Winter Line under the command of Fifth US Army. On the night of 17/18 January it carried out an assault crossing of the Garigliano, the preliminary phase of the Battle of Monte Cassino. This was successful and the engineers began building bridges. However, the follow-up crossings upstream on 19/20 January failed, and the operations against Monte Cassino descended into stalemate by mid-February. X Corps' attempts to expand its bridgehead came under counter-attack but it had 12 AA Bde's LAA regiments to defend the Garigliano bridges against Luftwaffe fighter-bomber attacks, while 56th's responsibility was the HQs and gun areas. Because the HAA regiments were largely engaged in ground fire, their gun-laying radar sets could be used to supplement the single local-warning radar set and pick up the approach of raids using cloud cover before diving to low level. [36] [37] [38]

Anzio

Meanwhile, to outflank the Monte Cassino position, Fifth US Army carried out a landing on the coast further north. 1st British Division made the initial landing at Anzio alongside US troops in Operation Shingle on 21 January. Its 90th LAA Rgt landed a Bofors battery with the first wave and the whole regiment was ashore by D + 5 to defend the field artillery positions. At first all went well, but the commander of the operation waited too long to build up his forces and lost the initiative. The Germans quickly contained the beachhead and by 1 February were driving the Allied troops back towards the sea, and sending over waves of air attacks. 168 LAA Battery was sent from 56th (EL) LAA Rgt to reinforce 90th LAA Rgt and landed on 5 February, followed by the first battery of 100th LAA Rgt on 14 February as 56th (London) Division arrived in the beachhead. These five LAA batteries, coordinated by the commanding officer (CO) of 90th LAA Rgt, had to cover the spread of six British field artillery regiments, which were unable to disperse or find cover in the congested beachhead. [39] [40]

Most of the AA effort at Anzio was controlled by 35th US AA Artillery Brigade, but the radar of its single mobile operations room was having trouble giving early warning of attacks by low-flying Messerschmitt Bf 109 and Focke-Wulf Fw 190 single-seat fighter-bombers. 90th LAA Regiment's CO asked for help and got some mobile No 4 Mark III lightweight local warning radar sets sent from Salerno. All his batteries prepared concentrations of fire within their sectors, for use by day or night to cover the front. The guns fired on fixed bearings at an elevation of 35 degrees, employing 12-second long-burning tracer ammunition: 'this produced a curtain of bursts at about 8,000 feet (2,400 m) with sheets of tracer behind it'. These concentrations could be ordered by the gun operations room, by radio, or by a 'master gun' on watch in each troop. By 19 February the other two batteries of 100th LAA Rgt arrived to extend the fire plan. [39]

A Bofors gun crew in Italy, April 1944. The British Army in Italy 1944 NA13703.jpg
A Bofors gun crew in Italy, April 1944.

In the flat, open country of the beachhead, the LAA positions were dangerously conspicuous and were frequently shelled and mortared. Although the battered infantry of 1st Division were rotated, the LAA remained in action. Raids continued all through March, in strengths varying from single aircraft to 20+, while the grim fighting along the front often drew in the LAA troops to give fire support to the infantry. 35th US AAA Brigade claimed that by 25 March the number of aircraft shot down by all AA units amounted to 141. Although the tempo of air attacks declined in April, the calls for support from the infantry engaged in Trench warfare were endless. Targets included enemy forming-up areas, buildings containing machine-guns, and enemy positions along railway embarkments, The LAA batteries used the field artillery's observation posts (OPs) or set up their own. Meanwhile, they continued to shoot down attacking aircraft in large numbers: Luftwaffe casualties were so heavy that it stopped daylight raids in May and concentrated on night bombing of the port and beaches, which were protected by the heavy AA guns of 35th US AAA Bde. [39]

Monte Cassino to the Gothic Line

During March and April 1944 X Corps was regrouped for the final assault on Monte Cassino (Operation Diadem). Communications in the mountainous area were difficult, and on X Corps' front the HAA batteries were strung out in a line with gun positions about 5 miles (8.0 km) apart; the LAA gunners helped their colleagues by carrying supplies up to these positions at night and under mortar fire. The renewed attack on Cassino began on the night of 11/12 May. The LAA regiments were committed to bridges, defiles, assembly areas and artillery positions, and enemy aircraft were active in low-level strafing and bombing. Meanwhile, the Allies broke out of the Anzio beachhead on 23 May and Fifth US Army drove on and captured Rome in early June. The Germans then pulled back to the Gothic Line with the Allies following up. There were severe problems in getting the AA guns forward along the heavily congested routes. [37] [41]

Although it carried out a number of raids, the gravely weakened Luftwaffe had been unable to influence any of these operations. Meanwhile, British forces in Italy were suffering an acute manpower shortage. In June 1944 the Chiefs of Staff decided that the AA regiments in Italy must be reduced – LAA regiments shrank from 54 to 36 guns – their surplus personnel being converted to other roles, particularly infantry. [42] [43] [44] [45] As part of the reorganisation, corps LAA regiments were abolished, and those remaining joined the AA brigades. In July, 56th (EL) LAA Rgt joined 8 AA Bde, which had moved up from protecting ports and airfields in the rear to take over defence of the new US airfields in the Tiber plain. This commitment soon diminished, and the brigade moved across Italy to join Eighth Army. However, 56th (EL) LAA Rgt remained at the airfields under Fifth US Army and joined 62 AA Bde by October. [38] [45] [46] [47]

Fifth US Army had been slowly pounding away at the Gothic Line. In December the Germans launched a counter-attack (the Battle of Garfagnana) between Lucca and Pistoia to retake Livorno, and 62 AA Bde was closely involved in this battle. There was little air activity, and while some of the LAA regiments acted as infantry, 56th (EL) LAA Rgt was used in an anti-tank role equipped with US M10 tank destroyers mounting 3-inch guns. [38] [46] [48]

By late 1944, the Luftwaffe was suffering from such shortages of pilots, aircraft and fuel that serious air attacks could be discounted. As a result, further cuts could be made in AA units to address the British reinforcement crisis. [42] [43] [49] 56th (East Lancashire) LAA Regiment left 62 AA Bde in February 1945 and together with 166, 167 and 168 LAA Btys entered suspended animation on 6 March 1945. [1] [2] [46] [47]

Postwar

AA Command's formation sign. AA command 2nd.svg
AA Command's formation sign.

The TA was reconstituted on 1 January 1947, and the regiment was reformed as 556 (East Lancashire) Heavy AA Rgt at Manchester in 70 Anti-Aircraft Brigade of AA Command. [1] [2] [50] [51] [52] [53] [54] [55]

AA Command was disbanded on 10 March 1955 and there were wholesale mergers amongst its units. Together with 293 (East Lancashire) LAA Rgt (descended from its prewar parent, 52nd (EL) LAA Rgt) the regiment was merged into 380 (King's Own) Light Regiment (a light field regiment rather than AA). When there were further reductions in the TA on 1 May 1961, the King's Own part of the regiment reverted to infantry in the King's Own Royal Regiment (Lancaster), while the two former East Lancashire batteries, P and Q, amalgamated into 288 (2nd West Lancashire) LAA Rgt as Q (East Lancashire) Bty. However, when the TA was reduced into the Territorial and Army Volunteer Reserve (TAVR) in 1967, this regiment also became part of the King's Own, ending the artillery lineage. [2] [51] [53] [54] [56] [57] [58]

Insignia

A regimental arm badge was authorised for 556 (EL) HAA Rgt in 1952 and worn until 1955. It consisted of a Red Rose of Lancaster within a silver circle (representing the end of a gun barrel) on a dark blue square. [2]

Notes

  1. 1 2 3 4 Frederick, pp. 802, 828–9.
  2. 1 2 3 4 5 Litchfield, pp. 115–6.
  3. Routledge, pp. 52–5.
  4. Routledge, pp. 65–6, 371.
  5. Western Command 3 September 1939 at Patriot Files.
  6. 39 AA Bde War Diary 1939–41, The National Archives (TNA), Kew, file WO 166/2272.
  7. 1 2 3 4 5 6 Farndale, pp. 27–8; Annex C.
  8. 1 2 Routledge, pp. 108–9.
  9. Derry, pp. 60–5.
  10. 1 2 3 Derry, Appendix B, Pt II.
  11. Joslen, p. 461.
  12. Derry, pp. 67–9, 79, 98–100, 103–15, 119–32, 134–9, Map 6.
  13. 1 2 Routledge, p. 109.
  14. Derry, pp. 84–96, 139–42.
  15. Derry, pp. 204–5, Map 10.
  16. 1 2 Routledge, pp. 110–2.
  17. Derry, pp. 201–2, 207–11, 213–22.
  18. Farndale, Years of Defeat p. 98.
  19. 1 2 Joslen, p. 219.
  20. Order of Battle of the Field Force in the United Kingdom, Part 3: Royal Artillery (Non-Divisional Units), 25 March 1941, TNA file WO 212/5.
  21. 1 2 3 Joslen, p. 22.
  22. 1 2 Joslen, pp. 170–4, 574.
  23. Joslen, pp. 567–8.
  24. Playfair & Molony, Vol IV, pp. 7–9, 37.
  25. Routledge, Table XXIII, p. 161.
  26. Playfair & Molony, Vol IV, pp. 37–41, 44–9, 54–7, 64–79, 81–97, Maps 12 & 13.
  27. 1 2 3 Routledge, pp. 155–8.
  28. 1 2 Joslen, p. 486.
  29. 1 2 Table XXIV, pp. 161–2.
  30. Playfair & Molony, Vol IV, pp. 215–21, 227, 230–32, 236–7, Map 25.
  31. Playfair & Molony, Vol IV, p. 237.
  32. Routledge, Table XXV, p. 164.
  33. Joslen, p. 467.
  34. Molony, Vol V, pp. 259–60, 276–80, 289–90, 295–7, 299–303, 307–10, 324, 343, 438–40, 443–4.
  35. Routledge, pp. 270–4.
  36. Molony, Vol V, pp. 606–12, 614–20, 622–36.
  37. 1 2 Routledge, p. 283.
  38. 1 2 3 Routledge, Table XLVII, pp. 296–7.
  39. 1 2 3 Routledge, pp. 286–7.
  40. Molony, Vol V, pp. 650–1, 666–70, 674–7, 726–9, 744–5.
  41. Molony, Vol VI, Pt I, pp. 61, 228–34, 247–9, 279–80.
  42. 1 2 Molony, Vol V, pp. 421–3.
  43. 1 2 Molony, Vol VI, Pt I, pp. 448–50.
  44. Jackson, Vol VI, Pt II, pp. 137–8.
  45. 1 2 Routledge, p. 278.
  46. 1 2 3 Routledge, pp. 284–6, 289.
  47. 1 2 Routledge, Table XLIV, p. 293.
  48. Jackson, Vol VI, Pt III, pp. 127–9.
  49. Jackson, Vol VI, Pt II, pp. 371–2.
  50. Farndale, Years of Defeat, Annex M.
  51. 1 2 Frederick, pp. 1002, 1022.
  52. Litchfield, Appendix 5.
  53. 1 2 289–302 Rgts RA at British Army 1945 onwards.
  54. 1 2 520–563 Rgts RA at British Army 1945 onwards.
  55. Watson, TA 1947.
  56. Frederick, pp. 1008–9.
  57. Litchfield, p. 124.
  58. 372–413 Rgts RA at British Army 1945 onwards.

Related Research Articles

<span class="mw-page-title-main">City of London Yeomanry (Rough Riders)</span> British Territorial Army unit

The City of London Yeomanry (Rough Riders) was a yeomanry regiment of the British Territorial Army, formed in 1901 from veterans of the Second Boer War. In the First World War it served dismounted in the Gallipoli Campaign but reverted to the mounted role in the Senussi campaign, at Salonika and in Palestine. It ended the war as a machine gun unit on the Western Front. In the interwar years it was reduced to a battery in a composite Royal Horse Artillery unit in London, but in the period of rearmament before the Second World War it was expanded into a full regiment of light anti-aircraft artillery. It served in this role during The Blitz and later in the Tunisian and Italian campaigns. Postwar it became an armoured regiment. It amalgamated with the Inns of Court Regiment to form the Inns of Court & City Yeomanry in 1961. The lineage is maintained by 68 (Inns of Court & City Yeomanry) Signal Squadron, part of 71 (Yeomanry) Signal Regiment.

<span class="mw-page-title-main">Manx Regiment</span> Military unit

The Manx Regiment – the 15th Light Anti Aircraft Regiment, Royal Artillery – was raised in 1938 as a Territorial Army (TA) unit of the British Army. It recruited on the Isle of Man and formed part of Anti-Aircraft Command at the outbreak of the Second World War. The regiment was posted to the Middle East in November 1940, serving in the Western Desert, East Africa and Crete. In August 1942 it became the air defence regiment for the 7th Armoured Division. It served with the division through the North African, Italian and North West European campaigns. It was reformed in the postwar TA as 515 Light Anti-Aircraft Regiment before being reduced to a staff troop in 42nd (Lancashire) Division in 1955.

<span class="mw-page-title-main">45th Light Anti-Aircraft Regiment, Royal Artillery</span> Military unit

45th Light Anti-Aircraft Regiment, Royal Artillery, was a British Territorial Army (TA) unit formed in July 1940. After serving in Anti-Aircraft Command during the Battle of Britain and The Blitz, it went to North Africa as part of Operation Torch and fought in Tunisia and Italy. It ended World War II as a garrison regiment.

42nd Anti-Aircraft Brigade was an air defence formation of Britain's Territorial Army (TA). It was responsible for protecting the area around Glasgow and industry along the Firth of Clyde during the Second World War.

The 80th Anti-Aircraft Brigade was an air defence formation of the British Army during the Second World War. It landed on D-Day and saw action throughout the campaign in North West Europe, providing early warning of attacks by V-1 flying bombs against Antwerp during the winter of 1944–45.

The 76th Anti-Aircraft Brigade was an air defence formation of the British Army during the Second World War. It landed on D-Day and saw action throughout the campaign in North West Europe. Its guns operated in both anti-aircraft (AA) and ground roles in clearing and then defending the Scheldt Estuary until the end of the war.

<span class="mw-page-title-main">73rd Light Anti-Aircraft Regiment, Royal Artillery</span> Military unit

The 73rd Light Anti-Aircraft Regiment, was an air defence unit of the British Army's Royal Artillery during World War II. It served during the London Blitz, landed on D-Day, seeing action throughout the campaign in North West Europe and defending the cities of Belgium against V-1 flying bombs.

<span class="mw-page-title-main">1st Devonshire Artillery Volunteers</span> Military unit

The 1st Devonshire Artillery Volunteers and its successor units served in the British Army's Reserve Forces from 1859 to 1961. During World War I it carried out garrison duty in British India but went on to see active service in the Third Anglo-Afghan War. Converting to an air defence role before World War II its units participated in the Norwegian campaign and the Dunkirk evacuation, the Battle of Britain and then the campaigns in North Africa, Italy, and Burma

6th Anti-Aircraft Brigade was an air defence formation of the British Army formed during the Second World War. It served in the disastrous Norwegian Campaign in 1940 and then defended East Anglia during the Battle of Britain and The Blitz. It was reorganised to take part in the invasion of Normandy, but instead was diverted to defending Southern England against V-1 flying bombs. It was briefly recreated in the postwar Regular Army.

2nd Anti-Aircraft Brigade was an air defence formation of the British Army during the Second World War, seeing active service in the Battle of France and the North African and Italian campaigns.

52nd Light Anti-Aircraft Brigade was an air defence formation of Britain's Territorial Army (TA) during the Second World War. Formed on the outbreak of war to control static searchlight (S/L) sites in Scotland, it later operated as a headquarters (HQ) for mobile anti-aircraft (AA) gun units in the Allied invasion of North Africa and subsequent Italian Campaign.

The 1st Linlithgowshire Rifle Volunteers was a Scottish unit of Britain's Volunteer Force raised in Linlithgow in 1860. It later became a cyclist battalion of the Royal Scots, which served in Home Defence and saw action in the North Russia Intervention force during World War I. Between the wars it was reduced to company strength, but just before World War II it was converted into an anti-aircraft (AA) regiment of the Royal Artillery (RA). This served in Anti-Aircraft Command during the Blitz and later distinguished itself in the Siege of Tobruk. It fought through the Italian Campaign and its successors continued in the postwar Territorial Army (TA) until 1967.

12th Anti-Aircraft Brigade was an air defence formation of the British Army during the Second World War. It specialised in providing anti-aircraft (AA) protection for forward airfields, for the Advanced Air Striking Force in the Battle of France and the Desert Air Force in the North African Campaign. It landed at Salerno in 1943 and fought through the Italian Campaign, its guns often engaging ground targets as well as aircraft. It was reformed postwar and continued for a few years in Anti-Aircraft Command.

<span class="mw-page-title-main">25th Light Anti-Aircraft Regiment, Royal Artillery</span> Military unit

25th Light Anti-Aircraft Regiment, Royal Artillery was an air defence unit of Britain's Territorial Army (TA) formed in Liverpool just before the outbreak of World War II. It saw active service in the Western Desert Campaign, losing a battery at the Battle of Gazala, and then joined 50th (Northumbrian) Infantry Division for the assault landings in Sicily and Normandy. It ended the war with 53rd (Welsh) Infantry Division in Germany, and was reformed in the postwar TA, eventually merging with other Liverpool units.

<span class="mw-page-title-main">61st Light Anti-Aircraft Regiment, Royal Artillery</span> Military unit

61st Light Anti-Aircraft Regiment was an air defence unit of Britain's Royal Artillery formed during the Second World War. Its component Territorial Army batteries, both from London, had already seen action in the Battle of France before the regiment was formed in 1940. It went on to serve with armoured formations in the Western Desert Campaign, including the Battle of Gazala. It was broken up in the Middle East in 1944 to provide infantry reinforcements for the Italian Campaign.

<span class="mw-page-title-main">117th Light Anti-Aircraft Regiment, Royal Artillery</span> Military unit

The 117th Light Anti-Aircraft Regiment, Royal Artillery, was an air defence unit of the British Army during World War II. Initially raised as an infantry battalion of the Royal Ulster Rifles (RUR) in 1940, it transferred to the Royal Artillery in 1942. It served in Tunisia, Malta, Sicily and Italy before being broken up in 1944 and the gunners converted back into infantrymen.

<span class="mw-page-title-main">90th Light Anti-Aircraft Regiment, Royal Artillery</span> Military unit

The 90th Light Anti-Aircraft Regiment, Royal Artillery, was an air defence unit of the British Army during World War II. Initially raised as an infantry battalion of the South Wales Borderers in 1940, it transferred to the Royal Artillery in 1941. It served with 1st Infantry Division in the final stages of the Tunisian Campaign, distinguished itself in the Anzio landings and subsequent fighting, and continued serving in Italy before being disbanded at the beginning of 1945.

<span class="mw-page-title-main">49th Light Anti-Aircraft Regiment, Royal Artillery</span> Military unit

The 49th Light Anti-Aircraft Regiment was an air defence unit of Britain's Royal Artillery during World War II. After serving with Anti-Aircraft Command during and after the Blitz, it joined 78th 'Battleaxe' Division to take part in the Allied invasion of North Africa. It then served with the division in Sicily and Italy until it was disbanded at the end of 1944.

<span class="mw-page-title-main">99th Light Anti-Aircraft Regiment, Royal Artillery</span> Military unit

The 99th Light Anti-Aircraft Regiment was an air defence unit of the British Army during World War II. Initially raised as an infantry battalion of the Queen's Royal Regiment in 1940, it transferred to the Royal Artillery at the end of 1941. It participated in the assault landings in Sicily and Italy. It then served through the Italian Campaign until it was disbanded in 1944.

<span class="mw-page-title-main">52nd (East Lancashire) Light Anti-Aircraft Regiment, Royal Artillery</span> Military unit

The 52nd Light Anti-Aircraft Regiment, was a Royal Artillery (RA) air defence unit of Britain's part-time Territorial Army (TA) converted from a field artillery unit just before the outbreak of World War II. It served in the Battle of France, shooting down a large number of aircraft before being evacuated from Dunkirk. It was then sent to the Mediterranean, where detached batteries were destroyed in the fighting in Greece and Crete. The reformed regiment then took part in the defence of the Suez Canal and later in the Italian Campaign. It continued in the postwar TA until 1955 when it merged with other units in Lancashire.

References

External sources