The Battle of Cane Hill was fought between Union and Confederate forces during the American Civil War on November 28, 1862, in northwestern Arkansas, near the town of Cane Hill. Confederate Major GeneralThomas C. Hindman had made an abortive offensive into southwestern Missouri from Arkansas earlier in the year, but had withdrawn to Arkansas. Union troops under Brigadier GeneralJames G. Blunt had followed Hindman into northwestern Arkansas, and the Confederate general saw an opportunity to attack Blunt while his division was separated from the rest of the Union Army of the Frontier. Hindman then sent a force under Brigadier General John S. Marmaduke to Cane Hill, which was also known as Boonsboro, to collect supplies. In early November, a detachment of Blunt's command led by ColonelWilliam F. Cloud defeated a small Confederate force commanded by Colonel Emmett MacDonald in the Cane Hill area.
After MacDonald's defeat, Marmaduke remained in the Cane Hill area with his force. Blunt moved to attack Marmaduke on November 27. The Confederates expected the Union attack to come up the Cincinnati Road, but it instead followed the Ridge Road and then the Fayetteville Road. Cloud's men led the Union advance and made contact with Colonel Joseph O. Shelby's Confederate troopers on the morning of November 28. Shelby withdrew from the Cane Hill area after an artillery duel, and Marmaduke reformed his line in the Newburg area.
Due to the Union artillery advantage, the Confederates fell back from Newburg to an elevation known as Reed's Mountain. Shelby conducted a rear-guard action by having a series of small forces confront the Union before falling back and allowing the next line to engage. The Confederates made a stand at Reed's Mountain, but were forced to withdraw. Blunt continued to pursue, and several miles south of the John Morrow house, Confederate troops led by Colonel Charles A. Carroll laid an ambush for Blunt's leading elements. The Confederates then presented a flag of truce as a ruse to give themselves time to withdraw from the field. In early December, Hindman moved to attack Blunt's force, but Union reinforcements from Springfield, Missouri, under the command of Brigadier General Francis J. Herron arrived in time to aid Blunt. The ensuing Battle of Prairie Grove was fought on December 7. While the outcome of the fighting was inconclusive, Hindman withdrew from the field and the Union retained control of Missouri and northwestern Arkansas.
In March 1862, Union forces commanded by Brigadier GeneralSamuel R. Curtis defeated a Confederate army commanded by Major GeneralEarl Van Dorn in the Battle of Pea Ridge fought in northwestern Arkansas.[4] After the defeat, Van Dorn abandoned Arkansas and took most of the Confederate soldiers and military supplies in the state with him across the Mississippi River into Tennessee.[5] Curtis moved his army east and captured the Mississippi River city of Helena.[6][7] On May 31, Major General Thomas C. Hindman took command of Confederate forces in Arkansas, Missouri, and the Indian Territory[8] and rebuilt Confederate military strength in the region. To accomplish this, Hindman used methods that were both unpopular and sometimes extralegal, and he angered many prominent Arkansas civilians. As a result, he was removed from district command by the Confederate government and replaced by Major General Theophilus Holmes.[9]
Hindman retained a field command, and advanced his forces into southwestern Missouri.[10] Curtis, who now commanded the Department of Missouri, formed the Army of the Frontier which was commanded by Brigadier General John M. Schofield. Hindman was temporarily recalled by Holmes, and the two commanders left in charge in his absence performed poorly.[11] By the end of October, the Confederates had been driven back from Missouri into Arkansas, and Schofield had one division, commanded by Brigadier General James G. Blunt, stationed in Benton County in northwestern Arkansas. In early November, the other two divisions of the Army of the Frontier fell back to the vicinity of Springfield, Missouri, while Hindman's Confederates occupied Van Buren, Arkansas.[12][13]
Prelude
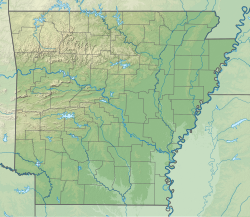
A map of northwestern Arkansas, showing locations significant to the American Civil War
Hindman saw an opportunity in the Union positioning, since Blunt was isolated from the rest of the Army of the Frontier. Hindman decided to push a cavalry force into the Cane Hill[14][a] area to distract Blunt, and then isolate Blunt's force and defeat it before reinforcements from Springfield could arrive.[14] The Confederate cavalry was commanded by Brigadier General John S. Marmaduke,[10] and in early November, Marmaduke's division moved north towards Cane Hill with about 2,000 men and six cannons, collecting provisions from civilians in the area.[16] Blunt learned of this movement, and on November 7, sent ColonelWilliam F. Cloud with 500 men and an artillery battery to attack the Confederates. The next day, Cloud's command routed a Confederate cavalry force commanded by Colonel Emmett MacDonald before returning to the main Union camp.[17]
Marmaduke's cavalry remained in the general area, raiding mills and collecting supplies.[18] While Marmaduke had around 2,000 men, Union intelligence placed the Confederate strength at 5,000 men. Blunt placed his division into a defensive posture and informed Schofield of the developments; a planned movement east by the divisions at Springfield was cancelled.[19] On November 23, Union reports credited the Confederates at Cane Hill with over 8,000 men,[20] while Blunt had about 6,000 men with him.[21] Wanting to stop the Confederates' supply-gathering in the Cane Hill area and believing himself abandoned by Schofield, Blunt decided to go on the offensive. Blunt believed that an attack brought the best odds of success,[22] and he was still smarting from an earlier incident in which he assumed a defensive position in the face of a Confederate assault that had never occurred.[21] This advance was delayed by two days while Blunt waited for a group of supply wagons to arrive. Logistics was difficult in the Ozark Mountains and played a major role in the operation and timing of campaigns in the region.[23] While Blunt's men had plentiful ammunition, Marmaduke's Confederates were short on both ammunition and percussion caps. The Union also had a numerical advantage in artillery:[24] thirty guns to six.[25][26] Furthermore, most of the Confederate cannons were obsolescent. The Union cavalry's horses were in better condition than those of the Confederates, and the Confederates were inadequately uniformed.[24] Leaving on November 27 with 5,000 men,[23] Blunt's force reached Rhea's Mill the next morning;[27] Rhea's Mill was only 7 miles (11km) from Cane Hill.[28]
Marmaduke had planned a strike against a Union position at Elkhorn Tavern, but he learned early on the morning of November 28 that Blunt's forces were advancing up the Line Road, so the Elkhorn Tavern movement was cancelled. Ordering his supply wagons to safety, Marmaduke decided to fight a delaying action to buy time for the wagons. Anticipating that the Union forces would take the direct route via the Cincinnati Road, the Confederates took up a position defending that road. However, Blunt approached via the Ridge Road, which intersected the Fayetteville Road before leading to the Cane Hill area. This resulted in the Confederates holding a line facing northwest, while Blunt arrived from the northeast.[29] Patrols from Colonel Joseph O. Shelby's force guarded the Fayetteville Road. Two guns from Joseph Bledsoe's Missouri Battery were positioned: one aimed down the Cincinnati Road, and the other overlooking the Fayetteville Road.[30]
Battle
After having resumed the movement at 5:00 am on November 28,[31] Blunt's advance passed the junction of the Ridge Road and the Fayetteville Road, and Cloud was ordered to take the lead of the column. He sent forward the 2nd Kansas Cavalry Regiment and an artillery battery associated with the regiment that was armed with two mountain howitzers.[32] After having made it to about 0.5 miles (0.8km) from the Confederate position without resistance,[31] the Kansans encountered Shelby's scouts who withdrew to the main Confederate camp after a brief exchange of fire. The Union pursuit followed to a position below a hill where Bledsoe's battery was deployed. Cloud claimed that one of the mountain howitzers opened the ensuing artillery duel, while Confederate staff officer John Newman Edwards claimed that the Confederate artillery fired first. Both historian William L. Shea and a journal article written by Kim Allen Scott and Stephen Burgess side with the Confederate claim to have opened the artillery duel.[33][34] This exchange of artillery began at about 10:00 am.[33]
Map of the battlefield prepared by the American Battlefield Protection Program. The top red ring is the location of the Cane Hill/Newburg fighting, the middle red ring encloses the Reed's Mountain area, and the lower one is the site of the fighting south of the Morrow place.
Both sides brought up additional cannons. Bledsoe's second gun was repositioned, and two cannons from Shoup's Arkansas Battery were advanced to the front. On the Union side, six cannons from the 2nd Indiana Battery deployed. Both sides' batteries fired upon each for about an hour with little effect.[35] By this time, Shelby had determined that Union forces were not using the Cincinnati Road.[36] Blunt found himself with only the small lead force, as the rest of his column had not yet arrived. He sent an aide, Verplanck Van Antwerp, to the rear to hurry forward the rest of his command.[37] Van Antwerp found that the reason for the holdup was that an infantry unit had been placed as the second unit in the marching column.[38] The cavalry units behind the infantry regiment (the 11th Kansas Infantry Regiment) were ordered to pass the marching men, and the 11th Kansas moved forward at double time behind them.[39]
Once the rest of his brigade had arrived, Cloud deployed the additional men. The lead portion of the 2nd Kansas Cavalry was in the front, along with the 1st Indian Home Guard. Hopkins's Kansas Battery arrived and was deployed to the rear, with the 2nd Kansas Cavalry in support. The 11th Kansas Infantry was positioned between Hopkins's battery and the 2nd Indiana Battery.[40] Seeing the Union attack building, Shelby ordered a retreat.[41] Cloud attacked with 1,500 men, and the fighting soon passed through town, although the Cane Hill College was damaged by artillery fire.[42] On the other side of town were 200 Confederate soldiers commanded by MacDonald, but they too were forced to withdraw.[43]
Positioned beyond Cane Hill at a location known as Kidd's Mill was Colonel Charles A. Carroll's Confederate brigade. Carroll had about 400 men (less than one quarter of his brigade's strength on paper), and two mountain howitzers that were positioned on the Confederate right.[43] The two Confederate cannons were able to temporarily slow the Union advance, but fire from Hopkins's battery caused the Confederate cannoneers to withdraw.[44] At least some of Carroll's men were armed only with shotguns, and after firing a few volleys with little effect Carroll's force withdrew.[43] Shelby's men provided a rear guard for Carroll's retreat.[45] By this time it was around noon, and the fighting was shifting 0.5 miles (0.80km) to the south toward Newburg.[43][b]
Marmaduke had formed a line near Newburg that Blunt considered to be a strong one. Expecting the Confederates to stand and fight, Blunt took the time to reorganize his force.[47] Besides allowing Cloud's disorganized brigade to gather, Blunt also brought up Colonel William Weer's brigade. Six Parrott rifles from the 1st Kansas Battery as well as the guns of the 2nd Indiana Battery opened fire on the Confederate position; Bledsoe's battery and the two mountain howitzers from Carroll's brigade returned fire at about 1:00 pm.[48] Not long after the exchange began, the Confederate forces withdrew,[49] moving down the Van Buren Road. Shea and historian Henry F. Hartsell state that Marmaduke's decision to withdraw was at least partially informed by the fact that his artillery was much less effective than that of the Union.[50][51]
The battle then transitioned into a running fight. Reed's Mountain was located 1 mile (1.6km) south of Newburg. The mountain was about 400 feet (120m) higher than the terrain around it.[50] During the Confederate retreat towards Reed's Mountain was reached,[52] Shelby responded with defensive tactics that Scott and Burgess refer to as "brilliant".[53] Shelby aligned his men in a series of lines, with soldiers on either side of the road. When the Union soldiers encountered the front line, the Confederate troops fired, before quickly retreating. The Union troops would then encounter Shelby's next prepared line.[52][53] At about 2:00 pm, Marmaduke decided to make a stand at Reed's Mountain, deploying Shelby and MacDonald in a forward line with Carroll's men further up the mountain. Shea attributes the decision to defend the mountain to a fear that continuing the retreat at the current pace would allow the Union troops to catch up to the wagons.[50] However, Scott and Burgess state that the wagons would already have been safe by that point, and that Marmaduke was instead trying to create an opportunity for Hindman to advance with the main Confederate force and attack Blunt.[53]
Blunt was personally with the lead Union units at this point, and he along with part of the 2nd Kansas Cavalry and the 3rd Indian Home Guard were the first Union forces to reach Reed's Mountain. Blunt decided to attack the Reed's Mountain position, and the men he had with him, who were joined by the 11th Kansas Infantry not long after, advanced against the Confederate line.[50] The 6th Kansas Cavalry Regiment was also involved in this stage of the fighting.[54] The Confederate troops tended to fire over the heads of the Union troops. At times, the fighting became hand-to-hand, and at one point, MacDonald's men made a small counterattack.[55] After about half an hour of fighting on the mountain, visibility became very poor due to smoke, as the brush had caught fire. The reduction in visibility sometimes prevented the two sides from seeing each other. Blunt brought up artillery, including four mountain howitzers that fired on the Confederate lines at very short range. Bledsoe's guns had to withdraw due to lack of ammunition, and another Confederate cannon was damaged and forced to withdraw. With his cavalrymen running low on ammunition as well, Marmaduke ordered a withdrawal. The fight for Reed's Mountain had lasted about an hour and a half.[56]
As Shelby's men retreated, they taunted Carroll's men for the minimal role they had played in the battle. Carroll ordered his men to form a line and then fire a single volley at the advancing Union troops before withdrawing.[57] At around 5:00 pm, the pursuit reached a house owned by John Morrow where the Confederate retreat turned to the south. Carroll's men began to panic, and the Confederate retreat became more disorganized; Carroll later referred to the conduct of his own soldiers as "disgraceful".[58] Either 2 miles (3.2km)[57] or 4 miles (6.4km) south of the Morrow house, the Confederates laid a trap.[59] In a hollow that was wider than the portion of the valley to the north, Carroll aligned men from Shelby's command and Monroe's Arkansas Cavalry Regiment.[57] Blunt had aggressively pushed ahead with only a small force from the 6th Kansas Cavalry, hoping to capture the Confederate cannons.[60]
When Blunt and the 6th Kansas Cavalry reached the Confederate ambuscade, the Confederate cavalrymen opened fire, throwing the Union troops into confusion. Carroll ordered 85 men led by Monroe to attack, in order to allow the rest of his force to retire. Cloud had arrived on the scene with parts or all of three artillery batteries, as well as portions of the 3rd Indian Home Guard and the 11th Kansas Infantry.[61] What happened next is the subject of disagreement among participants in the battle. Confederate reports generally do not mention a flag of truce being presented, although Edwards, whose writings on the battle tend to be hyperbolic and careless with the truth, claimed that Union forces presented one. Union accounts claim that the Confederates presented a flag of truce in the waning moments of the fight.[62] Shea along with Scott and Burgess take the position that the Confederates did present a flag of truce at the end of the battle as a ruse to give the battered Confederate forces time to break contact and leave the area.[63][64] The Confederates used the lull to successfully break contact and get away while aid was being provided to wounded soldiers.[63] The fighting had lasted for about nine hours and had taken place over 12[65] or 15 miles (19 or 24 km) of ground.[66]
Aftermath
Shea and Scott and Burgess place Union losses as eight men killed and thirty-six wounded,[63][64] with Scott and Burgess also mentioning that Blunt reported the capture of a Lieutenant Campbell.[64] Official Confederate reports admitted losses of five men killed, twenty-eight wounded, and six men missing in action,[64] although no casualty reports from Shelby are known to exist.[67] A Confederate officer later estimated that Marmaduke lost 10 men killed and 50 wounded.[64] Shea places Confederate battle losses at ten killed and at least 70 wounded or missing.[63]Preservationist Frances E. Kennedy estimates losses as 41 for Blunt and 45 for Marmaduke.[68] Historian Don Montgomery places Union losses as two killed and thirty-eight wounded, and states that Confederate casualties are unknown, but were probably double those of the Union.[26] A 2006 battlefield guide prepared by Shea and historians Earl J. Hess, Richard W. Hatcher, and William Garrett Piston places Union losses at six killed and thirty-five wounded, and Confederate casualties as ten killed, 66 wounded, and six missing.[69] Historian Stephen B. Oates has Blunt's loss at eight men killed and thirty-two wounded and similar Confederate casualties.[66] Both Shea and Scott and Burgess note that casualties were lower than would be expected under the circumstances.[63][64] Scott and Burgess suggest that the reasons for this include weapons that were ineffective except at close range, terrain difficulties, poor aim, the tactics the Confederates used, and the fact that only portions of each army were engaged at any one time.[70] Oates attributes the low casualty totals to Marmaduke's tactics, suggesting that if Marmaduke had attempted to fight a decisive defensive battle then his command would probably have been completely wrecked.[66]
Both sides were able to view the results of the battle as having accomplished their goals. Blunt held the field after the battle, and had driven Marmaduke from the area, while the Confederates had escaped with their supply train and drawn Blunt further south:[71] Blunt's Union soldiers were now much closer to the main Confederate force than to their reinforcements.[65] Blunt claimed victory, while the Confederates viewed the action as only a setback.[72] Scott and Burgess compare the outcome of the battle to a hung jury.[71] The 2006 battlefield guide describes the battle as a Union tactical victory.[69] According to Oates, Marmaduke's men learned lessons in cavalry fighting that would later be put to use in raids into Missouri.[66] After the fighting ended, Blunt withdrew his forces to Cane Hill, and it became the base of operations for his division. Marmaduke withdrew his men to Lee Creek, and then fell back to Dripping Springs,[73] which was north of Van Buren.[74] Union troops looted the Cane Hill College during the early portion of their stay at Cane Hill.[75]
On December 3, Hindman moved his army north from Van Buren to attack Blunt; the day before, Blunt had suspected that the Confederates were going to be on the move, and he ordered the two divisions at Springfield to join him while he took up defensive positions near Cane Hill. The divisions near Springfield were commanded by Brigadier General Francis J. Herron, who after receipt of the message from Blunt, moved his men 110 miles (180km) south on foot in three and a half days. On December 6 Hindman learned of Herron's approach, and he decided to confront Herron first instead of Blunt. On the morning of December 7, the Confederates made a stand near Prairie Grove, and Herron and his men arrived that morning as well. The two forces made contact and the Battle of Prairie Grove began. Hindman's and Herron's men fought inconclusively in the morning, before Blunt arrived in the afternoon and joined the fighting. While neither side gained a major advantage, the Confederates withdrew after nightfall. The fighting at Prairie Grove ensured that Missouri and northwestern Arkansas remained under Union control.[76]
A portion of the Cane Hill battlefield, about 5,750 acres (2,330ha), was listed on the National Register of Historic Places in 1994 as the Cane Hill Battlefield.[77] The Arkansas Civil War Centennial Commission erected a highway marker near the battle site to interpret the fighting.[78] While the town of Cane Hill was a regional cultural center at the time of the battle, it has since greatly declined.[79]
Hartsell, Henry F. (1980). "The Battle of Cane Hill, Arkansas, November 28, 1862". Journal of the West. 19 (4): 51–62.
Hess, Earl J.; Hatcher, Richard W.; Piston, William Garrett; Shea, William L. (2006). Wilson's Creek, Pea Ridge, and Prairie Grove: A Battlefield Guide with a Section on Wire Road. Lincoln: University of Nebraska Press. ISBN978-0-8032-7366-5.
Moneyhon, Carl (1994). "1861: 'The Die is Cast'". In Christ, Mark K. (ed.). Rugged and Sublime: The Civil War in Arkansas. Fayetteville: University of Arkansas Press. pp.1–19. ISBN978-1-55728-356-6.
Piston, William Garrett; Rutherford, John C. (2021). "We Gave Them Thunder": Marmaduke's Raid and the Civil War in Missouri and Arkansas. Springfield, Missouri: Ozarks Studies Institute. ISBN978-1-7346290-1-9.
Shea, William L. (1998). "Prairie Grove, Arkansas". In Kennedy, Frances H. (ed.). The Civil War Battlefield Guide (2nded.). Boston/New York: Houghton Mifflin. pp.141–144. ISBN978-0-395-74012-5.
This page is based on this Wikipedia article Text is available under the CC BY-SA 4.0 license; additional terms may apply. Images, videos and audio are available under their respective licenses.