The Battle of the Nek was a minor battle that took place on 7 August 1915, during the Gallipoli campaign of World War I. "The Nek" was a narrow stretch of ridge on the Gallipoli Peninsula. The name derives from the Afrikaans word for a "mountain pass" but the terrain itself was a perfect bottleneck and easy to defend, as had been proven during an Ottoman attack in June. It connected Australian and New Zealand trenches on the ridge known as "Russell's Top" to the knoll called "Baby 700" on which the Ottoman defenders were entrenched.

The Battle of Chunuk Bair was a World War I battle fought between the Ottoman defenders and troops of the British Empire over control of the peak in August 1915. The capture of Chunuk Bair,, the secondary peak of the Sari Bair range, was one of the two objectives of the Battle of Sari Bair.
The 1st South African Infantry Division was an infantry division of the army of the Union of South Africa. During World War II the division served in East Africa from 1940 to 1941 and in the Western Desert Campaign from 1941 to 1942. The division was disbanded on 1 January 1943, for conversion into what would become the 6th South African Armoured Division. The division was also briefly active after the war from 1 July 1948 to 1 November 1949.

The Battle of Glendale, also known as the Battle of Frayser's Farm, Frazier's Farm, Nelson's Farm, Charles City Crossroads, New Market Road, or Riddell's Shop, took place on June 30, 1862, in Henrico County, Virginia, on the sixth day of the Seven Days Battles of the American Civil War.

The Rhodesian African Rifles (RAR) was a regiment of the Rhodesian Army. The ranks of the RAR were recruited from the black African population, although officers were generally from the white population. The regiment was formed in May 1940 in the British colony of Southern Rhodesia.

The 10th Indian Infantry Division was a war formed infantry division of the Indian Army during World War II. In four years, the division travelled over 4,000 miles (6,400 km) from Tehran to Trieste, fought three small wars, and fought two great campaigns: the Anglo-Iraqi War, the Invasion of Syria–Lebanon, the Anglo-Soviet invasion of Iran, the North African Campaign, and the Italian Campaign.

The South African Overseas Expeditionary Force (SAOEF) was a volunteer military organisation in World War I.

The Battle of Salaita Hill was the first large-scale engagement of the East African Campaign of the First World War to involve British, Indian, Rhodesian, and South African troops. The battle took place on February 12, 1916, as part of the three-pronged offensive into German East Africa launched by General Jan Smuts, who had been given overall command of the Allied forces in the region.
The Battle of Kondoa Irangi took place during the East African Campaign of World War I.

The Battle of Diamond Hill (Donkerhoek) was an engagement of the Second Boer War that took place on 11 and 12 June 1900 in central Transvaal.

The South African 1st Infantry Brigade was an infantry brigade of the army of the Union of South Africa during World Wars I and II. During World War I, the Brigade served as a British formation in Egypt and on the Western Front, most famously the Battle of Delville Wood. It was reactivated at the start of the Second World War as a South African formation and served in East Africa and the Western Desert; the Brigade disbanded on 1 January 1943.
The Battle of Ladysmith was one of the early engagements of the Second Boer War. A large British force which had concentrated at the garrison town of Ladysmith launched a sortie on 30 October 1899, against Boer armies which were slowly surrounding the town. The result was a disaster for the British. The main body was driven back into the town, and an isolated detachment of 800 men was forced to surrender to Commandant De Wet. The Boers did not follow up their advantage by proceeding towards the strategically important port of Durban, and instead began a siege of Ladysmith, which was relieved after 118 days. John Norwood was awarded the Victoria Cross for his actions during the battle.

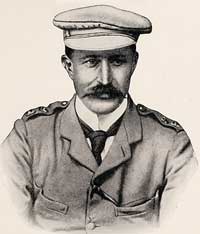
Major-General Sir Henry Jenner Scobell, KCVO, CB was a British military leader who served as the last officer in command of Cape Colony before the formation of the Union of South Africa.
The Battle of Kibata was fought north-west from Kilwa during the East African Campaign of World War I. The British theatre commander, South African General Jan Smuts, planned to seize Kibata and prevent German forces from withdrawing southwards.

The Capture of Jisr ed Damieh took place on 22 September 1918 during the Third Transjordan attack of the Battle of Nablus which, along with the main Battle of Sharon formed the Battle of Megiddo fought during the Sinai and Palestine Campaign of the First World War. Units of Chaytor's Force under the commanded by Brigadier-General William Meldrum, and known as "Meldrum's Force", attacked and captured the bridge. This successful attack cut the most direct line of retreat from the Judean Hills for the Seventh and remnants of the Eighth Armies, while units from these two armies were moving towards, and crossing the Jisr ed Damieh bridge over the Jordan River. This victory by Meldrum's Force opened the way for Chaytor's Force to advance along the main Nablus to Es Salt road to capture Es Salt and to continue on to the victory at the Second Battle of Amman.

Southern Rhodesia, then a self-governing colony of the United Kingdom that is located in the now-independent Zimbabwe, entered World War II along with Britain shortly after the invasion of Poland in 1939. By the war's end, 26,121 Southern Rhodesians of all races had served in the armed forces, 8,390 of them overseas, operating in the European theatre, the Mediterranean and Middle East theatre, East Africa, Burma and elsewhere. The territory's most important contribution to the war is commonly held to be its contribution to the Empire Air Training Scheme (EATS), under which 8,235 British, Commonwealth and Allied airmen were trained in Southern Rhodesian flying schools. The colony's operational casualties numbered 916 killed and 483 wounded of all races.

The Battle of Tug Argan was fought between forces of the British Empire and Italy from 11 to 15 August 1940 in the Somaliland Protectorate. The battle determined the result of the Italian invasion of British Somaliland and the larger East African Campaign of the Second World War.

The 1st Missouri Field Battery was a field artillery battery that served in the Confederate States Army during the American Civil War. The battery was formed by Captain Westley F. Roberts in Arkansas in September 1862 as Roberts' Missouri Battery and was originally armed with two 12-pounder James rifles and two 6-pounder smoothbore guns. The unit fought in the Battle of Prairie Grove on December 7, as part of a Confederate offensive. Roberts' Battery withdrew after the battle and transferred to Little Rock, Arkansas, where Roberts resigned and was replaced by Lieutenant Samuel T. Ruffner.
Major Georg Kraut was an officer of the Imperial German Army during the First World War, a veteran of the Schutztruppe, and the second-in-command of Paul von Lettow-Vorbeck. He was active in German East Africa. He participated in multiple battles, including the Battle of Tanga, the Battle of Salaita Hill, and the Battle of Iringa. Post-war, he joined the Freikorps with Lettow-Vorbeck and helped suppress the Spartacist Revolt.

The 18th Texas Infantry Regiment was a unit of volunteers recruited in Texas that fought in the Confederate States Army during the American Civil War. The regiment was enrolled in Confederate service in May 1862 and always campaigned west of the Mississippi River in the region known as the Trans-Mississippi Department. The unit was assigned to the Texas infantry division known as Walker's Greyhounds. The regiment fought at Milliken's Bend, Richmond (La.), and Bayou Bourbeux in 1863 and Mansfield, Pleasant Hill, and Jenkins' Ferry in 1864. The regiment disbanded in mid-May 1865, but its formal surrender date was 26 May 1865.


