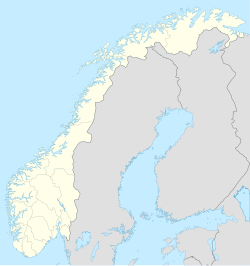
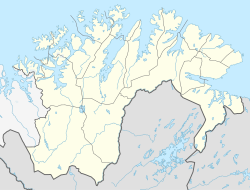
Operation Goodwood was a series of British carrierair raids conducted against the German battleship Tirpitz at her anchorage in Kaafjord in occupied Norway during late August 1944. It was the last of several attacks made by the Home Fleet during 1944 which sought to damage or sink Tirpitz and thereby eliminate the threat it posed to Allied shipping. Previous raids on Kaafjord conducted by Fleet Air Arm aircraft had involved only one air attack; in Operation Goodwood several attacks were made in a single week. The Royal Navy hoped that these raids would wear down the formidable German defences.
The British fleet departed its base on 18 August and launched the first raid against Kaafjord on the morning of 22 August. The attack failed, and a small raid that evening inflicted little damage. Attacks were conducted on 24 and 29 August and were also failures. Tirpitz had been hit by two bombs during the raid on 24 August, but neither caused significant damage. British losses during Operation Goodwood were 17 aircraft to all causes, a frigate sunk by a submarine, and an escort carrier badly damaged. German forces suffered the loss of 12 aircraft and damage to 7 ships.
In late August 1944, responsibility for attacking Tirpitz was transferred to the Royal Air Force. In three heavy bomber raids conducted during September and October 1944, the battleship was first crippled and then sunk. Historians regard Operation Goodwood as a significant failure for the Fleet Air Arm and attribute its results to the shortcomings of the force's aircraft and their armament.
Background
From early 1942, Tirpitz posed a significant threat to the Allied convoys transporting supplies through the Norwegian Sea to the Soviet Union. Stationed in fjords on the Norwegian coast, the battleship was capable of overwhelming the close-escort forces assigned to the Arctic convoys or breaking out into the North Atlantic.[3] To counter this threat, the Allies needed to keep a powerful force of warships with the British Home Fleet, and capital ships accompanied most convoys part of the way to the Soviet Union.[4][5]
Aerial photo of Tirpitz moored in Kaafjord
Several air and naval attacks were launched against Tirpitz in 1942 and 1943. On 6 March 1942, torpedo bombers flying from the aircraft carrier HMSVictorious attacked the battleship while she was attempting to intercept Convoy PQ 12 but did not achieve any hits.[6][7] Bombers from the Royal Air Force and Soviet Air Forces also attempted to strike Tirpitz in her anchorages several times in 1942 and 1943 but failed to inflict any damage.[6] On 23 September 1943, two British X-class midget submarines penetrated the defences around the battleship's main anchorage at Kaafjord in northern Norway during Operation Source, and placed explosive charges in the water beneath her. This attack caused extensive damage to Tirpitz, putting her out of service for six months.[8]
Following Operation Source, the task of attacking Tirpitz was assigned to the Home Fleet's aircraft carriers. Following months of preparations, a successful attack (Operation Tungsten) involving two strike forces of 20 Fairey Barracuda dive bombers escorted by 40 fighters was conducted on 3 April 1944. While Tirpitz's crew suffered heavy casualties during this operation, the battleship was not badly damaged.[9] Nevertheless, she was placed out of action for several additional months while repairs were completed.[10]
The Home Fleet initiated a further four raids against Tirpitz between April and July 1944, though the battleship was only attacked during the last of these operations. These attacks were hindered by the transfer of many of the Home Fleet's airmen to other units following Operation Tungsten, as the replacement aircrew were less experienced.[11] The first raid (Operation Planet) began on 21 April, but it was cancelled three days later when agents stationed near Kaafjord reported bad weather over the target area.[12] The Home Fleet put to sea to attack Tirpitz again in mid-May in what was designated Operation Brawn.[12][13] A strike force of 27 Barracudas escorted by Vought F4U Corsair and Supermarine Seafire fighters took off from the carriers HMSFurious and Victorious on 15 May, but returned to the ships without attacking after they encountered heavy clouds over Kaafjord.[14] The next raid, Operation Tiger Claw, was initiated in late May but cancelled due to bad weather on the 28th of the month.[14] The subsequent attack (Operation Mascot) was timed for mid-July, before the resumption of the Arctic convoys, which had been suspended since April 1944 in order to free ships for the Normandy landings.[15] The strike force of 44 Barracudas and 40 fighters dispatched on 17 July reached the target area, but found Tirpitz cloaked in a protective smokescreen and the attack failed to inflict any damage on the battleship.[13]
In the weeks after Operation Mascot, Tirpitz continued to prepare for potential combat operations. Following trials in the sheltered waters of Altafjord, she put to sea on 31 July and 1 August to train with her protective destroyers. Additional smoke generators were also installed around Kaafjord to improve the area's already strong defences.[10][16] These activities were reported by spies, and the British Admiralty interpreted them to mean that Tirpitz was being readied for a raid against Allied shipping.[16] To defend against this threat, it was decided to conduct further attacks against the battleship at her anchorage in Kaafjord at the time of the next series of Arctic convoys.[17][18] In reality, the German Navy was not planning to use Tirpitz offensively as she would be very vulnerable to the superior Allied naval and air forces if she put to sea. Instead, the battleship was being maintained in active service to tie down Allied warships and aircraft.[19]
The failure of Operation Mascot convinced the commander of the Home Fleet, Admiral Sir Henry Moore, that the Fleet Air Arm's main strike aircraft, the Fairey Barracuda dive bomber, was not suited to operations against Kaafjord. As the dive bombers' slow speed gave the defenders of Kaafjord enough time to cover Tirpitz in a smoke screen between the time incoming raids were detected and their arrival over the target area, Moore concluded that further attacks using these aircraft would be futile. However, the Admiralty judged that repeatedly striking Kaafjord with Barracudas over a 48-hour period might wear down the German defences and exhaust the supply of fuel for Tirpitz's protective smoke generators. Consideration was also given to flying fast and long-ranged de Havilland Mosquito bombers off the carriers in an attempt to achieve surprise, but none of these land-based aircraft could be spared from supporting the Allied bombing of Germany. Despite his misgivings, Moore agreed to make another attempt to strike Tirpitz.[20]
As proposed by the Admiralty, Moore's plans for the new attack on Kaafjord involved the Home Fleet's aircraft attacking the region over several days. While the fighter aircraft involved in the previous raids had used only their machine guns to strafe German defences in order to reduce the threat they posed to the Barracudas, it was decided to use some of these aircraft as dive bombers during Operation Goodwood. In preparation, the two squadrons of Corsairs and a single squadron of Grumman F6F Hellcats selected to participate in the attack received training in dive-bombing tactics during the period between Operations Mascot and Goodwood. Another new element of the plans was a decision to use Fleet Air Arm aircraft to drop mines near Tirpitz and the entrance to Kaafjord. The mines dropped near the battleship were to be fitted with time-delay fuses, and it was hoped that the explosions of these devices would cause Tirpitz's captain to try to move the warship into safer waters and pass through the minefield at the fjord's entrance.[21][22] During the period before Operation Goodwood, the Home Fleet's flying squadrons conducted training exercises using a target range at Loch Eriboll in northern Scotland; the terrain in this area is comparable to that around Kaafjord, and the loch had also been used for this purpose as part of the preparations for Operation Tungsten.[23][24]
Opposing forces
The Operation Goodwood attack fleet was divided into three groups. Admiral Moore embarked on board the battleship HMSDuke of York, which sailed with the fleet aircraft carriers HMSIndefatigable (the flagship of Rear Admiral Rhoderick McGrigor, commander of the 1st Cruiser Squadron), Formidable and Furious, as well as two cruisers and fourteen destroyers. The second force comprised the escort carriers HMSNabob and Trumpeter, cruiser HMSKent and a group of frigates. A pair of fleet oilers escorted by four corvettes sailed separately to support the two attack groups.[25]
The aircraft carriers embarked the largest group of Fleet Air Arm aircraft assembled up to that point in the war.[16] Their main striking element was the 35 Barracudas assigned to 820, 826, 827, and 828 Naval Air Squadrons which operated from the three fleet carriers. The two units of 6 Naval Fighter Wing, 1841 and 1842 Squadrons, flew 30 Corsairs from Formidable. A total of 48 Seafires were assigned to 801, 880, 887 and 894 Squadrons on board Indefatigable and Furious. In addition, 1770 and 1840 Squadrons operated 12 Fairey Firefly and 12 Hellcat fighters respectively from Indefatigable. The two escort carriers embarked a total of 20 Grumman TBF Avengers (which had responsibility for the mine-dropping element of Operation Goodwood) and 8 Grumman F4F Wildcat fighters; these aircraft were split between 846 Squadron on board Trumpeter and 852 Squadron on Nabob.[11][26]
Tirpitz's anchorage at Kaafjord was heavily defended. Prior to Operation Tungsten, eleven batteries of anti-aircraft guns, several anti-aircraft warships and a system of smoke generators capable of hiding Tirpitz from aircraft were located around the fjord.[27] After the attack, additional radar stations, and observation posts were established and the number of smoke generators was increased.[22]Tirpitz's air defences were strengthened by fitting her with additional 20-millimetre (0.79in) cannons, modifying the 150-millimetre (5.9in) guns so they could be used to attack aircraft, and supplying anti-aircraft shells for her 380-millimetre (15in) main guns.[10] The German Air Force (Luftwaffe) had few fighters stationed at airfields near Kaafjord, and their operations were constrained by a lack of fuel.[28][29]
Attacks
22 August
HMS Nabob after being torpedoed on 22 August
The Operation Goodwood attack force sailed on 18 August. The timing of the operation was set to allow the Home Fleet to also protect Convoy JW 59, which had departed from Scotland on 15 August bound for the Soviet Union. After an uneventful journey north, the attack forces arrived off Norway on 20 August. While the first attack against Kaafjord had been planned to take place on 21 August, weather conditions that day were unsuitable for flying operations, and Moore decided upon a 24-hour postponement.[22][25] The Germans were first alerted to the presence of the British fleet on 21 August when radio messages from the carriers were detected.[17]
The first strike against Kaafjord was launched on 22 August. While flying conditions were poor due to low cloud, Moore decided to attack that day as some of his ships were starting to run low on fuel and would soon need to move away from Norway to refuel.[30] At 11:00am a force comprising 32 Barracudas, 24 Corsairs, 11 Fireflies, 9 Hellcats and 8 Seafires was launched from the three fleet carriers.[25][31] No Avengers were dispatched as the cloudy conditions were unsuitable for the execution of their task. Because few mines were available and the Avengers could not safely land while still carrying these weapons, the mine-dropping element of the plan would fail if the aircraft were unable to locate Tirpitz and had to dump their loads into the sea.[11][25]
As the strike force neared the coast, heavy cloud was sighted covering the hills near Kaafjord. Because the clouds prevented accurate bombing, the Barracudas and Corsairs returned to the carriers without attacking. The Hellcat and Firefly fighters continued on, and approached the fjord below the cloud base.[32] These aircraft achieved surprise, and Tirpitz was not obscured by smoke when they arrived over Kaafjord. The Fireflies initiated the attack at 12:49pm by strafing German anti-aircraft guns on and around Tirpitz. Two minutes later nine Hellcats attacked the battleship with 500-pound (230kg) bombs but did not achieve any hits.[32] As the strike force returned to the carriers it destroyed two of Tirpitz's seaplanes in Bukta harbour and badly damaged the submarine U-965 at Hammerfest.[30][32] At Ingøy, north of Hammerfest, three Hellcats strafed a German radio station. The attack set the station's buildings ablaze and damaged the aerials.[33] The eight Seafires made diversionary attacks on the Banak area and a nearby seaplane base, destroying five German seaplanes.[30] Three British aircraft were lost during the attack on the morning of 22 August; one Hellcat and a Seafire were shot down, and one of the Barracudas was forced to ditch into the sea during its return flight.[30][31]
After the strike force was recovered, much of the Home Fleet sailed away from the Norwegian coast to refuel. A group comprising Formidable, Furious, two cruisers and several destroyers set a course for the two fleet oilers, and the escort carrier group withdrew so that the carriers could refuel their escorts.[30] At 5:25pm, Nabob was struck by a torpedo fired from U-354. The carrier suffered serious damage and 21 fatalities but was able to continue limited flight operations.[30][34][35] Shortly afterwards U-354 torpedoed the frigate HMSBickerton as the latter searched for Nabob's attacker.[36]Nabob was forced to return to the Home Fleet's base at Scapa Flow that evening, escorted by Trumpeter, a cruiser and several destroyers.[11]Formidable and Furious covered their withdrawal; during this period Furious also refuelled from the Home Fleet's tankers.[31] The departure of both escort carriers meant that the mine-dropping component of Operation Goodwood had to be cancelled.[11]Bickerton's stern was wrecked by the torpedo, and she could have potentially been salvaged. However, the force's commander did not want to have to protect two crippled ships, and the frigate was scuttled at around 8:30pm on 22 August.[37] Shortly after the attacks on Nabob and Bickerton, Seafires from 894 Naval Air Squadron shot down two German Blohm & Voss BV 138 reconnaissance aircraft.[34]
During the evening of 22 August, a force of eight Fireflies and six bomb-armed Hellcats from Indefatigable raided Kaafjord again.[38] This was the first in what was intended to be a series of small harassing attacks conducted to wear down the German defences.[39] German forces did not detect the aircraft before they arrived over Kaafjord at 7:10pm, and the Fireflies' strafing attacks on German gun positions killed one member of Tirpitz's crew and wounded ten. However, the Hellcats' bombs failed to inflict any damage on the battleship. The British fighters also attacked German ships and radar stations on their return flight, damaging two tankers, a supply ship, and a patrol boat.[32] No British aircraft were lost during this raid.[40]
24 August
Fog caused the cancellation of Indefatigable's flying operations on 23 August, including a planned diversionary attack against German shipping in Langfjord.[31] The other two carriers and their escorts rejoined Moore and Indefatigable off Norway during the morning of 24 August. While conditions that day were initially foggy, the weather cleared enough in the afternoon to permit a strike against Kaafjord.[39] The attacking force comprised 33 Barracudas carrying 1,600-pound (730kg)armour-piecing bombs, 24 Corsairs (including 5 armed with a 1,000-pound [450kg] bomb), 10 Hellcats, 10 Fireflies and 8 Seafires. In an attempt to achieve surprise, the aircraft flew off from the carriers from a point further to the south of those used in previous raids. The strike aircraft then flew parallel to the coast, before making landfall and approaching Kaafjord from the south. A German radar station detected the force at 3:41pm, and immediately alerted Tirpitz.[32]
A Barracuda landing on HMS Furious at the conclusion of one of the attacks on Tirpitz during Operation Goodwood
The British attack began at 4:00pm. It was initiated with attacks on German gun positions by the Hellcats and Fireflies, which were flying five minutes ahead of the Barracudas and Corsairs.[32][39]Tirpitz's protective smokescreen was not fully in place at the start of the raid, but by the time the Barracudas and Corsairs arrived she was completely covered by smoke.[32] As a result, these aircraft had to blind bomb the ship, releasing their weapons from altitudes between 5,000 and 4,000 feet (1,500 and 1,200m).[41] Only two bombs hit Tirpitz. The first was a 500-pound (230kg) weapon dropped by a Hellcat that exploded on the roof of her "Bruno" main gun turret. The explosion destroyed the quadruple 20-millimetre (0.79in) anti-aircraft gun mount located on top of the turret, but did not cause any significant damage to the turret itself.[32][42] The second bomb to strike the ship was a 1,600-pound (730kg) armour-piercing weapon which penetrated through five decks, killed a sailor in a radio room and lodged near an electrical switch room. This bomb failed to explode, and German bomb disposal experts later determined that it had been only partially filled with explosives. The German report on the attack judged that if the bomb had gone off it would have caused "immeasurable" damage.[36][42] British fighters also attacked other German ships and facilities in the Kaafjord area, damaging two patrol boats, a minesweeper and a radar station, as well as destroying an ammunition dump and three guns of an anti-aircraft battery. Tirpitz's last remaining Arado Ar 196 seaplane was attacked in Bukta harbour and damaged beyond repair.[43] Four Corsairs and two Hellcats were shot down during the raid, and the battleship's crew suffered 8 fatalities and 18 men wounded.[11][41] Casualties among the anti-aircraft units stationed around Kaafjord were heavy.[44]
At 7:30pm on 24 August, a pair of Fireflies conducted a photo-reconnaissance sortie over Kaafjord to gather intelligence on the results of the attack; their presence caused the Germans to generate a smoke screen over the fjord and fire an intensive anti-aircraft barrage.[43] In a separate action that day, U-354 was sunk off Bear Island by Fairey Swordfish operating from the escort carrier HMSVindex which was escorting Convoy JW 59.[34][45]
The German command at Kaafjord judged that the attacks on 24 August had been "undoubtedly the heaviest and most determined so far", and requested that fighter units be transferred from northern Finland to bolster the area's defences. Due to the other demands on Germany's fighter force at this time, the request was turned down on 26 August by the Luftwaffe's headquarters.[46]
Gales and fog prevented the British from conducting further attacks between 25 and 28 August.[47] On 25 August Indefatigable, Formidable, two cruisers and seven destroyers refuelled from the oilers. Both of the cruisers later detached from the force and returned to Scapa Flow. Duke of York, Furious, a cruiser and five destroyers also sailed to the Faroe Islands to load supplies. Before leaving the fleet, Furious transferred two Barracudas and a pair of Hellcats to Indefatigable.[44] As the elderly Furious was judged to be no longer capable of combat operations, she proceeded from the Faroe Islands to Scapa Flow with the cruiser and several destroyers.[36][43] On 29 August Duke of York and the remaining destroyers rejoined the main body of the Home Fleet off north Norway.[44] During this period, the flying squadrons' maintenance personnel worked to repair aircraft which had been damaged during the 24 August attacks.[48]
Convoy JW 59 completed its journey on 25 August, with most of its ships docking at Kola in northern Russia. The convoy had been repeatedly attacked by U-boats from 20 to 24 August, and its escorting warships and aircraft sank two submarines. All of the merchant vessels arrived safely, with the only Allied loss being the sloop HMSKite which was torpedoed and sunk by U-344 on 21 August.[49]
29 August
British sailors moving bombs along the deck of an aircraft carrier prior to "bombing up" Barracudas for one of the raids conducted during Operation Goodwood
The final attack of Operation Goodwood was made on 29 August. The strike force comprised 26 Barracudas, 17 Corsairs (of which two were armed with 1,000-pound [450kg] bombs), 10 Fireflies and seven Hellcats. Seven Seafires also conducted a diversionary raid on Hammerfest. In an attempt to give the bombers accurate aiming points once the artificial smokescreen was generated around Tirpitz, four of the Hellcats were armed with target indicator bombs. The aircraft began launching at 3:30pm.[43]
The British aircraft failed to achieve surprise. German radar stations had been tracking the Home Fleet's routine anti-submarine and fighter patrols, and the Seafires were detected at 4:40pm when they were 54 miles (87km) from Kaafjord.[43] In response to this report, the smoke generators around Kaafjord were activated and the fjord's defenders went to their battle positions.[41] The arrival of the main body of British aircraft over Kaafjord was delayed by stronger than expected winds and a navigational error, and they did not reach the target area until 5:25pm. By this time Tirpitz was covered in a very thick smokescreen, and none of the British airmen sighted the ship. The Barracudas and Corsairs were forced to blind-bomb Kaafjord, and while no hits were achieved on the battleship, six members of her crew were wounded by bomb fragments from near misses. German ships and gun positions were once again strafed by the fighters, but no significant damage was inflicted. Heavy anti-aircraft gunfire from Tirpitz, which was directed by a party of observers stationed on a mountain near Kaafjord, shot down a Corsair and a Firefly.[43]
Following the raid on 29 August, the Home Fleet sailed west to cover Convoy RA 59A which had sailed from northern Russia on 28 August bound for the UK.[43] Due to fuel shortages, Indefatigable and three destroyers detached later that day to return to Scapa Flow and Formidable with two destroyers followed 24 hours later. Duke of York and six destroyers remained on station in the Arctic Sea until 11:00am on 1 September when the convoy was judged to be safe from attack.[50]
Overall, Fleet Air Arm casualties during Operation Goodwood were 40 airmen killed and 17 aircraft destroyed.[47]Nabob was also judged to be beyond economical repair, and was withdrawn from service.[34] The escort carrier's crew had been mainly provided by the Royal Canadian Navy to gain experience with naval aviation before Canada took delivery of its own aircraft carriers. Nabob's loss hindered this program.[51] On the German side, Tirpitz suffered only superficial damage.[34]
Aftermath
A New Zealand airman who flew from HMS Formidable and was killed during Operation Goodwood is interred at the Commonwealth War Graves section of Tromsø's main cemetery.
Following the 29 August raid, the British learned from Ultra signals intelligence that Tirpitz had not sustained any significant damage during Operation Goodwood.[53] In public statements the Royal Navy claimed to have damaged or sunk 19 German warships during the attacks on Kaafjord, but did not report damage to Tirpitz.[53]
During the final days of Operation Goodwood, Royal Navy planners decided not to order further Fleet Air Arm operations against Kaafjord. The planners accepted that the Germans were now able to cover Tirpitz in smoke before Barracudas could reach the battleship, and these aircraft could not carry bombs large enough to inflict heavy damage. Further consideration was given to attacking Kaafjord using Mosquitos launched from aircraft carriers, but the light bombers continued to be in short supply and it was judged that they were not well suited to the task. Moreover, there was a growing need to transfer the carriers to the Pacific to strengthen Britain's contribution to the war against Japan.[54][55]
As Tirpitz was still considered a threat to shipping, the British Chiefs of Staff Committee and the Supreme Allied Commander of the Allied Expeditionary Force, General Dwight D. Eisenhower, decided in late August to conduct further attacks against her using Royal Air Force heavy bombers.[56][Note 1] On 15 September, a force of Avro Lancastersattacked Kaafjord after refuelling at bases in northern Russia and inflicted irreparable damage on the battleship. Following this raid she sailed to an anchorage near Tromsø to be used as an immobile coastal defence battery. Another heavy bomber attack on 29 October caused only minor damage. In a third raid mounted on 12 November Tirpitz was struck by several Tallboy bombs and capsized, sinking with heavy loss of life.[58]
Historians have judged Operation Goodwood to have been a failure. Writing in 1961, the British official historian Stephen Roskill stated that the attacks marked the end of a "series of operations whose results can only be classed as intensely disappointing". He concluded that the possibility of sinking Tirpitz had been "remote" due to the shortcomings of the Barracudas and their armament.[59] Similarly, Norman Polmar argued in 1969 that Operation Goodwood was "perhaps the most striking failure of the F.A.A. (Fleet Air Arm) during World War II and can be directly attributed to the lack of effective aircraft– the Barracudas were too slow and could not carry large enough bombs to make effective attacks".[38] More recently, Mark Llewellyn Evans judged the results of Operation Goodwood to have been "pathetic",[60] and Patrick Bishop concluded that "the Fleet Air Arm's greatest operation of the war ... ended in failure".[47]
References
Footnotes
↑Eisenhower was involved in this decision as RAF Bomber Command was under his command at the time to support the invasion of Normandy.[57]
Bennett, G. H. (2012). "Introduction". In Bennett, G. H. (ed.). Hunting Tirpitz: Naval Operations Against Bismarck's Sister Ship. Plymouth, Devon: University of Plymouth Press. pp.7–25. ISBN978-1-84102-310-6.
Bishop, Patrick (2012). Target Tirpitz. London: Harper Press. ISBN978-0-00-743119-9.
Brown, David (1977). Tirpitz: The Floating Fortress. London: Arms and Armour Press. ISBN0-85368-341-7.
Brown, David (1990). Warship Losses of World War Two. London: Arms and Armour. ISBN0-85368-802-8.
Brown, David (2009). Hobbs, David (ed.). Carrier Operations in World War II. Barnsley, South Yorkshire: Frontline. ISBN978-1-84832-042-0.
Ellis, John (1999). One Day in a Very Long War: Wednesday 25th October 1944 (Pimlicoed.). London: Pimlico. ISBN0-7126-7465-9.
Evans, Mark Llewellyn (1999). Great World War II Battles in the Arctic. Westport, Connecticut: Greenwood Press. ISBN0-313-30892-6.
Faulkner, Marcus; Wilkinson, Peter (2012). War at Sea: A Naval Atlas, 1939–1945. Annapolis, Maryland: Naval Institute Press. ISBN978-1-59114-560-8.
Garzke, William H.; Dulin, Robert O. (1985). Battleships: Axis and Neutral Battleships in World War II. Annapolis, Maryland: Naval Institute Press. ISBN978-0-87021-101-0.
Hinsley, F. H.; etal. (1984). British Intelligence in the Second World War: Its Influence on Strategy and Operations. Volume Three, Part I. London: Her Majesty's Stationery Office. ISBN0-11-630935-0.
Hobbs, David (2022). The Fleet Air Arm and the War in Europe 1939-1945. Barnsley, United Kingdom: Seaforth Publishing. ISBN978-1-5267-9979-1.
Polmar, Norman (1969). Aircraft Carriers: A Graphic History of Carrier Aviation and Its Influence on World Events. London: Macdonald & Co. ISBN1-57488-663-0.
Roskill, S. W. (1961). The War at Sea 1939–1945. Volume III: The Offensive Part II. London: Her Majesty's Stationery Office. OCLC59005418.
Sweetman, John (2000). Tirpitz: Hunting the Beast: Air Attacks on the German Battleship, 1940–44. Annapolis, Maryland: Naval Institute Press. ISBN1-55750-822-4.
Tactical, Torpedo and Staff Duties Division (Historical Section) (2012) [1944]. "Naval Aircraft Attack on the Tirpitz (Operation 'Tungsten') 3 April 1944". In Bennett, G. H. (ed.). Hunting Tirpitz: Naval Operations Against Bismarck's Sister Ship. Plymouth, Devon: University of Plymouth Press. pp.133–177. ISBN978-1-84102-310-6.
Tarrant, V. E. (1994). The Last Year of the Kriegsmarine: May 1944– May 1945. London: Arms and Armour Press. ISBN1-85409-176-X.
Williamson, Gordon (2003). German Battleships 1939–45. Botley, Oxfordshire: Osprey Publishing. ISBN1-84176-498-1.
Woodman, Richard (2004). The Arctic Convoys: 1941–1945 (Paperbacked.). London: John Murray. ISBN0-7195-6617-7.
Wragg, David (2005). The Escort Carrier in World War II: Combustible, Vulnerable, Expendable!. Barnsley, South Yorkshire: Pen & Sword Maritime. ISBN1-84415-220-0.
Zetterling, Niklas; Tamelander, Michael (2009). Tirpitz: The Life and Death of Germany's Last Super Battleship. Philadelphia: Casemate. ISBN978-1-935149-18-7.
This page is based on this Wikipedia article Text is available under the CC BY-SA 4.0 license; additional terms may apply. Images, videos and audio are available under their respective licenses.