The position and direction of the two forces shortly before impact. The combined fleet had been sailing south but Villeneuve had left standing orders that, if the rear of the column was attacked first, they were to reverse direction (by wearing ship) and they had carried out those orders. The centre, where he was located, was exposed in either case.This map showing the all-important wind direction, which was NNW (or NW). Both fleets were sailing downwind, with the wind on different tacks. They were thus converging on the centre of the combined fleet, at the vertex of the angle of convergence. Seeing the battle about to begin, the French-Spanish wore ship and began to close-haul in the reverse direction. Villeneuve thought to bring the whole van crashing down on Nelson in the centre, but he lost headway against the wind and could not close. Meanwhile his former rear, now his van, appeared to Nelson to be escaping to Cadiz. He brought the weather column into the wind to pursue and caught them. The business in the centre was finished by Collingwood, lee column commander, who took on the new enemy rear piecemeal as it came slowly into range.
The Battle of Trafalgar was fought between British and Franco-Spanish fleets on 21 October 1805. A force of 27 British ships of the line faced 33 allied ships. Both forces were formed in two columns; the British sailed parallel, the allied one following the other.
The Battle of Trafalgar was fought by sailing vessels and therefore cannot be understood in substance except as the manoeuvring of sailing vessels according to the principles of sailing.[citation needed] Without understanding the importance of wind and weather, especially wind direction, the modern can make no sense of the manoeuvring. Once those principles are understood, the plan of battle unfolds in a transparent fashion. The plan is included here as well as its general applicability to real events.
Real battles do not always develop according to plan, or exactly according to plan. Commanding officers usually are empowered to respond to the battlefield situation as it develops. Such concepts as "sailing order" and "battle order" are constructs. In a column of ships sailing anywhere the first ship forward was Number 1, the second, Number 2, etc. The battle order was based on planned order of attack.[citation needed] Ships were assigned places in these orders by the commander, sometimes temporarily or even extemporaneously.
Nelson used the order that was best momentarily. In stormy weather or other adverse conditions the commanders might not be able to control the order. "Nelson's fleet" was not a fixed entity; ships were continually joining or leaving his fleet for various reasons: for example HMSSuperb, was in the docks being repaired after four years at sea, including the chase of Villeneuve and was daily expected to re-join the fleet, where her Captain, Richard Goodwin Keats was to be Nelson’s second, but she was not repaired in time.[1] The complements of the ships also were variable. The early historians of the battle were not sure of what they were, nor did they know exactly what the casualties were. [citation needed] The roster lists of the ships before sailing were generally used. Afterward there were plenty of reports.
The numbers and orders of this article are based on the figures of modern scholars for the most part. There is general disagreement on the exact order and the exact numbers, but, on the whole, the different estimates are close to each other and can probably be taken as accurate within a few per cent. [citation needed] An effort is made to keep consistency between the tables and the graph.
The combined French-Spanish fleet left Cadiz harbour in a loose line and turned to the south along the coast of Andalusia, headed for Naples through the Straits of Gibraltar. They were taking advantage of the north-westerly wind which was blowing on the starboard (right) rear quarter, nearly amidships, pushing them along at a slow rate and causing a swell (waves) perpendicular to the wind direction. It struck the ships from the side, causing them to roll and ruining their stability as gun platforms. The column had a predetermined order, which was necessary for sailing, to prevent some ships from getting between the wind and other ships, "stealing" their wind and running the risk of collision.
Representation of the Santisima Trinidad, the largest ship in the combined fleet, with 4 decks and 136 guns, under full sail. The position of the flag and the curvature of the sails reveal the direction of the wind. The ship is depicted at maximum headway. If the ship were to wear, it would rotate clockwise. The observer is looking at the weather side.
The same wind that was moving the French and Spanish south was also bringing the British north. A sail is basically an airfoil. When full it is curved in such a way as to create a sideways "lift," or force perpendicular to its surface, one component of which is actually against the general direction of the wind. A sailing vessel can thus sail "into the wind." A keel prevents the ship from "slipping," or sliding sideways along the wind. The sails "are full;" that is, fully curved, only at certain angles to the wind direction. The angle is adjustable via "sheets," or lines, which generally have to be winched from the deck. The force required is high,[2] giving rise to the idea that one is "hauling" the ship into the wind, and therefore the ship is "close-hauled." When not full, the sails flap uselessly in the wind, or "luff." The sailors must then change the angle, or "trim the sails," until they fill.
A square rigged ship cannot sail within 6 points (67.5 degrees) either side of the wind. If the wind is coming from the north, the closest it could sail would be ENE or WNW. In order to travel in that direction, it must "fall off," or move to an angle with the wind on one side or the other, a "tack." A ship tacks back and forth against the wind, or "beats," each tack earning it some "headway". However, because of the huge distance a square-rigger had to travel before it could fill its sails again, tacking would only be done in a dire emergency; where speed of manoeuvre outweighed the enormous risk of being caught in irons. By far the most common way of working to windward was wearing round (gybing).
In addition, sailing with the wind directly aft ("abaft") or directly on either side ("abeam") was difficult and inefficient. Sails with the wind in those directions do not fill. The wind must be allowed only from the quarters. At those angles the sails fill and there is a component of force in the desired direction. If the wind is directly abeam, the ship must fall off or close up. The ship may sail on either side of a wind directly astern. A manoeuvre similar to coming about is used to move the wind from one side to another: wearing. The helm is put over, the sails go limp, they are adjusted to fill on the other side. The ship does not have to rotate as far, so the manoeuvre is less disruptive.
Wind is everything to a sailing vessel. It cannot move anywhere without it (is "becalmed"). If the wind is too great the sails may have to be shortened to present less area, a procedure call "reefing." In a storm the ship must sail close to the wind or have it close astern. As the waves are generally coming in with the wind, a ship sailing close into the wind generally cuts them perpendicularly and only pitches; i.e., drops into the troughs and rises on the crests. A ship with the storm wind abeam is struck longitudinally and rolls treacherously, running a risk of capsizing. To avoid that risk the captain must run before the wind. All directions are evaluated with regard to the wind. The side of a ship toward the wind is called the "weather" or "upwind" side; away, the "lee" or "downwind" side (refer to Windward and leeward).
Much has been made of the tactics of various great sailing captains, but the greatest constraints come from wind direction and relative position. The captain of a steam vessel has considerably more freedom to take his ship where he wishes to take it, but the tactics of a sailing captain are to a large extent already predetermined by nature. To get to any point the sailing captain must plot a course taking wind direction into consideration. He must have judgement and skill, and is evaluated by the men on that skill.
Nelson's plan of battle
Nelson's battle plan is revealed on a surviving "memorandum" to his captains scrawled on a sheet of paper. The memorandum was meant to be official, as it is signed "Nelson and Bronte"[lower-alpha 3] and dated "Victory, off Cadiz, 9th October, 1805," which was 12 days before the battle on the 21st.[3] Nelson and his fleet were patrolling off Cadiz, waiting the exit of a combined French and Spanish fleet. He knew better than to attack a heavily fortified harbour, the most heavily fortified in Spain. Meanwhile Nelson was staying out of sight and out of reach.
Sailing ships were not amenable, compared to modern ships, to this type of combat; they moved in slow motion at the mercy of wind and wave. A fleet of ships could deliver the most fire without risking hitting one of their own when it was sailing broadside in a line to the enemy, hence the designation "ship-of-the-line" for heavy ships of 50 or more guns. In variable weather, the manoeuvring required to set up a line could cost "... such a loss of time that the opportunity would probably be lost ...."[citation needed] While the attackers were manoeuvring, the targets might escape. Nelson therefore, had his fleet sail in order of battle.
In order "to make the business decisive," Nelson would attack on sight, going directly for the enemy line. This tactic was not standard, but neither was it new or unusual. The plan was revealed to one of Nelson’s favourite captains, Richard Goodwin Keats, in an animated conversation while the two were walking in Nelson’s garden at Merton just weeks earlier.[4][5] It did have a drawback. Only the front of the attacking column could engage. Nelson's 27 ships-of-the-line would attack in two columns. If they succeeded in breaking the enemy line, they could then take on the enemy piecemeal.
The general orders from Nelson were to "make the attack upon the enemy, and to follow up the blow until they are captured or destroyed."[citation needed] If individual ships were momentarily lost in the confusion, they could do no better, said Nelson, than to pull alongside an enemy and fight broadside.
Once the enemy was in sight, the British fleet would form two columns. The double column would be sailing with the wind on one side, the windward or weather side. The columns were thus described as the "weather column" or the "lee column." Nelson would take command of the weather column while his "second-in-command" would take the other. The second could act independently. However, at that time Nelson did not know which side would be the weather side. That detail could not be decided until they were on the expected final approach. At that time the second half of the single line would sail along the leeward side of the first.
As they sailed, the wind could be anywhere on the weather side, from bow to stern. It could not be from a disallowed direction. If, reasoned Nelson, the enemy fleet was first seen to windward, it was probably extended so that the van (front) could not help whatever was behind it. Such a scenario implies the enemy stretched across Nelson's port bow quarter moving anticlockwise, but he did not know where the wind would be. His column would either be able to fetch[lower-alpha 4] the enemy column or not. If not, the opportunity was lost; they would have to fall off to leeward, wear, and come up on the other side, by which time the hoped-for battle would be only a pursuit.
If they could fetch the enemy on the current tack, they were to turn to port perpendicular to the enemy column (or near it). The lee column would now be facing the enemy's rear. Taking a bearing on the 12th ship from the end, they were to sail through to it, while the weather column sailed through to the centre. The 20 ships to the front were to be ignored. Nelson hoped to destroy all the ships to the rear before the enemy's van could wear round and join the battle. They were hoping to capture Villeneuve, whom they supposed to be in the centre. If the enemy van tacked or wore in an effort to stage a rescue, the British fleet would station itself between them and the captured and disabled ships, and defeat them in further battle.
If on the other hand the enemy fleet was first seen off the lee side; that is, off the starboard bow, the British would be in the strongest position. Turning to starboard they could glide downwind to the enemy and strike him wherever they pleased. Nelson seems to have believed the enemy line would have the same direction of travel, anticlockwise around the British line. Thus the lee line would act by the same instructions, turning to starboard, sail through to the 12th ship from the end.
As luck would have it, in the real battle, the enemy appeared to the lee. However, they were sailing clockwise around the British fleet, forcing the weather column to attack their rear[citation needed]. The real situation changed rapidly as the enemy column reacted but the direct attack on the centre and doubling of the column were planned and resulted in victory.
The French and Spanish were crowded into Cadiz Harbour, protected by shore batteries. Nelson entertained briefly a proposal to sail up to the entrance to the harbour and saturate it with the new Congreve Rocket, setting the enemy ships on fire. That is exactly what Villeneuve was hoping they would do. He believed the combined fire of shore and ship was the best chance of destroying Nelson. He delayed, hoping to exploit any impetuosity and impatience the younger commander might evidence.
Nelson's link to the enemy was an unobtrusive line of spy ships. The enemy saw only the first in line observing them at a distance. That ship was in signal range of another, which was in range of another, all the way back to Nelson, wherever he happened to be.
Higher-level decisions were being made by Napoleon, who could not wait indefinitely for the opportunity to invade Britain, and who had switched his attention to war on the continent, especially Austria and Italy. He needed Villeneuve in the Mediterranean and issued an order to sail out of Cadiz immediately.
Napoleon however, was not as skilled in naval matters and imagined that a fleet of 40 or so large vessels could leave port in an instant. It could take a considerable time for that many ships to get out of port, even under the best conditions. Moreover, they could not do so without favourable winds. If the winds were fickle, progress would be even slower and if the winds were contrary, the whole operation would be impossible.
British fleet
The table below shows the British vessels as they were deployed just prior to engagement. HMS Africa, somewhat detached to the north due to a combination of weather and a missed signal during the night, was supposed to have been fourth from last, in the lee column.[citation needed] The rest of the ships-of-the-line were divided into two columns, with the weather column forming the northern flank and the lee column the southern flank. The enemy line had been sailing north to south in front of the wind. Just as the battle was beginning they turned individually anticlockwise, wore ship, and came into the wind, hoping to bear down on Nelson. The order of British ships in the table is the one of that moment. Prior to closing with the enemy, they were in a single line, and after engagement, the ships manoeuvred to assume the best firing positions. The British fleet of the battle consisted of 33 warships, 27 of which were ships of the line.[6] During the battle the frigates (which had been the force observing Cadiz) and smaller vessels acted in support to the fleet, relaying messages and towing ships but did not engage. When Collingwood took command after Nelson's death he transferred to Euralyus as his own flagship, the Royal Sovereign, was badly damaged.
Just before the engagement the French and Spanish ships of the line had been sailing north to south. After wearing, the order of sailing was reversed, so that the former head was now the rear. During the battle itself the entire line broke into small units and individual ships. The combined fleet consisted of 40 vessels with 18 French ships of the line and 15 Spanish ships of the line.[74]
Below is a graph of the percentage of casualties plotted for each ship along the three battle columns. The graph is a construct only. The losses were incurred throughout the entire battle and after, most while the ships were not actually in that order. The order in the graph is shown as a convenience.
Three columns and a separate ship are shown on the horizontal axis, which represents units of conventional distance between ship positions. All units are assumed to be the same. There are three origin points, one for the beginning of each column and the Africa, which was not in the three.
The vertical axis shows percentage of casualties per ship. For example, casualties for the Victory are plotted at 20%. A casualty is someone who was known to have been wounded, someone who was known to have been killed, or someone missing in action and presumed drowned. The percentage is the ratio of casualties to ship's complement multiplied by 100. Casualties continued over the next few weeks as enemy crews rebelled, retook their ships, and were subdued. The graph covers only the main battle on the first day.
Casualties by Ship. Yellow = HMS Africa Green = British Weather Column, led by Nelson Grey = British Lee Column, led by Collingwood The number is the order in the column. Blue = French Red = Spanish. The number is the order in the line. Data for this chart are from the above table.
Notes
↑ The map is based an illustration in Nofi, Al (1981). "Nelson's Last Victory: The Battle of Trafalgar, Oct. 21, 1805". Strategies and Tactics Magazine (84).. The map is identical to Map GREN 4B/10 in the Grenville Collection of the National Maritime Museum, Greenwich, London. Hand-drawn with a hand-written battle order, it is dated to 1805.
↑ Map is a reproduction of Weller, F.S. (1892). "Battle of Trafalgar, 21st October, 1805". In Gardiner, Samuel Rawson (ed.). A School Atlas of English History. London and New York: Longmans, Green and Co. p.84.. Gardiner says in the "Preface," however, that No. 84 was taken from another work, Johnston, Alexander Keith (1850). Alison, M.R. (ed.). Atlas to Alison's History of Europe. Edinburgh and London: William Blackwood and Sons. p.34.
↑ Nelson was the Duke of Bronte; he signed much of his official correspondence with this conceit.
↑ Bring it within the allowed angles for close-hauling.
1 2 Names marked † were killed in action, (DOW) were not killed immediately but died after of their wounds.[8](WIA) were wounded in the action but did not die of those wounds
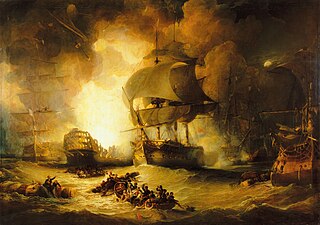
The Battle of the Nile was a major naval battle fought between the British Royal Navy and the Navy of the French Republic at Aboukir Bay on the Mediterranean coast off the Nile Delta of Egypt from the 1st to the 3rd of August 1798. The battle was the climax of a naval campaign that had raged across the Mediterranean during the previous three months, as a large French convoy sailed from Toulon to Alexandria carrying an expeditionary force under General Napoleon Bonaparte. The British fleet was led in the battle by Rear-Admiral Sir Horatio Nelson; they decisively defeated the French under Vice-Admiral François-Paul Brueys d'Aigalliers.
The Battle of Trafalgar was a naval engagement that took place on 21 October 1805 between the British Royal Navy and the combined fleets of the French and Spanish Navies during the War of the Third Coalition of the Napoleonic Wars (1803–1815).
The Battle of Cape St. Vincent was one of the opening battles of the Anglo-Spanish War (1796–1808), as part of the French Revolutionary Wars, where a British fleet under Admiral Sir John Jervis defeated a greatly superior Spanish fleet under Admiral Don José de Córdoba y Ramos near Cape St. Vincent, Portugal.
A ship of the line was a type of naval warship constructed during the Age of Sail from the 17th century to the mid-19th century. The ship of the line was designed for the naval tactic known as the line of battle, which involved the two columns of opposing warships maneuvering to volley fire with the cannons along their broadsides. In conflicts where opposing ships were both able to fire from their broadsides, the opponent with more cannons firing – and therefore more firepower – typically had an advantage.
HMS Bellerophon, known to sailors as the "Billy Ruffian", was a ship of the line of the Royal Navy. A third-rate of 74 guns, she was launched in 1786. Bellerophon served during the French Revolutionary and Napoleonic Wars, mostly on blockades or convoy escort duties. She fought in three fleet actions: the Glorious First of June (1794), the Battle of the Nile (1798) and the Battle of Trafalgar (1805). While the ship was on blockade duty in 1815, Napoleon boarded Bellerophon so he could surrender to the ship's captain, ending 22 years of almost continuous war between Britain and France.
The line of battle is a tactic in naval warfare in which a fleet of ships forms a line end to end. The first example of its use as a tactic is disputed—it has been variously claimed for dates ranging from 1502 to 1652. Line-of-battle tactics were in widespread use by 1675.
HMS Agamemnon was a 64-gun third-rate ship of the line of the British Royal Navy. She saw service in the American Revolutionary War, French Revolutionary and Napoleonic Wars, and fought in many of the major naval battles of those conflicts. She is remembered as being Nelson's favourite ship, and was named after the mythical ancient Greek king Agamemnon, being the first ship of the Royal Navy to bear the name.
HMS Royal Sovereign was a 100-gun first-rate ship of the line of the Royal Navy, which served as the flagship of Admiral Collingwood at the Battle of Trafalgar. She was the third of seven Royal Navy ships to bear the name. She was launched at Plymouth Dockyard on 11 September 1786, at a cost of £67,458, and was the only ship built to her design. Because of the high number of Northumbrians on board the crew were known as the Tars of the Tyne.
HMS Neptune was a 98-gun second-rate ship of the line of the Royal Navy. She served on a number of stations during the French Revolutionary and Napoleonic Wars and was present at the Battle of Trafalgar in 1805.
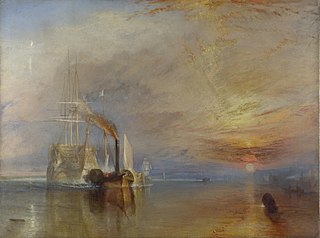
HMS Temeraire was a 98-gun second-rate ship of the line of the United Kingdom's Royal Navy. Launched in 1798, she served during the French Revolutionary and Napoleonic Wars, mostly on blockades or convoy escort duties. She fought only one fleet action, the Battle of Trafalgar, but became so well known for that action and her subsequent depictions in art and literature that she has been remembered as The Fighting Temeraire.
In naval warfare during the Age of Sail, raking fire was cannon fire directed parallel to the long axis of an enemy ship from ahead or astern. Although each shot was directed against a smaller profile compared to firing at the target ship's broadside and thus more likely to miss the target ship to one side or the other, an individual cannon shot that hit would pass through more of the ship, thereby increasing damage to the hull, sails, cannon and crew. In addition, the targeted ship would have fewer guns able to return fire. Historically, a stern rake tended to be more damaging than a bow rake because the shots were less likely to be deflected by the curved and strengthened bow, and because disabling the exposed rudder at the stern would render the target unable to steer and thus manoeuvre. However, achieving a position to rake a single enemy ship was usually very difficult unless the opponent was unable to manoeuvre due to damage to its sails or rudder; it was easier if the enemy ship was required to maintain its position in a line of battle.
Neptune was a Bucentaure-class 80-gun ship of the line of the French Navy. Built during the last years of the French Revolutionary Wars she was launched at the beginning of the Napoleonic Wars. Her brief career with the French included several major battles, though she spent the last 12 years of her life under the Spanish flag.
HMS Achille was a 74-gun third-rate ship of the line of the Royal Navy. She was built by Cleverley Bros., a private shipyard at Gravesend, and launched on 16 April 1798. Her design was based on the lines of the captured French ship Pompée. She was the fourth Royal Navy ship to be named after the Greek hero Achilles in the French style.
Sailing ship tactics were the naval tactics employed by sailing ships in contrast to galley tactics employed by oared vessels. This article focuses on the period from c. 1500 to the mid-19th century, after which sailing warships were replaced with steam-powered ironclads.
The Battle of Cape Ortegal was the final action of the Trafalgar campaign, and was fought between a squadron of the Royal Navy and a remnant of the fleet that had been defeated earlier at the Battle of Trafalgar. It took place on 4 November 1805 off Cape Ortegal, in north-west Spain and saw Captain Sir Richard Strachan defeat and capture a French squadron under Rear-Admiral Pierre Dumanoir le Pelley. It is sometimes referred to as Strachan's Action.
The Trafalgar campaign was a long and complicated series of fleet manoeuvres carried out by the combined French and Spanish fleets; and the opposing moves of the Royal Navy during much of 1805. These were the culmination of French plans to force a passage through the English Channel, and so achieve a successful invasion of the United Kingdom. The plans were extremely complicated and proved to be impractical. Much of the detail was due to the personal intervention of Napoleon, who as a soldier rather than a sailor failed to consider the effects of weather, difficulties in communication, and the Royal Navy. Despite limited successes in achieving some elements of the plan the French commanders were unable to follow the main objective through to execution. The campaign, which took place over thousands of miles of ocean, was marked by several naval engagements, most significantly at the Battle of Trafalgar on 21 October, where the combined fleet was decisively defeated, and from which the campaign takes its name. A final mopping up action at the Battle of Cape Ortegal on 4 November completed the destruction of the combined fleet, and secured the supremacy of the Royal Navy at sea.
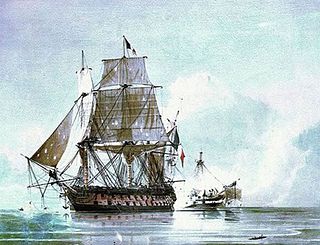
The action of 18 August 1798 was a minor naval engagement of the French Revolutionary Wars, fought between the British fourth rate ship HMS Leander and the French ship of the line Généreux. Both ships had been engaged at the Battle of the Nile three weeks earlier, in which a British fleet under Rear-Admiral Sir Horatio Nelson had destroyed a French fleet at Aboukir Bay on the Mediterranean coast of Egypt. Généreux was one of only four French ships to survive the battle, while Leander had been detached from the British fleet by Nelson on 6 August. On board, Captain Edward Berry sailed as a passenger, charged with carrying despatches to the squadron under Earl St Vincent off Cadiz. On 18 August, while passing the western shore of Crete, Leander was intercepted and attacked by Généreux, which had separated from the rest of the French survivors the day before.
Neptuno was an 80-gun Neptuno-class ship of the line of the Spanish Navy. She was built in 1795 and took part in the French Revolutionary and Napoleonic Wars. She fought with the Franco-Spanish fleet in the battle of Trafalgar, and was wrecked in its aftermath.
The Algeciras campaign was an attempt by a French naval squadron from Toulon under Contre-Admiral Charles Linois to join a French and Spanish fleet at Cadiz during June and July 1801 during the French Revolutionary Wars prior to a planned operation against either Egypt or Portugal. To reach Cadiz, the French squadron had to pass the British naval base at Gibraltar, which housed the squadron tasked with blockading Cadiz. The British squadron was commanded by Rear-Admiral Sir James Saumarez. After a successful voyage between Toulon and Gibraltar, in which a number of British vessels were captured, the squadron anchored at Algeciras, a fortified port city within sight of Gibraltar across Gibraltar Bay. On 6 July 1801, Saumarez attacked the anchored squadron, in the First Battle of Algeciras. Although severe damage was inflicted on all three French ships of the line, none could be successfully captured and the British were forced to withdraw without HMS Hannibal, which had grounded and was subsequently seized by the French.
HMS Victory is a 104-gun first-rate ship of the line of the Royal Navy. She was ordered in 1758, laid down in 1759, and launched in 1765. With 246 years of service as of 2024, she is the world's oldest naval vessel still in commission.
References
↑ Hannah. p.124.{{cite book}}: Missing or empty |title= (help)
↑ Mortlock 2017, p.32 "the sailing of these vessels was a constant manual labour with skilled work that required balance, timing, and strength"
↑ Mortlock 2017, p.32 "Many men who survived amputation succumbed later to bacterial infections.... Complicated surgical procedures on abdominal wounds were impossible ... Infections were almost inevitable."
↑ "Battle of Trafalgar - Federico Carlos Gravina y Nápoli", hnelson.iespana.es (in Spanish), archived from the original on 27 March 2010. Schom, Alan, Trafalgar, Countdown to Battle, 1803-1805 (p355 & 384) describes Gravina as mortally wounded. Harbron, John D, Trafalgar and the Spanish Navy p113, describes Gravina in March 1806 as dying of wounds received at the battle of Trafalgar.
Winfield, Rif; Tredrea, John M; García-Torralba Pérez, Enrique & Blasco Felip, Manuel (2023). Spanish Warships in the Age of Sail 1700—1860: Design, Construction, Careers and Fates. Barnsley, UK: Seaforth Publishing. ISBN978-1-5267-9078-1.
This page is based on this Wikipedia article Text is available under the CC BY-SA 4.0 license; additional terms may apply. Images, videos and audio are available under their respective licenses.