6th Heavy Anti-Aircraft Regiment, Royal Artillery was an air defence unit of the British Army raised in the years leading up to World War II. It served in the Battle of France and was evacuated from Dunkirk. Re-equipped, it defended London and the West Midlands during the Battle of Britain and The Blitz. It was then sent to the Middle East theatre, but was diverted en route to the Far East, where the Japanese Army had invaded British Malaya. Split up, ill-equipped and fighting against overwhelming odds, the regiment was captured in Java, Dutch East Indies, in March 1942. Many of the men taken prisoner later died working on the Burma Railway and in the 'Hell Ships' taking them to work in Japan. Its successor unit served in the post-war British Army until 1958.
An AEC 850 6 x 6 artillery tractor of 15 AA Battery towing a 3-inch AA gun on the cruciform travelling platform.
Headquarters (HQ)
3 AA Bty
12 AA Bty
16 AA Bty (left for 4th AA Bde on 1 July 1936 and was replaced by 15 (Independent) AA Bty)
1 Machine Gun Bty (redesignated 1 Light AA Bty 1 May 1937 and left by August 1939 and later joined 1st LAA Rgt)
Apart from 1 MG Bty, the standard equipment of the batteries was the QF 3-inch 20 cwt AA gun that had been used in World War I, mounted on a cruciform travelling platform and towed by a lorry. The brigade became 6th AA Regiment on 1 May 1938 when the RA changed its unit designations and from 1 June 1940 the 6th and other heavy AA (HAA) regiments and batteries adopted the HAA designation.[1][5][6] The regiment formed part of 1 AA Brigade (previously 1 AD Bde) in Aldershot Command.[7]
Mobilisation
A predictor crew at work at a 3-inch gun site of 2 HAA Battery, near BEF GHQ at Wanquetin, 19 October 1939.
On the outbreak of war 6th HAA Rgt mobilised at Blackdown under the command of Lt-Col E.D. Milligan as part of 1 AA Bde. It was embarked from Southampton in the British Expeditionary Force (BEF) sent to France, landing at Cherbourg Harbour and initially deploying to protect the BEF's concentration area round Le Mans from attacks by the Luftwaffe. As the build-up continued it moved to Bellancourt on the Somme and later to Berlette in the Aubigny area. Here 3 HAA Bty carried out the regiment's first engagement, against a Heinkel He 111, on 21 November. There followed months of tedium as the 'Phoney War' dragged on.[6][7][8][9]
The regiment was reorganised in January 1940, exchanging 15 HAA Bty for 2 HAA Bty from 1st HAA Rgt and 3 HAA Bty for 18 HAA Bty from 4th HAA Rgt, while 1 LAA Bty was subordinated directly to 1 (later 4) AA Bde. Lieutenant-Colonel Milligan was promoted to command 1 AA Bde and was succeeded by Lt-Col E.M.C. Brittan as CO.[8][10]
On 19 March the regiment received its first Gunlaying Mk I radar sets to provide early warning and to assist optical instruments in picking up targets, although there were problems in calibrating them. They were later handed over to 4th HAA Rgt, which was envisaged to have a more static role in the forthcoming campaign.[11][12]
Battle of France
3-inch AA guns of 2 HAA Battery, deployed near BEF GHQ at Wanquetin, 19 October 1939.
The Battle of France began on 10 May with the German invasion of the Low Countries. The BEF followed the pre-arranged Plan D and advanced into Belgium to take up defences along the Dyle. 1 AA Brigade's role was to defend the routes forward, protecting roads and bridges, artillery concentrations, HQs and supply dumps. 6th HAA Regiment moved up as part of this advance, split into detachments. On 13 May, B Section of 12 Bty brought down a Junkers Ju 88, and later B and C Sections hit three low-flying Dornier Do 17s and believed they had brought one down. On 15 May B and D shot down another Ju 88.[13][14][15][16]
However, on that day a German breakthrough in the Ardennes forced the BEF to fall back again. While 15 Bty remained in the Ypres area, 3 and 12 Btys fell back. As the situation deteriorated, HAA guns were also used in an anti-tank role. On 19 May one Troop knocked out two German Panzers, but the HAA guns could not be withdrawn and had to be disabled. On 20 May D Section was relocated to defend the canal bridge at Svegegham and came under attack as low-flying bombers attempted to destroy the bridge, without success on either side. On 21 May 15 Bty was ordered to detach a party with Bren guns to assist in defending Vimy Ridge; the battery finally got away from Ypres on 22 May while the city was under heavy bombing. Deploying south of Lille the battery got its first confirmed 'kill' when A Section scored a direct hit on a Ju 88 at 8000 feet while conducting barrage fire.[17][18][19]
By now the main body of the BEF was cut off and making for Dunkirk to be evacuated (in Operation Dynamo). 15 Battery set up near the perimeter and tried to hit a Heinkel spotter aircraft before switching fire to a low-flying bomber attacking a nearby Bofors gun position; it hit this aircraft with Shrapnel shell and brought it down. 3 Battery reached Armentières on 23 May, by which time the Dunkirk perimeter was shrinking. On 27 May the regiment was ordered to destroy all transport and stores other than those attached to the guns, and the following day the (mistaken) order was received to destroy all guns and instruments. B Section did not receive the order, and continued to fire from La Panne until out of ammunition. Many of the regiment's gunners were got away from the beaches at La Panne and Bray-Dunes, some aboard the Royal Daffodil.[20][21][22][23][24]
Battle of Britain
AA units returning from France were rapidly reinforced, re-equipped where possible, and redeployed for future integration into existing defence plans. 6th HAA Regiment, with its original HAA batteries (3, 12 and 15) back under command, went to Aberystwyth in Wales, where it re-equipped with 3-inch guns.[25][26] RHQ then moved on 4 July to Eastleigh, with 12 HAA Bty nearby at West End, Hampshire, to help defend Southampton Docks, while 3 HAA Bty went on 5 July to Falmouth, Cornwall, to defend the harbour there. 15 HAA Battery still had no guns and was posted to Bristol, where it became temporarily attached to 76th (Gloucestershire) HAA Rgt, which had four old semi-mobile 3-inch guns available for re-training. On 12 July the battery got some shots off against a Ju 88, forcing it to jettison its bombs. 12 HAA Battery redeployed with A and C Sections at Brownwich, Fareham, under 252 HAA Bty of 80th (Berkshire) HAA Rgt, B and D sections at Fort Southwick and Fort Nelson respectively, both under 250/80 HAA Bty. Here they had the chance to familiarise themselves with modern 3.7-inch HAA guns, even though these were in a poor state of maintenance. They had a brief engagement with a Do 17 on 11 July.[27][28][29]
The Battle of Britain was now under way, and during late July and throughout August the batteries had fleeting engagements with small numbers of raiders along the South Coast and Severn Estuary. There were attacks on Southampton and Portsmouth, on Lee-on-Solent and Gosport airfields, and on the Thornycroft factory at Woolston. 12 and 15 HAA Btys provided a cadre of officers and other ranks to 211 AA Training Rgt at Oswestry to form the basis of a new battery. GL Radar was delivered to 15 HAA Bty, to improve the defences of Bristol. Falmouth, meanwhile, was subject to mine-laying operations by enemy aircraft.[32][33]
By the end of August, 12 HAA Bty had rejoined RHQ, which was also commanding 251/80 HAA Bty, 260 HAA Bty of 84th (Middlesex, London Transport) HAA Rgt and 152 LAA Bty of 51st (Devon) LAA Rgt as a mobile force in Kent.[30] During early September the pattern of fleeting targets – but no 'kills' – for all the batteries continued by day and night, though most of the 3-inch guns had been replaced by 3.7s, together with the new Sperry Predictor No 2.[32][34][35]
After its heavy losses so far during the Battle of Britain, the Luftwaffe changed tactics and started bombing London. On 9 September, 12 HAA Bty and its attached 212 Signal Section, Royal Corps of Signals (RCS), were sent to strengthen the London Inner Artillery Zone (IAZ). It split its eight guns between sites ZS7 at Eltham and ZS22 at Grove Park, Lewisham, under the command of 105th HAA Rgt in 48 AA Bde. The raids against London worsened, and RHQ of 6 HAA Rgt with two sections of 250/80 HAA Bty were brought from Kent on 14 September to take over command of six more sites in South East London under 48 AA Bde: ZS4 (Bostall Heath), ZS17 (Mitcham), and ZS26 (Thornet Wood, Bromley) (all mobile guns) and ZS9 (Sundridge Park), ZS12 (Southwark Park) and ZS23 (Ravensbourne, Bromley) (all static guns). HQ was established at Holly Hedge Drill Hall in Blackheath.[32][36][37][38]
Large daylight raids against London on 14 and 15 September were intercepted by Royal Air Force (RAF) fighters, so the guns were silent, but were active again at night, with several bombs dropped round the Eltham sites, and more batteries were brought into the IAZ. Bristol was also attacked, and part of 15 HAA Bty was moved to Henbury Golf Course to be closer to the Bristol aircraft factory at Filton.[32][36][39][40]
The Blitz
After 15 September the Luftwaffe concentrated on night raids – the London Blitz – which went on night after night. On 12 October, 3 HAA Bty was brought up from Cornwall to rejoin 6 HAA Rgt, taking over ZS23 and ZS26 sites, allowing 328 HAA Bty to return to its parent regiment (104th HAA Rgt). Shortly afterwards 15 HAA Bty was also brought back from Bristol, taking over sites ZW7 (Chingford) and ZE18 (Queen Elizabeth), both north of London under 4th HAA Rgt. Later 3 and 12 HAA Btys were concentrated in a 16-gun site at ZS34 (Addington). By now most of the gunsites were well equipped with 3.7-inch guns, Sperry predictors, and GL Mk I radar with an elevation finding (E/F) attachment, which slowly improved the success rate of the guns in the IAZ: on 19 November, 12 Bty scored its first 'bullseye' on an He 111. Several of the gunsites received minor damage and casualties (killed and wounded) from bombs, the most serious being an oil bomb that hit an ammunition lorry.[32][41][42][43][44]
11 AA Divisional formation sign.
On 15 November the Luftwaffe carried out Operation Mondscheinsonate (Moonlight Sonata) – the Coventry Blitz – the first in a new series of attacks on industrial cities.[32][45][46] AA Command reacted by increasing the AA cover of the West Midlands, including moving 6th HAA Rgt with 3 and 12 HAA Btys (16 x 3.7-inch mobile guns) to Wolverhampton. The convoy set out on 24 November and the guns were deployed in their new positions by nightfall, with 3 HAA Bty at an 8-gun site H49 (Upper Penn) and 12 HAA Bty split between two 4-gun sites at H50 (Bushbury) and H51 (Wergs). RHQ was established at Patshull Hall. There were also searchlight sites nearby, manned by 38th (King's Regiment) S/L Rgt including ones at Bushbury and Penn Common. 15 HAA Bty joined from Grove Park on 11 December, taking over two new sites (as yet without guns) at Castle Bromwich near an important aircraft factory, with Battery HQ at Sutton Coldfield.[47] The regiment was now part of 34 (South Midland) AA Bde in a newly formed 11 AA Division.[48][49]
Action was rare, most of the raids seen being en route to bomb Sheffield, Liverpool or Manchester. Without guns, 15 HAA Bty was detailed to ground defence of 34 AA Bde HQ and Gun Operations Room, until two old 3-inch guns arrived for each of the battery's sites on 17 January 1941. Shortly afterwards, 15 HAA Bty exchanged with 168 HAA Bty of 60th HAA Rgt and took over two 4-gun 3.7-inch sites near Wednesfield and Willenhall.[46][50]
Mobile training
3.7-inch gun towed by a Matador tractor on mobile exercises in the UK.
The regiment continued to serve in AA Command as part of 34 AA Bde, but was simultaneously part of the War Office (WO) Reserve, organised as a mobile unit with all the necessary ancillary units:[51][52][53]
Mobilisation exercises (codenamed 'Chestnut') were held in March and April to reconnoitre redeployment to Banbury, Oxford and Didcot to provide AA defence of defiles for the field army. Also in March, 15 HAA Bty shifted four guns from Penn Common to a site south of Birmingham, and 12 HAA Bty deployed to new sites near Coventry. There was a heavy raid on Birmingham and Coventry on 9/10 April, when 12 HAA Bty scored damaging hits on two aircraft. There was another Chestnut exercise in May, when the redeployments to Oxfordshire were carried out for practice, before the guns returned to the Midlands. Some of the guns were away on another exercise when Birmingham was attacked on 16/17 May; however 12 HAA Bty appeared to damage the formation leader, and the bombs were scattered to some extent. By now the guns were being regularly switched between sites to confuse the Luftwaffe. Longer distance mobile exercises (named 'Bertram Mills' schemes after the travelling circus) were carried out by batteries to Yorkshire, and Sussex, and sites were temporarily manned by 181/65 HAA Bty and 198 HAA Bty of 67th (York and Lancaster Regiment) HAA Rgt while 6th HAA Rgt's gunners went to practice ranges in Wales.[54]
Lieutenant-Colonel G.W.G. Baass (who changed his surname to Baillie later that year) became CO on 15 June 1941.[55][56]
In September, the regiment was ordered to prepare for embarkation for the Middle East. It left AA Command and was relieved at its gunsites by 71st (Forth) HAA Rgt and concentrated at Bulford Camp on Salisbury Plain before proceeding to Liverpool for embarkation. On 14 November 1941 the regiment sailed aboard the Monarch of Bermuda in Convoy WS12 bound for Iraq to join the build-up of AA defences for the oil terminal at Basra.[57][58][59][60]
However, on 8 December, while the convoy was at Durban, the Japanese invaded Malaya shortly before attacking Pearl Harbor. On 11 December the convoy was split, and the part containing 6th HAA Rgt (now aboard HM Transport Aorangi) was diverted to Singapore, arriving on 13 January 1942. Several of the ships carrying equipment and vehicles had continued to Basra, but the gunners manned existing gunsites around Singapore island.[61][62][63][64][65]
On Sumatra, 6th HAA Rgt was sent to guard two airfields known as P1 and P2, and the Pladjoe and Soengei Gerong oil refineries and tank farm situated in dense jungle at Palembang. The journey involved ferry crossings and a combined road and rail lift of equipment. On arrival the batteries had six 3.7-inch guns with them, but no instruments or communication equipment. Much ammunition had been lost when one of the ships was sunk by Japanese bombers. Another 10 x 3.7-inch guns were aboard SS Subadar when she was attacked and damaged, but the guns were landed. 15 HAA Bty deployed with eight guns of at P1, while 12 HAA Bty had four at P2 and two each at Pladjoe and Soengei Gerong. Each HAA site also had a few LAA guns from 78 and 89 LAA Btys of 35th LAA Rgt. The batteries were in position by 3 February 1942, with RHQ alongside that of the RAF commander.[63][66][68][69]
Singapore
The Battle of Singapore began at the end of January when the last Allied troops retreated onto the island from Malaya. 3 HAA Battery's positions came under daily air attack, and some of the gunners were shifted to AA positions at airfields in the north of the island. Once their guns were out of action they manned trenches as infantry or joined anti-tank gunners as the defensive perimeter shrank. The survivors became Prisoners of War (PoWs) when the city surrendered on 15 February.[70]
Sumatra
Kawasaki Ki-56, easily mistaken for a Hudson.
The Japanese attack on Sumatra began with air raids on P1: low-level Strafing attacks by Mitsubishi Zero fighters were an impossible HAA target, while without instruments the gunners could only put up barrage fire against high level bombers, and had no success. Palembang was also raided. On the same day that Singapore fell (14 February) the Japanese launched their invasion of Sumatra. This began with a paratroop drop at P1 and Pladjoe – until the actual drop the approaching Kawasaki Ki-56 transports were thought to be friendly Lockheed Hudsons (both aircraft were developed from the Lockheed Model 14 Super Electra). Once the paratroop drop began, the AA batteries opened fire, shooting down one aircraft, causing another to force-land and others to veer off course (including the fighters and bombers that accompanied the transports, 15 HAA Bty shot down three aircraft). The transports gained height to avoid the gunfire, and the paratroops dropped from too high, making them vulnerable to airburst fire. However the drop was successful, and the paratroops began working through the jungle to the installations. One 3.7-inch Troop was rescued by a party of RAF pilots and ground crew with a Vickers machine gun and rifles, who cleared a drop zone. A 3.7-inch shell fired with minimum fuze over open sights cleared a nest of snipers from a tree, while another destroyed a captured Bofors LAA gun.[58][63][68][71][72]
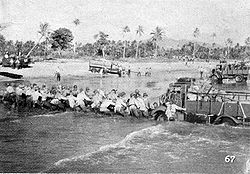
The port facilities at Oosthaven are destroyed 20 February 1942 as the Allies retreat.
As the airfield was overrun, the gunners attempted to pull back to Palembang, but there were only two serviceable AEC Matador gun tractors left. The remaining guns were disabled and a convoy of gunners and RAF personnel attempted to retreat. The road was under fire and the convoy ran into a road block, so the HAA and LAA gunners and RAF men made their way in small parties to Palembang, having taken heavy casualties along the way. Only one 3.7-inch gun was recovered, which was sited at the ferry site at Palembang[73]
At the refinery the commander of 12 HAA Bty had formed a party from his battery HQ to attack another drop zone, and engaged the Japanese in a five-hour fire-fight with small arms. The battery's guns were in action all day, claiming 16 'kills' in conjunction with 78/35 LAA Bty.[74] As Japanese invasion barges approached next day, the Dutch commander destroyed the refinery and evacuated to P2, which was still operational. Once again, the AA gunners at the refinery had to disable most of their guns; two 3.7s were ferried across the river to cover the railway and bridges, then on to P2, but the gun of 15 HAA Bty at the ferry had to be abandoned.[75]
Once the last aircraft had flown out of P2, the decision was made to evacuate southern Sumatra. The force retreated to Oosthaven by road and rail, destroying the remaining AA guns which could not negotiate the bridges on the route. From Oosthaven the surviving RAF personnel and AA gunners were shipped to Java.[71][76]
Java
The Japanese invasion of Java.
By mid-February, Java was the only part of the Dutch East Indies holding out. 77th (Welsh) HAA Rgt had been defending the naval base of Sourabaya against air attack for several weeks. Brigadier H.D.W, Sitwell of 16 AA Bde was promoted to command all British troops on the island, of which his brigade represented the majority. It was not in good shape, the units having arrived piecemeal, some without their equipment: 12 and 15 Btys of 6 HAA Rgt from Sumatra had no guns and were employed as infantry to defend the airfields, with the men of 78/35 LAA Bty and two Troops of 89/35 LAA Bty also under command with some Bofors guns. Japanese landings on Java began on 1 March with the airfields as their primary target. The survivors of 12 HAA Bty, with some RAF defence troops and Bofors gunners, and some light Dutch armoured vehicles, defended Kalidjati airfield, while 15 HAA Bty were deployed to Tjililitan and other airfields. The defence forces at Kalidjati set up roadblocks and mobile patrols, but were caught be surprise when a Japanese motorised column arrived and destroyed many of the aircraft. Nevertheless, they put up a vigorous defence before the airfield was overrun. The survivors of 12 HAA Bty joined 15 HAA Bty, which had been under air but not ground attack. Major-General Sitwell relieved the regiment's CO, Lt-Col Baillie, of his command and sent him back to Ceylon.[lower-alpha 2] 'Blackforce', a mixed force of Australians and British commanded by Brig Arthur Blackburn, VC, kept up an active defence for several days, but the Dutch commander ordered his units to cease fire on 8 March, and the remnants of 16 AA Bde including 6th HAA Rgt surrendered on 12 March.[58][63][79][80][81][82]
Imprisonment
The survivors of 3 HAA Bty at Singapore were first put into PoW camps in and around Changi Prison. A large number were then shipped to Saigon to work in the docks, airfields and rubber plantations. Later they were moved to work on the notorious Burma Railway on which many died, including around 60 from 6th HAA Rgt. The PoWs from the regiment on Java were moved around various camps until October 1942 when they were transported by sea to Singapore and then on to Japan: 65 men of 6th HAA Rgt died aboard ship or shortly afterwards. In Japan they were set to work in the coal mines, docks and ironworks at Ube.[83] Others were sent to Borneo to construct airfields and died in the infamous Sandakan Death Marches, and at least 20 men of 6th HAA Rgt were killed in the Balalae Island massacre.[84]
The 'Hell Ship' Kachidoki Maru: men of 3 HAA Bty were lost when it was torpedoed.
After the completion of the Burma Railway in March 1944, most of the PoWs were to be transported from Saigon to Japan, but there was no shipping, so they were moved to Singapore, where they worked in Keppel Harbour. In September, the ships Rakuyo Maru and Kachidoki Maru became available and the PoWs were loaded aboard in appalling conditions. The convoy was intercepted by US Navy submarines and both ships were sunk, with heavy loss of life among the PoWs; 15 men from 3 HAA Bty were killed.[85] Several other men from the regiment died aboard other Japanese 'Hell Ships' bringing prisoners from Java that were torpedoed on other occasions, including 15 men aboard the Tokyo Maru, who either drowned or were murdered in the water by the Japanese escort vessels. Others died building the Sumatra Railway.[86]
In June 1945, the mines and town of Ube were destroyed by USAAF bombers and the PoWs from 6th HAA Rgt were moved to other mines and camps, including Hiroshima and Nagasaki, where they witnessed the atomic bombs that ended the war. Some members of 3 HAA Bty were still working on maintaining the Burma Railway when they were rescued.[87]
According to Commonwealth War Graves Commission records, 6th HAA Rgt's fatal casualties during World War II comprise 29 buried in France and Belgium, 19 in the UK, and 447 in the Far East. The regimental historian has identified 738 men who survived the Far East campaign.[88]
Postwar
6th Heavy AA Regiment was reformed in the postwar army on 1 April 1946 from 140th HAA Rgt at Weymouth, Dorset; that regiment's 418 420 and 429 HAA Btys were redesignated 3, 12 and 15 HAA Btys to recreate those lost in Java.[1]
In the reorganisation of the RA the following year, 6th HAA Rgt was redesignated 77th Heavy Anti-Aircraft Regiment[lower-alpha 3] with 209, 221, 222 HAA Btys from the former 3, 12, 15 HAA Btys. At the time it was stationed at Newcombe Lines, Larkhill, equipped with 3.7-inch guns and forming part of 5 AA Bde covering South Wales, Bristol and the Solent in 2 AA Group.[1][89][90][91][92][93]
On 1 April 1955, 209 HAA Bty was placed in suspended animation to resuscitate 29 Bty (late of 65th HAA Rgt, the wartime 124th HAA Rgt). The same process was carried out with 222 HAA Bty to resuscitate 41 Bty (late of 17th Training Rgt) on 30 April. On 17 June, 37 Bty (the wartime 13th Coast Bty, late of 75th HAA Rgt) was resuscitated, and 221 HAA Bty disbanded on 1 July. This left the regiment with 29, 37 and 41 Btys.[89][92][94][95]
↑ One normally reliable source[1] asserts that 6th AA Bde was formed in Hong Kong where 12 AA Bty was then stationed; this seems to be due to a confusion with 12 Heavy Bty in Hong Kong.
↑ The circumstances of Baillie's removal are unclear[77] but have been examined by Walker[78] and Tulloch[55]
↑ Not to be confused with the Territorial Army 77th (Welsh) HAA Rgt, (see above) which was simultaneously reformed as 282nd (Welsh) HAA Rgt
↑ Order of Battle of the Field Force in the United Kingdom, Part 3: Royal Artillery (Non-Divisional units), 22 October 1941, TNA files WO 212/6 and WO 33/1883.
1st Anti-Aircraft Brigade was an Air Defence formation of the British Army, during the Second World War, and served in the Battle of France and during The Blitz. It then transferred to the Middle East, where it defended the Eighth Army's lines of communication during the final phases of the North African Campaign.
The Berkshire Royal Horse Artillery was a Territorial Force Royal Horse Artillery battery that was formed in Berkshire in 1908. It saw active service during the First World War in the Middle East, notably at Aden and in particular in the Sinai and Palestine Campaign, from 1915 to 1918. A second line battery, 2/1st Berkshire RHA, served on the Western Front in 1917 and 1918 as part of an Army Field Artillery Brigade. After the Armistice, it was reconstituted as a Royal Field Artillery battery of the Territorial Army (TA), later being expanded into a full heavy anti-aircraft (HAA) regiment that served during the Second World War in the Battle of Britain and Blitz, in the assault landings in North Africa, Sicily and Italy. Postwar, it continued in the TA until 1968.
51st (London) Heavy Anti-Aircraft Regiment was a volunteer air defence unit of Britain's Territorial Army from 1922 until 1955. During World War II it served in Norway, The Blitz, North Africa, and finally in Italy until the end of the war in Europe, by which time a proportion of the regiment's personnel were African soldiers, and the guns were engaging ground targets rather than aircraft.
The 79th Heavy Anti-Aircraft Regiment, Royal Artillery was an air defence unit of Britain's Territorial Army (TA). Formed just before World War II, it fought in the Battle of France, the Swansea Blitz, Operation Torch and the Italian Campaign. It continued serving in the post-war TA until 1955.
The 34th Anti-Aircraft Brigade was an air defence formation of Anti-Aircraft Command in the British Territorial Army formed shortly before the outbreak of the Second World War. It defended the West Midlands of England during The Blitz.
The 80th Anti-Aircraft Brigade was an air defence formation of the British Army during the Second World War. It landed on D-Day and saw action throughout the campaign in North West Europe, providing early warning of attacks by V-1 flying bombs against Antwerp during the winter of 1944–45.
The 86th Heavy Anti-Aircraft Regiment, Royal Artillery was an air defence unit of Britain's Territorial Army (TA) that served throughout World War II. It defended London during The Blitz, landed on Juno Beach on D-Day, and defended the cities of Belgium against V-1 flying bombs.
73rd Heavy Anti-Aircraft Regiment, Royal Artillery was a West Midlands-based volunteer air defence unit of Britain's Territorial Army (TA) raised in 1937. During World War II, it served in the Battle of France, The Blitz, Egypt, Sicily and Italy. Postwar, its successor regiments continued to serve until 1967, and a battery descended from the regiment forms part of today's Army Reserve
The 89th Heavy Anti-Aircraft Regiment, Royal Artillery was an air defence unit of Britain's Territorial Army (TA) raised in Kent just before the outbreak of World War II. It served during the Battle of Britain and defended the Suez Canal while batteries served in the Battle of Crete and the Siege of Tobruk. The regiment then fought through the North African and Italian campaigns.
88th Heavy Anti-Aircraft Regiment, Royal Artillery (TA) was a volunteer air defence unit of Britain's Territorial Army (TA) from 1939 until amalgamated in 1950. During World War II it defended South Wales and the Severn Valley during the Blitz and then took part in the North African and Italian campaigns, fighting in both the anti-aircraft (AA) and ground fire roles.
85th (Tees) Heavy Anti-Aircraft Regiment, Royal Artillery was a part-time unit of Britain's Territorial Army (TA) formed from forces around the river Tees just before the outbreak of World War II. Its service during the war included the Battle of France and Dunkirk evacuation, the Battle of Britain and Blitz, and the North African and Italian campaigns. It continued to serve in the air defence role until 1961.
91st Heavy Anti-Aircraft Regiment, Royal Artillery was a part-time unit of Britain's Territorial Army (TA) formed in the West Riding of Yorkshire just before the outbreak of World War II. Its service during the war included Home Defence during the Battle of Britain and The Blitz, and a length period in Middle East Forces. Postwar it continued to serve in the TA in the air defence role until 1955.
7th Heavy Anti-Aircraft Regiment, Royal Artillery was an air defence unit of the British Army that served in the Siege of Malta during World War II. It fired the first British shots in the Mediterranean Theatre in the war, and provided the basis on which the heavy anti-aircraft defences of Malta were built. Late in the war it returned to defend the UK against V-1 flying bombs, and continued in the postwar army until 1954.
The 101st Heavy Anti-Aircraft Regiment, Royal Artillery was an air defence unit of Britain's Territorial Army raised in northern Scotland just before World War II. After defending the naval base of Scapa Flow against air attack in the early part of the war, the regiment went to India and later took part in the Burma Campaign in the anti-aircraft role and with heavy howitzers in support of ground forces, even on occasion fighting as infantry. It was reformed in the post-war TA and continued until the abolition of Anti-Aircraft Command in 1955.
2nd Anti-Aircraft Brigade was an air defence formation of the British Army during the Second World War, seeing active service in the Battle of France and the North African and Italian campaigns.
4th Anti-Aircraft Brigade was an air defence formation of the British Army during the Second World War. It was formed just before the Battle of France to protect the British Expeditionary Force's bases. After the Dunkirk evacuation it was reformed in Egypt as a mobile formation with the Western Desert Force. It played a distinguished part in the Defence of Tobruk in 1941, but its headquarters was captured in the Fall of Tobruk the following year. It was reconstituted as a training formation in Persia and Iraq Command for the rest of the war.
12th Anti-Aircraft Brigade was an air defence formation of the British Army during the Second World War. It specialised in providing anti-aircraft (AA) protection for forward airfields, for the Advanced Air Striking Force in the Battle of France and the Desert Air Force in the North African Campaign. It landed at Salerno in 1943 and fought through the Italian Campaign, its guns often engaging ground targets as well as aircraft. It was reformed postwar and continued for a few years in Anti-Aircraft Command.
94th Heavy Anti-Aircraft Regiment, Royal Artillery, was a Scottish air defence unit of Britain's Territorial Army (TA) formed around Edinburgh during the period of international tension leading up to the outbreak of World War II. It defended Eastern Scotland during the early part of the war and then served in the North African Campaign. The regiment continued in the postwar TA until amalgamated in 1955
143rd Heavy Anti-Aircraft Regiment was an air defence unit of Britain's Royal Artillery formed during World War II. It started out as a 'Mixed' regiment with around two-thirds of its personnel being women from the Auxiliary Territorial Service (ATS). The regiment defended the West of England from 1942 to the end of the war when it moved to South East England. The regiment continued in the postwar British Army.
The 52nd Light Anti-Aircraft Regiment, was a Royal Artillery (RA) air defence unit of Britain's part-time Territorial Army (TA) converted from a field artillery unit just before the outbreak of World War II. It served in the Battle of France, shooting down a large number of aircraft before being evacuated from Dunkirk. It was then sent to the Mediterranean, where detached batteries were destroyed in the fighting in Greece and Crete. The reformed regiment then took part in the defence of the Suez Canal and later in the Italian Campaign. It continued in the postwar TA until 1955 when it merged with other units in Lancashire.
Gen Sir Martin Farndale, History of the Royal Regiment of Artillery: The Years of Defeat: Europe and North Africa, 1939–1941, Woolwich: Royal Artillery Institution, 1988/London: Brasseys, 1996, ISBN1-85753-080-2.
Gen Sir Martin Farndale, History of the Royal Regiment of Artillery: The Far East Theatre 1939–1946, London: Brasseys, 2002, ISBN185753302X.
J.B.M. Frederick, Lineage Book of British Land Forces 1660–1978, Vol II, Wakefield, Microform Academic, 1984, ISBN1-85117-009-X.
Joslen, H. F. (2003) [1960]. Orders of Battle: Second World War, 1939–1945. Uckfield, East Sussex: Naval and Military Press. ISBN978-1-84342-474-1.
Brig N.W. Routledge, History of the Royal Regiment of Artillery: Anti-Aircraft Artillery 1914–55, London: Royal Artillery Institution/Brassey's, 1994, ISBN1-85753-099-3
Patrick Walker, 6th Heavy Anti-Aircraft Regiment, Royal Artillery, Rev Edn, Gloucester: Choir Press, 2013, ISBN978-0-9562190-4-6.
Maj-Gen S. Woodburn Kirby, History of the Second World War, United Kingdom Military Series: The War Against Japan Vol I, The Loss of Singapore, London: HM Stationery Office, 1957.
This page is based on this Wikipedia article Text is available under the CC BY-SA 4.0 license; additional terms may apply. Images, videos and audio are available under their respective licenses.