Battle of Hill 60 (Gallipoli)

Last updated
Battle of Hill 60
Part of the Gallipoli Campaign in the Middle Eastern Theatre of the First World War
Kaiajik Dere and Hill 60.jpg
Kaiajik Dere and Hill 60, 1919
Date21–29 August 1915
Location 40°16′21″N26°17′35″E / 40.2726°N 26.2931°E / 40.2726; 26.2931
Result Ottoman victory
Belligerents

Flag of the United Kingdom.svg  British Empire

Flag of the Ottoman Empire (1844-1922).svg  Ottoman Empire
Commanders and leaders
Flag of the United Kingdom.svg William Birdwood Flag of the Ottoman Empire (1844-1922).svg Mustafa Kemal
Flag of the Ottoman Empire (1844-1922).svg Cevat Pasha
Strength
4,000 [1] Unknown
Casualties and losses
1,100 [2] Unknown
Turkey adm location map.svg
Red pog.svg
Location within Turkey

The Battle of Hill 60 was one of the last major assault of the Gallipoli Campaign. It was launched on 21 August 1915 to coincide with the attack on Scimitar Hill made from the Suvla front by Major-General H. de B. De Lisle's British IX Corps, Frederick Stopford having been replaced in the few days previous. Hill 60 was a low knoll at the northern end of the Sari Bair range which dominated the Suvla landing. Capturing this hill along with Scimitar Hill would have allowed the Anzac and Suvla landings to be securely linked.

Contents

Two major attacks were made by Allied forces, the first on 21 August and the second on 27 August. The first assault resulted in limited gains around the lower parts of the hill, but the Ottoman defenders managed to hold the heights even after the attack was continued by a fresh Australian battalion on 22 August. Reinforcements were committed, but nevertheless the second major assault on 27 August fared similarly, and although fighting around the summit continued over the course of three days, at the end of the battle the Ottoman forces remained in possession of the summit.

Background

Hill 60 (Kaiajik Aghala) commanded the low ground occupied by a thin line of outposts between the Allied forces at Anzac and Suvla. [3] The hill was to be taken as part of an attack that stretched over a two-mile front from Hill 60 through Hetman Chair, Hill 70 and Oglu Tepe. [4] The initial attacking force was based on troops allocated to Major-General Herbert Cox by Lieutenant-General William Birdwood: [5] [6]

Canterbury Mounted Rifles and the Otago Mounted Rifles of the New Zealand Mounted Rifles Brigade (400 men)
13th and 14th Battalions of the Australian 4th Infantry Brigade (500 men),
2 Gurkha battalions of the 29th Indian Brigade of the 10th Indian Division,
5th Battalion of the Irish Connaught Rangers (700 men), 10th Hampshires (330 men) and 4th South Wales Borderers of the British 29th Division.
Starting positions and projected advance for 21 August 1915 Hill 60 Gallipoli start+plan.png
Starting positions and projected advance for 21 August 1915

The initial plan allocated the primary objective of Hill 60 to the New Zealand Mounted Rifles (NZMR). To their left, the Connaught Rangers were to take the water wells at Kabak Kuyu and the Gurkhas the wells at Susak Kuyu. To the right of the NZMR, troops of the Australian 4th Infantry Brigade (4 Aust) supported by the 10th Hampshires were to launch a feint attack, on the spur just above the knoll itself, to draw off Turkish reserves. [7] [8]

Battle

On the morning of 21 August, it was decided that the New Zealand artillery support, that had been planned to pre-empt the attack, would be diverted to support the Suvla offensive. The start time for the advance on Hill 60 was put back by 30 minutes, by which time it was expected that the artillery would be available to support it. As a consequence Hill 60, and the area around it, received practically no bombardment and the attackers were guaranteed to face severe opposition because the Turks were alerted. [9]

Situation at nightfall, 21 August Hill 60 Gallipoli 21st nightfall.png
Situation at nightfall, 21 August

The NZMR moved out at 3:30 with a 400-metre (1,300 ft) approach march to the Ottoman positions. A number of Turks, on seeing the advancing lines abandoned their front trench, ran back to their rear trenches and, by 3:45, the New Zealanders began occupying the forward position. At 4 pm, the NZMR were in their first objective but neither the Indian Brigade on their left nor 4 Aust on their right were up with them though the Connaught Rangers had secured their first objective, the wells at Kabak. Brigadier-General Andrew Hamilton Russell, the NZMR commander, ordered the Australians to push forward and requested that the Connaughts assist on the left flank. Although only 'A' Company was ordered forward, the Connaughts had become very mixed and the charge was made up from a crowd of men from all the companies, "mad with the lust for battle". Passing the first line trench on the west of the hill, with Turks running before them, the Connaughts were stopped by heavy rifle and machine gun fire from the crest as well as accurate artillery fire. [10] [11]

The survivors consolidated their position in the first-line trench, and were relieved by the Gurkhas from 5:15, leaving the Connaughts to concentrate on securing and fortifying the wells. The right flank was still having difficulties. From Hill 100 down to Hill 60, the Turkish trenches and artillery commanded the Kaiajik Dere valley which 4 Aust and the Hampshires had to cross. Those that survived the crossing had dug in at 5 pm. An artillery shell had set undergrowth on fire, burning many of the wounded to death. The Connaughts joined up with the NZMR to their right by 7 pm, but there was still a gap between the NZMR and the Australian 4th Infantry Brigade. [10] [11]

On 22 August, the attack was reinforced by the Australian 18th Battalion which was part of the newly arrived Australian 2nd Division. The men were fresh and healthy, in stark contrast to the veteran troops, but were inexperienced and ill-equipped. Attacking only with the bayonet, they suffered 383 casualties, out of 750 men, in their dawn attack on Hill 60. [12] [13]

Situation of Allied and Turkish forces at 29 August Hill 60 Gallipoli 29 Aug 1915.png
Situation of Allied and Turkish forces at 29 August

The assault resumed on 27 August and further progress was made up the slope, but the summit of the hill was still held by the Ottomans. [14] On the evening of 27 August 1915, the 9th Light Horse Regiment, of the Australian 3rd Light Horse Brigade, were sent in as reinforcements. One wave of 75 men led by the new commander, Lieutenant Colonel Carew Reynell, lost its way and was caught in the open by Ottoman machine guns, with many soldiers and Reynell being killed. [15] The 10th Light Horse Regiment was committed to the fighting, [16] and on 28 August, some trenches at the summit were captured but the Ottomans clung to the vital northern face which overlooked Suvla. Attacking and counter-attacking continued until this final assault on Hill 60 ended on 29 August 1915. [17]

Aftermath

Lieutenant General Birdwood near Hill 60 in October 1915 William Birdwood near Hill 60.jpg
Lieutenant General Birdwood near Hill 60 in October 1915

The attack on Hill 60 was the last offensive action undertaken around Anzac by the Allies prior to the evacuation in December 1915. [18] Historian Chris Coulthard-Clark describes the battle as a series of "...badly handled attacks which resulted in costly and confused fighting". [19] The Allies were ultimately unsuccessful in capturing the hill's summit, although according to Brad Manera, the attack gained some advantage for the Allies, stating that by capturing the "seaward slopes, the Anzac flank was secured and the link with Suvla opened". [16] Nevertheless, it proved costly with the Allies suffering over 1,100 casualties; the Australian 18th Battalion alone was reduced to one third of its original strength after less than a fortnight of action. [2] One Australian, Second Lieutenant Hugo Throssell of the 10th Light Horse, received the Victoria Cross for his actions during the battle, the last VC to be awarded on the peninsula. [20] [16] [21]

General Ian Hamilton, the overall Allied commander, recorded on 29 August that "this evening we were all in good form owing to the news from Anzac. Knoll 60, now ours throughout, commands the Biyuk Anafarta valley with view and fire —a big tactical scoop." This was based on a report from Birdwood who mistakenly believed that the knoll itself had been taken whereas, in reality, the Turks still occupied half of Hill 60. [22] [2]

Australian recruiting poster, 1915 Hill 60 Australian Recruting poster 1915.JPG
Australian recruiting poster, 1915

During November, New Zealand sappers drove a mine under Hill 60 creating a large crater at the summit though the Allies did not occupy it. The Turks later mined the Allied positions. The positions on Hill 60 were mined prior to evacuation on 12 December, which was scheduled for 45 minutes prior to the evacuation of Russell's Top. On the night of 19–20 December, all survivors of the Anzac front were evacuated from Gallipoli. [23] [24]

Hill 60 Cemetery Hill 60 Commonwealth War Graves Commission Cemetery.jpg
Hill 60 Cemetery

After the war, the peace treaty with Turkey included a provision for "full and exclusive rights of ownership over the land in which are situated the graves of those who fell in action, for the purpose of laying out cemeteries or erecting memorials". In 1920, the Central Graves unit handed over the cemetery to the Imperial War Graves Commission. Today, the hill is the location of the Hill 60 Commonwealth War Graves Commission Cemetery. [25] [26]

Related Research Articles

<span class="mw-page-title-main">Gallipoli campaign</span> Military campaign against the Ottoman Empire during World War I

The Gallipoli campaign, the Dardanelles campaign, the Defense of Gallipoli or the Battle of Gallipoli was a military campaign in the First World War on the Gallipoli peninsula from 19 February 1915 to 9 January 1916. The Entente powers, Britain, France and the Russian Empire, sought to weaken the Ottoman Empire, one of the Central Powers, by taking control of the Ottoman straits. This would expose the Ottoman capital at Constantinople to bombardment by Entente battleships and cut it off from the Asian part of the empire. With the Ottoman Empire defeated, the Suez Canal would be safe and the Bosphorus and Dardanelles straits would be open to Entente supplies to the Black Sea and warm-water ports in Russia.

<span class="mw-page-title-main">13th (Western) Division</span> Military unit

The 13th (Western) Division was one of the Kitchener's Army divisions in the First World War, raised from volunteers by Lord Kitchener. It fought at Gallipoli, in Mesopotamia and Persia.

<span class="mw-page-title-main">Battle of the Nek</span> World War I battle of the Gallipoli campaign

The Battle of the Nek was a minor battle that took place on 7 August 1915, during the Gallipoli campaign of World War I. "The Nek" was a narrow stretch of ridge on the Gallipoli Peninsula. The name derives from the Afrikaans word for a "mountain pass" but the terrain itself was a perfect bottleneck and easy to defend, as had been proven during an Ottoman attack in June. It connected Australian and New Zealand trenches on the ridge known as "Russell's Top" to the knoll called "Baby 700" on which the Ottoman defenders were entrenched.

<span class="mw-page-title-main">New Zealand and Australian Division</span> First World War Australian and New Zealand infantry division

The New Zealand and Australian Division was a composite army division raised for service in the First World War under the command of Major General Alexander Godley. Consisting of several mounted and standard infantry brigades from both New Zealand and Australia, it served in the Gallipoli Campaign between April and December 1915.

<span class="mw-page-title-main">Battle of Lone Pine</span> Battle of the Gallipoli Campaign in WWI

The Battle of Lone Pine was fought between Australian and New Zealand Army Corps (ANZAC) and Ottoman Empire forces during the Gallipoli Campaign of the First World War, between 6 and 10 August 1915. The battle was part of a diversionary attack to draw Ottoman attention away from the main assaults being conducted by British, Indian and New Zealand troops around Sari Bair, Chunuk Bair and Hill 971, which became known as the August Offensive.

The Battle of Sari Bair, also known as the August Offensive, represented the final attempt made by the British in August 1915 to seize control of the Gallipoli peninsula from the Ottoman Empire during the First World War.

The Battle of Scimitar Hill was the last offensive mounted by the British at Suvla during the Battle of Gallipoli in World War I. It was also the largest single-day attack ever mounted by the Allies at Gallipoli, involving three divisions. The purpose of the attack was to remove the immediate Ottoman threat from the exposed Suvla landing and to link with the ANZAC sectors to the south. Launched on 21 August 1915 to coincide with the simultaneous attack on Hill 60, it was a costly failure, in which the Turks were forced to use all their reserves in "severe and bloody fighting" far into the night, with some Turkish trenches lost and retaken twice.

<span class="mw-page-title-main">Battle of Chunuk Bair</span> 1915 conflict in Gallipoliㅤ

The Battle of Chunuk Bair was a World War I battle fought between the Ottoman defenders and troops of the British Empire over control of the peak in August 1915. The capture of Chunuk Bair,, the secondary peak of the Sari Bair range, was one of the two objectives of the Battle of Sari Bair.

<span class="mw-page-title-main">Second Battle of Krithia</span> Battle of the Gallipoli Campaign in WWI

The Second Battle of Krithia continued the Allies' attempts to advance on the Helles battlefield during the Battle of Gallipoli of the First World War. The village of Krithia and neighbouring hill of Achi Baba had to be captured in order for the British to advance up the Gallipoli peninsula to the forts that controlled passage of the Dardanelles straits. A small amount of ground was captured after two days of costly fighting, but the objectives remained out of reach.

<span class="mw-page-title-main">Landing at Anzac Cove</span> 1915 battle in the First World War

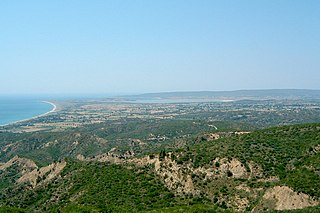
The landing at Anzac Cove on Sunday, 25 April 1915, also known as the landing at Gaba Tepe and, to the Turks, as the Arıburnu Battle, was part of the amphibious invasion of the Gallipoli Peninsula by the forces of the British Empire, which began the land phase of the Gallipoli Campaign of the First World War.

This article presents the timeline of the Gallipoli Campaign. The period of the proper battle is considered to be 19 February 1915 to 9 January 1916; however, a number of events took place between August 1914 and January 1915 that are relevant to the battle.

Lieutenant-General Sir Harold Bridgwood Walker, was a senior British Army commander who led Australian and New Zealand forces for much of the First World War. He was highly regarded by the men he commanded and was only replaced in 1918 when politics dictated that all divisions of the Australian Imperial Force should be commanded by Australians.

<span class="mw-page-title-main">Landing at Suvla Bay</span> 1915 World War I amphibious landing

The landing at Suvla Bay was an amphibious landing made at Suvla on the Aegean coast of the Gallipoli peninsula in the Ottoman Empire as part of the August Offensive, the final British attempt to break the deadlock of the Battle of Gallipoli. The landing, which commenced on the night of 6 August 1915, was intended to support a breakout from the ANZAC sector, five miles (8 km) to the south.

<span class="mw-page-title-main">New Zealand Mounted Rifles Brigade</span> WW1 New Zealand Army unit

The New Zealand Mounted Rifles Brigade was a brigade of the New Zealand Army during the First World War. Raised in 1914 as part of the New Zealand Expeditionary Force, it was one of the first New Zealand units to sail for service overseas.

<span class="mw-page-title-main">Hill 60 Commonwealth War Graves Commission Cemetery</span> CWGC cemetery in Gallipoli, Turkey

Hill 60 Cemetery is a Commonwealth War Graves Commission cemetery dating from World War I at the Northern end of the former Anzac sector of the Gallipoli Peninsula, Turkey and the location of Hill 60 Memorial, one of four memorials on the peninsula which commemorate New Zealanders killed in the campaign but who have no known grave.

<span class="mw-page-title-main">Norman Frederick Hastings</span>

Major Norman Frederick Hastings, DSO served as Officer Commanding New Zealand's 6th (Manawatu) Squadron, Wellington Mounted Rifles Regiment. After serving with British military units during the Second Anglo-Boer War in South Africa, he worked as an engineering fitter with the New Zealand Railways Department workshops at Petone. He enlisted in the New Zealand Expeditionary Force at the outbreak of World War I, and served with distinction before dying of wounds after the attack on Chunuk Bair, Gallipoli, in August 1915. He was awarded the Distinguished Service Order, was Mentioned in Despatches, and was one of only 14 members of the New Zealand Army to receive the French Legion of Honour decoration during the war. The memorial flagstaff at Petone railway station appears to have been erected in his honour, and was the site of New Zealand's first public Anzac Day ceremony on 25 April 1916.

<span class="mw-page-title-main">Battle for Baby 700</span> Battle of the Gallipoli campaign in May 1915

The battle for Baby 700, was an engagement fought during the Gallipoli Campaign of the First World War, between the forces of the British Empire and the Ottoman Empire.

<span class="mw-page-title-main">August 1915</span> Month of 1915

The following events occurred in August 1915:

<span class="mw-page-title-main">Third attack on Anzac Cove</span> Battle in 1915 during the First World War

The third attack on Anzac Cove was an engagement during the Gallipoli Campaign of the First World War. The attack was conducted by the forces of the Ottoman Turkish Empire, against the forces of the British Empire defending the cove.

<span class="mw-page-title-main">Battle for No.3 Post</span> Fought during the Gallipoli Campaign in World War I

The battle for No.3 Post was fought during the Gallipoli Campaign in the First World War, between the forces of the New Zealand Mounted Rifles Brigade and the Turkish 19th Division.

References

  1. Bean 1924, p. 744.
  2. 1 2 3 Bean 1924, p. 761.
  3. Cooper 1918, p. 187.
  4. Hamilton 1920, pp. 124–128.
  5. Bean 1924, p. 725.
  6. Cooper 1918, p. 186.
  7. Bean 1924, pp. 725–726, 729.
  8. Cooper 1918, p. 188.
  9. Bean 1924, pp. 727, 728, 730.
  10. 1 2 Bean 1924, pp. 730–732, 735.
  11. 1 2 Cooper 1918, pp. 192–194.
  12. Bean 1924, pp. 739–744.
  13. Cooper 1918, p. 196.
  14. Bean 1924, pp. 749–750.
  15. Bean 1924, pp. 754–755.
  16. 1 2 3 Manera 2014.
  17. Bean 1924, pp. 760–762.
  18. Cameron 2011a, p. 130.
  19. Coulthard-Clark 1998, pp. 110–111.
  20. Aspinall-Oglander 1932, p. 361.
  21. Snelling 2012.
  22. Hamilton 1920, p. 158.
  23. Cameron 2011b.
  24. Erickson 2001, p. 93.
  25. Correspondent 1920, p. 13.
  26. New Zealand Govt 2004.

Sources

  • Aspinall-Oglander, Cecil Faber (1932). Military Operations Gallipoli: May 1915 to the Evacuation. History of the Great War Based on Official Documents by Direction of the Historical Section of the Committee of Imperial Defence. Vol. II (IWM & Battery Press 1992 ed.). London: Heinemann. ISBN   0-89839-175-X.
  • Bean, Charles Edwin Woodrow (1924). The Story of ANZAC from 4 May, 1915, to the evacuation of the Gallipoli Peninsula. Official History of Australia in the War of 1914–1918. Vol. II. University of Queensland Press.
  • Cameron, David (2011a). The August Offensive at Anzac, 1915. Canberra, Australian Capital Territory: Army History Unit. ISBN   978-0987057471 . Retrieved 7 November 2014.
  • Cameron, David (2011b). Gallipoli: The Final Battles and Evacuation of ANZAC. Newport, New South Wales: Big Sky Publishing. ISBN   978-0980814095 . Retrieved 7 November 2014.
  • Cooper, B (1918). The Tenth (Irish) Division in Gallipoli (1st ed.). London: Herbert Jenkins. OCLC   253010093 . Retrieved 3 November 2014.
  • Correspondent, Special (1 November 1920). "Cemetery of unknown dead". The Times . London. Retrieved 7 November 2014.
  • Coulthard-Clark, Chris (1998). The Encyclopaedia of Australia's Battles (1st ed.). St Leonards, New South Wales: Allen & Unwin. ISBN   978-1-86448-611-7 . Retrieved 7 November 2014.
  • Erickson, Edward J (2001). Ordered to Die: A History of the Ottoman Army in the First World War. Westport, Connecticut: Greenwood Press. ISBN   0-313-31516-7 . Retrieved 7 November 2014.
  • Hamilton, I. S. M. (1920). Gallipoli Diary. Vol. II. London: Edward Arnold. OCLC   816494856 . Retrieved 3 November 2014.
  • Manera, Brad (2014). "Gallipoli: The August Offensive Hill 60: The Last Battle: 29 August 1915". Australian War Memorial. Retrieved 7 November 2014.
  • New Zealand Govt (2004). "Hill 60 Cemetery". Archived from the original on 13 January 2015. Retrieved 1 November 2014.
  • Snelling, Stephen (2012). VCs of the First World War Gallipoli. Stroud: The History Press. ISBN   978-0-7524-8752-6 . Retrieved 7 November 2014.