The Battle of Ioribaiwa took place between 14 and 16 September 1942, during the Kokoda Track campaign in Papua during the Second World War. Involving forces from Australia, the United States, and Japan, the fighting centred on a high feature known as Ioribaiwa Ridge, south of Ofi Creek on the Kokoda Track, in the Territory of Papua. It was the last of three defensive battles fought by the Australians along the Kokoda Track to halt the Japanese advance from the north coast of Papua towards Port Moresby.
Although the Japanese were successful in pushing the Australian defenders back in the centre of their position on the track, heavy fighting on the flanks of the position blunted the Japanese attack, bringing it to a standstill. In the aftermath, the Australian commander, Brigadier Kenneth Eather, perceiving that the attack could not be held any further and that Ioribaiwa Ridge was unsuited to launching a counter-attack, withdrew his force back to Imita Ridge. The Japanese, however, had reached the limit of their supply line, and strategic factors and reverses elsewhere forced the Japanese commander, Major General Tomitaro Horii, to pursue a more defensive approach in Papua and New Guinea. As a result, in October the Japanese began to withdraw towards their beachheads at Buna–Gona, with the Australians in pursuit.
Background
On 21 July 1942, Japanese forces landed on the northern Papuan coast around Buna and Gona, as part of a plan to capture the strategically important town of Port Moresby via an overland advance along the Kokoda Track, following an unsuccessful seaborne attempt during the Battle of the Coral Sea in May 1942.[1] Two days later, the first engagement of the campaign was fought when a small force of Australian and Papuan soldiers clashed with the advancing Japanese around Awala. They were quickly brushed aside and over the course of late July, August and into September, a series of battles were fought along the Kokoda Track as the Japanese advanced south. The initial Japanese landing forces, consisting mainly of the Sasebo 5th Special Landing Force and the Yokoyama Advance Party, were bolstered in mid-August by the arrival of the South Seas Detachment, consisting mainly of the 144th and 41st Infantry Regiments, under the command of Major General Tomitaro Horii.[2]
Map depicting the Japanese advance along the Kokoda Track
With only limited forces in the region initially, in an effort to slow the Japanese advance to allow reinforcements to arrive, the Australian force– designated Maroubra Force– resorted to delaying tactics while reinforcements were sent north from Port Moresby. Kokoda fell in early August,[3] and this was followed by heavy fighting around Isurava later in the month as the veteran 21st Brigade reinforced the Militia troops that had been holding the line to that point. After this, rearguard actions were fought around Eora Creek and Templeton's Crossing, as well as around Efogi, before the Australians fell back towards Menari, where their rearguard clashed with the pursuing Japanese in the Maguli Range,[4] before the withdrawal continued on to Ioribaiwa in mid-September.[5][6]
The fighting around Ioribaiwa saw the remnants of the Australian 21st Brigade reinforced by the 25th Brigade, clash with Japanese forces from the 144th Infantry Regiment under the command of Colonel Masao Kusunose, which had been leading the Japanese advance south.[7] In the lead up to the battle, Brigadier Arnold Potts, the commander of Maroubra Force, was relieved of his command following the defeat around Efogi.[8] He was replaced by Brigadier Selwyn Porter on 10 September,[9] after the 21st Brigade had completed its withdrawal from Menari and Nauro along the Kokoda Track.[7] According to author Peter Brune, Porter was given orders to "stabilise the situation and then gain what ground he could".[10] To achieve this, Porter was provided reinforcements in the form of the 2/1st Pioneer Battalion and the Militia 3rd Infantry Battalion, while plans were made to dispatch more reinforcements from Port Moresby.[11] Nevertheless, Brune argues that in the circumstances the order to gain ground was impossible and demonstrated the disconnect between the Australian high command and the commanders on the ground.[10]
Battle
Resolving to make a counter-attack to prevent a further advance towards Port Moresby, the Australians established themselves along Ioribaiwa Ridge and awaited reinforcements.[6] Situated south of Ofi Creek, the ridge was, according to authors Craig Collie and Hajime Marutani the "second-last razorback ridgeline before the Papuan capital".[12] Brune writes that the decision to withdraw to Ioribaiwa had been made by Porter after he determined that the ground further north was not favourable to launching a counter-attack.[13] Running perpendicular to the Kokoda Track it was dominated by two high peaks. During the withdrawal to Ioribaiwa, the Australians attempted to slow the Japanese pursuit, springing an ambush in the Maguli Range, which was eventually repulsed,[14] but inflicted heavy casualties upon the pursuing Japanese. By 11 September, the heavily depleted 2/14th and 2/16th Infantry Battalions– who had borne the brunt of the fighting around Isurava, Eora Creek and Templeton's Crossing– forming a composite unit of just two companies,[15][10] held a position astride the track which ran along the north–south spur line that protruded from the ridge's northern slopes. The 21st Brigade's third battalion, the 2/27th, had been cut off after the fighting around Efogi and was still attempting to rejoin Maroubra Force.[16] As such, the Australian right was held by the 3rd Infantry Battalion, which extended the defensive line along Ioribaiwa Ridge to the east. Flank security was provided over 12 and 13 September by elements of the 2/6th Independent Company.[17]
As Japanese artillery and mortars began shelling the Australian position from the northern slope overlooking Ofi Creek, several minor skirmishes were fought around the position over the course of 12–13 September. Lacking their own artillery support, there was little the Australian defenders could do to counter the Japanese indirect fire, but several Japanese probing patrols were turned back, and elements of the Australian 2/16th and 3rd Infantry Battalions sprung a successful ambush around Ofi Creek, killing between 20 and 30 Japanese who were lured into an abandoned food dump.[12][18] Meanwhile, the fresh 25th Brigade, under Brigadier Kenneth Eather arrived from Port Moresby, advancing from Imita Ridge to Ioribaiwa with orders to launch a counter-attack, passing through Porter's position to advance to Nauro.[19] With the arrival of these troops, Maroubra Force swelled to 2,957 personnel,[20] providing the Australians with size advantage over the 1,650-strong Japanese committed to the battle.[21] The 2/25th Infantry Battalion was subsequently laid down south of the ridge in depth, in the low ground forward of the Ua-Ule Creek, to provide a reserve force to be committed in case of emergency. Meanwhile, the 25th Brigade's other two battalions– the 2/31st and 2/33rd– made preparations to launch an attack either side of the defensive line, to outflank the pursuing Japanese in an effort to cut the track at Nauro.[7][22]
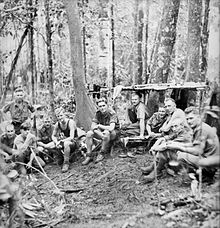
Men from the 2/14th Infantry Battalion rest near Ioribaiwa in September 1942
Two Japanese battalions from the 144th Infantry Regiment forming Horii's South Seas Detachment had pursued the Australians from Efogi, while the main Japanese force had remained behind waiting for permission to continue the advance. The Japanese pursuit group subsequently launched their attack on Ioribaiwa Ridge just as the two Australian battalions began to deploy into their attacking positions on either side of the defensive line: the 2/31st was positioned to the left of the 2/14th and 2/16th on a knoll on the western side of the east–west ridge line, and the 2/33rd was on the right of line, to the east of the 3rd Infantry Battalion. The start of the Japanese attack halted the forward movement of the 2/31st and 2/33rd Infantry Battalions as they came into line with the defensively postured units, which inadvertently extended the Australian line on either side of the ridge.[7]
On the first day of the battle, 14 September, half of the III Battalion, 144th Infantry attacked the composite 2/14th– 2/16th Battalion in the centre along the track supported by quick firing artillery from a mountain battery. During the attack the Japanese took several casualties to booby traps and trip wires that had been set up in front the Australian position and from heavy small arms fire,[23] but they succeeded in pushing the Australians back slightly to the south. Meanwhile, the II Battalion attempted a flanking move to the west, where they came up against the 2/31st Infantry Battalion, which was occupying a position on the flank that the Japanese had thought was unheld. Heavy casualties in the centre of the Australian line were inflicted by Japanese artillery, but the depleted composite unit managed to check the Japanese advance in their sector throughout the day.[7] The following day, 15 September, the other half of the III Battalion attempted to find the eastern flank of the Australian position, but found that the line was much longer than expected there also due to the earlier movement made by the 2/33rd during the preparatory phase of the battle. Nevertheless, the Japanese found a gap in the Allied line in between the 3rd Infantry Battalion and the 2/33rd, seizing an opportunity to rush an Australian Militia section that had forgotten to post a sentry whilst expanding its pits.[24][22] Seizing a vital position that allowed them to fire down on the Australians from the east, the Japanese had succeeded in a gaining a significant vantage point, but they were unable to exploit it further after the 2/25th counter-attacked from its depth position. The 2/25th's counter-attack was turned back and failed to dislodge the Japanese on the right of the Australian line. The Japanese were subsequently able to dig-in there,[22] although the III Battalion was unable to exploit their position any further, being caught in between the two Australian infantry battalions. A stalemate developed on the left which the Australians and Japanese each attempted to break by launching flanking attacks that were subsequently countered each time. The 2/33rd also attempted a counter-attack on the right to attack the Japanese detachment from behind but was unable to locate the Japanese in the thick vegetation.[7][22]
By 16 September, the fighting around Ioribaiwa had reached a stalemate, with the initiative having been taken away from the attacking troops and the Japanese commander, Kusunose, pondering his next move. Casualties among the 2/14th and 2/16th composite battalion in the Australian centre had been high due to the concentration of the Japanese artillery, but the Australians had effectively fought a successful defensive battle, having fought the Japanese to a stand-still for the first time in the campaign. Nevertheless, the Australian commander, Eather, decided to withdraw unaware of the dilemmas facing his opposite number, Kusunose, who had realised he was outnumbered with no reserves,[25] In reaching this decision, he potentially misjudged the tactical situation, perceiving that the Japanese attack could not be held any longer.[7] In summing this decision up, author Peter Williams writes that "Eather became convinced he was defeated, and so he was." He goes on to draw parallels between the situation at Ioribaiwa and the 1870 battle at Spicheren during the Franco-Prussian War where the French commander, Frossard, had been beaten by his own perception of the situation rather than the reality.[26] After consulting with Porter, Eather subsequently requested permission to continue the withdrawal south to Imita Ridge. This was granted by the 7th Division commander, Major General Arthur Allen, on the proviso that there could be no further retreat from there; indeed author Lex McAulay states that Allen told Eather that Imita "was to be held to the death", to which Eather agreed.[27] In the aftermath, the Australians withdrew across the Ua-Ule Creek to Imita Ridge,[24] with the first elements arriving late on 16 September and the remainder arriving mid-morning the following day.[7][28] On Imita Ridge, the Australians finally came within range of their own artillery, as two 25-pounder guns from the 14th Field Regiment had been manhandled into position atop a peak located around Uberi.[28] Reinforcements from the 2/1st Pioneer Battalion arrived at this time also,[29] having been held back around Owers Corner and then Uberi where they had undertaken labouring and defensive tasks.[30]
Aftermath
Japanese shells found abandoned on Ioribaiwa following their withdrawal
Casualties around Ioribaiwa were roughly the same for both sides with the Australians losing 49 killed and 121 wounded, many of which had been inflicted by the Japanese artillery which had landed on the 2/14– 2/16th's position. Against this, the Japanese lost 40 dead and 120 wounded.[7] Although the fighting around Ioribaiwa ended in a further withdrawal for the Australians, it proved to be their final defensive action of the campaign. The Australian retreat was completed in an orderly fashion, and the rearguard fought to keep the pursuing Japanese at bay long enough for the Australians to firmly establish themselves on Imita Ridge.[31] There, Maroubra Force was able to consolidate and regain its strength following the tempo of the previous stage of the fighting. In the days that followed, there were only small-scale actions. The Australians sent out regular patrols towards Ioribaiwa to determine Japanese dispositions and intent, while the Japanese worked solidify their hold on Ioribaiwa, digging in, and sending out foraging parties.[32]
Imita Ridge, only a short distance from Port Moresby, ultimately proved to be the limit of the Japanese advance south. Having exhausted their supply line, which was increasingly being interdicted by US and Australian aircraft,[33] and as events elsewhere, particularly Guadalcanal, coupled with the earlier defeat around Milne Bay, turned in favour of the Allies, the Japanese were forced into adopting a more defensive posture in New Guinea. Instead of a final stand, the fighting around Imita Ridge petered out into a series of small-scale patrol actions, before the Japanese began withdrawing north, beginning on 26 September.[34] The remnants of the Australian 21st Brigade were led south by Porter, while the Australians, bolstered by the arrival of fresh troops from the 25th Brigade,[5] launched a counter-attack under Eather,[35] who officially assumed command of Maroubra Force on 17 September.[36]
The counter-attack would ultimately see the Australians advance to the Japanese beach-heads on the northern coast over the space of October and November. After tentatively pushing patrols north from Imita Ridge to Ioribaiwa, which was found to have been abandoned by the Japanese, the pursuit began in earnest on 2 October.[37] Pressing on to Efogi against little opposition, in late October the Australians reached Eora Creek and Templeton's Crossing,[38] which had earlier been the scene of heavy fighting during the Japanese advance. A second battle was subsequently fought there as the Australians gained the vital ridge overlooking the creek at heavy cost against stiff opposition determined to buy time for the remainder of their comrades to make good their escape.[39] As service politics within the upper echelons of the Australian and US high commands increased pressure for the Australians to speed up the pursuit, the 16th Brigade arrived to reinvigorate the advance which had been slow to that point due to restrictions of the terrain and supply difficulties.[40] Nevertheless, the Australian pursuit was held up long enough to enable the majority of the Japanese force to fall back to the northern beachheads.[41]
In the fighting that followed, Kokoda village was retaken on 2 November, providing the Australians with a forward airfield for supplies to be flown into, which helped resolve many of their supply difficulties.[42] As the rate of the Australian advance increased, in mid-November heavy fighting took place around Oivi and Gorari, where the Australians and Japanese fought the final battle of the campaign before crossing the Kumusi River.[41] In December 1942, the Battle of Buna–Gona saw the Australians link up with US ground forces. They would subsequently clash with the Japanese around the northern beachhead amidst heavy fighting which lasted until late January 1943, when the remainder of the Japanese garrison was withdrawn to Salamaua–Lae.[7]
After the war, a battle honour was awarded to Australian units for their involvement in the fighting around Ioribaiwa.[43] This was awarded to the 3rd, 2/14th, 2/16th, 2/25th, 2/31st and 2/33rd Infantry Battalions.[44]
Anderson, Nicholas (2014). To Kokoda. Australian Army Campaigns Series– 14. Sydney, New South Wales: Big Sky Publishing. ISBN978-1-922132-95-6.
Brune, Peter (2004). A Bastard of a Place. Crows Nest, New South Wales: Allen & Unwin. ISBN1-74114-403-5.
Collie, Craig; Marutani, Hajime (2009). The Path of Infinite Sorrow: The Japanese on the Kokoda Track. Crows Nest, New South Wales: Allen & Unwin. ISBN978-1-74175-839-9.
Coulthard-Clark, Chris (1998). The Encyclopaedia of Australia's Battles. Sydney, New South Wales: Allen & Unwin. ISBN1-86448-611-2.
Crawford, Barclay (6 June 2010). "Sacred site of Diggers found". The Sunday Telegraph. Sydney, New South Wales. p.11. ISSN1038-8753.
James, Karl (2013). "On Australia's Doorstep: Kokoda and Milne Bay". In Dean, Peter (ed.). Australia 1942: In the Shadow of War. Port Melbourne, Victoria: Cambridge University Press. pp.199–215. ISBN978-1-10703-227-9.
Keogh, Eustace (1965). South West Pacific 1941–45. Melbourne, Victoria: Grayflower Publications. OCLC7185705.
Maitland, Gordon (1999). The Second World War and its Australian Army Battle Honours. East Roseville, New South Wales: Kangaroo Press. ISBN0-86417-975-8.
McAulay, Lex (1991). Blood and Iron: The Battle for Kokoda 1942. Sydney, New South Wales: Arrow Books. ISBN0091826284.
Osborn, Gordon (1988). The Pioneers: Unit History of the 2nd/1st Australian Pioneer Battalion Second A.I.F. Beverly Hills, New South Wales: M.D. Herron. ISBN073162145X.
Williams, Peter (2012). The Kokoda Campaign 1942: Myth and Reality. Melbourne, Victoria: Cambridge University Press. ISBN978-1-10701-594-4.
Tanaka, Kengoro (1980). Operations of the Imperial Japanese Armed Forces in the Papua New Guinea Theater During World War II. Tokyo, Japan: Japan Papua New Guinea Goodwill Society. OCLC9206229.
This page is based on this Wikipedia article Text is available under the CC BY-SA 4.0 license; additional terms may apply. Images, videos and audio are available under their respective licenses.