Related Research Articles

Clementine was a joint space project between the Ballistic Missile Defense Organization and NASA, launched on January 25, 1994. Its objective was to test sensors and spacecraft components in long-term exposure to space and to make scientific observations of both the Moon and the near-Earth asteroid 1620 Geographos.

Geometric dimensioning and tolerancing (GD&T) is a system for defining and communicating engineering tolerances via a symbolic language on engineering drawings and computer-generated 3D models that describes a physical object's nominal geometry and the permissible variation thereof. GD&T is used to define the nominal geometry of parts and assemblies, the allowable variation in size, form, orientation, and location of individual features, and how features may vary in relation to one another such that a component is considered satisfactory for its intended use. Dimensional specifications define the nominal, as-modeled or as-intended geometry, while tolerance specifications define the allowable physical variation of individual features of a part or assembly.
A scatterometer or diffusionmeter is a scientific instrument to measure the return of a beam of light or radar waves scattered by diffusion in a medium such as air. Diffusionmeters using visible light are found in airports or along roads to measure horizontal visibility. Radar scatterometers use radio or microwaves to determine the normalized radar cross section of a surface. They are often mounted on weather satellites to find wind speed and direction, and are used in industries to analyze the roughness of surfaces.

Surface roughness can be regarded as the quality of a surface of not being smooth and it is hence linked to human (haptic) perception of the surface texture. From a mathematical perspective it is related to the spatial variability structure of surfaces, and inherently it is a multiscale property. It has different interpretations and definitions depending from the disciplines considered.
Surface metrology is the measurement of small-scale features on surfaces, and is a branch of metrology. Surface primary form, surface fractality, and surface finish are the parameters most commonly associated with the field. It is important to many disciplines and is mostly known for the machining of precision parts and assemblies which contain mating surfaces or which must operate with high internal pressures.
Condition monitoring is the process of monitoring a parameter of condition in machinery, in order to identify a significant change which is indicative of a developing fault. It is a major component of predictive maintenance. The use of condition monitoring allows maintenance to be scheduled, or other actions to be taken to prevent consequential damages and avoid its consequences. Condition monitoring has a unique benefit in that conditions that would shorten normal lifespan can be addressed before they develop into a major failure. Condition monitoring techniques are normally used on rotating equipment, auxiliary systems and other machinery like belt-driven equipment,, while periodic inspection using non-destructive testing (NDT) techniques and fit for service (FFS) evaluation are used for static plant equipment such as steam boilers, piping and heat exchangers.

Gloss is an optical property which indicates how well a surface reflects light in a specular (mirror-like) direction. It is one of the important parameters that are used to describe the visual appearance of an object. Other categories of visual appearance related to the perception of regular or diffuse reflection and transmission of light have been organized under the concept of cesia in an order system with three variables, including gloss among the involved aspects. The factors that affect gloss are the refractive index of the material, the angle of incident light and the surface topography.

In metalworking, rolling is a metal forming process in which metal stock is passed through one or more pairs of rolls to reduce the thickness, to make the thickness uniform, and/or to impart a desired mechanical property. The concept is similar to the rolling of dough. Rolling is classified according to the temperature of the metal rolled. If the temperature of the metal is above its recrystallization temperature, then the process is known as hot rolling. If the temperature of the metal is below its recrystallization temperature, the process is known as cold rolling. In terms of usage, hot rolling processes more tonnage than any other manufacturing process, and cold rolling processes the most tonnage out of all cold working processes. Roll stands holding pairs of rolls are grouped together into rolling mills that can quickly process metal, typically steel, into products such as structural steel, bar stock, and rails. Most steel mills have rolling mill divisions that convert the semi-finished casting products into finished products.
Surface finish, also known as surface texture or surface topography, is the nature of a surface as defined by the three characteristics of lay, surface roughness, and waviness. It comprises the small, local deviations of a surface from the perfectly flat ideal.
Roundness is the measure of how closely the shape of an object approaches that of a mathematically perfect circle. Roundness applies in two dimensions, such as the cross sectional circles along a cylindrical object such as a shaft or a cylindrical roller for a bearing. In geometric dimensioning and tolerancing, control of a cylinder can also include its fidelity to the longitudinal axis, yielding cylindricity. The analogue of roundness in three dimensions is sphericity.
ISO 25178: Geometrical Product Specifications (GPS) – Surface texture: areal is an International Organization for Standardization collection of international standards relating to the analysis of 3D areal surface texture.

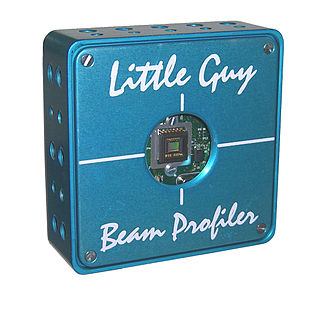
A laser beam profiler captures, displays, and records the spatial intensity profile of a laser beam at a particular plane transverse to the beam propagation path. Since there are many types of lasers — ultraviolet, visible, infrared, continuous wave, pulsed, high-power, low-power — there is an assortment of instrumentation for measuring laser beam profiles. No single laser beam profiler can handle every power level, pulse duration, repetition rate, wavelength, and beam size.
Road surface textures are deviations from a planar and smooth surface, affecting the vehicle/tyre interaction. Pavement texture is divided into: microtexture with wavelengths from 0 mm to 0.5 millimetres (0.020 in), macrotexture with wavelengths from 0.5 millimetres (0.020 in) to 50 millimetres (2.0 in) and megatexture with wavelengths from 50 millimetres (2.0 in) to 500 millimetres (20 in).

The Abbott-Firestone curve or bearing area curve (BAC) describes the surface texture of an object. The curve can be found from a profile trace by drawing lines parallel to the datum and measuring the fraction of the line which lies within the profile.
In manufacturing and mechanical engineering, flatness is an important geometric condition for workpieces and tools. Flatness is the condition of a surface or derived median plane having all elements in one plane.
Surface integrity is the surface condition of a workpiece after being modified by a manufacturing process. The term was coined by Michael Field and John F. Kahles in 1964.

Mountains is an image analysis and surface metrology software platform published by the company Digital Surf. Its core is micro-topography, the science of studying surface texture and form in 3D at the microscopic scale. The software is dedicated to profilometers, 3D light microscopes ("MountainsMap"), scanning electron microscopes ("MountainsSEM") and scanning probe microscopes ("MountainsSPIP").
Digital Surf is a French software company formed in 1989 mainly known for its Mountains software, that is offered as embedded or optional OEM surface analysis software by the majority of profilometer and microscope manufacturers.
Taylor Hobson is an English company founded in 1886 and located in Leicester, England. Originally a manufacturer of still camera and cine lenses, the company now manufactures precision metrology instruments—in particular, profilometers for the analysis of surface textures and forms.
ISO 16610: Geometrical product specifications (GPS) – Filtration is a standard series on filters for surface texture, and provides guidance on the use of these filters in various applications. Filters are used in surface texture in order reduce the bandwidth of analysis in order to obtain functional correlation with physical phenomena such as friction, wear, adhesion, etc. For example, filters are used to separate roughness and waviness from the primary profile, or to create a multiscale decomposition in order to identify the scale at which a phenomenon occurs. Historically, the first roughness measuring instruments - stylus profilometer - used to have electronic filters made of capacitors and resistors that filtered out low frequencies in order to retain frequencies that represent roughness. Later, digital filters replaced analog filters and international standards such as ISO 11562 for the Gaussian filter were published.
References
- ↑ Oberg et al. 2000 , p. 699.
- ↑ Oberg et al. 2000 , p. 702.
- 1 2 ISO 4287, Geometrical Product Specifications (GPS) -- Surface texture: Profile method -- Terms, definitions and surface texture parameters
- ↑ ISO 16610, Geometrical product specifications (GPS) -- Filtration -- Part 21: Linear profile filters: Gaussian filters
- ↑ ASME B46.1, Surface Texture (Surface Roughness, Waviness, and Lay).
- ↑ Jensen 2001 , p. 86.
- ↑ Measuring waviness , retrieved 2009-08-20.
- ↑ Degarmo, Black & Kohser 2003 , p. 225.
- ↑ Harsha, S.P.; Kankar, P.K. (July 2004), "Stability analysis of a rotor bearing system due to surface waviness and number of balls", International Journal of Mechanical Sciences, 46 (7): 1057–1081, doi:10.1016/j.ijmecsci.2004.07.007 .
- ↑ Harsha, S. P.; Sandeep, K.; Prakash, R. (July 2004), "Nonlinear Dynamic Response of a Rotor Bearing System Due to Surface Waviness", Nonlinear Dynamics , 37 (2): 91–114, doi:10.1023/B:NODY.0000042916.10351.ff, S2CID 120661760 .
- ↑ Yhland, E. M. (1967), "Waviness measurement—an instrument for quality control in rolling bearing industry", Proceedings of the Institution of Mechanical Engineers, 182 (3K): 438–445, doi:10.1243/PIME_CONF_1967_182_341_02
Bibliography
- Degarmo, E. Paul; Black, J T.; Kohser, Ronald A. (2003), Materials and Processes in Manufacturing (9th ed.), Wiley, ISBN 0-471-65653-4 .
- Jensen, Cecil Howard (2001), Interpreting Engineering Drawings (6th ed.), SteinerBooks, ISBN 978-0-7668-2897-1 .
- Oberg, Erik; Jones, Franklin D.; Horton, Holbrook L.; Ryffel, Henry H. (2000), Machinery's Handbook (26th ed.), New York: Industrial Press Inc., ISBN 0-8311-2635-3 .