The First Battle of Newbury was a battle of the First English Civil War that was fought on 20 September 1643 between a Royalist army, under the personal command of King Charles, and a Parliamentarian force led by the Earl of Essex. Following a year of Royalist battlefield successes, in which they took Banbury, Oxford and Reading without conflict before storming Bristol, the Parliamentarians were left without an effective army in the west of England. When Charles laid siege to Gloucester, Parliament was forced to muster a force under Essex with which to beat Charles' forces off. After a long march, Essex surprised the Royalists and forced them away from Gloucester before beginning a retreat to London. Charles rallied his forces and pursued Essex, overtaking the Parliamentarian army at Newbury and forcing them to march past the Royalist force to continue their retreat.
Essex reacted by making a surprise attack on the Royalist lines at dawn, capturing several pieces of high ground and leaving Charles on the back foot. A series of Royalist attacks led to a large number of casualties and the slow retreat of Essex's force, which was driven from the central hill and almost encircled; Essex succeeded in rallying his infantry, however, and pushed forward in a counter-attack. The slowing of this counter-attack in the face of the Royalist cavalry forced Essex to send for reinforcements, which, while marching to him, were attacked and forced to retreat. This left a hole in the Parliamentarian line, dividing the army into two wings through which the Royalists hoped to pass, splitting the Parliamentarians and allowing Charles's troops to encircle and defeat them. In line with this, the Royalists moved forward to press the attack, but were forced to halt by the London Trained Bands. With night falling, the battle ended, and both exhausted armies disengaged. The next morning, low on ammunition, the Royalists were forced to allow Essex to pass and continue his retreat to London.
Reasons for the Royalist failure to defeat the Parliamentarians include shortage of ammunition, the relative lack of professionalism of their soldiers and the tactics of Essex, who compensated "for his much lamented paucity of cavalry by tactical ingenuity and firepower",[2] countering Prince Rupert's cavalry by driving them off with mass infantry formations. Although the numbers of casualties were relatively small (1,300 Royalists and 1,200 Parliamentarians), historians who have studied the battle consider it to be one of the most crucial of the First English Civil War, marking the high point of the Royalist advance and leading to the signing of the Solemn League and Covenant, which brought the Scottish Covenanters into the war on the side of Parliament and led to the eventual victory of the Parliamentarian cause.
When the war started, both sides expected it to be settled by one battle; by the end of 1642, it soon became clear that that would not be the case. After the inconclusive Battle of Edgehill in October, the Royalists advanced on London; after they were halted at the Turnham Green in November, Charles established his capital at Oxford. The Earl of Essex, commander of the main Parliamentarian army, was ordered to take Oxford, and on 27 April, captured Reading. Here he remained until mid-May, claiming he was unable to advance further without additional supplies, and money.[3]
Despite the stalemate outside Oxford, Royalist success elsewhere provided an opportunity for a decisive victory. In the south-west, Royalist commander Sir Ralph Hopton secured Cornwall with victory at Braddock Down in January, before inflicting a serious defeat on Waller's 'Army of the Western Association' at Roundway Down on 13 July. Arguably the most comprehensive Royalist victory of the war, it isolated Parliament's garrisons in the west; reinforced by troops from Oxford under Prince Rupert, on 26 July they captured Bristol, gaining the second largest city in Britain.[4]
Bristol
Despite this, Royalist forces were significantly depleted by the battle at Bristol. Suffering over 1,000 men dead, and having exhausted their supplies, the armies were forced to regroup. Even considering this, the capture of Bristol is considered the high-water mark for the Royalist cause during the First English Civil War.[5] With the city captured, however, an immediate dispute occurred over who was to govern it, and this led to Charles travelling there on 1 August to take personal command of the Royalist forces.[6] Upon arriving he summoned his council of war to discuss their next move, the primary questions at hand being "first, whether the armies should be united, and march in one upon the next design. And then, what the design should be".[7] The western army, although still strong, refused to advance further to the east due to the presence of Parliamentarian forces within Dorset and Cornwall; the army's commanders felt that if they tried to push for such a move, their forces would either mutiny or simply desert.[8]
Prince Rupert of the Rhine, whose capture of Bristol represented the high-water mark for the Royalist cause
Because of this unrest, it was quickly resolved that the western army would remain an independent fighting force and remain in Dorset and Cornwall to "mop up" the remaining Parliamentarians. Accordingly, the western army, commanded by Lord Carnarvon, remained in the region, capturing Dorchester in a bloodless victory on 2 August. Prince Maurice left 1,200 infantry and approximately 200 cavalry to garrison Bristol before marching to Dorchester and personally taking command.[9] The greater issues were what to do with the Oxford army and what the "next design" of the Royalist campaign would be. Rupert's strategy was to advance through the Severn Valley and capture Gloucester, which would allow Royalist forces in south Wales to reinforce Charles's army and thus allow for an assault on London. Another faction, however, argued that London could be captured with the army as it was, and that Gloucester would serve as a distraction from the main goal of the campaign.[10]
By 6 August, it was clear that Rupert's strategy would be abandoned; instead, an alternate means of capturing the city was considered. During the early stages of the war, the loyalty of combatants on both sides, particularly that of professional soldiers, had been flexible. Gloucester was led by Edward Massie, a non-partisan mercenary who only took a job with the Parliamentarians after he was refused a significant Royalist command. At the same time, it was felt that there was "a strong if so far silent party of Royalist sympathisers in the city", while the governor of Sudeley Castle was reporting that Gloucester's soldiers had stated they would not resist a Royalist advance. Given this, the council of war decided to march on Gloucester – not to besiege it or capture it by force, but to capture it by having the governor betray the city beforehand.[11]William Legge, who had served with Massie in the Bishops' Wars, contacted him and asked him to "surrender Gloucester to his lawful sovereign". Although this message was rebuffed, Legge's messenger reported that he had met Massie a second time in secret, and had been asked to tell Legge that Massie was willing to surrender the town to the King. As a result of this, on 7 August Charles and the Oxford army marched to Gloucester.[12]
Charles's main force began marching on 7 August and reached the village of Painswick a day later; however, Rupert's cavalry screen had already advanced and taken the village. Charles himself did not accompany the force, but instead rode across the Cotswolds to Rendcomb, where he met reinforcements from Oxford on 9 August.[13] On the morning of 10 August, the Royalist army marched to Gloucester itself and besieged the city with approximately 6,000 infantry and 2,500 cavalry.[14] With the force assembled, Charles sent a group of heralds, escorted by 1,000 musketeers, forward at approximately 2:00pm, at which point they read out the King's demands to a meeting of 26 local council and garrison officers, including Massie. The King's announcement was that if the officers submitted, he would pardon all the officers, prohibit his army from causing any damage to the city, and leave only a small garrison behind. If they did not, he would take the city by force, and the inhabitants would be responsible "for all the calamities and miseries that must befall them". Despite earlier claims that Massie would surrender, he did not; a short time later, a refusal of the offer was drawn up and unanimously signed by the officers.[15] The reasons for Massie's failure to surrender the city, despite the feelers he put out to Royalist contacts, are unknown.[16]
At this point, Charles called another council of war to discuss the situation. It was resolved that it was crucial that Gloucester was still to be taken; if it was left in Parliamentarian hands, it would act as a break in lines of communication should the Royalists advance further east towards London. In addition, Charles's personal reputation had been sullied – travelling so far and yet not taking Gloucester would affect the respect and prestige accorded to him, about which he was "notoriously sensitive". Based on reconnaissance, Charles's officers were confident that the garrison's food and ammunition would not last long; they argued that the city could be taken in less than 10 days, with Parliament lacking an effective army to relieve the city. If Essex's forces did not attack, the Royalists would take the city. If they did attack, they would be exhausted and, according to Royalist intelligence, far weaker than the Oxford army, allowing Charles to destroy Parliament's one remaining significant force.[17]
Sir Edward Massie; the Royalist advance on Gloucester was based on the assumption that he would surrender the city, which he did not.
Under the direct command of the Earl of Forth, the Royalists laid siege to the city; Rupert had suggested a direct assault, but this proposal was not adopted due to fears of high casualties.[18] By 11 August, the Royalist trenches were dug and the artillery prepared, despite Massie's attempts to disrupt work with musket fire. With this work done, there was no way out for the Parliamentarians; the only hope was to delay the Royalists long enough for a relief army to arrive. To this end, Massie ordered raids under the cover of darkness, with James Harcus, his second-in-command, leading a raid on the artillery trenches. In revenge the Royalists attacked the east of the city, but were driven off by cannon fire. 12 August saw more raids, this time during the day, which cost the Royalists 10 men and a supply depot, with no Parliamentarian losses. Despite this, the assaults did not disrupt Royalist preparations and by the evening they were able to start bombarding the town.[19]
By 24 August, the Royalists, suffering from shortfalls in their stocks of gunpowder and cannonballs, remained unable to breach the walls. Essex, in the meantime, had been urgently preparing his army, which thanks to disease, indiscipline and desertion numbered less than 6,000 infantry and 3,500 cavalry.[20] This was not a force strong enough to defeat the Royalists, and so he demanded an extra 5,000 soldiers; Parliamentarians in London responded by mobilising a brigade of the London Trained Bands, which provided an additional 6,000 men.[21] Taking into account additional problems and desertions, the eventual force was 9,000-foot soldiers and 5,000 cavalry. After being mustered on Hounslow Heath, the army began marching towards Aylesbury, arriving on 28 August. This force was formally mustered on 30 August,[22] and after being reinforced by Lord Grey on 1 September at Brackley, marched to Gloucester.[23] On 5 September, with heavy rain falling, the Parliamentarian army reached the town and camped on Prestbury Hill, immediately outside it; their presence forced the Royalists to abandon the siege given that neither army, wet and exhausted, was in a state to seek battle.[24]
Pursuit
Charles's cautious failure to directly assault the town, putting a higher priority on minimising losses than on victory, had cost the Royalists dearly; while claims for their number of dead and wounded men ranged from 1,000 to 1,500, only around 50 people inside the city were killed.[25] Essex's force, on the other hand, was in relatively good shape; its one issue was the lack of supplies. If he stayed in the Severn Valley, Essex would be unable to get reinforcements or outside aid, the London elements of the army would demand to go home, and the one remaining significant Parliamentarian force would find itself pinned down, while Charles, with secure bases at Oxford and Bristol, would be able to starve them into surrender while other Royalist armies ran rampant through Britain. Because of this, Essex had no choice but to try to return to London. Travelling back across the Cotswolds, as he had done to reach Gloucester initially, would expose the Parliamentarians to Charles's cavalry on open ground.[26]
The first alternative was to march southeast to the River Kennet and cross it, going through Newbury and returning to Reading's fortifications, thus evading the Royalists and allowing for a safe retreat to London. The disadvantage to this was the time it would take to cross the relatively open land between Essex's position and the Kennet. The second, and the option Essex initially took, was to go north, either to make battle in more advantageous circumstances or to evade the Royalists. If Essex was able to cross to the west bank of the River Avon, he could secure the bridges across it and prevent the Royalists from crossing it and confronting his army.[27] His cavalry advanced to Upton to screen the main force from Royalist interference on 11 September, with the rest of the soldiers quickly following.[28] The Royalists were left wrong-footed; Charles did not discover Essex's retreat for another 24 hours, during which the gap between the armies widened. The Royalists finally began to march on 16 September, with Rupert's cavalry streaming ahead to try to disrupt the Parliamentarian retreat.[29]
By 18 September, Rupert's force had caught up to the Parliamentarians outside Aldbourne, Wiltshire. Essex had lost his advantage; Parliamentarian intelligence reports had convinced him that Charles was heading towards Oxford and had given up the campaign. In fact Charles was barely 14 miles (23km) away, but the complacency such reports induced meant that one contemporary source stated the Parliamentarians were marching barely 5 miles (8.0km) a day, allowing the Royalists to quickly catch up.[10] Suitably chastened by the discovery of his error, Essex increased the pace of his retreat, with the Royalists pursuing closely. Both sides were heading for Newbury, on roughly parallel routes; the Royalists' route took them through Faringdon and Wantage, increasing the distance they would have to travel to 30 miles (48km) while the Parliamentarians had to travel only 20.[30] Charles reacted by dispatching Rupert and 7,000 cavalry in a flying column to disrupt and harass the Parliamentary retreat. Encountering Essex's forces at Aldbourne Chase, Rupert made battle; however, lacking enough troops to engage the Parliamentarians directly, he instead attacked a section of their army, causing chaos and crucially delaying Essex's march just enough for Charles's forces to close the gap.[11]
The effect of Rupert's actions, even after his forces disengaged, was to force another delay in the Parliamentarian retreat; Essex spent much of 19 September looking after wounded soldiers and, when he finally managed to begin moving again, he was confronted with swampland and bog which further delayed him while the Royalists marched across the relatively open chalk downs above the Kennet. These hardships meant that the Royalists arrived at Newbury before Essex, with both armies settling down for the night outside the town, too exhausted to immediately fight.[31]
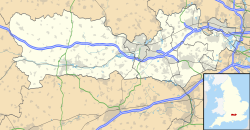
Newbury
Landscape
First battle of Newbury site, facing South
The landscape of the area around Newbury was a significant factor in the tactics of both sides during the resulting battle. Though the land was mostly open country, a crescent-shaped escarpment known as Biggs Hill sat between the Royalist and Parliamentarian forces. To either side of Essex's army lay open fields, while the battlefield was bracketed by the River Kennet on one side and the River Enborne on the other, which neither side attempted to cross on foot.[32] Essex's most obvious route of advance was to push past the Royalist forces, secure the bridge and return to London. Unfortunately, the open area approaching the bridge was a "killing ground"; soldiers would be entirely in the open and forced to march no more than six abreast, which would prevent Essex effectively deploying against a Royalist attack and leave the Parliamentarian's forces bunched up and subject to artillery fire. Even if Essex managed to cross the bridge, the other side of the river featured several hundred metres of waterlogged ground, which would slow his soldiers and leave them open to attack while necessitating the abandonment of the Parliamentarian artillery, a "major humiliation for a seventeenth-century army".[33]
The only alternative to a bridge-based retreat would be to bypass Newbury completely by marching around the Royalists, but this would again involve moving through open fields and subjecting Essex's soldiers to the attacks of Royalist cavalry, who were described as greatly outnumbering the Parliamentarian cavalry.[34] Confronting the Royalists directly would involve moving into ground described as containing "dense copses and innumerable banked hedges with ditches flanking fields and lining sunken lanes"; while this would allow the troops to move in a concealed fashion, it would also make deployment difficult, and the numerous lanes would restrict movement in the heat of battle.[35]
Order of battle
There are no definitive orders of battle for Newbury, as official contemporary evidence is thin; it is possible to glean some information from both later official reports and contemporary accounts, which allow for a reconstruction of the likely disposition of each force. The Royalists were led by Charles I personally, with William Vavasour commanding the right wing, Prince Rupert the left, and Sir John Byron the centre.[36] Artillery support consisted of 20 cannons in total: 6 heavy, 6 medium and 8 light.[37] Initial Royalist and Parliamentarian estimates were of a force of around 17,000 men;[38] modern estimates are of around 7,500 infantry, and 7,000 cavalry.[39] Essex led the Parliamentarians, commanding both the entire force and, separately, the right wing; the left wing was commanded by Philip Stapleton. Artillery support was provided by two heavy cannons and around 20 light cannons; most of the heavy artillery was left at Gloucester to help defend the city.[40] Estimates as to the total number of men vary between 7,000 and 15,000;[41] John Barratt, noting the losses at Gloucester, estimates that Essex's force totalled around 14,000 men, with 6,000 cavalry and dragoons and 8,000 infantry.[42]
Battle
Essex attacks
The battle began on 20 September; Essex's army was roused before dawn, and initial reports stated he had gone "from regiment to regiment...[putting] the question of a battle unto them".[43] After consultation, the army advanced with "most cheerful and courageous spirits" at around 7am.[44] Divided into "three bodies of Foot, both lined and flanked with bodies of Horse", with a reserve behind them, the army was preceded by Stapleton's cavalry, which quickly cleared the Royalist pickets and allowed Essex's advance to Wash Common, a patch of open ground between the two forces. This march took approximately an hour due to the heavy clay soil being soaked from the previous night's rain; the open space before Biggs Hill, the objective of their march, allowed for a much welcome chance to regroup.[45] Rupert had established a cavalry guard on Biggs Hill; while the size is unknown, it was large enough to attack the Parliamentarian horse head-on. Stapleton waited until the Royalists were close before firing, leading to the faltering of their charge and the advance of the Parliamentarian cavalry to drive them off with swords.[46] The cavalry were unable to make further gains, having engaged only a small part of the Royalist horse and being unwilling to press their attack against the larger body.[47]
Plan of the battle
Led by Philip Skippon, the Parliamentarian right flank attacked their main objective, nearby Round Hill; their account reported they "charged so fiercely that [they] beat [the Royalists] from the hill", but makes no mention of casualties or what happened to the Royalist guns which were allegedly deployed on the hill. The Royalists claimed the hill was undefended; the facts suggest this was closer to the truth and "the king and his generals had been caught napping".[48] Its capture allowed Skippon to position 1,000 musketeers on top, who could fire down into any Royalist advance.[49]
Royalist counter-attack
As a result of this quick advance, Charles found his army in chaos, with Skippon's force organised and flanking them. The Royalist council of war reconvened to discuss the events, and accounts suggest the meeting was acrimonious, with the fall of Round Hill described as "a most gross and absurd error".[50] Rupert decided to try to contain both Essex and Skippon. Leaving two regiments of horse with Byron, he led the remainder of the cavalry to Essex's position on the left flank. Byron, in the meantime, was commanded to support an attack by the Royalist musketeers on Skippon's force, drawing his regiments up behind the infantry "ready to second them in case the enemy's horse should advance towards them".[51] Rupert's advance has been criticised by both Parliamentarian and Royalist sources; instead of a small engagement, the stubbornness of the Parliamentary resistance forced Rupert to commit more and more forces to the fray, eventually turning a series of small engagements into a full-scale battle, with reinforcements gradually being drawn in. The terrain limited the localised advantage Rupert's forces had in numbers, but after three attacks Stapleton's brigade crumbled, allowing Rupert to hook around Essex's left flank, stop his advance and capture five pieces of artillery. This came at a cost; the Royalists took heavy casualties, and failed to completely break Essex's infantry.[52] The infantry instead stubbornly retreated, allowing the Parliamentary cavalry to reorganise behind them. Even though his advance had been stopped, Essex was not yet beaten.[53]
Byron's attack on Skippon's musketeers in the centre also went poorly. Pushing three regiments of foot forward, the force suffered similarly high casualties in an attempt to take Round Hill; after the attack stalled, the cavalry had to be called in to force it forward. Despite heavy losses due to the only avenue of advance being a narrow lane lined with Parliamentarian musketeers, this move succeeded in allowing Byron to take Round Hill, forcing the Parliamentarian infantry back to a hedge on the far side. The attack eventually lost momentum, and although Round Hill was taken, Byron was unable to advance any further.[54] On the right flank, William Vavasour attempted to overwhelm the Parliamentary flank with a substantial brigade of foot, which included a small amount of cavalry support.[55] His initial attack was repulsed thanks to the Parliamentarian artillery opening fire, but a subsequent head-on attack forced Skippon's beleaguered force in the centre to send several regiments over to assist, with the fight turning into a bloody melee. Vavasour's force was eventually forced to retire, with the Parliamentarians failing to give ground.[56]
Crisis and stalemate
After heavy fighting, the Royalists had succeeded only in pushing Essex's forces briefly back; they had given ground but not retreated from the battle, and his main force of infantry remained strong. In an attempt to proceed, Essex waved his infantry and light artillery forward. Rupert's cavalry was too weak to defend against this advance due to its large firepower, and he instead ordered two regiments of foot commanded by John Belasyse to halt Essex. The Parliamentarian records report they were "hotly charged by the enemies' horse and foot", who succeeded in forcing Essex slowly back, although the fight took four hours.[57] In response, Essex called for Skippon to send him reinforcements; Skippon obliged by ordering a Mainwaring's Regiment of infantry to remove themselves from his line and march to replace some of Essex's exhausted soldiers. As soon as they arrived, they were charged by two bodies of cavalry and a regiment of infantry under John Byron, who forced the regiment to retreat; the Royalists hacked down the fleeing Parliamentarians and, according to Byron, his force "had not left a man of them unkilled, but that the hedges were so high the horse could not pursue them".[58] Although the Royalists failed to press this attack due to the difficulty of manoeuvring cavalry in the field, and Essex briefly retook the ground, the loss of this infantry regiment opened a gap in the Parliamentarian line. If Rupert was able to drive through this gap, he would break Essex's army into two wings and be able to encircle them. Recognizing this possibility, he began redeploying the Royalist force: two regiments of cavalry and a regiment of infantry under his command would occupy Essex, while two regiments under Charles Gerard would push through the gap in the Parliamentarian line.[59]
Luckily for the Parliamentarians, Skippon saw this opening and ordered the Red and Blue Regiments of the London Trained Bands to close the gap. Although they succeeded in bridging the gap between the two wings of Essex's force, there was no cover, and a Royalist battery of eight heavy guns drawn up on high ground began firing on them. Unable to move because of the necessity of their position, they were left enduring close-range fire "when men's bowels and brains flew in [their] faces", resisting two attacks by Royalist cavalry and infantry led by Jacob Astley.[60] Historian John Day notes that records show most Trained Band casualties were hit in the head, while a survivor boasted that the artillery "did us no harm, only the shot broke our pikes"; evidently, in the heat of battle, the Royalist artillery were firing too high.[61] Despite this, the Royalist artillery fire had taken its toll, and the Trained Band regiments were forced to retreat.[62] The Royalists pursued, and only close-quarters musket fire allowed the militia to regroup without substantial losses. After regrouping, the militia was again attacked by two regiments of foot and two of cavalry, who despite surrounding the Londoners and dragging away a cannon were unable to break them.[63]
At this point, both armies began to draw apart; although sporadic fighting continued as night fell, by midnight both forces had disengaged completely. Both army councils met; Essex's plan to force his way past the Royalists seemed feasible, and many Parliamentarians, loath to give up the ground they had taken, fully expected the battle to continue. The Royalists, on the other hand, were plagued by poor morale, heavy losses and a lack of supplies, having used 80 of their 90 barrels of gunpowder. Although Rupert argued for the battle to continue, he was out-voted, and the next morning Essex was allowed to bypass the Royalist force without issue and continue his retreat towards London.[64]
Aftermath
Essex enters London after the battle
The Parliamentarian force, now free of Charles's army, retreated towards Aldermaston as quickly as possible and eventually made it to Reading and then London, where Essex received a hero's welcome. The Royalists, on the other hand, were forced to spend the next day recovering their casualties, finding more than a thousand injured soldiers who were sent back to Oxford.[65] After they finished recovering their dead and wounded men, the Royalists left 200 infantry, 25 cavalry and 4 guns in Donnington Castle to defend their rear and then marched to Oxford, having buried their dead senior officers in Newbury Guildhall.[66] Casualties at Newbury eventually came to approximately 1,300 losses for the Royalists, and 1,200 for the Parliamentarians. The loss at Newbury was due to a multitude of factors; Day gives credit to the greater ability of Essex to conserve his force through the campaign, which put the Royalists at a numerical disadvantage by Newbury, and notes the Royalist over-reliance on cavalry, with Essex "[compensating] for his much lamented paucity of cavalry by tactical ingenuity and firepower", countering Rupert's cavalry by driving them off with mass infantry formations.[2] The Royalists' infantry were also outperformed, Essex's force retaining a high level of cohesiveness while the Royalists were described as relatively unprofessional; both Day and Blair Worden also give the paucity of ammunition and gunpowder as an important (and endemic) deciding factor in the success or failure of Charles' campaign.[67][68]
Although the attention of historians is normally on the larger battles such as Edgehill and Marston Moor, several historians who have studied the period consider the First Battle of Newbury to be the defining moment of the First English Civil War, both as the high point of the Royalist advance and as the "one bright period of [Essex's] generalship".[69] John Day writes that "Militarily and politically, Parliament's position at the beginning of October 1643 was demonstrably far stronger than in late July. With hindsight, the capture of Bristol was the high tide of King Charles' war, his best and only chance of ending the conflict on his own terms".[70] John Barratt noted that the Royalists had failed in "what might prove to have been their best chance to destroy the principle field army of their opponents, and hopes of a crushing victory which would bring down the Parliamentarian 'war party' lay in ruins".[71] The high Parliamentarian feelings after Newbury led to the signing of the Solemn League and Covenant, bringing a powerful Scottish army down to assault the Royalists. "Thanks to the failure...to win a decisive victory there, the English, Welsh, Scottish and Irish subjects of all of King Charles' Three Kingdoms would henceforth play a bloody price in a steadily widening and deepening war".[72]
Sources and historiography
Malcolm Wanklyn has described the First Battle of Newbury as being "both the longest battle of the English Civil War and the one that historians have found the greatest difficulty in describing",[73] because there is no contemporary plan of the battlefield or record of the plans of each side while, conversely, there are diverse and contradictory accounts from both sides of the battle. An official Royalist account was written by Lord Digby on 22 September, which suffered from defects due to Digby's position away from the main fighting, and because it was designed "as a reflection on the battle's outcome, not a blow-by-blow description of what happened".[73] Conversely, those written by officers who actively fought in the main arenas of the battle are very narrow in focus, for example, the accounts of Joshua Moone and John Gwyn, commoners who fought on Wash Common, and an anonymous tract from the perspective of a soldier who assaulted Round Hill.[74]
On the Parliamentarian side, an official source was published a month after the battle; due to the circumstances of its publication and the high Parliamentarian morale after Newbury, it made no attempt to gloss over errors and was designed to "explain to a lay readership what had happened on the battlefield".[75][73] A more narrow view was taken by Sergeant Henry Foster, who fought with the London Trained Band in their attempt to prevent the Royalists splitting Essex's army. The diary of Walter Yonge of Colyton also contains two reports written for the House of Commons by Essex's generals, including Stapleton, although the originals have been lost.[76]
Barratt, John (2005). The First Battle of Newbury. Tempus Publishing. ISBN0-7524-2569-2.
Day, Jon (2007). Gloucester & Newbury 1643: The Turning Point of the Civil War. Pen & Sword. ISBN978-1-84415-591-0.
Scott, Christopher L. (2008). The Battles of Newbury: Crossroads of the English Civil War. Pen & Sword. ISBN978-1-84415-670-2.
Wanklyn, Malcolm (2006). Decisive Battles of the English Civil War. Pen & Sword. ISBN1-84415-454-8.
Wedgwood, C.V. (1958). The King's War, 1641–1647 (1983ed.). Penguin Classics. ISBN978-0-14-006991-4.
Worden, Blair (2009). The English Civil Wars, 1640–1660. Phoenix. ISBN978-0-7538-2691-1.
Young, Peter (1964). "The Order of Battle of the Parliamentarian and Royalist Armies at the First Battle of Newbury, 20 Sept., 1643". Journal of the Society for Army Historical Research. 42 (171): 132–136. JSTOR44223506.
This page is based on this Wikipedia article Text is available under the CC BY-SA 4.0 license; additional terms may apply. Images, videos and audio are available under their respective licenses.