Desperado (chess)

Last updated

In chess, a desperado is a piece that is (in the first meaning) either en prise or trapped, but captures an enemy piece before it is itself captured in order to compensate the loss a little, or (in the second meaning) is used as a sacrifice that will result in stalemate if it is captured. [1] The former case can arise in a situation where both sides have hanging pieces, in which case these pieces are used to win material prior to being captured. [2] A desperado in the latter case is usually a rook or a queen; such a piece is sometimes also called crazy or mad (e.g. crazy rook).

Contents

Examples of the first definition

Petrosian vs. Fischer

Petrosian vs. Fischer, 1958
abcdefgh
8
Chessboard480.svg
Chess rdt45.svg
Chess bdt45.svg
Chess qdt45.svg
Chess rdt45.svg
Chess kdt45.svg
Chess pdt45.svg
Chess pdt45.svg
Chess pdt45.svg
Chess ndt45.svg
Chess bdt45.svg
Chess pdt45.svg
Chess pdt45.svg
Chess plt45.svg
Chess nlt45.svg
Chess pdt45.svg
Chess ndt45.svg
Chess plt45.svg
Chess nlt45.svg
Chess plt45.svg
Chess plt45.svg
Chess plt45.svg
Chess plt45.svg
Chess blt45.svg
Chess plt45.svg
Chess rlt45.svg
Chess blt45.svg
Chess qlt45.svg
Chess rlt45.svg
Chess klt45.svg
8
77
66
55
44
33
22
11
abcdefgh
Position after 12.Nxe5

A simple example illustrating the first definition comes from a 1958 game between future world champions Tigran Petrosian and Bobby Fischer (see diagram). White had just captured the e5-pawn with his knight on f3. The white knight can be taken, but White's move also opened a discovered attack on the black knight on h5. If Black takes the knight, then 13.Qxh5 leaves him a pawn down. To avoid this, Black sacrificed the h5-knight, capturing a pawn with tempo on the rook:

12... Nxg3 13. hxg3 Bxe5

Fischer later said 13...dxe5 would have been better; [3] the game ended in a draw. [4]

Bogoljubow vs. Schmid

Bogoljubow vs. Schmid, 1949
abcdefgh
8
Chessboard480.svg
Chess rdt45.svg
Chess bdt45.svg
Chess qdt45.svg
Chess kdt45.svg
Chess bdt45.svg
Chess rdt45.svg
Chess pdt45.svg
Chess pdt45.svg
Chess pdt45.svg
Chess pdt45.svg
Chess pdt45.svg
Chess pdt45.svg
Chess pdt45.svg
Chess ndt45.svg
Chess ndt45.svg
Chess nlt45.svg
Chess plt45.svg
Chess nlt45.svg
Chess plt45.svg
Chess plt45.svg
Chess plt45.svg
Chess plt45.svg
Chess plt45.svg
Chess plt45.svg
Chess rlt45.svg
Chess blt45.svg
Chess qlt45.svg
Chess klt45.svg
Chess blt45.svg
Chess rlt45.svg
8
77
66
55
44
33
22
11
abcdefgh
In this position, Schmid played 5...Nxe4!?

A classic example of the first definition is BogoljubowSchmid, West German championship, Bad Pyrmont 1949. In the position shown, Schmid played the surprising novelty 5... Nxe4!?, with the point that 6.Nxe4 would be met by 6...Qe7 7.f3 d5, and Black will regain the sacrificed piece. According to the Encyclopedia of Chess Openings , White can then gain a small advantage with 8.Bb5 Bd7 9.Bxc6 bxc6 10.0-0 dxe4 11.fxe4! g6 (or 11...0-0-0 12.Qf3) 12.Qf3 Bg7 13.c3 0-0 14.Bf4 c5 15.Nb3 Bc6 16.Qg3! Instead of 7.f3, Tartakower and du Mont recommend 7.Nb5 Qxe4+ 8.Be2 Kd8 9.0-0 "with compensations for the mislaid pawn". [5]

Instead, play continued 6. Nxc6 Nxc3! initiating a sequence of desperado moves, where each player keeps capturing with his knight, rather than pausing to capture the opponent's knight. Black cannot pause for 6...bxc6?? 7.Nxe4 Qe7 8.Qe2, leaving White a piece up with a winning position . 7. Nxd8! White must also continue in desperado fashion, since 7.bxc3? bxc6 would leave Black a pawn up. 7... Nxd1 Again the desperado move is forced, since 7...Kxd8?? 8.bxc3 would leave Black a queen down. 8. Nxf7 Since 8.Kxd1 Kxd8 would leave White a pawn down, the knight continues capturing. 8... Nxf2 Still continuing in desperado fashion, in preference to 8...Kxf7 9.Kxd1 with material equality. 9. Nxh8 Nxh1. Between them, the desperado knights have captured thus far two queens, two rooks, two knights, and three pawns. The complete score of the game:

1. e4 e5 2. Nf3 Nc6 3. Nc3 Nf6 4. d4 exd4 5. Nxd4 Nxe4!? 6. Nxc6 Nxc3 7. Nxd8 Nxd1 8. Nxf7 Nxf2 9. Nxh8 Nxh1 10. Bd3 Bc5 11. Bxh7 Nf2 12. Bf4 d6 13. Bg6+ Kf8 14. Bg3 Ng4 15. Nf7? (Better is 15.Bd3 followed by Ng6+ "with a probable draw". [6] ) 15... Ne3 16. Kd2 Bf5! 17. Ng5?? (Bogoljubow probably saw 17.Bxf5 Nxf5 18.Ng5 Be3+ wins, and played Ng5 in desperation; however, 17.Bxf5 Nxf5 18.Rf1 was possible) 17... Bxg6 18. Ne6+ Ke7 19. Nxc5 Nxc2! (The desperado knight strikes again, this time with deadly effect. Not 19...dxc5? 20.Kxe3 with equality.) 20. Bh4+ Ke8 21. Ne6 Kd7 22. Nf4 Nxa1 23. Nxg6 Re8 24. Bf2 Nc2! 25. Nf4 (If 25.Kxc2, Re2+ followed by ...Rxf2 wins.) 25... Nb4 (The knight departs, having captured in its 13 moves White's queen, both rooks, a knight and three pawns. Its White counterpart captured the queen, a rook, both bishops, a knight, and two pawns in its 14 moves.) 0–1

Tal vs. Keres

Tal vs. Keres, 1962
abcdefgh
8
Chessboard480.svg
Chess rdt45.svg
Chess bdt45.svg
Chess qdt45.svg
Chess rdt45.svg
Chess kdt45.svg
Chess pdt45.svg
Chess pdt45.svg
Chess pdt45.svg
Chess pdt45.svg
Chess pdt45.svg
Chess bdt45.svg
Chess pdt45.svg
Chess ndt45.svg
Chess nlt45.svg
Chess plt45.svg
Chess plt45.svg
Chess plt45.svg
Chess plt45.svg
Chess blt45.svg
Chess blt45.svg
Chess plt45.svg
Chess plt45.svg
Chess rlt45.svg
Chess qlt45.svg
Chess rlt45.svg
Chess klt45.svg
8
77
66
55
44
33
22
11
abcdefgh
Here, Keres played 18...Nd3!

Another example of this type of desperado is Tal–Keres, Candidates Tournament, Curaçao 1962 [7] (see diagram).

Seeing that White's knight on d4 is unprotected, Keres offered to simplify the position with 18... Nd3!, when 19.Bxd3 Bxd4 20.Rb1? would allow 20...Qf6! forking White's b- and f-pawns. Instead, Tal went in for complications with 19. Nc6? Nxf2!, when either 20.Kxf2 Qb6+ or 20.Nxd8 Nxd1 21.Nxf7 Nxb2 22.Nxd6 Nc4! 23.Nxc4 Bxa1 would leave Black with a material advantage.

Tal tried:

   20. Qf3? Nxh3+! 21. Kh2

If White captures the knight, 21...Qb6+ regains the piece and leaves Black with a won game.

   21... Be5+! 22. Nxe5 dxe5 23. Rad1

If 23.gxh3, Qxd2.

   23... Nf4!

Now 24.Bxf4 is met by 24...Qh4+. Black won. [8]

Examples of the second definition

Pilnick vs. Reshevsky

Pilnick vs. Reshevsky, 1942
abcdefgh
8
Chessboard480.svg
Chess kdt45.svg
Chess pdt45.svg
Chess pdt45.svg
Chess plt45.svg
Chess qlt45.svg
Chess pdt45.svg
Chess pdt45.svg
Chess qdt45.svg
Chess klt45.svg
8
77
66
55
44
33
22
11
abcdefgh
Black moved 92...g4??; White replied 93.Qf2!

One of the best known examples of sacrificing a desperado piece to achieve stalemate is the game between Carl Pilnick and Sammy Reshevsky, US Championship 1942 [9] (see diagram). After:

92... g4?? 93. Qf2!

the white queen is a desperado piece: Black will lose if he doesn't capture it, but its capture results in stalemate.

Evans vs. Reshevsky

Evans vs. Reshevsky, 1963

Another of the best known examples involves a swindle in a game by Larry Evans versus Samuel Reshevsky. [10] Evans sacrificed his queen on move 49 and offered his rook on move 50. White's rook has been called the eternal rook. Capturing it results in stalemate, but otherwise it stays on the seventh rank and checks Black's king ad infinitum .

   47. h4! Re2+ 48. Kh1 Qxg3?? 49. Qg8+! Kxg8 50. Rxg7+

Either a draw by agreement will occur or a draw by threefold repetition or the fifty-move rule can eventually be claimed. [11] [12]

The game was called "The Swindle of the Century".

Reshevsky vs. Geller

Reshevsky vs. Geller, 1953
abcdefgh
8
Chessboard480.svg
Chess rlt45.svg
Chess pdt45.svg
Chess kdt45.svg
Chess plt45.svg
Chess plt45.svg
Chess rdt45.svg
Chess plt45.svg
Chess klt45.svg
8
77
66
55
44
33
22
11
abcdefgh
Position after 53...Rf3+!

Reshevsky also fell into a stalemating trap against Efim Geller in the Zürich 1953 Candidates Tournament. [13] After 53... Rf3+! (diagram) 54.Kxf3 would be stalemate. If 54.Kg2, then 54...Rxg3+! winning a crucial pawn; again, White could not take the rook without resulting in stalemate.

The game continued:

54. Ke2 Rxg3 55. Rxf5+ Kxh4

and the players agreed to a draw a few moves later.

In light of the three aforementioned Reshevsky games, the Russian analyst Verkhovsky observed that Reshevsky apparently suffered from stalemate blindness every 11 years. [14]

Keres vs. Fischer

abcdefgh
8
Chessboard480.svg
Chess pdt45.svg
Chess blt45.svg
Chess kdt45.svg
Chess pdt45.svg
Chess plt45.svg
Chess klt45.svg
Chess qlt45.svg
Chess pdt45.svg
Chess qdt45.svg
8
77
66
55
44
33
22
11
abcdefgh
Position after 71...Kh7

Another famous game saved by the possibility of stalemate is Keres–Fischer, Curaçao 1962. [15] Although Fischer avoided the stalemating lines, he allowed Keres to draw by perpetual check instead. In the diagrammed position, Keres played the centralizing 72. Qe5!! Fischer commented:

What's this? He makes no attempt to stop me from queening!? Gradually my excitement subsided. The more I studied the situation, the more I realized Black had no win.

Analysis: Keres vs. Fischer
abcdefgh
8
Chessboard480.svg
Chess pdt45.svg
Chess kdt45.svg
Chess pdt45.svg
Chess qlt45.svg
Chess plt45.svg
Chess klt45.svg
Chess blt45.svg
Chess qdt45.svg
Chess qdt45.svg
8
77
66
55
44
33
22
11
abcdefgh
After 75.Qg6+!

Now if 72... g1=Q, 73.Bf5+ Kg8 (73... Kh6?? 74.Qh8#) 74.Qe8+ Kg7 75.Qe7+ Kg8 (75...Kh8?? 76.Qh7#) 76.Qe8+ draws by repetition; if 72...Qf2+, 73.Kh3 g1=Q 74.Bf5+ Kh6 75.Qf6+ Kh5 76.Bg6+! Qxg6 77.Qg5+!! and either capture is stalemate. The game continued:

   72... Qh1+ 73. Bh3

Now if 73...g1=Q, 74.Qh5+ Kg7 75.Qg6+! and either capture of the queen results in stalemate (see analysis diagram) – otherwise the white queen keeps checking the black king: 75...Kh8 76.Qh6+ Kg8 77.Qg6+! Kf8 78.Qf6+ Ke8 79.Qe6+, and Black must repeat moves with 79...Kf8, since 79...Kd8?? runs into 80.Qd7#. [16]

73... Qxh3+ 74. Kxh3 g1=Q 75. Qe7+ Kh8 76. Qf8+ Kh7 77. Qf7+ ½–½ [17]

Tilberger vs. Drelikiewicz

Tilberger vs. Drelikiewicz, 1970
abcdefgh
8
Chessboard480.svg
Chess rlt45.svg
Chess pdt45.svg
Chess rdt45.svg
Chess kdt45.svg
Chess plt45.svg
Chess plt45.svg
Chess pdt45.svg
Chess plt45.svg
Chess qlt45.svg
Chess klt45.svg
Chess plt45.svg
Chess qdt45.svg
8
77
66
55
44
33
22
11
abcdefgh
Black to move

Sometimes it is possible for the inferior side to sacrifice two or three pieces in rapid succession to achieve a stalemate. An example is seen in the game Tilberger–Drelikiewicz, Poland 1970 (see diagram).

Black saved the draw with:

1... h3+! 2. Kxh3 Qf5+! 3. Qxf5

Not 3.Kg2? Qxd7.

3... Rxg3+! 4. Kh4 Rg4+!

Korchnoi vs. Vaganian

abcdefgh
8
Chessboard480.svg
Chess pdt45.svg
Chess pdt45.svg
Chess kdt45.svg
Chess bdt45.svg
Chess rlt45.svg
Chess qlt45.svg
Chess pdt45.svg
Chess pdt45.svg
Chess plt45.svg
Chess ndt45.svg
Chess plt45.svg
Chess plt45.svg
Chess plt45.svg
Chess plt45.svg
Chess plt45.svg
Chess klt45.svg
Chess plt45.svg
Chess qdt45.svg
8
77
66
55
44
33
22
11
abcdefgh
Black to move

In Korchnoi–Vaganian, Skellefteå 1989, [18] a similar three-piece sacrifice might have enabled Vaganian to save the game. From the position diagrammed, Vaganian played:

   35... Qxc2+? 36. Kh3 Qa4 37. Kh4

Jacob Aagaard notes that now "White had a winning endgame, which Korchnoi indeed won."

Analysis: Korchnoi vs. Vaganian
abcdefgh
8
Chessboard480.svg
Chess pdt45.svg
Chess kdt45.svg
Chess pdt45.svg
Chess qlt45.svg
Chess pdt45.svg
Chess pdt45.svg
Chess plt45.svg
Chess plt45.svg
Chess plt45.svg
Chess plt45.svg
Chess rlt45.svg
Chess plt45.svg
Chess plt45.svg
Chess klt45.svg
Chess plt45.svg
Chess qdt45.svg
8
77
66
55
44
33
22
11
abcdefgh
After 37...Qf1+!

Aagaard instead recommends 35... b6!!, when the natural 36. Qxc6 would be met by 36... Ne3+! 37. Rxe3 Qf1+! (analysis diagram) 38. Kxf1 stalemate. [19]

Korn vs. Pitschak

abcdefgh
8
Chessboard480.svg
Chess kdt45.svg
Chess pdt45.svg
Chess ndt45.svg
Chess pdt45.svg
Chess pdt45.svg
Chess plt45.svg
Chess plt45.svg
Chess plt45.svg
Chess qdt45.svg
Chess qlt45.svg
Chess pdt45.svg
Chess pdt45.svg
Chess blt45.svg
Chess plt45.svg
Chess rlt45.svg
Chess klt45.svg
8
77
66
55
44
33
22
11
abcdefgh
Black to move

In KornPitschak, Brno 1936, White's desperado queen and rook saved the draw despite White's apparently mobile e-pawns. In the position illustrated, Black appeared to be winning after:

   1... dxe2!

in light of 2.Qxd4 exf1=Q+ or 2.Qxe2 Qh4+ 3.Kg1 Qh2#. Instead, Korn played:

Korn vs. Pitschak, 1936
abcdefgh
8
Chessboard480.svg
Chess kdt45.svg
Chess ndt45.svg
Chess pdt45.svg
Chess qlt45.svg
Chess pdt45.svg
Chess pdt45.svg
Chess plt45.svg
Chess plt45.svg
Chess plt45.svg
Chess qdt45.svg
Chess pdt45.svg
Chess pdt45.svg
Chess plt45.svg
Chess klt45.svg
8
77
66
55
44
33
22
11
abcdefgh
Position after 6.Qe7+!

   2. Rf8+! Kxf8 3. Qf5+ Ke8

3...Kg8? 4.Qf7+ Kh8 5.Qf8#

   4. Qf7+ Kd8 5. Qf8+! Ne8 6. Qe7+! (diagram)

Now 6...Kxe7 is stalemate, while 6...Kc8 loses to 7.Qb7+ Kd8 8.e7#. [20] [21]

Hegde vs. Palatnik

Hegde vs. Palatnik, 1988
abcdefgh
8
Chessboard480.svg
Chess kdt45.svg
Chess plt45.svg
Chess rlt45.svg
Chess klt45.svg
Chess bdt45.svg
8
77
66
55
44
33
22
11
abcdefgh
Black to move can draw by 59...Bg7!

This endgame position is from a game between Ravi Gopal Hegde and Semon Palatnik, Kozhikode 1988. [22] The position appeared in the endgame section of Chess Informant 45. Black resigned in this position but had an easy draw:

59... Bg7! 60. Rh4 Bd4!

(threatening 61...Bxa7), etc. [23]

Capturing the bishop results in a stalemate, allowing 61...Bxa7 is a draw, and 61.Rh7 Bg7 leads to a repetition of position.

Vasilevich vs. Kosteniuk

Vasilevich vs. Kosteniuk, 2000
abcdefgh
8
Chessboard480.svg
Chess qlt45.svg
Chess kdt45.svg
Chess pdt45.svg
Chess qdt45.svg
Chess ndt45.svg
Chess klt45.svg
8
77
66
55
44
33
22
11
abcdefgh
Black had just blundered with 55...Nh4–f3??

Now (see diagram) the game ended with:

56. Qg4+!

If Black captures the queen, it is stalemate. If Black instead plays 56...Kh6, then 57.Qg6+! forces Black to capture the queen.

Instead of 55...Nf3??, 55...Qc3+ followed by 56...Nf3 would have allowed Black to keep her decisive advantage.

Ponziani study

Ponziani, 1782
abcdefgh
8
Chessboard480.svg
Chess kdt45.svg
Chess rdt45.svg
Chess qlt45.svg
Chess klt45.svg
8
77
66
55
44
33
22
11
abcdefgh
Black to move draws, starting with 1...Rh7+

Black draws after: [24]

1... Rh7+ 2. Kg5 Rg7+ 3. Kh6 Rh7+!

Capturing the rook results in stalemate.

4. Kg5 Rg7+ 5. Kf6

If 5.Kf5 then 5...Rf7+; and then if 6.Ke5 then 6...Re7.

5... Rg6+!

Capturing the rook results in stalemate.

Related Research Articles

In the game of chess, perpetual check is a situation in which one player can force a draw by an unending series of checks. This typically arises when the player who is checking cannot deliver checkmate, and failing to continue the series of checks gives the opponent at least a chance to win. A draw by perpetual check is no longer one of the rules of chess; however, such a situation will eventually allow a draw claim by either threefold repetition or the fifty-move rule. Players usually agree to a draw long before that, however.

Zugzwang is a situation found in chess and other turn-based games wherein one player is put at a disadvantage because of their obligation to make a move; a player is said to be "in zugzwang" when any legal move will worsen their position.

Stalemate is a situation in chess where the player whose turn it is to move is not in check and has no legal move. Stalemate results in a draw. During the endgame, stalemate is a resource that can enable the player with the inferior position to draw the game rather than lose. In more complex positions, stalemate is much rarer, usually taking the form of a swindle that succeeds only if the superior side is inattentive. Stalemate is also a common theme in endgame studies and other chess problems.

<span class="mw-page-title-main">Checkmate</span> Winning game position in chess

Checkmate is any game position in chess and other chess-like games in which a player's king is in check and there is no possible escape. Checkmating the opponent wins the game.

The two knights endgame is a chess endgame with a king and two knights versus a king. In contrast to a king and two bishops, or a bishop and a knight, a king and two knights cannot force checkmate against a lone king. Although there are checkmate positions, a king and two knights cannot force them against proper, relatively easy defense.

In chess, a passed pawn is a pawn with no opposing pawns to prevent it from advancing to the eighth rank; i.e. there are no opposing pawns in front of it on either the same file or adjacent files. A passed pawn is sometimes colloquially called a passer. Passed pawns are advantageous because only the opponent's pieces can stop them from promoting.

<span class="mw-page-title-main">Promotion (chess)</span> Chess rule

In chess, promotion is the replacement of a pawn with a new piece when the pawn is moved to its last rank. The player replaces the pawn immediately with a queen, rook, bishop, or knight of the same color. The new piece does not have to be a previously captured piece. Promotion is mandatory when moving to the last rank; the pawn cannot remain as a pawn.

In chess, a queen sacrifice is a move that sacrifices a queen, the most powerful piece, in return for some compensation, such as a tactical or positional advantage.

In chess, a sacrifice is a move that gives up a piece with the objective of gaining tactical or positional compensation in other forms. A sacrifice could also be a deliberate exchange of a chess piece of higher value for an opponent's piece of lower value.

The chess endgame with a king and a pawn versus a king is one of the most important and fundamental endgames, other than the basic checkmates. It is an important endgame for chess players to master, since most other endgames have the potential of reducing to this type of endgame via exchanges of pieces. Players need to be able to determine quickly whether a given position is a win or a draw, and to know the technique for playing it. The crux of this endgame is whether or not the pawn can be promoted, so checkmate can be forced.

In chess, the exchange is the material difference of a rook for a minor piece. Having a rook for a minor piece is generally advantageous, since the rook is usually more valuable. A player who has a rook for a minor piece is said to be up the exchange, and the other player is down the exchange. A player who wins a rook for a minor piece is said to have won the exchange, while the other player has lost the exchange. The opposing captures often happen on consecutive moves, but this is not strictly necessary. Although it is generally detrimental to lose the exchange, one may occasionally find reason to purposely do so; the result is an exchange sacrifice.

In chess, a fortress is an endgame drawing technique in which the side behind in material sets up a zone of protection that the opponent cannot penetrate. This might involve keeping the enemy king out of one's position, or a zone the enemy cannot force one out of. An elementary fortress is a theoretically drawn position with reduced material in which a passive defense will maintain the draw.

In chess, a decoy is a tactic that lures an enemy man off its square and away from its defensive role. Typically this means away from a square on which it defends another piece or threat. The tactic is also called a deflection. Usually the piece is decoyed to a particular square via the sacrifice of a piece on that square. A piece so sacrificed is called a decoy. When the piece decoyed or deflected is the king, the tactic is known as attraction. In general in the middlegame, the sacrifice of a decoy piece is called a diversionary sacrifice.

The rook and pawn versus rook endgame is a fundamentally important, widely studied chess endgame. Precise play is usually required in these positions. With optimal play, some complicated wins require sixty moves to either checkmate, capture the defending rook, or successfully promote the pawn. In some cases, thirty-five moves are required to advance the pawn once.

In chess, opposition is a situation in which two kings are two squares apart on the same rank or file. Since kings cannot move adjacent to each other, each king prevents the other's advance, creating a mutual blockade. In this situation, the player not having to move is said to have the opposition. It is a special type of zugzwang and most often occurs in endgames with only kings and pawns. The side with the move may have to move their king away, potentially allowing the opposing king access to important squares. Taking the opposition is a means to an end, normally to force the opponent's king to move to a weaker position, and is not always the best thing to do.

In chess, a blunder is a critically bad move or decision. A blunder severely worsens the player's situation by allowing a loss of material, checkmate, or anything similar. It is usually caused by some tactical oversight, whether due to time trouble, overconfidence, or carelessness. Although blunders are most common in beginner games, all human players make them, even at the world championship level. Creating opportunities for the opponent to blunder is an important skill in over-the-board chess.

<span class="mw-page-title-main">Swindle (chess)</span> Chess maneuver

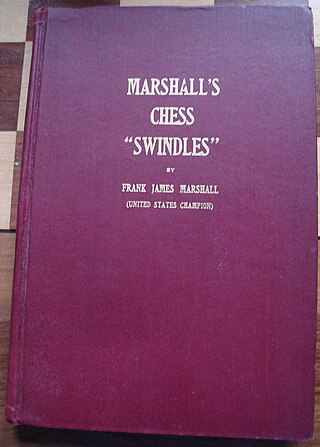
In chess, a swindle is a ruse by which a player in a losing position tricks their opponent and thereby achieves a win or draw instead of the expected loss. It may also refer more generally to obtaining a win or draw from a clearly losing position. I. A. Horowitz and Fred Reinfeld distinguish among "traps", "pitfalls", and "swindles". In their terminology, a "trap" refers to a situation where players go wrong through their own efforts. In a "pitfall", the beneficiary of the pitfall plays an active role, creating a situation where a plausible move by the opponent will turn out badly. A "swindle" is a pitfall adopted by a player who has a clearly lost game. Horowitz and Reinfeld observe that swindles, "though ignored in virtually all chess books", "play an enormously important role in over-the-board chess, and decide the fate of countless games".

The opposite-colored bishops endgame is a chess endgame in which each side has a single bishop and those bishops operate on opposite-colored squares. Without other pieces besides pawns and the kings, these endings are widely known for their tendency to result in a draw. These are the most difficult endings in which to convert a small material advantage to a win. With additional pieces, the stronger side has more chances to win, but still not as many as when bishops are on the same color.

In a chess endgame of a king, bishop, and pawn versus king, a wrong rook pawn is a rook pawn whose promotion square is the opposite color from the bishop's square color. Since a side's rook pawns promote on opposite-colored squares, one of them may be the "wrong rook pawn". This situation is also known as having the wrong-colored bishop or wrong bishop. In many cases, the wrong rook pawn will only draw, when any other pawn would win. This is because the defending side can sometimes get their king to the corner in front of the pawn, after which the attacking side cannot chase the king away to enable promotion. A fairly common defensive tactic is to reach one of these drawn endgames, often through a sacrifice.

The queen and pawn versus queen endgame is a chess endgame in which both sides have a queen and one side has a pawn, which one tries to promote. It is very complicated and difficult to play. Cross-checks are often used as a device to win the game by forcing the exchange of queens. It is almost always a draw if the defending king is in front of the pawn.

References

  1. ( Hooper & Whyld 1992 :106–07)
  2. ( Soltis 1975 :246)
  3. ( Fischer 2008 :24–25)
  4. "Petrosian vs. Fischer, Portoroz 1958". Chessgames.com .
  5. ( Tartakower & du Mont 1975 :39–40)
  6. ( Tartakower & du Mont 1975 :39–40)
  7. "Tal vs. Keres, Curaçao 1962". Chessgames.com .
  8. ( Soltis 1975 :247–48)
  9. "Pilnick vs. Reshevsky, US Ch 1942". Chessgames.com .
  10. "Evans vs. Reshevsky, US Ch 1963/64". Chessgames.com .
  11. ( Averbakh 1996 :80–81)
  12. ( Evans 1970 :15)
  13. "Samuel Reshevsky vs. Efim Geller, Zuerich 1953". Chessgames.com . Retrieved 20 April 2023.
  14. O'Keefe, Jack (July 1999). "Stalemate!". Michigan Chess Online. Archived from the original on 2012-05-02. Retrieved 2007-08-06.
  15. "Keres vs. Fischer, Curacao 1962". Chessgames.com .
  16. ( Fischer 2008 :233)
  17. ( van Perlo 2006 :127)
  18. "Korchnoi vs. Vaganian, Skellefteå 1989". Chessgames.com .
  19. ( Aagaard 2004 :28)
  20. ( Korn 1966 :16)
  21. ( Pachman 1973 :17–18)
  22. "Ravi Gopal Hegde vs. Semon Palatnik, Kozhikode 1988". Chessgames.com .
  23. ( Dvoretsky 2006 :237)
  24. ( Rabinovich 2012 :476)

Bibliography

Further reading