
Admiral of the Fleet Sir Frederick Charles Doveton Sturdee, 1st Baronet was a Royal Navy officer. After training as a torpedo officer, he commanded two different cruisers and then three different battleships before becoming commander of the 1st Battle Squadron of the Home Fleet. He went on to command the 3rd Cruiser Squadron and then the 2nd Cruiser Squadron.

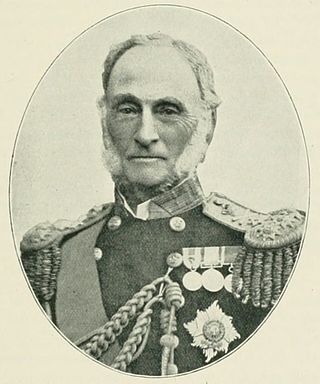
Admiral of the Fleet Sir Nowell Salmon, was a Royal Navy officer. As a junior officer he served in the naval brigade and took part in the Siege of Lucknow during the Indian Mutiny. He was a member of the force defending the Residency when he volunteered to climb a tree near the wall of the Shah Nujeff mosque to observe the fall of shot, despite being under fire himself and wounded in the thigh. He and his colleague, Leading Seaman John Harrison, were awarded the Victoria Cross, the highest award for gallantry in the face of the enemy that can be awarded to British and Commonwealth forces for this action.
Admiral of the Fleet Sir Geoffrey Thomas Phipps Hornby GCB was a Royal Navy officer. As a junior officer, he saw action at the capture of Acre in November 1840 during the Egyptian–Ottoman War. As a captain, he was assigned to Vancouver Island with a naval brigade where he found a unit of United States troops ready to take over the San Juan Islands in a dispute that became known as the Pig War. Hornby used his powers of diplomacy to facilitate a peaceful handover of the islands to the United States.
Admiral of the Fleet Sir Reginald Yorke Tyrwhitt, 1st Baronet, was a Royal Navy officer. During the First World War he served as commander of the Harwich Force. He led a supporting naval force of 31 destroyers and two cruisers at the Battle of Heligoland Bight in August 1914, in which action the 1st Battlecruiser Squadron under Sir David Beatty sank three German cruisers and one German destroyer with minimal loss of allied warships. Tyrwhitt also led the British naval forces during the Cuxhaven Raid in December 1914, when British seaplanes destroyed German Zeppelin airships and at the Battle of Dogger Bank in January 1915, in which action Tyrwhitt again supported Beatty's powerful battlecruiser squadron.

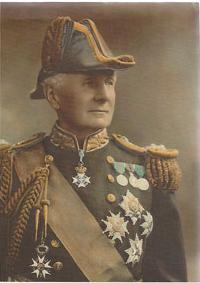
Admiral of the Fleet The Honourable Sir Henry Keppel was a Royal Navy officer. His first command was largely spent off the coast of Spain, which was then in the midst of the First Carlist War. As commanding officer of the corvette HMS Dido on the East Indies and China Station he was deployed in operations during the First Opium War and in operations against Borneo pirates. He later served as commander of the naval brigade besieging Sebastopol during the Crimean War. After becoming second-in-command of the East Indies and China Station, he commanded the British squadron in the action with Chinese pirates at the Battle of Fatshan Creek when he sank around 100 enemy war-junks. He subsequently took part in the capture of Canton during the Second Opium War.

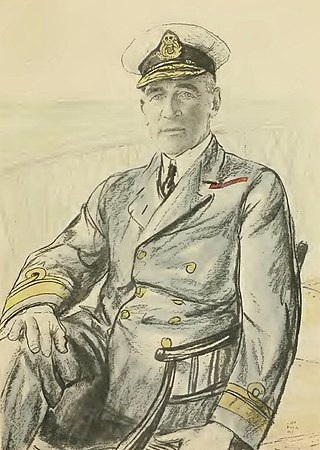
Admiral of the Fleet Sir Henry Francis Oliver, was a Royal Navy officer. After serving in the Second Boer War as a navigating officer in a cruiser on the Cape of Good Hope and West Coast of Africa Station, he became the first commanding officer of the new navigation school HMS Mercury in the early years of the 20th century. He went to be commanding officer first of the armoured cruiser HMS Achilles and then of the new battleship HMS Thunderer before becoming Director of the Intelligence Division at the Admiralty.
Admiral of the Fleet Sir Somerset Arthur Gough-Calthorpe, sometimes known as Sir Somerset Calthorpe, was a Royal Navy officer and a member of the Gough-Calthorpe family. After serving as a junior officer during the Fourth Anglo-Ashanti War, he became naval attaché observing the actions of the Imperial Russian Navy during the Russo-Japanese War and then went on to command an armoured cruiser and then a battleship during the early years of the 20th century.

Admiral of the Fleet Sir Henry Bradwardine Jackson, was a Royal Navy officer. After serving in the Anglo-Zulu War he established an early reputation as a pioneer of ship-to-ship wireless technology. Later he became the first person to achieve ship-to-ship wireless communications and demonstrated continuous communication with another vessel up to three miles away. He went on to be Third Sea Lord and Controller of the Navy, then Director of the Royal Naval War College and subsequently Chief of the Admiralty War Staff. He was advisor on overseas expeditions planning attacks on Germany's colonial possessions at the start of the First World War and was selected as the surprise successor to Admiral Lord Fisher upon the latter's spectacular resignation in May 1915 following the failure of the Gallipoli Campaign. He had a cordial working relationship with First Lord of the Admiralty Arthur Balfour, but largely concerned himself with administrative matters and his prestige suffered when German destroyers appeared in the Channel, as a result of which he was replaced in December 1916.
Admiral of the Fleet Sir Charles Edward Madden, 1st Baronet,, was a Royal Navy officer who served during the First World War as Chief of the Staff to Sir John Jellicoe in the Grand Fleet from 1914 to 1916 and as Second-in-Command of the fleet under Sir David Beatty from 1916 to 1919. He was Commander-in-Chief of the Atlantic Fleet after the war and served as First Sea Lord in the late 1920s. In that role, in order to avoid an arms race, he accepted parity with the United States in the form of 50 cruisers defending his position on the basis that he only actually had 48 cruisers anyway.
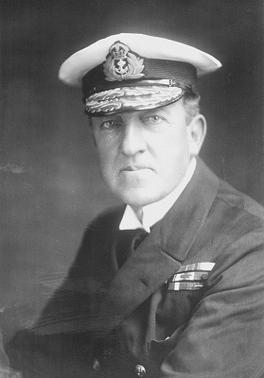
Admiral Sir Francis Charles Bridgeman Bridgeman was a Royal Navy officer. As a captain he commanded a battleship and then an armoured cruiser and then, after serving as second-in-command of three different fleets, he twice undertook tours as Commander-in-Chief of the Home Fleet with a stint as Second Sea Lord in between those tours. He became First Sea Lord in November 1911 but clashed with First Lord of the Admiralty Winston Churchill on technical issues as well as matters relating to a perceived overriding of naval traditions by Churchill: this led to Bridgeman's resignation just a year later.

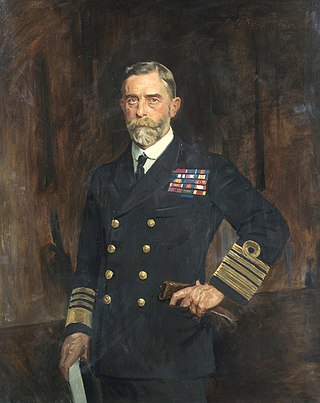
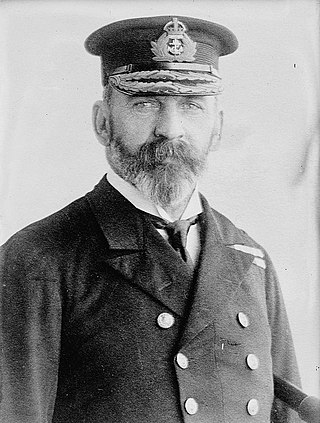
Admiral of the Fleet Sir Frederick William Richards, was a Royal Navy officer. He commanded a paddle-sloop during the Second Opium War in 1860 and, as senior officer on the Cape of Good Hope and West Coast of Africa Station, he landed on the coast of South Africa with a small naval brigade which he led at the Battle of Gingindlovu and the Siege of Eshowe in April 1879 during the Anglo–Zulu War. He took part in the Battle of Laing's Nek in January 1881 during the First Boer War and, as Commander-in-Chief of the East Indies Station, he organized and equipped a naval brigade to support the British advance up the Irrawaddy River in November 1885 during the Third Anglo-Burmese War. He went on to be First Naval Lord and in that role led a huge shipbuilding and naval works programme undertaken in accordance with the provisions of the Naval Defence Act 1889. The programme was opposed by Prime Minister William Gladstone who was concerned about its vast cost and who resigned after a Cabinet defeat over it in March 1894. The programme continued under the Governments of Lord Rosebery and then Lord Salisbury and Richards remained in office driving the programme throughout the political turmoil.

Admiral of the Fleet Sir Cecil Burney, 1st Baronet, was a Royal Navy officer. After seeing action as a junior office in naval brigades during both the Anglo-Egyptian War and the Mahdist War, he commanded a cruiser in operational service during the Second Boer War. As a flag officer he commanded the Plymouth Division of the Home Fleet, the 5th Cruiser Squadron, the Atlantic Fleet and then the 3rd Battle Squadron.

Admiral of the Fleet Richard James Meade, 4th Earl of Clanwilliam, styled Lord Gillford until 1879, was a Royal Navy officer. As a junior officer, he served at the Battle of Escape Creek and at the Battle of Fatshan Creek during the campaign against Chinese pirates. He also took part in the Battle of Canton, where he was severely wounded, during the Second Opium War.

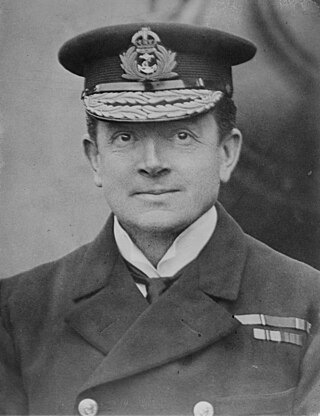
Admiral of the Fleet Sir Osmond de Beauvoir Brock, was a Royal Navy officer. Brock served as assistant director of naval intelligence and then as assistant director of naval mobilisation at the Admiralty in the early years of the 20th century. During the First World War Brock commanded the battlecruiser HMS Princess Royal at the Battle of Heligoland Bight and at the Battle of Dogger Bank. He then commanded the 1st Battlecruiser Squadron with his flag in HMS Princess Royal at the Battle of Jutland.
Admiral of the Fleet Sir John Donald Kelly was a Royal Navy officer. He served in the First World War as commanding officer of the cruiser HMS Dublin which came close to intercepting the German battlecruiser SMS Goeben. After the War he took charge of a naval force dispatched to strengthen the Mediterranean Fleet during the Chanak Crisis. After serving as Fourth Sea Lord and then commander of the 1st Battle Squadron, Kelly, known for his skill in personnel matters, was asked to take command of the Atlantic Fleet in the aftermath of the Invergordon Mutiny. He rapidly restored discipline and issued a report which was quite critical of the Admiralty Board's handling of the pay cuts issue in the first place. He went on to be Commander-in-Chief, Portsmouth.
Admiral Sir Arthur William Moore, was a Royal Navy officer who became both Commander-in-Chief, China and Commander-in-Chief, Portsmouth.

Admiral Sir William Lowther Grant was a Royal Navy officer who went on to be Commander-in-Chief, North America and West Indies Station.

Vice Admiral Sir Trevylyan Dacres Willes Napier, was a Royal Navy officer who went on to be Commander-in-Chief, America and West Indies Station.
Admiral Sir John Durnford was a Royal Navy officer who went on to be Commander-in-Chief, Cape of Good Hope Station.
Rear Admiral Sir Richard Hugh Loraine Bevan, was a British Royal Navy officer of the First World War and inter-war period.
