Measurement is the quantification of attributes of an object or event, which can be used to compare with other objects or events. In other words, measurement is a process of determining how large or small a physical quantity is as compared to a basic reference quantity of the same kind. The scope and application of measurement are dependent on the context and discipline. In natural sciences and engineering, measurements do not apply to nominal properties of objects or events, which is consistent with the guidelines of the International vocabulary of metrology published by the International Bureau of Weights and Measures. However, in other fields such as statistics as well as the social and behavioural sciences, measurements can have multiple levels, which would include nominal, ordinal, interval and ratio scales.
The National Institute of Standards and Technology (NIST) is an agency of the United States Department of Commerce whose mission is to promote American innovation and industrial competitiveness. NIST's activities are organized into physical science laboratory programs that include nanoscale science and technology, engineering, information technology, neutron research, material measurement, and physical measurement. From 1901 to 1988, the agency was named the National Bureau of Standards.

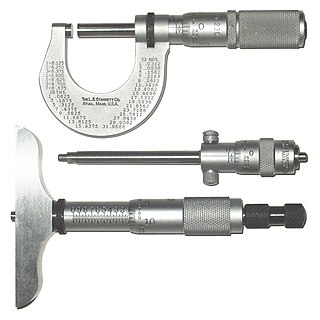
A micrometer, sometimes known as a micrometer screw gauge, is a device incorporating a calibrated screw widely used for accurate measurement of components in mechanical engineering and machining as well as most mechanical trades, along with other metrological instruments such as dial, vernier, and digital calipers. Micrometers are usually, but not always, in the form of calipers. The spindle is a very accurately machined screw and the object to be measured is placed between the spindle and the anvil. The spindle is moved by turning the ratchet knob or thimble until the object to be measured is lightly touched by both the spindle and the anvil.
In measurement technology and metrology, calibration is the comparison of measurement values delivered by a device under test with those of a calibration standard of known accuracy. Such a standard could be another measurement device of known accuracy, a device generating the quantity to be measured such as a voltage, a sound tone, or a physical artifact, such as a meter ruler.

Surveying or land surveying is the technique, profession, art, and science of determining the terrestrial two-dimensional or three-dimensional positions of points and the distances and angles between them. These points are usually on the surface of the Earth, and they are often used to establish maps and boundaries for ownership, locations, such as the designed positions of structural components for construction or the surface location of subsurface features, or other purposes required by government or civil law, such as property sales.

A theodolite is a precision optical instrument for measuring angles between designated visible points in the horizontal and vertical planes. The traditional use has been for land surveying, but it is also used extensively for building and infrastructure construction, and some specialized applications such as meteorology and rocket launching.

A radar speed gun, also known as a radar gun, speed gun, or speed trap gun, is a device used to measure the speed of moving objects. It is commonly used by police to check the speed of moving vehicles while conducting traffic enforcement, and in professional sports to measure speeds such as those of baseball pitches, tennis serves, and cricket bowls.

A Kibble balance is an electromechanical measuring instrument that measures the weight of a test object very precisely by the electric current and voltage needed to produce a compensating force. It is a metrological instrument that can realize the definition of the kilogram unit of mass based on fundamental constants.

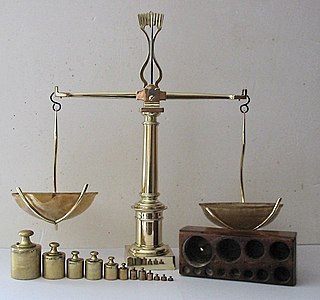
A scale or balance is a device used to measure weight or mass. These are also known as mass scales, weight scales, mass balances, massometers and weight balances.

Laser Doppler velocimetry, also known as laser Doppler anemometry, is the technique of using the Doppler shift in a laser beam to measure the velocity in transparent or semi-transparent fluid flows or the linear or vibratory motion of opaque, reflecting surfaces. The measurement with laser Doppler anemometry is absolute and linear with velocity and requires no pre-calibration.

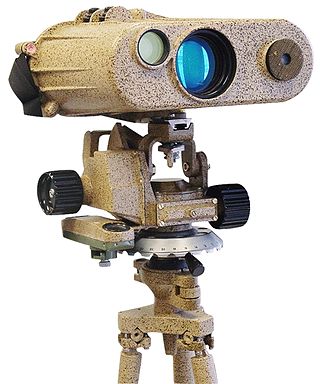
A laser rangefinder, also known as a laser telemeter, is a rangefinder that uses a laser beam to determine the distance to an object. The most common form of laser rangefinder operates on the time of flight principle by sending a laser pulse in a narrow beam towards the object and measuring the time taken by the pulse to be reflected off the target and returned to the sender. Due to the high speed of light, this technique is not appropriate for high precision sub-millimeter measurements, where triangulation and other techniques are often used. It is a type of scannerless lidar.

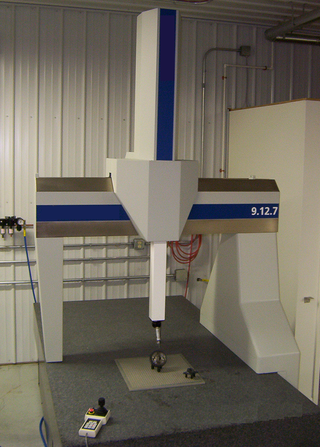
A coordinate-measuring machine (CMM) is a device that measures the geometry of physical objects by sensing discrete points on the surface of the object with a probe. Various types of probes are used in CMMs, the most common being mechanical and laser sensors, though optical and white light sensors do exist. Depending on the machine, the probe position may be manually controlled by an operator, or it may be computer controlled. CMMs typically specify a probe's position in terms of its displacement from a reference position in a three-dimensional Cartesian coordinate system. In addition to moving the probe along the X, Y, and Z axes, many machines also allow the probe angle to be controlled to allow measurement of surfaces that would otherwise be unreachable.

An infrared thermometer is a thermometer which infers temperature from a portion of the thermal radiation sometimes called black-body radiation emitted by the object being measured. They are sometimes called laser thermometers as a laser is used to help aim the thermometer, or non-contact thermometers or temperature guns, to describe the device's ability to measure temperature from a distance. By knowing the amount of infrared energy emitted by the object and its emissivity, the object's temperature can often be determined within a certain range of its actual temperature. Infrared thermometers are a subset of devices known as "thermal radiation thermometers".

An autocollimator is an optical instrument for non-contact measurement of angles. They are typically used to align components and measure deflections in optical or mechanical systems. An autocollimator works by projecting an image onto a target mirror and measuring the deflection of the returned image against a scale, either visually or by means of an electronic detector. A visual autocollimator can measure angles as small as 1 arcsecond, while an electronic autocollimator can have up to 100 times more resolution.
Dimensional metrology, also known as industrial metrology, is the application of metrology for quantifying the physical size, form (shape), characteristics, and relational distance from any given feature.

Nanometrology is a subfield of metrology, concerned with the science of measurement at the nanoscale level. Nanometrology has a crucial role in order to produce nanomaterials and devices with a high degree of accuracy and reliability in nanomanufacturing.

A rangefinder is a device used to measure distances to remote objects. Originally optical devices used in surveying, they soon found applications in other fields, such as photography, the military, and space travel. They were especially useful for finding the range of a target, such as in naval gunnery and anti-aircraft artillery. The word telemeter is derived from Ancient Greek τῆλε (têle) 'distant, far away', and μέτρον (métron) 'something used to measure'.

A nanoindenter is the main component for indentation hardness tests used in nanoindentation. Since the mid-1970s nanoindentation has become the primary method for measuring and testing very small volumes of mechanical properties. Nanoindentation, also called depth sensing indentation or instrumented indentation, gained popularity with the development of machines that could record small load and displacement with high accuracy and precision. The load displacement data can be used to determine modulus of elasticity, hardness, yield strength, fracture toughness, scratch hardness and wear properties.
Length measurement, distance measurement, or range measurement (ranging) refers to the many ways in which length, distance, or range can be measured. The most commonly used approaches are the rulers, followed by transit-time methods and the interferometer methods based upon the speed of light.
Tree height is the vertical distance between the base of the tree and the tip of the highest branch on the tree, and is difficult to measure accurately. It is not the same as the length of the trunk. If a tree is leaning, the trunk length may be greater than the height of the tree. The base of the tree is where the projection of the pith (center) of the tree intersects the existing supporting surface upon which the tree is growing or where the seed sprouted. If the tree is growing on the side of a cliff, the base of the tree is at the point where the pith would intersect the cliff side. Roots extending down from that point would not add to the height of the tree. On a slope this base point is considered as halfway between the ground level at the upper and lower sides of the tree. Tree height can be measured in a number of ways with varying degrees of accuracy.


