The Third Battle of Gaza was fought on the night of 1–2 November 1917 between British and Ottoman forces during the Sinai and Palestine Campaign of World War I and came after the British Egyptian Expeditionary Force (EEF) victory at the Battle of Beersheba had ended the Stalemate in Southern Palestine. The fighting occurred at the beginning of the Southern Palestine Offensive, and, together with attacks on Hareira and Sheria on 6–7 November and the continuing Battle of Tel el Khuweilfe, which had been launched by General Edmund Allenby on 1 November, it eventually broke the Gaza-to-Beersheba line defended by the Yildirim Army Group. Despite having held this line since March 1917, the Ottoman Army was forced to evacuate Gaza and Tel el Khuweilfe during the night of 6–7 November. Only Sheria held out for most of 7 November before it too was captured.

The City of London Yeomanry (Rough Riders) was a yeomanry regiment of the British Territorial Army, formed in 1901 from veterans of the Second Boer War. In the First World War it served dismounted in the Gallipoli Campaign but reverted to the mounted role in the Senussi campaign, at Salonika and in Palestine. It ended the war as a machine gun unit on the Western Front. In the interwar years it was reduced to a battery in a composite Royal Horse Artillery unit in London, but in the period of rearmament before the Second World War it was expanded into a full regiment of light anti-aircraft artillery. It served in this role during The Blitz and later in the Tunisian and Italian campaigns. Postwar it became an armoured regiment. It amalgamated with the Inns of Court Regiment to form the Inns of Court & City Yeomanry in 1961. The lineage is maintained by 68 (Inns of Court & City Yeomanry) Signal Squadron, part of 71 (Yeomanry) Signal Regiment.

The 7th (Meerut) Division was an infantry division of the Indian Army and before 1895, the Bengal Army, that saw active service during World War I.
The 1st Isle of Wight Rifle Volunteers, later the 8th Battalion, Hampshire Regiment, but known informally as the 'Isle of Wight Rifles', was an auxiliary unit of the British Army formed to defend the Isle of Wight after a mid-19th Century invasion scare. During World War I it fought in the Gallipoli Campaign, taking part in the calamitous attack at Suvla Bay, and later at the battles of Gaza and Megiddo in Palestine. Between the wars it was converted to coast defence artillery and served in this role on the Isle of Wight throughout World War II. One battery was sent to reinforce the garrison of Tobruk, where it was captured in 1942. Postwar the unit converted to the air defence role, then reverted to infantry, and its successors continue in today's Army Reserve.

The Hertfordshire Yeomanry was a Yeomanry Cavalry regiment of the British Army that could trace its formation to the late 18th century. First seeing mounted service in the Second Boer War and World War I, it subsequently converted to artillery. Three regiments saw service in World War II, one of which was captured at the fall of Singapore. It continued through various postwar amalgamations and its lineage was maintained by 201 Battery, 100th (Yeomanry) Regiment Royal Artillery until that unit was placed in suspended animation in 2014.
The West Somerset Yeomanry was a Yeomanry regiment of the British Army. First raised in 1794, it participated in the Second Boer War and World War I before being converted to an artillery regiment. It served in World War II. Post-war it was gradually reduced in strength until the yeomanry lineage of the successor unit was discontinued on 9 November 1988.

75th Division was an infantry division of the British Army in World War I. It was raised in the field by the Egyptian Expeditionary Force (EEF) in 1917 and it included British, Indian and South African troops. It served in the Middle East during the Sinai and Palestine campaign being involved in the Battles of Megiddo.

The Finsbury Rifles was a unit of Britain's Volunteer Force and later Territorial Army from 1860 to 1961. It saw action at Gallipoli, in Palestine and on the Western Front during the First World War. In the Second World War, it served in the Anti-Aircraft (AA) role during the Battle of Britain and the Blitz, then in North Africa, Sicily and Italy.
The 1st Durham Volunteer Artillery was a unit of Britain's Volunteer Force and Territorial Army from 1860 to 1956. During World War I, it was the only coastal defence unit to engage the enemy, and it also trained siege gunners for service on the Western Front. It continued its coast defence role in World War II, after which it was converted into air defence and engineer units.
The 1/1st Hertfordshire Yeomanry was the active service unit formed by the Hertfordshire Yeomanry during World War I. It was sent to garrison Egypt and then served dismounted in the Gallipoli Campaign. On return to Egypt it was engaged in the Senussi Campaign in the Western Desert. The regiment was then split into independent squadrons acting as divisional cavalry to different infantry divisions. These served in Palestine, on the Western Front and in Mesopotamia, where one of its squadrons were the first troops to enter Baghdad. Later in the war two of the squadrons fought alongside each other in XXI Corps Cavalry Regiment during the final victory in Palestine and the advance into Syria, while the other operated with the North Persia Force and on peacekeeping duties in India.
The 1st Lanarkshire Artillery Volunteers were formed in 1859 as a response to a French invasion threat. Its units fought at Gallipoli and in Palestine during World War I, and in Normandy and North West Europe during World War II. It continued in the postwar Territorial Army until 1961.
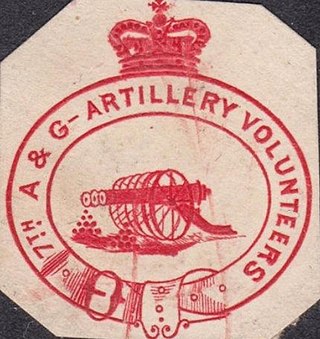
The 1st Ayrshire and Galloway Artillery Volunteer Corps was formed in 1859 as a response to a French invasion threat. It transferred to the Territorial Force (TF) in 1908 and its successor units fought with the 52nd (Lowland) Infantry Division in Palestine during World War I, and in North West Europe and Burma during World War II. It continued in the Territorial Army (TA) until amalgamation in 1967.

The Pembroke Royal Garrison Artillery was a part-time unit of the British Army that defended the coast of West Wales during both world wars. Although it never saw action in its coastal defence role, it manned a number of siege batteries of heavy howitzers for service on the Western Front and Italian Front in World War I.
The Structure of the Egyptian Expeditionary Force over the course of the First World War is shown below.
The Sussex Royal Garrison Artillery and its successors were part-time coast defence units of the British Army from 1910 to 1932. Although the unit saw no active service, it supplied trained gunners to siege batteries engaged on the Western Front during World War I.
134th Siege Battery was a heavy howitzer unit of Britain's Royal Garrison Artillery (RGA) raised during World War I. It saw active service at Salonika and in Palestine.
245th Siege Battery was a heavy howitzer unit of Britain's Royal Garrison Artillery (RGA) raised in Essex and Suffolk during World War I. It saw active service on the Western Front at Messines and Ypres, against the German Spring Offensive, at Villers-Bretonneux and in the final Allied Hundred Days Offensive.
The East Anglian (Essex) Heavy Battery, Royal Garrison Artillery was a part-time unit of Britain's Territorial Force formed in 1908 from part of an existing Essex volunteer artillery unit. It fought on the Western Front during World War I, at the Battles of Vimy Ridge and Passchendaele, during the German Spring Offensive, and at the Battles of Amiens, Épehy, the St Quentin Canal, the Selle and the Sambre. It was merged into a medium artillery unit from Suffolk in the postwar Territorial Army.

The South African Heavy Artillery (SAHA) was a regiment formed in 1915 as part of the South African Overseas Expeditionary Force to serve under British command during World War I. It never fought as a single formation, but contributed a number of batteries and brigades to the Royal Garrison Artillery that fought on the Western Front from 1916 until the Armistice.

XXI Corps Cavalry Regiment was a composite mounted regiment of the British Army made up from separate squadrons of Yeomanry cavalry. It served under XXI Corps Headquarters in Palestine during World War I, seeing action at the Third Battle of Gaza with the seizure of Wadi el Hesi and Junction Station, and at the Battles of Jaffa and Tell 'Asur. After reorganisation in the summer of 1918, XXI Corps participated in the Battle of Megiddo, when it broke through the Turkish lines at the Battle of Sharon, and its cavalry regiment led the pursuit up the coast of present-day Lebanon. The regiment reached Tripoli before hostilities ended.