
The Third Battle of Ypres, also known as the Battle of Passchendaele, was a campaign of the First World War, fought by the Allies against the German Empire. The battle took place on the Western Front, from July to November 1917, for control of the ridges south and east of the Belgian city of Ypres in West Flanders, as part of a strategy decided by the Allies at conferences in November 1916 and May 1917. Passchendaele lies on the last ridge east of Ypres, 5 mi (8 km) from Roulers, a junction of the Bruges-(Brugge)-to-Kortrijk railway. The station at Roulers was on the main supply route of the German 4th Army. Once Passchendaele Ridge had been captured, the Allied advance was to continue to a line from Thourout to Couckelaere (Koekelare).
The British Expeditionary Force (BEF) was the six-divisions the British Army sent to the Western Front during the First World War. Planning for a British Expeditionary Force began with the 1906–1912 Haldane Reforms of the British Army carried out by the Secretary of State for War Richard Haldane following the Second Boer War (1899–1902).

The First Australian Imperial Force was the main expeditionary force of the Australian Army during the First World War. It was formed as the Australian Imperial Force (AIF) following Britain's declaration of war on Germany on 15 August 1914, with an initial strength of one infantry division and one light horse brigade. The infantry division subsequently fought at Gallipoli between April and December 1915, with a newly raised second division, as well as three light horse brigades, reinforcing the committed units.

The 3rd Division was an infantry division of the Australian Army. Existing during various periods between 1916 and 1991, it is considered the "longest serving Australian Army division". It was first formed during World War I, as an infantry division of the Australian Imperial Force and saw service on the Western Front in France and Belgium. During this time it fought major battles at Messines, Broodseinde Ridge, Passchendaele, Amiens, and the St Quentin Canal.

The Australian 4th Division was formed in the First World War during the expansion of the Australian Imperial Force (AIF) infantry brigades in February 1916. In addition to the experienced 4th Brigade were added the new 12th and 13th Brigades. From Egypt the division was sent to France, where it took part in the fighting on the Western Front during 1916–1918. After the war ended, the AIF was demobilised and the division was dissolved.
The Australian Mounted Division originally formed as the Imperial Mounted Division in January 1917, was a mounted infantry, light horse and yeomanry division. The division was formed in Egypt, and along with the Anzac Mounted Division formed part of Desert Column, Egyptian Expeditionary Force in World War I. The division was originally made up of the Australian 3rd Light Horse Brigade, the reconstituted 4th Light Horse Brigade, and two British yeomanry brigades; the 5th Mounted Brigade and 6th Mounted Brigade.
The I ANZAC Corps was a combined Australian and New Zealand army corps that served during World War I.
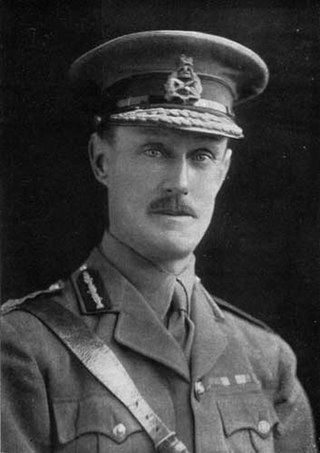
Lieutenant-General Sir Harold Bridgwood Walker, was a senior British Army commander who led Australian and New Zealand forces for much of the First World War. He was highly regarded by the men he commanded and was only replaced in 1918 when politics dictated that all divisions of the Australian Imperial Force should be commanded by Australians.

The 1st Division, also known as the 1st (Australian) Division, is headquartered in Enoggera, a suburb of Brisbane. The division was first formed in 1914 for service during World War I as a part of the Australian Imperial Force (AIF). It was initially part of the Australian and New Zealand Army Corps (ANZAC) and served with that formation during the Gallipoli campaign, before later serving on the Western Front. After the war, the division became a part-time unit based in New South Wales. During World War II it undertook defensive duties in Australia. It was disbanded in 1945.

General Sir Cyril Brudenell Bingham White,, more commonly known as Sir Brudenell White or C. B. B. White, was a senior officer in the Australian Army who served as Chief of the General Staff from 1920 to 1923 and again from March to August 1940, when he was killed in the Canberra air disaster.
General Sir Alexander John Godley, was a senior British Army officer. He is best known for his role as commander of the New Zealand Expeditionary Force and II Anzac Corps during the First World War.
In Australia, the outbreak of World War I was greeted with considerable enthusiasm. Even before Britain declared war on Germany on 4 August 1914, the nation pledged its support alongside other states of the British Empire and almost immediately began preparations to send forces overseas to engage in the conflict. The first campaign that Australians were involved in was in German New Guinea after a hastily raised force known as the Australian Naval and Military Expeditionary Force was dispatched in September 1914 from Australia and seized and held German possessions in the Pacific. At the same time another expeditionary force, initially consisting of 20,000 men and known as the First Australian Imperial Force (AIF), was raised for service overseas.

The 1st Light Horse Brigade was a mounted infantry brigade of the Australian Imperial Force (AIF), which served in the Middle Eastern theatre of World War I. The brigade was initially formed as a part-time militia formation in the early 1900s in New South Wales and then later in Queensland. In 1914, the brigade was re-constituted as part of the AIF and was sent to Egypt. Forming part of the New Zealand and Australian Division, during the Gallipoli Campaign it served in a dismounted role between May and December 1915. After being withdrawn to Egypt it served in the Anzac Mounted Division from March 1916 as part of the Egyptian Expeditionary Force, taking part in the Sinai and Palestine Campaign until the end of the war. It was disbanded in 1919. After the war, the AIF light horse regiments were demobilised and disbanded; however, the brigade briefly existed as a part-time militia formation in Queensland until 1921 when its regiments were reorganised into cavalry brigades.

The 2nd Light Horse Brigade was a mounted infantry brigade of the Australian Imperial Force (AIF) which served in the Middle Eastern theatre of World War I. The brigade was initially formed as a part-time militia formation in the early 1900s in New South Wales. In 1914, the brigade was re-constituted as part of the AIF. The brigade first saw action while serving in the Australian and New Zealand Army Corps (ANZAC) during the Gallipoli campaign. After being withdrawn to Egypt in February 1916 they served in the ANZAC Mounted Division from March 1916 as part of the Egyptian Expeditionary Force during the Sinai and Palestine Campaign until the end of the war. After the war, the AIF light horse regiments were demobilised and disbanded; however, the brigade briefly existed as a part-time militia formation in New South Wales until 1921 when its regiments were reorganised into cavalry brigades.

The 3rd Light Horse Brigade was a mounted infantry brigade of the Australian Imperial Force (AIF), which served in the Middle Eastern theatre of World War I. The brigade was initially formed as a part-time militia formation in the early 1900s in Victoria. In 1914, the brigade was re-constituted as part of the AIF. The brigade first saw action while serving with the Australian and New Zealand Army Corps during the Gallipoli campaign where they were noted for their attack during the Battle of the Nek. After being withdrawn to Egypt in February 1916 they were involved in the Sinai and Palestine Campaign until the end of the war. They were attached to a number of different formations being part of the Anzac Mounted Division in March 1916 and the Australian Mounted Division in June 1917, who they remained with until the end of the war. After the war, the AIF light horse regiments were demobilised and disbanded; however, the brigade briefly existed as a part-time militia formation in New South Wales until 1921 when its regiments were reorganised into cavalry brigades.
The Somerset Royal Horse Artillery was a Territorial Force Royal Horse Artillery battery that was formed in Somerset in 1908. It saw active service during the First World War in the Sinai and Palestine Campaign with the ANZAC Mounted Division from 1916 to 1918. A second line battery, 2/1st Somerset RHA, served on the Western Front with the 63rd Division from 1916 to 1918. It was disembodied after the end of the war and was not reconstituted in the Territorial Force in 1920.

The Leicestershire Royal Horse Artillery was a Territorial Force Royal Horse Artillery battery that was formed in Leicestershire in 1908. It saw active service during the First World War in Egypt and Palestine from 1916 to 1918, initially with ANZAC Mounted Division before joining the Yeomanry Mounted Division and 1st Mounted / 4th Cavalry Division. A second line battery, 2/1st Leicestershire RHA, served on the Western Front with the 63rd Division from 1916 to 1918. Post-war, it was reconstituted as a Royal Field Artillery battery.
The Australian Army was the largest service in the Australian military during World War I. The First Australian Imperial Force (AIF) was the Army's main expeditionary force and was formed from 15 August 1914 with an initial strength of 20,000 men, following Britain's declaration of war on Germany. Meanwhile, the separate, hastily raised 2,000-man Australian Naval and Military Expeditionary Force (AN&MEF), landed near Rabaul in German New Guinea on 11 September 1914 and obtained the surrender of the German garrison after ten days; it later provided occupation forces for the duration of the war. In addition, small military forces based on the pre-war Permanent Forces and part-time Citizen Forces were maintained in Australia to defend the country from attack.

In early 1916, the Australian and New Zealand governments proposed the formation of a new field army, to be named the Australian and New Zealand Army, including all of the existing divisions of the Australian Imperial Force (AIF) and New Zealand Expeditionary Force (NZEF). However, the British government objected to the proposal, on the grounds that two corps, comprising six divisions, were insufficient for a field army. As a result, the plan was abandoned, and Australian and New Zealand divisions instead served as part of British field armies, for the remainder of World War I. However, in late 1917, the five Australian divisions were grouped together as the Australian Corps.
245th Siege Battery was a heavy howitzer unit of Britain's Royal Garrison Artillery (RGA) raised in Essex and Suffolk during World War I. It saw active service on the Western Front at Messines and Ypres, against the German Spring Offensive, at Villers-Bretonneux and in the final Allied Hundred Days Offensive.
