Related Research Articles

In materials science and metallurgy, toughness is the ability of a material to absorb energy and plastically deform without fracturing. Toughness is the strength with which the material opposes rupture. One definition of material toughness is the amount of energy per unit volume that a material can absorb before rupturing. This measure of toughness is different from that used for fracture toughness, which describes load bearing capabilities of materials with flaws. It is also defined as a material's resistance to fracture when stressed.

Shrink wrap, also shrink film, is a material made up of polymer plastic film. When heat is applied, it shrinks tightly over whatever it is covering. Heat can be applied with a handheld heat gun, or the product and film can pass through a heat tunnel on a conveyor.

A heat sealer is a machine used to seal products, packaging, and other thermoplastic materials using heat. This can be with uniform thermoplastic monolayers or with materials having several layers, at least one being thermoplastic. Heat sealing can join two similar materials together or can join dissimilar materials, one of which has a thermoplastic layer.

Delamination is a mode of failure where a material fractures into layers. A variety of materials including laminate composites and concrete can fail by delamination. Processing can create layers in materials such as steel formed by rolling and plastics and metals from 3D printing which can fail from layer separation. Also, surface coatings such as paints and films can delaminate from the coated substrate.

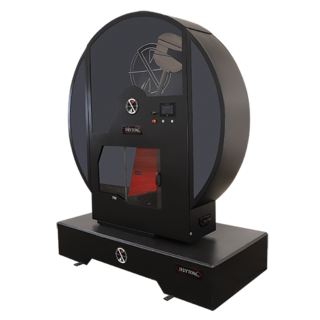
In materials science, the Charpy impact test, also known as the Charpy V-notch test, is a standardized high strain rate test which determines the amount of energy absorbed by a material during fracture. Absorbed energy is a measure of the material's notch toughness. It is widely used in industry, since it is easy to prepare and conduct and results can be obtained quickly and cheaply. A disadvantage is that some results are only comparative. The test was pivotal in understanding the fracture problems of ships during World War II.
Moisture vapor transmission rate (MVTR), also water vapor transmission rate (WVTR), is a measure of the passage of water vapor through a substance. It is a measure of the permeability for vapor barriers.

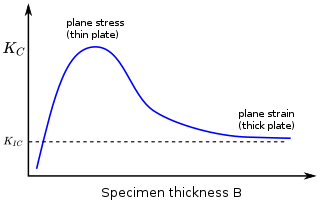
In materials science, fracture toughness is the critical stress intensity factor of a sharp crack where propagation of the crack suddenly becomes rapid and unlimited. A component's thickness affects the constraint conditions at the tip of a crack with thin components having plane stress conditions and thick components having plane strain conditions. Plane strain conditions give the lowest fracture toughness value which is a material property. The critical value of stress intensity factor in mode I loading measured under plane strain conditions is known as the plane strain fracture toughness, denoted . When a test fails to meet the thickness and other test requirements that are in place to ensure plane strain conditions, the fracture toughness value produced is given the designation . Fracture toughness is a quantitative way of expressing a material's resistance to crack propagation and standard values for a given material are generally available.

The Izod impact strength test is an ASTM standard method of determining the impact resistance of materials. A pivoting arm is raised to a specific height and then released. The arm swings down hitting a notched sample, breaking the specimen. The energy absorbed by the sample is calculated from the height the arm swings to after hitting the sample. A notched sample is generally used to determine impact energy and notch sensitivity.

The three-point bending flexural test provides values for the modulus of elasticity in bending , flexural stress , flexural strain and the flexural stress–strain response of the material. This test is performed on a universal testing machine with a three-point or four-point bend fixture. The main advantage of a three-point flexural test is the ease of the specimen preparation and testing. However, this method has also some disadvantages: the results of the testing method are sensitive to specimen and loading geometry and strain rate.

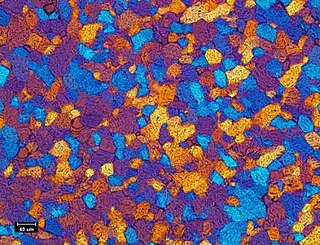
Ceramography is the art and science of preparation, examination and evaluation of ceramic microstructures. Ceramography can be thought of as the metallography of ceramics. The microstructure is the structure level of approximately 0.1 to 100 µm, between the minimum wavelength of visible light and the resolution limit of the naked eye. The microstructure includes most grains, secondary phases, grain boundaries, pores, micro-cracks and hardness microindentions. Most bulk mechanical, optical, thermal, electrical and magnetic properties are significantly affected by the microstructure. The fabrication method and process conditions are generally indicated by the microstructure. The root cause of many ceramic failures is evident in the microstructure. Ceramography is part of the broader field of materialography, which includes all the microscopic techniques of material analysis, such as metallography, petrography and plastography. Ceramography is usually reserved for high-performance ceramics for industrial applications, such as 85–99.9% alumina (Al2O3) in Fig. 1, zirconia (ZrO2), silicon carbide (SiC), silicon nitride (Si3N4), and ceramic-matrix composites. It is seldom used on whiteware ceramics such as sanitaryware, wall tiles and dishware.

Bituminous waterproofing systems are designed to protect residential and commercial buildings. Bitumen is a mixed substance made up of organic liquids that are highly sticky, viscous, and waterproof. These systems are sometimes used to construct roofs, in the form of roofing felt or roll roofing products.
Rubber toughening is a process in which rubber nanoparticles are interspersed within a polymer matrix to increase the mechanical robustness, or toughness, of the material. By "toughening" a polymer it is meant that the ability of the polymeric substance to absorb energy and plastically deform without fracture is increased. Considering the significant advantages in mechanical properties that rubber toughening offers, most major thermoplastics are available in rubber-toughened versions; for many engineering applications, material toughness is a deciding factor in final material selection.

Puncture resistance denotes the relative ability of a material or object to inhibit the intrusion of a foreign object. This is defined by a test method, regulation, or technical specification. It can be measured in several ways ranging from a slow controlled puncture to a rapid impact of a sharp object or a rounded probe.

Abrasion is the process of scuffing, scratching, wearing down, marring, or rubbing away. It can be intentionally imposed in a controlled process using an abrasive. Abrasion can be an undesirable effect of exposure to normal use or exposure to the elements.

Plastic film is a thin continuous polymeric material. Thicker plastic material is often called a "sheet". These thin plastic membranes are used to separate areas or volumes, to hold items, to act as barriers, or as printable surfaces.
Rising Step Load Testing is a testing system that can apply loads in tension or bending to evaluate hydrogen-induced cracking. It was specifically designed to conduct the accelerated ASTM F1624 step-modified, slow strain rate tests on a variety of test coupons or structural components. It can also function to conduct conventional ASTM E8 tensile tests; ASTM F519 200-hr Sustained Load Tests with subsequent programmable step loads to rupture for increased reliability; and ASTM G129 Slow Strain Rate Tensile tests.

Tensile testing, also known as tension testing, is a fundamental materials science and engineering test in which a sample is subjected to a controlled tension until failure. Properties that are directly measured via a tensile test are ultimate tensile strength, breaking strength, maximum elongation and reduction in area. From these measurements the following properties can also be determined: Young's modulus, Poisson's ratio, yield strength, and strain-hardening characteristics. Uniaxial tensile testing is the most commonly used for obtaining the mechanical characteristics of isotropic materials. Some materials use biaxial tensile testing. The main difference between these testing machines being how load is applied on the materials.
Polymer fracture is the study of the fracture surface of an already failed material to determine the method of crack formation and extension in polymers both fiber reinforced and otherwise. Failure in polymer components can occur at relatively low stress levels, far below the tensile strength because of four major reasons: long term stress or creep rupture, cyclic stresses or fatigue, the presence of structural flaws and stress-cracking agents. Formations of submicroscopic cracks in polymers under load have been studied by x ray scattering techniques and the main regularities of crack formation under different loading conditions have been analyzed. The low strength of polymers compared to theoretically predicted values are mainly due to the many microscopic imperfections found in the material. These defects namely dislocations, crystalline boundaries, amorphous interlayers and block structure can all lead to the non-uniform distribution of mechanical stress.
In materials modeled by linear elastic fracture mechanics (LEFM), crack extension occurs when the applied energy release rate exceeds , where is the material's resistance to crack extension.
Crack tip opening displacement (CTOD) or is the distance between the opposite faces of a crack tip at the 90° intercept position. The position behind the crack tip at which the distance is measured is arbitrary but commonly used is the point where two 45° lines, starting at the crack tip, intersect the crack faces. The parameter is used in fracture mechanics to characterize the loading on a crack and can be related to other crack tip loading parameters such as the stress intensity factor and the elastic-plastic J-integral.
References
- ↑ NAHAD GLOSSARY, http://www.nahad.org/aws/NAHAD/pt/sp/hsi_glossaries, 15 June 2012
- 1 2 3 4 Tear Resistance., "Physical Properties: Tear Resistance". Archived from the original on 25 May 2012. Retrieved 15 June 2012., 15 June 2012
- ↑ John Gilbert Kaufman (2001). Fracture Resistance of Aluminum Alloys: Notch Toughness, Tear Resistance. ASM International. p. 38. ISBN 9780871707321.