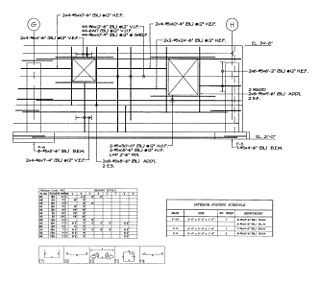
Computer-aided design (CAD) is the use of computers to aid in the creation, modification, analysis, or optimization of a design. CAD software is used to increase the productivity of the designer, improve the quality of design, improve communications through documentation, and to create a database for manufacturing. CAD output is often in the form of electronic files for print, machining, or other manufacturing operations. The term CADD is also used.

An engineering drawing is a type of technical drawing that is used to convey information about an object. A common use is to specify the geometry necessary for the construction of a component and is called a detail drawing. Usually, a number of drawings are necessary to completely specify even a simple component. The drawings are linked together by a master drawing or assembly drawing which gives the drawing numbers of the subsequent detailed components, quantities required, construction materials and possibly 3D images that can be used to locate individual items. Although mostly consisting of pictographic representations, abbreviations and symbols are used for brevity and additional textual explanations may also be provided to convey the necessary information.
Creo Elements/Pro, not to be confused with Creo Elements/Direct Modeling, which was formerly known, together with Creo Parametric, as Pro/Engineer and Wildfire, is a solid modeling or CAD, CAM, CAE, and associative 3D modeling application, running on Microsoft Windows.

An inspection is, most generally, an organized examination or formal evaluation exercise. In engineering activities inspection involves the measurements, tests, and gauges applied to certain characteristics in regard to an object or activity. The results are usually compared to specified requirements and standards for determining whether the item or activity is in line with these targets, often with a Standard Inspection Procedure in place to ensure consistent checking. Inspections are usually non-destructive.

Geometric Dimensioning and Tolerancing (GD&T) is a system for defining and communicating engineering tolerances. It uses a symbolic language on engineering drawings and computer-generated three-dimensional solid models that explicitly describe nominal geometry and its allowable variation. It tells the manufacturing staff and machines what degree of accuracy and precision is needed on each controlled feature of the part. GD&T is used to define the nominal geometry of parts and assemblies, to define the allowable variation in form and possible size of individual features, and to define the allowable variation between features.

In industry, product lifecycle management (PLM) is the process of managing the entire lifecycle of a product from inception, through engineering design and manufacture, to service and disposal of manufactured products. PLM integrates people, data, processes and business systems and provides a product information backbone for companies and their extended enterprise.
ISO 10303 is an ISO standard for the computer-interpretable representation and exchange of product manufacturing information. Its official title is: Automation systems and integration — Product data representation and exchange. It is known informally as "STEP", which stands for "Standard for the Exchange of Product model data". ISO 10303 can represent 3D objects in Computer-aided design (CAD) and related information.
Product and manufacturing information, also abbreviated PMI, conveys non-geometric attributes in 3D computer-aided design (CAD) and Collaborative Product Development systems necessary for manufacturing product components and assemblies. PMI may include geometric dimensions and tolerances, 3D annotation (text) and dimensions, surface finish, and material specifications. PMI is used in conjunction with the 3D model within model-based definition to allow for the elimination of 2D drawings for data set utilization.
CAD Standards are a set of guidelines for the way Computer-aided drafting (CAD), or (CADD) Computer Aided Design and Drawing, drawings should appear, to improve productivity and interchange of CAD documents between different offices and CAD programs, especially in architecture and engineering.
JT is an ISO-standardized 3D data format and is in industry used for product visualization, collaboration, CAD data exchange, and in some also for long-term data retention. It can contain any combination of approximate (faceted) data, boundary representation surfaces (NURBS), Product and Manufacturing Information (PMI), and Metadata either exported from the native CAD system or inserted by a product data management (PDM) system.
CAD data exchange is a modality of data exchange used to translate data between different Computer-aided design (CAD) authoring systems or between CAD and other downstream CAx systems.
Model-based definition (MBD), sometimes called digital product definition (DPD), is the practice of using 3D models within 3D CAD software to define individual components and product assemblies. The types of information included are geometric dimensioning and tolerancing (GD&T), component level materials, assembly level bills of materials, engineering configurations, design intent, etc. By contrast, other methodologies have historically required accompanying use of 2D engineering drawings to provide such details.

A shop drawing is a drawing or set of drawings produced by the contractor, supplier, manufacturer, subcontractor, consultants, or fabricator. Shop drawings are typically required for prefabricated components. Examples of these include: elevators, structural steel, trusses, pre-cast concrete, windows, appliances, cabinets, air handling units, and millwork. Also critical are the installation and coordination shop drawings of the MEP trades such as sheet metal ductwork, piping, plumbing, fire protection, and electrical. Shop drawings are produced by contractors and suppliers under their contract with the owner. The shop drawing is the manufacturer’s or the contractor’s drawn version of information shown in the construction documents. The shop drawing normally shows more detail than the construction documents. It is drawn to explain the fabrication and/or installation of the items to the manufacturer’s production crew or contractor's installation crews. The style of the shop drawing is usually very different from that of the architect’s drawing. The shop drawing’s primary emphasis is on the particular product or installation and excludes notation concerning other products and installations, unless integration with the subject product is necessary.
A specification often refers to a set of documented requirements to be satisfied by a material, design, product, or service. A specification is often a type of technical standard.

STEP-NC is a machine tool control language that extends the ISO 10303 STEP standards with the machining model in ISO 14649, adding geometric dimension and tolerance data for inspection, and the STEP PDM model for integration into the wider enterprise. The combined result has been standardized as ISO 10303-238.
Tolerance analysis is the general term for activities related to the study of accumulated variation in mechanical parts and assemblies. Its methods may be used on other types of systems subject to accumulated variation, such as mechanical and electrical systems. Engineers analyze tolerances for the purpose of evaluating geometric dimensioning and tolerancing (GD&T). Methods include 2D tolerance stacks, 3D Monte Carlo simulations, and datum conversions.
A reference dimension is a dimension on an engineering drawing provided for information only. Reference dimensions are provided for a variety of reasons and are often an accumulation of other dimensions that are defined elsewhere. These dimensions may also be used for convenience to identify a single dimension that is specified elsewhere.
Model-based enterprise (MBE) is a term used in manufacturing, to describe a strategy where an annotated digital three-dimensional (3D) model of a product serves as the authoritative information source for all activities in that product's lifecycle.
ASME Y14.5 is a standard published by the American Society of Mechanical Engineers (ASME) to establish rules, symbols, definitions, requirements, defaults, and recommended practices for stating and interpreting Geometric Dimensions and Tolerances (GD&T). ASME/ANSI issued the first version of this Y-series standard in 1973.


