1980 Game
| Position | 1980 a |
|---|---|
| Fullback | |
| Wing | |
| Centre | |
| Centre | |
| Wing | |
| Five-Eighth | |
| Halfback | |
| Prop | |
| Hooker | |
| Prop | |
| Second Row | |
| Second Row | |
| Lock | |
| Replacement | |
| Replacement | |
This article shows the players that have played in the New South Wales State of Origin team in the history of the Rugby League State of Origin series.
| Position | 1980 a |
|---|---|
| Fullback | |
| Wing | |
| Centre | |
| Centre | |
| Wing | |
| Five-Eighth | |
| Halfback | |
| Prop | |
| Hooker | |
| Prop | |
| Second Row | |
| Second Row | |
| Lock | |
| Replacement | |
| Replacement | |
| Position | 1981 a | |
|---|---|---|
| Fullback | | |
| Wing | | |
| Centre | | |
| Centre | | |
| Wing | | |
| Five-Eighth | | |
| Halfback | | |
| Prop | | |
| Hooker | | |
| Prop | | |
| Second Row | | |
| Second Row | | |
| Lock | | |
| Replacement | | |
| Replacement | | |
| Position | Game 1 | Game 2 | Game 3 | |||
|---|---|---|---|---|---|---|
| Fullback | | | ||||
| Wing | | | | |||
| Centre | | | | |||
| Centre | | | | |||
| Wing | | | | |||
| Five-Eighth | | | ||||
| Halfback | | |||||
| Prop | | | ||||
| Hooker | | |||||
| Prop | | | ||||
| Second Row | | | | |||
| Second Row | | | | |||
| Lock | | |||||
| Replacement | | | | |||
| Replacement | | | ||||
| Position | Game 1 | Game 2 | Game 3 | |||
|---|---|---|---|---|---|---|
| Fullback | | | ||||
| Wing | | | ||||
| Centre | | | ||||
| Centre | | | ||||
| Wing | | | ||||
| Five-Eighth | | | ||||
| Halfback | | | ||||
| Prop | | | ||||
| Hooker | | | | |||
| Prop | | | ||||
| Second Row | | | | |||
| Second Row | | Paul Field | ||||
| Lock | | | | |||
| Replacement | | | | |||
| Replacement | | | | |||
| Position | Game 1 | Game 2 | Game 3 | |||
|---|---|---|---|---|---|---|
| Fullback | | |||||
| Wing | | | ||||
| Centre | | | | |||
| Centre | | | ||||
| Wing | | |||||
| Five-Eighth | | | | |||
| Halfback | | | | |||
| Prop | | |||||
| Hooker | Rex Wright | | ||||
| Prop | | | | |||
| Second Row | | |||||
| Second Row | | | ||||
| Lock | | | ||||
| Replacement | | | | |||
| Replacement | | | ||||
| Position | Game 1 | Game 2 | Game 3 | |||||||
|---|---|---|---|---|---|---|---|---|---|---|
| Fullback | | |||||||||
| Wing | | |||||||||
| Centre | | |||||||||
| Centre | | |||||||||
| Wing | | |||||||||
| Five-Eighth | | |||||||||
| Halfback | | | ||||||||
| Prop | | |||||||||
| Hooker | | |||||||||
| Prop | | |||||||||
| Second Row | | | ||||||||
| Second Row | | |||||||||
| Lock | | | ||||||||
| Replacement | | |||||||||
| Replacement | | | ||||||||
| Position | Game 1 | Game 2 | Game 3 | |||
|---|---|---|---|---|---|---|
| Fullback | | |||||
| Wing | | | | |||
| Centre | | |||||
| Centre | | |||||
| Wing | | | ||||
| Five-Eighth | | |||||
| Halfback | | |||||
| Prop | | |||||
| Hooker | | |||||
| Prop | | |||||
| Second Row | | |||||
| Second Row | | |||||
| Lock | | |||||
| Replacement | | |||||
| Replacement | | |||||
| Position | Game 1 | Game 2 | Game 3 | Game 4 b | ||||
|---|---|---|---|---|---|---|---|---|
| Fullback | | | ||||||
| Wing | | | ||||||
| Centre | | | | |||||
| Centre | | | ||||||
| Wing | | | | |||||
| Five-Eighth | | | ||||||
| Halfback | | | ||||||
| Prop | | | | |||||
| Hooker | | |||||||
| Prop | | | ||||||
| Second Row | | | | |||||
| Second Row | | | ||||||
| Lock | | | ||||||
| Replacement | | | | |||||
| Replacement | | | | | ||||
| Position | Game 1 | Game 2 | Game 3 | |||
|---|---|---|---|---|---|---|
| Fullback | | | ||||
| Wing | | | ||||
| Centre | | |||||
| Centre | | |||||
| Wing | | |||||
| Five-Eighth | | | | |||
| Halfback | | | ||||
| Prop | | | | |||
| Hooker | | | ||||
| Prop | | |||||
| Second Row | | | ||||
| Second Row | | |||||
| Lock | | | ||||
| Replacement | | | | |||
| Replacement | | | | |||
| Position | Game 1 | Game 2 | Game 3 | |||||
|---|---|---|---|---|---|---|---|---|
| Fullback | | |||||||
| Wing | | |||||||
| Centre | | | | |||||
| Centre | | | ||||||
| Wing | | | ||||||
| Five-Eighth | | | | |||||
| Halfback | | | ||||||
| Prop | | | ||||||
| Hooker | | | ||||||
| Prop | | | ||||||
| Second Row | | |||||||
| Second Row | | | | |||||
| Lock | | | ||||||
| Replacement | | | | |||||
| Replacement | | | ||||||
| Replacement | | | | |||||
| Replacement | | | ||||||
| Position | Game 1 | Game 2 | Game 3 | |||
|---|---|---|---|---|---|---|
| Fullback | | |||||
| Wing | | |||||
| Centre | | | | |||
| Centre | | |||||
| Wing | | | ||||
| Five-Eighth | | | | |||
| Halfback | | |||||
| Prop | | | ||||
| Hooker | | |||||
| Prop | | |||||
| Second Row | | |||||
| Second Row | | |||||
| Lock | | |||||
| Replacement | | | ||||
| Replacement | | |||||
| Replacement | | | | |||
| Replacement | | | | |||
| Position | Game 1 | Game 2 | Game 3 | |||
|---|---|---|---|---|---|---|
| Fullback | | | | |||
| Wing | | |||||
| Centre | | | ||||
| Centre | | | ||||
| Wing | | | ||||
| Five-Eighth | | | ||||
| Halfback | | |||||
| Prop | | |||||
| Hooker | | |||||
| Prop | | | ||||
| Second Row | | | ||||
| Second Row | | | | |||
| Lock | | | | |||
| Interchange | | | ||||
| Interchange | | | | |||
| Interchange | | | ||||
| Interchange | | | | |||
| Position | Game 1 | Game 2 | Game 3 | |||
|---|---|---|---|---|---|---|
| Fullback | | |||||
| Wing | | | ||||
| Centre | | |||||
| Centre | | |||||
| Wing | | |||||
| Five-Eighth | | |||||
| Halfback | | | ||||
| Prop | | |||||
| Hooker | | |||||
| Prop | | |||||
| Second Row | | |||||
| Second Row | | |||||
| Lock | | |||||
| Interchange | | | | |||
| Interchange | | |||||
| Interchange | | |||||
| Interchange | | |||||
| Position | Game 1 | Game 2 | Game 3 | |||
|---|---|---|---|---|---|---|
| Fullback | | |||||
| Wing | | | ||||
| Centre | | | ||||
| Centre | | |||||
| Wing | | |||||
| Five-Eighth | | |||||
| Halfback | | |||||
| Prop | | |||||
| Hooker | | | | |||
| Prop | | | ||||
| Second Row | | |||||
| Second Row | | |||||
| Lock | | |||||
| Interchange | | | ||||
| Interchange | | | ||||
| Interchange | | | | |||
| Interchange | | |||||
| Position | Game 1 | Game 2 | Game 3 | |||
|---|---|---|---|---|---|---|
| Fullback | | |||||
| Wing | | | ||||
| Centre | | |||||
| Centre | | |||||
| Wing | | | ||||
| Five-Eighth | | |||||
| Halfback | | |||||
| Prop | | | ||||
| Hooker | | |||||
| Prop | | | ||||
| Second Row | | |||||
| Second Row | | | ||||
| Lock | | | ||||
| Interchange | | | ||||
| Interchange | | |||||
| Interchange | | | ||||
| Interchange | | |||||
| Position | Game 1 | Game 2 | Game 3 | |||
|---|---|---|---|---|---|---|
| Fullback | | |||||
| Wing | | |||||
| Centre | | |||||
| Centre | | |||||
| Wing | | | | |||
| Five-Eighth | | | | |||
| Halfback | | | ||||
| Prop | | |||||
| Hooker | | |||||
| Prop | | | | |||
| Second Row | | | | |||
| Second Row | | | | |||
| Lock | | | | |||
| Interchange | | | | |||
| Interchange | | |||||
| Interchange | | | | |||
| Interchange | | | ||||
| Position | Game 1 | Game 2 | Game 3 | |||
|---|---|---|---|---|---|---|
| Fullback | | |||||
| Wing | | |||||
| Centre | | |||||
| Centre | | |||||
| Wing | | |||||
| Five-Eighth | | |||||
| Halfback | | |||||
| Prop | | |||||
| Hooker | | |||||
| Prop | | |||||
| Second Row | | |||||
| Second Row | | |||||
| Lock | | |||||
| Interchange | | |||||
| Interchange | | |||||
| Interchange | | |||||
| Interchange | | |||||
| Position | Game 1 | Game 2 | Game 3 | |||
|---|---|---|---|---|---|---|
| Fullback | | |||||
| Wing | | |||||
| Centre | | | | |||
| Centre | | |||||
| Wing | | |||||
| Five-Eighth | | | ||||
| Halfback | | |||||
| Prop | | | ||||
| Hooker | | | ||||
| Prop | | | ||||
| Second Row | | | ||||
| Second Row | | | ||||
| Lock | | | ||||
| Interchange | | | | |||
| Interchange | | |||||
| Interchange | | | | |||
| Interchange | | | | |||
| Position | Game 1 | Game 2 | Game 3 | |||
|---|---|---|---|---|---|---|
| Fullback | | |||||
| Wing | | | ||||
| Centre | | | ||||
| Centre | | |||||
| Wing | | |||||
| Five-Eighth | | | | |||
| Halfback | | |||||
| Prop | | | ||||
| Hooker | | | ||||
| Prop | | |||||
| Second Row | | |||||
| Second Row | | | | |||
| Lock | | | | |||
| Interchange | | | ||||
| Interchange | | |||||
| Interchange | | | ||||
| Interchange | | |||||
| Position | Game 1 | Game 2 | Game 3 | |||
|---|---|---|---|---|---|---|
| Fullback | | | ||||
| Wing | | |||||
| Centre | | |||||
| Centre | | | ||||
| Wing | | |||||
| Five-Eighth | | |||||
| Halfback | | |||||
| Prop | | |||||
| Hooker | | |||||
| Prop | | | ||||
| Second Row | | |||||
| Second Row | | | ||||
| Lock | | | ||||
| Interchange | | | ||||
| Interchange | | | ||||
| Interchange | | | ||||
| Interchange | | | ||||
| Position | Game 1 | Game 2 | Game 3 | |||
|---|---|---|---|---|---|---|
| Fullback | | |||||
| Wing | | |||||
| Centre | | | ||||
| Centre | | |||||
| Wing | | |||||
| Five-Eighth | | |||||
| Halfback | | | | |||
| Prop | | |||||
| Hooker | | |||||
| Prop | | | ||||
| Second Row | | |||||
| Second Row | | | ||||
| Lock | | | | |||
| Interchange | | | ||||
| Interchange | | |||||
| Interchange | | | ||||
| Interchange | | | | |||
| Position | Game 1 | Game 2 | Game 3 | |||
|---|---|---|---|---|---|---|
| Fullback | | |||||
| Wing | | |||||
| Centre | | | ||||
| Centre | | | ||||
| Wing | | |||||
| Five-Eighth | | | | |||
| Halfback | | |||||
| Prop | | |||||
| Hooker | | |||||
| Prop | | | ||||
| Second Row | | |||||
| Second Row | | | | |||
| Lock | | |||||
| Interchange | | | | |||
| Interchange | | |||||
| Interchange | | | ||||
| Interchange | | |||||
| Position | Game 1 | Game 2 | Game 3 | |||
|---|---|---|---|---|---|---|
| Fullback | | |||||
| Wing | | |||||
| Centre | | |||||
| Centre | | |||||
| Wing | | |||||
| Five-Eighth | | |||||
| Halfback | | |||||
| Prop | | |||||
| Hooker | | |||||
| Prop | | |||||
| Second Row | | | ||||
| Second Row | | | ||||
| Lock | | | ||||
| Interchange | | |||||
| Interchange | | |||||
| Interchange | | |||||
| Interchange | | | | |||
| Position | Game 1 | Game 2 | Game 3 | |||
|---|---|---|---|---|---|---|
| Fullback | | | ||||
| Wing | | | | |||
| Centre | | | | |||
| Centre | | | ||||
| Wing | | |||||
| Five-Eighth | | | ||||
| Halfback | | | | |||
| Prop | | | | |||
| Hooker | | |||||
| Prop | | |||||
| Second Row | | |||||
| Second Row | | | ||||
| Lock | | | ||||
| Interchange | | |||||
| Interchange | | | ||||
| Interchange | | |||||
| Interchange | | |||||
| Position | Game 1 | Game 2 | Game 3 | |||
|---|---|---|---|---|---|---|
| Fullback | | |||||
| Wing | | |||||
| Centre | | |||||
| Centre | | |||||
| Wing | | | ||||
| Five-Eighth | | | ||||
| Halfback | | | ||||
| Prop | | | | |||
| Hooker | | |||||
| Prop | | |||||
| Second Row | | |||||
| Second Row | | |||||
| Lock | | |||||
| Interchange | | | ||||
| Interchange | | | ||||
| Interchange | | | | |||
| Interchange | | |||||
| Position | Game 1 | Game 2 | Game 3 | |||
|---|---|---|---|---|---|---|
| Fullback | | |||||
| Wing | | | ||||
| Centre | | | ||||
| Centre | | | ||||
| Wing | | |||||
| Five-Eighth | | | ||||
| Halfback | | | ||||
| Prop | | |||||
| Hooker | | |||||
| Prop | | | ||||
| Second Row | | |||||
| Second Row | | | | |||
| Lock | | | | |||
| Interchange | | | | |||
| Interchange | | | ||||
| Interchange | | |||||
| Interchange | | |||||
| Position | Game 1 | Game 2 | Game 3 | |||
|---|---|---|---|---|---|---|
| Fullback | | | ||||
| Wing | | | ||||
| Centre | | | ||||
| Centre | | |||||
| Wing | | |||||
| Five-Eighth | | | ||||
| Halfback | | | ||||
| Prop | | | | |||
| Hooker | | |||||
| Prop | | |||||
| Second Row | | | ||||
| Second Row | | |||||
| Lock | | | ||||
| Interchange | | |||||
| Interchange | | | | |||
| Interchange | | | ||||
| Interchange | | | | |||
| Position | Game 1 | Game 2 | Game 3 |
|---|---|---|---|
| Fullback | | | |
| Wing | | | |
| Centre | | ||
| Centre | | | |
| Wing | | ||
| Five-Eighth | | | |
| Halfback | | | |
| Prop | | | |
| Hooker | | ||
| Prop | | ||
| Second Row | | ||
| Second Row | | | |
| Lock | | ||
| Interchange | | ||
| Interchange | | ||
| Interchange | | | |
| Interchange | | | |
| Position | Game 1 | Game 2 | Game 3 |
|---|---|---|---|
| Fullback | | ||
| Wing | | ||
| Centre | | | |
| Centre | | | |
| Wing | | | |
| Five-Eighth | | | |
| Halfback | | | |
| Prop | | | |
| Hooker | | | |
| Prop | | | |
| Second Row | | | |
| Second Row | | ||
| Lock | | | |
| Interchange | | | |
| Interchange | | | |
| Interchange | | | |
| Interchange | | | |
| Coach | | ||
| Position | Game 1 | Game 2 | Game 3 |
|---|---|---|---|
| Fullback | | | |
| Wing | | | |
| Centre | | | |
| Centre | | | |
| Wing | | | |
| Five-Eighth | | | |
| Halfback | | | |
| Prop | | | |
| Hooker | | ||
| Prop | | | |
| 2nd Row | | | |
| 2nd Row | | | |
| Lock | | | |
| Interchange | | | |
| Interchange | | | |
| Interchange | | | |
| Interchange | | | |
| 18th man f | | | |
| Coach | | ||
| Position | Game 1 | Game 2 | Game 3 |
|---|---|---|---|
| Fullback | | | |
| Wing | | | |
| Centre | | | |
| Centre | | ||
| Wing | | ||
| Five-Eighth | | ||
| Halfback | | ||
| Prop | | | |
| Hooker | | | |
| Prop | | | |
| 2nd Row | | | |
| 2nd Row | | | |
| Lock | | | |
| Interchange | | | |
| Interchange | | | |
| Interchange | | | |
| Interchange | | | |
| 18th man f | | | |
| Coach | | ||
| Position | Game 1 | Game 2 | Game 3 |
|---|---|---|---|
| Fullback | | ||
| Wing | | ||
| Centre | | ||
| Centre | | ||
| Wing | | | |
| Five-Eighth | | ||
| Halfback | | ||
| Prop | | | |
| Hooker | | ||
| Prop | | ||
| 2nd Row | | | |
| 2nd Row | | | |
| Lock | | | |
| Interchange | | | |
| Interchange | | | |
| Interchange | | ||
| Interchange | | | |
| Coach | Ricky Stuart | ||
* Michael Jennings became the first selected player not to be playing First Grade since 1982 when Phil Duke was selected from the Moree Boomerangs in northern NSW after playing for Country Origin.
| Position | Game 1 | Game 2 | Game 3 |
|---|---|---|---|
| Fullback | | | |
| Wing | | ||
| Centre | | ||
| Centre | | ||
| Wing | | | |
| Five-Eighth | | ||
| Halfback | | ||
| Prop | | | |
| Hooker | | | |
| Prop | | | |
| Second Row | | ||
| Second Row | | ||
| Lock | | ||
| Interchange | | ||
| Interchange | | ||
| Interchange | | | |
| Interchange | | ||
| Coach | | ||
| 18th Man | | | |
1 - Blake Ferguson was originally selected to play in game two but was withdrawn after being suspended by the NRL. He was replaced by Nathan Merritt.
2 - Jarryd Hayne was originally selected to play in game three but withdrew due to injury. He was replaced by James McManus.
3 - Paul Gallen was originally selected to play in game three but withdrew due to injury. He was replaced by Aaron Woods as prop, and Robbie Farah as captain.
4 - Kurt Gidley was originally selected to play in game one but withdrew due to injury. He was replaced by Josh Reynolds.
5 - Josh Reynolds was originally selected to play in game three but under consultation with coach Laurie Daley was dropped to 18th Man. He was replaced by Boyd Cordner
| Position | Game 1 | Game 2 | Game 3 | |
|---|---|---|---|---|
| Fullback | | |||
| Wing | | | | |
| Centre | | | ||
| Centre | | | ||
| Wing | | |||
| Five-eighth | | |||
| Halfback | | |||
| Prop | | | ||
| Hooker | | |||
| Prop | | | ||
| Second row | | |||
| Second row | | |||
| Lock | | | ||
| Interchange | | | ||
| Interchange | | | ||
| Interchange | | | ||
| Interchange | | | ||
| Coach | | |||
| 18th Man | | | ||
| 19th Man | | | ||
| Position | Game 1 | Game 2 | Game 3 |
|---|---|---|---|
| Fullback | | ||
| Wing | | ||
| Centre | | ||
| Centre | | ||
| Wing | | | |
| Five-eighth | | ||
| Halfback | | ||
| Prop | | ||
| Hooker | | | |
| Prop | | ||
| Second row | | ||
| Second row | | ||
| Lock | | | |
| Interchange | | ||
| Interchange | | ||
| Interchange | | ||
| Interchange | | | |
| Coach | | ||
| 18th Man | | | |
| 19th Man | | | |
| 20th Man | | ||
1 - Gallen retained the captaincy role from Farah in Game II.
2 - Robbie Farah was originally chosen to play in Game lll but withdrew due to a hand injury, he was replaced by Michael Ennis.
| Position | Game 1 | Game 2 | Game 3 |
|---|---|---|---|
| Fullback | | | |
| Wing | | ||
| Centre | | ||
| Centre | | | |
| Wing | | ||
| Five-eighth | | | |
| Halfback | | | |
| Prop | | ||
| Hooker | | ||
| Prop | | | |
| Second row | | | |
| Second row | | ||
| Lock | | | |
| Interchange | | | |
| Interchange | | | |
| Interchange | | ||
| Interchange | | ||
| Coach | | ||
| 18th man | | | |
| 19th man | | ||
| 20th man | | ||
1 - Josh Dugan was originally selected to play in Game I, but he withdrew due to an elbow injury. He was replaced by Josh Morris.
2 - James Tamou was originally selected to start on the bench in Game I, but however on game day he swapped positions with Greg Bird. Bird was moved from lock to bench, Tamou moved from bench to prop and Paul Gallen from prop to lock.
3 - Wade Graham was originally selected to play in Game II, but he was suspended. He was replaced by Tyson Frizell.
4 - Josh Morris was originally selected to play in Game II, but was forced out due to injury. Dylan Walker was moved from the bench to centre, while Jack Bird was promoted from 19th man to the bench.
5 - Adam Reynolds was originally selected to play halfback in Game III, but withdrew due to injury. James Maloney shifted from five-eighth to halfback and Matt Moylan, who had originally been dropped from the squad for James Tedesco, was recalled into the squad to start at five-eighth.
| Position | Game I | Game II | Game III |
|---|---|---|---|
| Fullback | | ||
| Wing | | ||
| Centre | | ||
| Centre | | ||
| Wing | | ||
| Five-eighth | | ||
| Halfback | | ||
| Prop | | ||
| Hooker | | ||
| Prop | | ||
| Second row | | ||
| Second row | | ||
| Lock | | ||
| Interchange | | ||
| Interchange | | ||
| Interchange | | ||
| Interchange | | ||
| Coach | | ||
| 18th | | | |
| 19th | | | |
| 20th | | | |
Notes
| Position | Game 1 | Game 2 | Game 3 |
|---|---|---|---|
| Fullback | | ||
| Wing | | ||
| Centre | | ||
| Centre | | ||
| Wing | | ||
| Five-eighth | | ||
| Halfback | | ||
| Prop | | ||
| Hooker | | ||
| Prop | | | |
| Second row | | ||
| Second row | | ||
| Lock | | | |
| Interchange | | | |
| Interchange | | | |
| Interchange | | ||
| Interchange | | ||
| Coach | | ||
| Position | Game 1 | Game 2 | Game 3 |
|---|---|---|---|
| Fullback | | ||
| Wing | | | |
| Centre | | | |
| Centre | | | |
| Wing | | ||
| Five-eighth | | | |
| Halfback | | | |
| Prop | | | |
| Hooker | | ||
| Prop | | ||
| Second row | | ||
| Second row | | ||
| Lock | | ||
| Interchange | | | |
| Interchange | | | |
| Interchange | | ||
| Interchange | | | |
| Coach | | ||
| 18th man | | | |
| 19th man | | | |
1 – Nathan Cleary was originally selected in the squad for game three, but was forced to withdraw due to injury. He was replaced by Mitchell Pearce.
2 – Tariq Sims was originally selected in the squad for game three, but was forced to withdraw due to suspension. He was replaced by David Klemmer.
| Position | Game 1 | Game 2 | Game 3 |
|---|---|---|---|
| Fullback | | | |
| Wing | | ||
| Centre | | ||
| Centre | | ||
| Wing | | ||
| Five-eighth | | | |
| Halfback | | ||
| Prop | | ||
| Hooker | | ||
| Prop | | | |
| Second row | | | |
| Second row | | ||
| Lock | | ||
| Interchange | | | |
| Interchange | | | |
| Interchange | | | |
| Interchange | | | |
| Coach | | ||
| Position | Game 1 | Game 2 | Game 3 |
|---|---|---|---|
| Fullback | | ||
| Wing | | ||
| Centre | | ||
| Centre | | ||
| Wing | | ||
| Five-eighth | | | |
| Halfback | | | |
| Prop | | | |
| Hooker | | ||
| Prop | | | |
| Second row | | ||
| Second row | | ||
| Lock | | ||
| Interchange | | | |
| Interchange | | | |
| Interchange | | ||
| Interchange | | ||
| 18th man | | | |
| Coach | | ||
| Position | Game 1 | Game 2 | Game 3 |
|---|---|---|---|
| Fullback | | ||
| Wing | | ||
| Centre | | | |
| Centre | | | |
| Wing | | ||
| Five-eighth | | ||
| Halfback | | ||
| Prop | | | |
| Hooker | | | |
| Prop | | | |
| Second row | | | |
| Second row | | ||
| Lock | | ||
| Interchange | | | |
| Interchange | | | |
| Interchange | | | |
| Interchange | | | |
| 18th man | | | |
| Coach | | ||
1 – Jordan McLean was originally selected in the squad for game three, but was forced to withdraw due to injury. He was replaced by Jacob Saifiti.
| Position | Game 1 | Game 2 | Game 3 |
|---|---|---|---|
| Fullback | | ||
| Wing | | ||
| Centre | | ||
| Centre | | | |
| Wing | | ||
| Five-eighth | | | |
| Halfback | | | |
| Prop | | | |
| Hooker | | | |
| Prop | | | |
| Second row | | | |
| Second row | | | |
| Lock | | | |
| Interchange | | | |
| Interchange | | | |
| Interchange | | | |
| Interchange | | | |
| Replacement | | | |
| Reserve | | | |
| Coach | | ||
| Position | Game 1 | Game 2 | Game 3 |
|---|---|---|---|
| Fullback | | | |
| Wing | | ||
| Centre | | | |
| Centre | | ||
| Wing | | ||
| Five-eighth | | ||
| Halfback | | | |
| Prop | | ||
| Hooker | | ||
| Prop | | ||
| Second row | | ||
| Second row | | ||
| Lock | | | |
| Interchange | | | |
| Interchange | | ||
| Interchange | | | |
| Interchange | | ||
| Replacement | | | |
| Reserve | | | |
| Reserve | | | |
| Coach | | ||

Michael Ennis is an Australian sports commentator for Fox League and former professional rugby league footballer. A New South Wales State of Origin representative hooker, he played for the Canterbury-Bankstown Bulldogs, Brisbane Broncos, St George Illawarra Dragons, Newcastle Knights and the Cronulla-Sutherland Sharks, with whom he won the 2016 NRL premiership.

Robert Peter Farah is a former professional rugby league footballer who played in the 2000s and 2010s. An Australian international, Lebanese international and captain of New South Wales Blues team, he has played the majority of his professional career with the Wests Tigers, with whom he won the 2005 NRL Premiership. Between 2006 and 2012, Farah played for City in six City vs Country representative games, captaining the team from 2009 onwards. He played for the South Sydney Rabbitohs during the 2017 and 2018 National Rugby League seasons.

The 2009 State of Origin series was the 28th time that the annual three-game series between the Queensland and New South Wales representative rugby league football teams was played entirely under 'state of origin' selection rules. Queensland won their first two matches to retain the shield and to record 14 series wins, as well as the first time in Origin history that a state had won the series for four consecutive years. Maroon centre Greg Inglis was awarded the Wally Lewis Medal as player of the series.
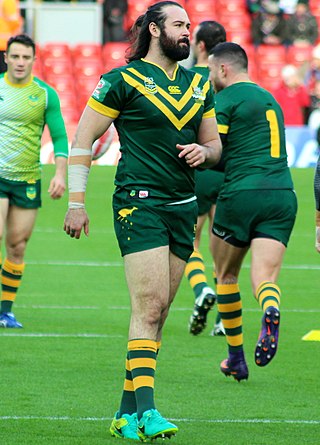
James Tamou is a former professional rugby league footballer who played as a prop for the Townsville Blackhawks on the Queensland Cup
The 2010 All Stars Match was the first time the event was held. The match was a pre season game between representative teams, Indigenous Australians versus the best in the National Rugby League and took place at the Gold Coast's Skilled Park on 13 February 2010. The Indigenous team featured 20 players of aboriginal descent chosen by public votes. Preston Campbell was selected automatically as Indigenous captain. The NRL All Stars featured one player from each of the 16 NRL teams as well as the Australian and New Zealand captains and deputy captains. Along with other rule changes exclusive to the match, the game trialled a new "Double Try" rule where a team can choose to swap a conversion attempt for a second try attempt.
The 2010 State of Origin series was the 29th annual best-of-three series of interstate rugby league football matches between the Queensland and New South Wales representative teams played entirely under 'state of origin' selection rules. For the second year in a row, a Queensland victory set a new record for consecutive State of Origin titles, reaching five. Queensland won all three matches, completing their first series white-wash since 1995.
Aaron Woods is a former Australian rugby league forward who captained Wests Tigers and played for the Canterbury-Bankstown Bulldogs, Cronulla-Sutherland Sharks, St. George Illawarra Dragons and Manly Warringah Sea Eagles in the National Rugby League (NRL). He has played at representative level for Australia, Prime Minister's XIII, NSW City Origin and New South Wales in the State of Origin series.
The 2011 State of Origin series was the 30th annual best-of-three series of interstate rugby league football matches between the Queensland and New South Wales representative teams contested under "State of Origin" selection rules. For the third successive year a Queensland victory set a new record for consecutive State of Origin titles, reaching six. Game I was played in Brisbane, Game II in Sydney and Game III was again played in Brisbane. Game III was also Australia's most watched sports TV programme for the year 2011.
The 2012 State of Origin series was the 31st time the annual best-of-three series between the Queensland and New South Wales rugby league teams was played entirely under 'state of origin' rules. For the fourth successive year a Queensland victory set a new record for consecutive State of Origin titles, reaching seven. Game I was played at Melbourne's sold out Etihad Stadium and won by Queensland; its television broadcast watched by more than 2.5 million viewers, rating it as the most-watched State of Origin broadcast since the introduction of OzTAM ratings in 1999. New South Wales' series-equalling win in Game II, played at Sydney's sold out ANZ Stadium, set a new TV ratings record for most-watched second game of any series in State of Origin history. The decider, Game III was played at Brisbane's Suncorp Stadium and was won by Queensland. This game set a new record for the highest television audience in Australia for a rugby league match since the introduction of the OzTam ratings system in 2001.
The 2013 All Stars Match was the fourth of the annual representative exhibition matches played between the Indigenous All Stars and the NRL All Stars team which was held on 9 February 2013. Once again the players were selected through a voting scheme which over 40,000 fans polled their selections over the two online voting stages. Final stage voting for both sides were closed on the midnight 14 January. After the success of the previous three events the match was moved from Gold Coast's Skilled Park to the larger capacity Suncorp Stadium in Brisbane. The Indigenous All Stars won the match 32–6 to even the ledger with two wins from the four games played so far. Both Ben Barba and Reece Robinson became the first players to score a hat-trick in an All Stars match. The preceding game included a Women's All Stars exhibition match which was won by the NRL Women's All Stars 22-6.
The 2013 State of Origin series was the 32nd time the annual best-of-three series between the Queensland and New South Wales rugby league teams was played entirely under 'state of origin' rules. It was the first series to be administered by the Australian Rugby League Commission which was created in a major re-structure of the sport's administration in Australia.
The 2014 State of Origin series was the 33rd time the annual best-of-three series between the Queensland and New South Wales rugby league teams has been played entirely under 'state of origin' rules. It is the second series to be administered by the Australian Rugby League Commission which was created in a major restructure of the sport's administration in Australia.
The 2015 State of Origin series was the 34th time the annual best-of-three series between the Queensland and New South Wales rugby league teams to be played entirely under 'state of origin' rules. It was the third series to be administered by the Australian Rugby League Commission which was created in a major restructure of the sport's administration in Australia.
The 2016 All Stars match was the sixth annual representative exhibition All Stars match. For the first time, the match was played between the Indigenous All Stars and a World All Stars team.
The 2017 All Stars match was the seventh annual representative exhibition All Stars match of Australian rugby. The match was played between the Indigenous All Stars and the World All Stars and for the first time, the match was played outside of Queensland. Mal Meninga took over as coach of the World All Stars from Wayne Bennett.

The 2018 State of Origin series was the 37th annual best-of-three series between the Queensland and New South Wales rugby league teams. Before this series, Queensland had won 21 times, NSW 13 times, with two series drawn. The 2018 series was won by New South Wales, after winning the first 2 games of the series, their first since 2014, and their second since 2005.
The 2019 All Stars match was the eighth annual representative exhibition All Stars match of Australian rugby league. The match was played between the Indigenous All Stars and the Māori All Stars and for the first time, the match was played in Victoria's AAMI Park. The match was held on 15 February 2019.
The 2020 All Stars match day was an annual pre-season fixture of Men's and Women's All Stars matches of Australian rugby league. Both games were played on 22 February 2020 at Queensland's Cbus Super Stadium, the original venue the fixture was first played at. The matches were played between the Indigenous All Stars and the Māori All Stars.
The 2020 State of Origin series was the 39th annual best-of-three series between the Queensland and New South Wales rugby league teams. Before this series, Queensland has won 21 times, NSW 15 times, with two series drawn.