Augmented by a giant Handley Page bomber, No. 40 Wing took part in the Battle of Megiddo, General Allenby's final offensive in Palestine, where its units inflicted "wholesale destruction" on Turkish columns through sustained aerial assaults.[8][9] At Wadi Fara on 21 September 1918, the Palestine Brigade, including the 40th Wing's four squadrons, destroyed the bulk of the Turkish Seventh Army as it attempted to cross the Jordan River along an old Roman road leading from Nablus, an early demonstration of the effects of concentrated air attack on ground troops.[10] Williams wrote: "The Turkish Seventh Army ceased to exist and it must be noted that this was entirely the result of attack from the air." A detachment from No. 1 Squadron also aided Major T. E. Lawrence's Arab army north of Amman when it was harassed by German aircraft operating from Deraa.[11]
While the wing's actions during the Battle of Megiddo "assured Allenby's victory" according to historian Lawrence James, the new method of waging war by inflicting "sickening slaughter" from the air provoked a strong reaction from Lieutenant General Edward Bulfin, commander of the British XXI Corps. He confronted Major General Geoffrey Salmond, Air Officer Commanding RAF Middle East, with the comment, "You are a butcher—you call that fighting?"[9]
No. 40 Wing was based at RAF Ismailia in Egypt from 1919, and disbanded on 1 April 1920.[1]
Order of battle
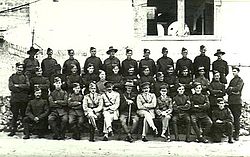
DH.9s of 40th Wing, 1918
Prior to the Battle of Megiddo in September 1918, No. 40 Wing consisted of the following units and equipment:[5]
This page is based on this Wikipedia article Text is available under the CC BY-SA 4.0 license; additional terms may apply. Images, videos and audio are available under their respective licenses.