Higher formation insignia of the British Army

Last updated

This page displays the formation signs of higher formations (above division) of the British Army during the First and Second World Wars, and after. For completeness it also shows those signs of Commonwealth and Empire formations which fought alongside the British, and multi national formations they were a part of. In addition to the field forces, lines of communication and home rear echelon formation signs are also shown.

Contents

First World War

Armies and Corps used the pre-existing scheme of red and black or red and white for army and corps respectively, with a number applied as an identifier. When this insecure method of identification was banned by order in 1916, other signs were used, but the army and corps colours continued to be used in some cases. These designs were used as vehicle signs and on notices, and not sewn directly on to the uniform. Army and Corps command personnel wore armbands when required (red-black-red for army or red-white-red for corps) to which was added the relevant sign. [1]

Army

Corps

Commonwealth and Empire

Second World War

World War II British battledress arm of service (corps) colours World War II British battledress arm of service colors.png
World War II British battledress arm of service (corps) colours

By the start of the Second World War, the British Army prohibited all identifying marks on its Battle Dress uniforms save for drab (black or white on khaki) regimental or corps (branch) slip-on titles, and even these were not to be worn in the field. In May 1940 an order (Army Council Instruction (ACI) 419) was issued banning division signs worn on uniforms, even though some were in use on vehicles in France. [28]

In September 1940 the order was replaced with ACI 1118, and formation signs were permitted to be worn on uniform below the shoulder title by those troops in independent brigades, divisions, (field) corps and command headquarters. Below this, troops of the British Army wore an 'arm of service' stripe (2 inches (5.1 cm) by 14 inch (0.64 cm)) showing the relevant corps colour (for the higher formations, these were most often the supporting arms, for example Engineers, red and blue, Service Corps, blue and yellow, RAMC dark cherry, and so on, see right). [29]

Until D-Day these signs were only to be displayed or worn in Britain, if a formation went overseas all formation markings had to be removed from vehicles (tactical signs excepted) and uniforms. This order was obeyed to varying degrees in various theatres of war. However all 21st Army Group formations wore their signs when they went to France. [30]

In the British Army, ACI 1118 specified that the design for the formation sign should be approved by the general officer commanding the formation and reported to the War Office. [31] A further order of December 1941 (ACI 2587) specified the material of the uniform patch as printed cotton (ordnance issue), this replaced the embroidered felt (or fulled wool) or metal badges used previously. In other theatres the uniform patch could be made from a variety of materials including printed or woven cotton, woven silk, leather or metal embroidered felt (or fulled wool). [32]

General Head Quarters and Theatre

Army group

Field Marshal Montgomery (left), Air Chief Marshal Sir Arthur Coningham (centre) and the Commander of the British Second Army, Lieutenant General Sir Miles Dempsey, talking after a conference in which Montgomery gave the order for the Second Army to begin the Operation Plunder. Note the formation patches for the 21st Army Group and the 2nd Army Operationvarsity.jpg
Field Marshal Montgomery (left), Air Chief Marshal Sir Arthur Coningham (centre) and the Commander of the British Second Army, Lieutenant General Sir Miles Dempsey, talking after a conference in which Montgomery gave the order for the Second Army to begin the Operation Plunder. Note the formation patches for the 21st Army Group and the 2nd Army

.

Army

Portrait of General Slim as commander of the Fourteenth Army, commissioned by the Ministry of Information. TNA INF3-5 General William Slim 1939-1946.jpg
Portrait of General Slim as commander of the Fourteenth Army, commissioned by the Ministry of Information.

Commonwealth and Empire

Commands

U.K., Commonwealth and Empire

Commands were notionally of Army level, some choosing army command colours (red and black) and in the U.K. in the early years of the war could command one or more corps as 'Corps districts'. [45] In Southern Command (United Kingdom) the colouring of the shield and sometimes the stars was varied according to the wearers arm of service, 18 second world war varieties are known including the headquarters, and the Auxiliary Territorial Service. [46]

Shown below are the commands on the territory of the United Kingdom, Commonwealth or Empire nations.

Corps

The corps formation sign would be worn by headquarters and any attached troops, that is, those not in a division, independent infantry or armoured brigade, an Army Group Royal Artillery or a lines of communication formation. After the B.E.F.'s return from France, existing and newly formed Corps (I - XII) were allocated districts, and known as 'Corps districts', under the existing Home Commands, as shown below. They were replaced by military districts during 1942 and 1943. [52] Not shown are VI Corps, based in Northern Ireland and VII Corps based around Oxfordshire and Gloucestershire, neither had a formation sign as a real formation and both were disbanded before the end of 1940. [53] [54]

The appropriate arm of service strip would be worn below the sign on a uniform (see above), with the exception of some (service) corps in I Corps, which altered the colours of the diamond as appropriate. For example, engineers (two diagonal blue stripes on the diamond), [55] signals (a blue diamond), [56] artillery (diamond halved vertically, blue and red) [57] and service corps (diamond halved horizontally blue on yellow). [58]

Commonwealth and Empire

The Canadian and Australian uniform signs shown below are the headquarters signs. Canadian attached troops indicated their (service) corps with the addition of letters (for example R C E for the Royal Canadian Engineers or a maroon stripe for the Royal Canadian Medical Service). [64] Australian attached troops indicated their (service) corps by replacing the black and white triangles with their corps colour (I Corps), or central triangle (II and III Corps) and replacing the black triangle with the green or red of the field corps, for example purple for the Royal Australian Engineers or brown for the Australian Army Medical Corps. [65]

Districts

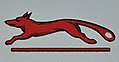
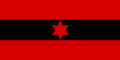
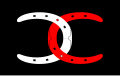
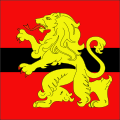
Military districts, the level below area commands were constantly changing, the signs below do not show a 'snap-shot' in time for any command area. [71] Being local formations, the signs reference local attributes such as history, geography, industry, regimental affiliations and heraldry. [72]

Britain

India

Mediterranean and Middle East

Lines of Communications

Depending on the theatre of operations these units could be under command of the Theatre, Army Group or Army. The Australian signs show the headquarters design for that formation, attached troops wore an additional colour/shape combination (for example, Service Corps sections wore a white on blue design in the centre of the patch). [85]

Post War

Armies and Commands

Corps and Districts

Related Research Articles

Corps is a term used for several different kinds of organization. A military innovation by Napoleon I, the formation was first named as such in 1805. The size of a corps varies greatly, but two to five divisions and anywhere from 40,000 to 80,000 are the numbers stated by the US Department of Defense.

<span class="mw-page-title-main">I Corps (United Kingdom)</span> Inactive British Army formation

I Corps was an army corps in existence as an active formation in the British Army for most of the 80 years from its creation in the First World War until the end of the Cold War, longer than any other corps. It had a short-lived precursor during the Waterloo Campaign. It served as the operational component of the British Army of the Rhine during the Cold War, and was tasked with defending West Germany.

<span class="mw-page-title-main">First Australian Army</span> Australian field army

The First Australian Army was a field army of the Australian Army, during World War II. The formation's headquarters was raised in April 1942 from the existing 1st Australian Corps headquarters, assuming command of all Allied troops in Queensland. Initially, the formation was assigned a defensive role in anticipation of a possible Japanese invasion; however, this threat subsided and eventually the army was deployed to Lae, in New Guinea, in late 1944, where it co-ordinated Australian offensives around Aitape, in New Guinea, on New Britain and Bougainville, and around Madang. The formation was disbanded in February 1946, when it was redesignated as the 8th Military District.

<span class="mw-page-title-main">VIII Corps (United Kingdom)</span> World War-era British Army formation

VIII Corps was a British Army corps formation that existed during the First and Second World Wars. In the latter, it took part in the Normandy Campaign in 1944, where it was involved in Operation Epsom and Operation Goodwood. It would later play a supporting role in Operation Market Garden and finish the war by advancing from the Rhine to the Baltic Sea.

<span class="mw-page-title-main">IX Corps (United Kingdom)</span> World War-era British Army formation

IX Corps was a corps-sized formation of the British Army that existed during the First and the Second World Wars.

<span class="mw-page-title-main">IV Corps (United Kingdom)</span> Military unit

IV Corps was a corps-sized formation of the British Army, formed in both the First World War and the Second World War. During the First World War the corps served on the Western Front throughout its existence. During the Second World War it served in Norway and Britain until it was transferred to India, which was threatened with attack after Japan entered the war.

<span class="mw-page-title-main">II Corps (United Kingdom)</span> Military unit

The II Corps was an army corps of the British Army formed in both the First World War and the Second World War. There had also been a short-lived II Corps during the Waterloo Campaign.

<span class="mw-page-title-main">III Corps (United Kingdom)</span> Corps of the British Army in the First and Second World Wars

III Corps was an army corps of the British Army formed in both the First World War and the Second World War.

<span class="mw-page-title-main">New Zealand Army</span> Land component of the New Zealand Defence Force

The New Zealand Army is the principal land warfare force of New Zealand, a component of the New Zealand Defence Force alongside the Royal New Zealand Navy and the Royal New Zealand Air Force.

<span class="mw-page-title-main">Royal New Zealand Corps of Signals</span> Military unit

The Royal New Zealand Signals Corps (RNZSigs) provides, co-ordinates and operates the communications networks of the New Zealand Army. The role of RNZSigs is to support other Arms by providing Communication Information System required for Command and Control of Units, Formations and Administrative installations in a theater of Operations and in the New Zealand support area. Modern signal equipment is essential to the army, demanding skilled operators and technicians. Because communications must be maintained even under the worst of conditions, signallers must be expert tradespeople. They must also accept a high degree of personal responsibility because the lives of soldiers can often rely on the fast and accurate transmission of battlefield information.

<span class="mw-page-title-main">Australian Army unit colour patches</span>

Unit colour patches are a method of identification used by the Australian Army, used to indicate which unit a soldier belongs to.

<span class="mw-page-title-main">Aldershot Garrison</span> Military installation in Hampshire, England

Aldershot Garrison, also known as Aldershot Military Town, is a major garrison in South East England, between Aldershot and Farnborough in Hampshire. The garrison was established when the War Department bought a large area of land near the village of Aldershot, with the objective of establishing a permanent training camp for the Army. Over time, this camp grew into a military town and continues to be used by the Army to the present day. It is home to the headquarters of the Army's Regional Command, and it is also the administrative base for the 101st Logistic Brigade. The garrison plays host to around 70 military units and organisations.

<span class="mw-page-title-main">X Corps (United Kingdom)</span> Military unit

X Corps was a corps of the British Army that served in the First World War on the Western Front before being disbanded in 1919. The corps was re-formed in 1942 during the Second World War and saw service in the North African Campaign and the Italian Campaign where it came under command of the US Fifth Army and the British Eighth Army.

<span class="mw-page-title-main">2nd Signal Brigade (United Kingdom)</span> Former signal formation of the British Army

The 2nd Signal Brigade, was a military formation of the British Army composed of Royal Corps of Signals units. The brigade was first formed following the reorganisation of the old Territorial Army in 1967, and was disbanded in 2012 under the Army 2020 programme. However, later the 2nd Signal Group was formed continuing the lineage of the old brigade, before it was disbanded in 2018.

United Kingdom Land Forces was a command of the British Army responsible for generating and preparing forces for current and contingency operations. The commander of the forces was known as Commander-in-Chief, United Kingdom Land Forces, who in turn reported to the Chief of the General Staff.

<span class="mw-page-title-main">Northern Command (United Kingdom)</span> Military unit

Northern Command was a Home Command of the British Army from 1793–1889 and 1905–1972.

<span class="mw-page-title-main">Southern Command (United Kingdom)</span> Military unit

Southern Command was a Command of the British Army.

<span class="mw-page-title-main">Structure of the Australian Army during World War II</span>

The structure of the Australian Army changed considerably during World War II. At the outbreak of war the Army comprised a small regular component and a large, but ill-trained and equipped, militia force. In September 1939 the government authorised the establishment of the Second Australian Imperial Force for overseas service; this force eventually reached a strength of four infantry divisions, an armoured division and various headquarters and support units. The militia force, which remained in Australia, was neglected until the outbreak of the Pacific War.

Formation signs at the division level were first introduced in the British Army in the First World War. They were intended (initially) as a security measure to avoid displaying the division's designation in the clear. They were used on vehicles, sign posts and notice boards and were increasingly, but not universally, worn on uniform as the War progressed. Discontinued by the regular army after 1918, only a few Territorial divisions continued to wear them before 1939. Reintroduced officially in late 1940 in the Second World War, divisional formation signs were much more prevalent on uniforms and were taken up by many other formations, independent brigades, corps, armies, overseas and home commands, military districts and lines of communication areas. The sign could be based on many things, geometry, heraldry, regional or historical associations, a pun, the role of the division or a combination.

References

  1. JPS Card nos. 27, 52, 56
  2. JPS card No. 95
  3. JPS card no. 27
  4. JPS card no. 33
  5. JPS card no. 81
  6. 1 2 JPS card no. 78
  7. JPS card no. 92
  8. 1 2 JPS card no. 29
  9. JPS card no. 53
  10. JPS card no. 61
  11. JPS card no. 96
  12. JPS card no. 38
  13. JPS card no. 70
  14. JPS card no. 87
  15. JPS card no. 56
  16. JPS card no. 3
  17. JPS card no. 74
  18. JPS card no. 22
  19. JPS card no. 75
  20. JPS card no. 68
  21. JPS card no. 82
  22. JPS card no. 25
  23. JPS card no. 93
  24. JPS card no. 16
  25. JPS card no. 40
  26. Glyde No. 9
  27. JPS card no. 101
  28. Davis p. 92
  29. Davis pps. 94-95, 97
  30. Cole p. 9
  31. Davis pps. 95, 97
  32. Davis pp. 99-100
  33. 1 2 3 4 Cole p. 14
  34. 1 2 3 Cole p. 60
  35. 1 2 3 Cole p. 21
  36. 1 2 3 Cole p. 15
  37. 1 2 Cole p. 16
  38. Cole p. 23
  39. 1 2 3 Cole p. 24
  40. 1 2 3 Cole p. 25
  41. Cole p. 26
  42. Glyde No. 402A
  43. Glyde No. 403
  44. 1 2 3 4 5 Cole p. 75
  45. "HQ Southern Command Order of Battle 23/06/1941". Orders of Battle. Retrieved 30 August 2017.
  46. Cole p. 19
  47. 1 2 3 4 5 Cole p. 17
  48. 1 2 3 Cole p. 18
  49. Boulanger p. 388
  50. Boulanger p. 389
  51. 1 2 Cole p. 20
  52. Palmer, Rob. "Map of Corps districts, September 1940" (PDF). britishmilitaryhistory.co.uk. Retrieved 1 September 2017.
  53. Palmer, Rob. "Northern Ireland District History" (PDF). britishmilitaryhistory.co.uk. Retrieved 1 September 2017.
  54. 1 2 3 4 5 6 Cole p. 28
  55. Boulanger p. 365
  56. Boulanger p. 382
  57. Boulanger p. 430
  58. Boulanger p. 576
  59. 1 2 3 Cole p. 27
  60. 1 2 3 4 Cole p. 29
  61. 1 2 3 Cole p. 30
  62. 1 2 Cole p. 53
  63. Cole p. 54
  64. Dorosh, Michael. "2nd Canadian Corps". canadiansoldiers.com. Retrieved 30 August 2017.
  65. Glyde Nos 633, 635, 1212, 1214
  66. Cole p. 61
  67. Glyde No. 405
  68. Glyde No. 406
  69. Glyde No. 407
  70. Cole p. 76
  71. 1 2 3 4 5 Cole p. 99
  72. Cole pp. 99-105
  73. 1 2 3 4 5 Cole p. 100
  74. 1 2 3 4 5 Cole p. 104
  75. 1 2 Cole p. 103
  76. 1 2 3 4 Cole p. 102
  77. 1 2 3 Cole p. 101
  78. Boulanger p. 446
  79. 1 2 3 Cole p. 105
  80. 1 2 3 4 5 Cole p. 119
  81. 1 2 3 4 Cole p. 118
  82. 1 2 Cole p. 112
  83. Cole p. 113
  84. Cole p. 114
  85. Glyde Nos.1173 - 1204
  86. 1 2 Cole p. 111
  87. Cole p. 120
  88. 1 2 3 4 Cole p. 116
  89. 1 2 3 4 5 6 Cole p. 117
  90. Glyde No. 438
  91. Glyde No. 437
  92. Glyde No. 436
  93. Glyde No. 435
  94. Glyde No. 434
  95. Glyde No. 433
  96. Glyde No. 432
  97. Glyde No. 431
  98. Cole (2) p. 25
  99. Cole (2) p. 12
  100. 1 2 Cole (2) p. 13
  101. Cole (2) p. 14
  102. 1 2 Cole (2) p. 15
  103. Cole (2) p. 52
  104. Cole (2) p. 85
  105. Cole (2) p. 86
  106. Cole (2) p. 38
  107. 1 2 Cole (2) p. 39
  108. 1 2 Cole (2) p. 36
  109. Cole (2) p. 33
  110. Cole (2) p. 35
  111. 1 2 3 Cole (2) p. 34
  112. Cole (2) p. 35 addendum
  113. 1 2 Cole p. 37
  114. 1 2 Cole (2) p. 31

Bibliography