Corps formation sign during the First World War.[3]
Military unit
I Corps ("First Corps") was an army corps in existence as an active formation in the British Army for most of the 80 years from its creation in the First World War until the end of the Cold War, longer than any other corps. It had a short-lived precursor during the Waterloo Campaign. It served as the operational component of the British Army of the Rhine (part of NATO's Northern Army Group (NORTHAG)) during the Cold War, and was tasked with defending West Germany.
Assembling an army in Belgium to fight Napoleon's resurgent forces in the spring of 1815, the Duke of Wellington formed it into army corps, deliberately mixing units from the Anglo-Hanoverian, Dutch-Belgian and German contingents so that the weaker elements would be stiffened by more experienced or reliable troops. As he put it: 'It was necessary to organize these troops in brigades, divisions, and corps d’armee with those better disciplined and more accustomed to war'.[4] He placed I Corps under the command of the Prince of Orange and it was this corps that was first contacted by the advancing French at Quatre Bras on 16 June 1815. However, Wellington did not employ the corps as tactical entities, and continued his accustomed practice of issuing orders directly to divisional and lower commanders. When he drew up his army on the ridge at Waterloo, elements of the various corps were mixed up, and although he gave the Prince of Orange nominal command of the centre, that officer had different forces under him. Subsequent to the battle, the corps structure was re-established for the advance into France, I Corps being commanded by Maj-Gen Sir John Byng, the Prince of Orange having been wounded at Waterloo.[5]
After Waterloo the army corps structure largely disappeared from the British Army, except for ad hoc formations assembled during annual manoeuvres (e.g. Army Manoeuvres of 1913). In 1876 a Mobilisation Scheme for eight army corps was published, with 'First Corps' based on Colchester. In 1880 First Corps' organization was:
E Battery C Brigade RHA (Woolwich), H Battery A Brigade RHA (Woolwich)
G/1st Brigade RA (Woolwich), B/5th Brigade RA (Sheffield)
Corps Engineers (Colchester)
A (Pontoons) Troop Royal Engineer Train (Aldershot)
C (Telegraph) Troop Royal Engineer Train (Aldershot)
23rd Company Royal Engineers and Field Park (Chatham)
This scheme had been dropped by 1881.[6] The Stanhope Memorandum of 1891 (drawn up by Edward Stanhope when Secretary of State for War) laid down the policy that after providing for garrisons and India, the army should be able to mobilise three army corps for home defence, two of regular troops and one partly of militia, each of three divisions. Only after those commitments, it was hoped, might two army corps be organised for the unlikely eventuality of deployment abroad.[7]
When the Second Anglo-Boer War was imminent in September 1899, a field army, referred to as the Army Corps (sometimes I Army Corps) was mobilised and sent to Cape Town. It was, in fact, 'about the equivalent of the First Army Corps of the existing mobilization scheme',[8] and was placed under the command of Gen Sir Redvers Buller, General Officer Commanding-in-Chief of Aldershot Command. However, once in South Africa the corps never operated as such, and the three divisions (1st, 2nd and 3rd) were widely dispersed.
The 1901 Army Estimates introduced by St John Brodrick allowed for six army corps based on the six regional commands (Aldershot, Southern, Irish, Eastern, Northern and Scottish) of which only I Corps (Aldershot Command) and II Corps (Southern Command on Salisbury Plain) would be entirely formed of regular troops.[9] However, these arrangements remained theoretical, the title 'I Corps' being added to Aldershot Command. In early October 1902 a memorandum was issued showing the organization and allocation of the 1st Army Corps, to which Sir John French had recently been appointed in command:[10]
In 1907 the title changed to 'Aldershot Corps' but reverted to simply 'Aldershot Command' the following year.[11] Finally, the Haldane Reforms of 1907 established a six-division British Expeditionary Force for deployment overseas, but only Aldershot Command possessed two infantry divisions and a full complement of 'army troops' to form an army corps in the field.[12]
First World War
Pre-war planning for the British Expeditionary Force (BEF) did not envisage any intermediate headquarters between GHQ and the six infantry divisions, but it was assumed that if corps HQs became necessary, then the GOC Aldershot Command would automatically become GOC I Corps in the field.[13] On mobilisation in August 1914 the decision was made to conform to the two-division army corps organisation employed by the French armies alongside which the BEF was to operate.[14] Sir Douglas Haig, then commanding at Aldershot, therefore took I Corps HQ to France with 1st Division and 2nd Division under command, and it remained on the Western Front throughout the war. It had a peripheral part at the Battle of Mons, then saw hard fighting at the Battle of the Aisne and First Battle of Ypres in 1914, at the Battle of Aubers Ridge in the Spring of 1915 and alongside the Canadian Corps at the Battle of Hill 70, as well in many other large battles of the First World War.
Composition of I Corps in First World War
The composition of army corps changed frequently. Some representative orders of battle for I Corps are given here.
By the time of the battles of Aubers Ridge and Festubert (May 1915), I Corps still had 1st and 2nd Divisions under command, but had been reinforced by 47th (1/2nd London) Division of the Territorial Force, and 1st Canadian Division.[17] Once the era of trench warfare had set in on the Western Front (1915–17), the BEF left its army corps in position for long periods, so that they became familiar with their sector, while rotating divisions as they required rest, training, or transfer to other sectors.[18]
Order of Battle during the final advance in Artois 2 October-11 November 1918[2][21]
General Officer Commanding: Lieut-Gen Sir Arthur Holland BGGS: Brig-Gen G.V. Hordern Deputy Adjutant & Quartermaster-General: Brig-Gen N.G. Anderson Commander, Royal Artillery: Brig-Gen H.C. Sheppard Commander, Heavy Artillery: Brig-Gen F.G. Maunsell Commander, Engineers: Brig-Gen H.W. Gordon
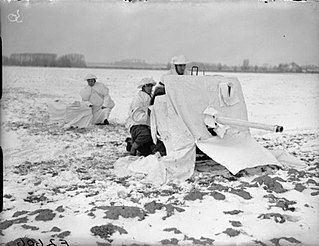
General Sir John Dill, General Officer Commanding I Corps, inspecting soldiers digging trenches at Flines, France. Stood three away from is his Brigadier General Staff (BGS), Brigadier Arthur Percival.
During the Second World War, I Corps' first assignment was again to the British Expeditionary Force (BEF) where it was commanded by General Sir John Dill, and then Lieutenant General Michael Barker from April 1940. After the Germans broke through Allied lines in the Battle of France in May 1940, the BEF was forced to retreat to Dunkirk for evacuation to England. The Commander-in-Chief (C-in-C) of the BEF, General Lord Gort, ordered Barker to form the rearguard with I Corps to cover the evacuation, and surrender to the Germans as a last resort. However, the acting commander of II Corps, Major General Bernard Montgomery, advised Gort that Barker was in an unfit state to be left in final command, and recommended that Major General Harold Alexander of the 1st Division should be put in charge. Gort did as Montgomery advised, and in the event the bulk of I Corps was successfully evacuated. As Montgomery recalled: '"Alex" got everyone away in his own calm and confident manner'.[24]
Composition of I Corps in the Battle of France
The order of battle was as follows:[25] General Officer Commanding: Lieutenant General M.G.H. Barker
Lieutenant General John Crocker, pictured here in August 1944.
I Corps, now commanded by Lieutenant General John Crocker, then took part in the Normandy landings on 6 June 1944 where, along with XXX Corps, under Lieutenant General Gerard Bucknall (who had commanded I Corps between April and August 1943), it was a spearhead corps of Lieutenant General Miles Dempsey's British Second Army, itself part of the 21st Army Group. The corps was then involved in the Battle of Normandy in fierce attritional fighting for control of the Normandy beachhead.
After the Battle of the Scheldt, I Corps gave up command of any combat forces. Its headquarters administered 21st Army Group's logistics area around the port of Antwerp, Belgium until the end of the war.
After the defeat of Germany, the 21st Army Group became the British Army of the Rhine (BAOR), and 1 Corps, under the command of Lieutenant-GeneralIvor Thomas, was transformed into a corps district, with an administrative, rather than combat, role. It was disbanded in 1947.[47]
In October 1951 the corps was reactivated to become the principal combat element of the BAOR, with its headquarters in Bielefeld. In March 1952, following the reactivation of 6th Armoured Division, its component formations were:
Included as part of this was Canadian Forces Europe, as Canada's contribution to the NATO land forces in Germany. A Canadian mechanised brigade remained part of BAOR until 1970, until it was moved south. The size of this force, 6,700, was such that it was referred to within British circles as a "light division".
On 1 July 1960, the 5th Division was redesignated as the 1st Division and the renamed formation took on the 1st Division's lineage and insignia. The division was located at Verden an der Aller, Germany, and formed part of the British Army of the Rhine (BAOR).[49][50][51] The formation conducted division-wide trials using the "square brigade" concept. When they were deemed successful in 1970, all brigades within the BAOR were reorganised accordingly.[52] The square brigade was developed in the 1950s. It called for a brigade to contain two armoured regiments and two mechanised infantry battalions. In the late 1960s, new anti-tank and defence in depth concepts were developed as fears of a possible surprise attack by the Warsaw Pact grew. Major-General Edwin Bramall promoted these new ideas when he took command of the 1st Division in January 1972. Bramall felt there was an over-reliance on the arrival of reinforcements to resist an offensive by the Soviet Union rather than the BAOR being able to do so itself. Using the division, the new tactics were refined and were later adopted by the BAOR, and further developed at a higher level in the mid-1970s.[53] The basic concept was to draw Soviet armoured forces into kill zones along their anticipated route of advance. These zones would be mined, and Soviet tanks engaged by anti-tank guided missile-equipped infantry and tanks in hull down positions to inflict heavy casualties. BAOR would conduct a fighting withdrawal as needed using its own reinforcements to counterattack any Soviet breakthroughs. It was expected such methods would allow BAOR to resist an offensive for five days without receiving external reinforcements. Because this strategy required tanks to be used in a more-defensive manner, it ran counter to the then-established doctrine that called for tanks to be used in a more-offensive capacity and in a local counterattack role.[53]
Between 1958-60 the Corps was reorganised into three mixed armour/infantry divisions including five brigade groups. In 1965 these brigade groups were brought together into three centralised divisions (1st, 2nd, and 4th). In 1958, the "infantry" designation was dropped from the 2nd Infantry Division's title as part of this reorganisation.[54] During the 1970s, 4th Division consisted of two "square" brigades.[55]
With the end of National Service, manpower across the whole of BAOR dropped from around 77,000 to 55,000.
In the late 1970s the Corps was reorganised as four small five-battle-group armoured divisions plus a roughly brigade sized infantry 'Field Force'. It then comprised:
In 1981, John Nott, the Secretary of State for Defence for the government elected in 1979, announced the 1981 Defence White Paper. It, like the Mason Review, aimed to balance the British military in line with the nation's financial resources and save manpower. Resultingly, the BAOR was restructured from four armoured divisions of two brigades, into a force of three divisions of three brigades.[57][58]
During the 1980s, the 33rd Armoured Brigade joined the 4th Armoured Division and in exchange the 3rd Armoured Division received the 19th Infantry Brigade (Colchester, England).[60] During 1983, the 6th Armoured Brigade converted into the 6th Airmobile Brigade and maintained that role until 1988.[61][62]
Structure of the 1 British Corps in 1989.
With the end of the Cold War, in 1992 1 (BR) Corps was disbanded, and its HQ closed. Some of the staff serving in HQ 1(BR) Corps were reassigned to the new HQ United Kingdom Support Command (Germany) which was formed from the rump of HQ BAOR. The remainder of the staff formed the British component (50% of the total staff in the HQ) in the Headquarters Allied Command Europe Rapid Reaction Corps (HQ ARRC), a newly instated multi-national NATO Rapid Reaction Corps HQ. The Corps Commander reported to the Supreme Allied Commander Europe SACEUR, but had no troops under command except when assigned to ARRC by NATO member nations, for operations or for exercises. HQ ARRC moved to Rheindahlen in 1994.
↑ Sanders Marble, 'Offensive versus Subsidiary Attacks, 1916–1918: The British Expeditionary Force Balancing its Options', Journal of the Society for Army Historical Research, Volume 87, No 351 (Autumn 2009).
↑ "No. 27370". The London Gazette. 1 November 1901. p.7048.
↑ "No. 27477". The London Gazette. 26 September 1902. p.6151.
Related Research Articles
British Army of the Rhine (BAOR) was the name given to British Army occupation forces in the Rhineland, West Germany, after the First and Second World Wars, and during the Cold War, becoming part of NATO's Northern Army Group (NORTHAG) tasked with defending the North German Plain from the armies of the Warsaw Pact. The BAOR constituted the bulk of British forces in West Germany, and was a part of British Forces Germany (BFG). British Forces Germany consisted of elements of the three service branches of the British Armed Forces based in West Germany; BAOR controlled Army units stationed there.
VIII Corps was a British Army corps formation that existed during the First and Second World Wars. In the latter, it took part in the Normandy Campaign in 1944, where it was involved in Operation Epsom and Operation Goodwood. It would later play a supporting role in Operation Market Garden and finish the war by advancing from the Rhine to the Baltic Sea.
IV Corps was a corps-sized formation of the British Army, formed in both the First World War and the Second World War. During the First World War the corps served on the Western Front throughout its existence. During the Second World War it served in Norway and Britain until it was transferred to India, which was threatened with attack after Japan entered the war.
The 3rd Division, also known as The Iron Division, is a regular army division of the British Army. It was created in 1809 by Arthur Wellesley, 1st Duke of Wellington, as part of the Anglo-Portuguese Army, for service in the Peninsular War, and was known as the Fighting 3rd under Sir Thomas Picton during the Napoleonic Wars. The division fought at the Battle of Waterloo, as well as during the Crimean War and the Second Boer War. As a result of bitter fighting in 1916, during the First World War, the division became referred to as the 3rd (Iron) Division, or the Iron Division or Ironsides. During the Second World War, the division fought in the Battle of France including a rearguard action during the Dunkirk Evacuation, and played a prominent role in the D-Day landings of 6 June 1944. The division was to have been part of a proposed Commonwealth Corps, formed for a planned invasion of Japan in 1945–46, and later served in the British Mandate of Palestine. During the Second World War, the insignia became the "pattern of three" — a black triangle trisected by an inverted red triangle.
The 4th Infantry Division was a regular infantry division of the British Army with a very long history, seeing active service in the Peninsular War and Waterloo Campaign, the Crimean and Boer Wars and both World Wars. It was disbanded after the Second World War and reformed in the 1950s as an armoured formation before being disbanded and reformed again and finally disbanded on 1 January 2012.
The 1st Division is an active division of the British Army that has been formed and disestablished numerous times between 1809 and the present. In its original incarnation as the 1st Division, it took part in the Peninsular War—part of the Coalition Wars of the Napoleonic Wars—and was disbanded in 1814 but was re-formed the following year for service in the War of the Seventh Coalition and fought at the Battle of Waterloo. It remained active as part of the British occupation of France until it was disbanded in 1818, when the British military withdrew. The division was then raised as needed; it served in the Crimean War, the Anglo-Zulu War, and the Second Boer War. In 1902, the British Army formed several permanent divisions, which included the 1st Division, which fought in the First World War, made various deployments during the interwar period, and took part in the Second World War when it was known as the 1st Infantry Division.
The II Corps was an army corps of the British Army formed in both the First World War and the Second World War. There had also been a short-lived II Corps during the Waterloo Campaign.
III Corps was an army corps of the British Army formed in both the First World War and the Second World War.
An Army Group Royal Artillery (AGRA) was a British Commonwealth military formation during the Second World War and shortly thereafter. Generally assigned to Army corps, an AGRA provided the medium and heavy artillery to higher formations within the British Army.
This is the British Expeditionary Force order of battle on 9 May 1940, the day before the German forces initiated the Battle of France.
The 11th Brigade is a brigade of the British Army which is transitioning to the tactical recce-strike role. The brigade was formerly the 11th Security Force Assistance Brigade, providing training and guidance for foreign militaries.
The 12th Armoured Brigade Combat Team, formerly the 12th Armoured Infantry Brigade, is a regular brigade of the British Army which has been in almost continuous existence since 1899 and now forms part of 3rd Division.
The 49th Infantry Brigade, later known as 49th (Eastern) Infantry Brigade during the Cold War, was a brigade of the British Army.
XII Corps was an army corps of the British Army that fought in the First and Second World Wars. In the First World War, it formed part of the British Salonika Force on the Macedonian front. In the Second World War, it formed part of the British Second Army during Operation Overlord and the subsequent North-West Europe Campaign of 1944-46.
The Northern Army Group (NORTHAG) was a NATO military formation comprising four Western European Army Corps, during the Cold War as part of NATO's forward defence in western Germany.
Aldershot Command was a Home Command of the British Army.
I Parachute Battery Royal Horse Artillery is the Headquarters battery of 7th Parachute Regiment Royal Horse Artillery, part of the Royal Horse Artillery of the British Army, currently based in Merville Barracks, Colchester.
The page contains the current structure of the British Army. The British Army is currently being reorganised to the Future Soldier structure.
The following is a hierarchical outline for the structure of the British Army in 1989. The most authoritative source for this type of information available is Ministry of Defence, Master Order of Battle, and United Kingdom Land Forces, HQ UKLF, UKLF ORBAT Review Action Plan, HQ UKLF, 1990.
Aldershot Command was a formation of the British Army at the start of the Second World War in September 1939.
References
Bailey, Jonathan; Iron, Richard; Strachan, Hew, eds. (2013). British Generals in Blair's Wars. Farnham, Surrey: Ashgate Publishing. ISBN978-1-40943-737-6.
Becke, Major A.F. (1935). History of the Great War Based on Official Documents. Order of Battle of Divisions: Part 1 - The Regular British Divisions. London: HMSO.
Blume, Peter (2007). BAOR The Final Years: Vehicles of the British Army of the Rhine 1980 – 1994. Erlangen, Germany: Tankograd Publishing. OCLC252418281.
Cordesman, Anthony H. (1988). NATO's Central Region Forces: Capabilities/Challenges/Concepts. London: Jane's. ISBN978-0-710-60487-3.
Cole, Howard (1973). Formation Badges of World War 2. Britain, Commonwealth and Empire. London: Arms and Armour Press.
Darwin, John (1988). Britain and Decolonisation: The Retreat from Empire in the Post-War World. London: MacMillan. ISBN978-0-33329-258-7.
Dunlop, Colonel John K., The Development of the British Army 1899–1914, London, Methuen (1938).
Ellis, John, The World War II Databook. BCA Publishing, 2003. CN 1185599.
Forty, George, British Army Handbook 1939-1945, Sutton Publishing (1998).
Hart, Stephen, Road To Falaise, Sutton Publishing (2004).
Hofschroer, Peter, 1815: The Waterloo Campaign: Wellington, his German Allies and the Battles of Ligny and Quatre Bras, London: Greenhill Books (1998) ( ISBN1-8536-7304-8).
Hofschroer, Peter, 1815: The Waterloo Campaign: The German Victory, London: Greenhill Books (1999) ( ISBN1-8536-7368-4).
Isby, David, & Kamps, Charles Jr, Armies of NATO's Central Front, Jane's Publishing Company (1985).
Isby, David C. (1988). "Developments in the Front-Line States: The United Kingdom". In Simon, Jeffrey (ed.). NATO-Warsaw Pact Force Mobilization. Washington D.C.: National Defense University Press. pp.317–352. OCLC18522267.
Brig E.A. James, British Regiments 1914–18, London: Samson Books, 1978, ISBN 0-906304-03-2/Uckfield: Naval & Military Press, 2001, ISBN 978-1-84342-197-9.
JPS Cigarette card series, Army, Corps and Divisional Signs 1914–1918, John Player and sons, 1920s.
Kneen, J. M.; Sutton, D. J. (1996). Craftsmen of the Army: The Story of the Royal Electrical and Mechanical Engineers 1969–1992. Vol.II. London: Leo Cooper. ISBN978-0-850-52549-6.
Lord, Cliff; Watson, Graham (2003). The Royal Corps of Signals: unit histories of the Corps (1920-2001) and its antecedents. Solihull, West Midlands, England: Helion & Company. ISBN1-8746-2292-2. OCLC184820114. ProQuest5774170.
Montgomery, Viscount, The Memoirs of Field-Marshal Montgomery, London: Collins (1958).
Official History 1914: Edmonds, Brigadier-General Sir James E., Military Operations France and Belgium, 1914, Volume I: Mons, the Retreat to the Seine, the Marne and the Aisne, August–October 1914 3rd revised edn 1933 (reprint Imperial War Museum, 1992) ( ISBN1-8704-2356-9).
Official History 1915: Edmonds, Brigadier-General Sir James E., and Wynne, Capt G.C., Military Operations France and Belgium, 1915 Volume II: Battle of Aubers Ridge, Festubert, and Loos, London: Macmillan, 1928.
Official History 1918: Edmonds, Brigadier-General Sir James E., Military Operations France and Belgium, 1918 Volume V: 26 September–11 November: The Advance to Victory 1947 (reprint Imperial War Museum, 1992) ( ISBN1-8704-2306-2).
Official History 1939-40: Ellis, Major L.F., History of the Second World War, United Kingdom Military Series: The War in France and Flanders 1939-1940, London: HMSO, 1954.
Stewart, Andrew (2013). "Chapter 6: Southern Iraq 2003–2004: Multi-National Command". In Bailey, Jonathan; Iron, Richard; Strachan, Hew (eds.). British Generals in Blair's Wars. Farnham, Surrey: Ashgate Publishing. pp.79–89. ISBN978-1-40943-737-6.
Stone, David (1998). Cold War Warriors: The Story of the Duke of Edinburgh's Royal Regiment (Berkshire and Wiltshire). London: Leo Cooper. ISBN978-0-850-52618-9.
Tanner, James (2014). The British Army since 2000. Oxford: Osprey Publishing. ISBN978-1-78200-593-3.
This page is based on this Wikipedia article Text is available under the CC BY-SA 4.0 license; additional terms may apply. Images, videos and audio are available under their respective licenses.