When Neville Chamberlain declared war on 3 September 1939, the Union Defence Force consisted of 5,385 Permanent Force members, 14,631 Citizen Force members and 122,000 Commandos of which only 39,000 were considered suited for field deployment. The Defence Act also prohibited the deployment of its members beyond the confines of southern Africa.[2] On 4 September, General Hertzog resigned and was replaced by General Smuts– and two days later, on 6 September South Africa declared war against Germany.
The "phoney war" luckily granted more time and by 22 September a policy paper had been submitted calling for the formation of two "Forces" and was approved in mid October, laying the foundations for the formation of 1 and 2 SA Divisions. In March 1941, fearing the Italian commitment to war, General Wavell requested the services of a South African Brigade Group in Kenya via the Imperial General Staff. Prime Minister Smuts consented.
Special Service Battalion shoulder title and wartime "red tabs"
Initially, to circumvent the limitations of the South African Defence Act (Act No 13 of 1912),[3] only volunteers were recruited and they were subject to an oath on induction whereby they consented to being deployed anywhere in Africa, this being a pre-requisite for acceptance into the Union forces. Men who attested under these terms were entitled to wear the distinct insignia of the Mobile Field Force, a red / orange shoulder strap which was to become known as the "Red Tab".[4] The Defence Act was later amended.
Advance party to East Africa
The formation of the 1st South Africa Infantry Brigade Group was approved on 13 May 1940.[5] Although approved, South Africa was desperately short of equipment and had few armoured vehicles[6] save for a limited number of locally designed prototype armoured cars.[nb 1] Due to this limited infantry and armour offensive capacity, all that could initially be mobilised was an anti-aircraft detachment. Thus, part of the 1st SA Anti-Aircraft brigade, who arrived in Mombasa on 1 June 1940 as an advance party to protect Mombasa harbour from feared Italian air attacks,[7] becoming the first South African land forces to be deployed outside of South Africa since the First World War.[7] On 10 June 1940, Italy declared war and on the next day South Africa officially declared war on Italy. Two hours after the South African declaration, four Ju 86's of the South African Air Force bombed Italian troops at a Banda Camp close to Moyale,[nb 2][7] a few kilometres across the Kenya border into Ethiopia.[8]
1st Brigade Group Mobilised
In order to rapidly provide forces to East Africa, as well as due to the lack of trained manpower – it was decided to initially form a single Infantry Brigade from the 1st Duke of Edinburgh's Own Rifles, the 1st Royal Natal Carabineers and the 1st Transvaal Scottish with brigade artillery and support elements (Refer ORBAT below). On 13 July, the 1st South African Brigade Group under command of Colonel John Daniel was issued its movement order and it assembled at Zonderwater for the farewell parade, with General Smuts taking the salute – ironically, that Sunday being celebrated as "Delville Wood Day".[9]
...From personal experience I know what awaits you. I know what war means – seven years of my life have been spent in wars. They were amongst the hardest years of my life, but they were also full of the richest experiences that life can give. I would not exchange my war experiences of the Anglo-Boer War and the last Great War for all the gold on the Rand. You are going to face danger, hardship and sacrifice – perhaps death itself – in all its fierce forms. But through it all, you will gather that experience of life and enrichment of character which are more valuable than gold or precious stones. Gen. Jan Smuts. Farewell parade, Zonderwater, 13 July 1940.[10]
Embarkation commenced in Durban the next day, with Brigade HQ, 1st Transvaal Scottish and attached troops boarding the MS Dilwara[11] while the Royal Natal Carbineers and a number of voluntary aid nurses boarded the Devonshire. The Duke of Edinburgh's Own Rifles followed in the Rajula.[12] The convoy cast off on 17 July 1940.[9][nb 3]
Establishment
On 13 August 1940 the 1st South African Infantry Division was officially constituted – consisting of the 1st SA Brigade Group already in Kenya and the 2nd and 5th South African Infantry Brigade Groups. Brig-Gen George Brink was appointed as commander with Lt. Col W.H.E. Poole as GSO 1.[13] The Division HQ landed at Mombasa on 11 November 1940.[14]
This account only reflects the role of the 1st SA Infantry Division. For an account of the 1st South African Infantry Brigade in East Africa, see 1st Infantry Brigade (South Africa).
2nd and 5th Brigades
Dominating the Dida Galgalla (Desert of the Night)
The Marmon-Herrington armoured car as used by the division in the East Africa and Western Desert Campaigns. Source: Imperial War Museum
After the success of the 1st South African Infantry Brigade against the Italians at the El Wak border post on 16 December 1940, Lieutenant-General Alan Cunningham was intent on opening access into the Galla-Sidamo area across the Chalbi Desert by advancing eastwards from the eastern side of Lake Rudolf and to support a possible rebellion by the Shifta tribe against the Italians.[15] This was the first offensive to be assigned to 1 SA Division. The division then consisted of the 2nd and 5th SA Brigades (located at Marsabit), the 25th East African Brigade (at Lokitaung) as well as six companies of the 2nd Abyssinian Irregulars. Almost on a daily basis, division infantry and armoured cars crossed the Dida Galgalla in search of enemy patrols. The Italians maintained a well established outpost at Turbi Hills, from which they had clear observation of any vehicle or troop movements in the Dida Galgalla. From December 1940 to February 1941 patrols had never been able to engage Italian patrols or elements – as they withdrew deeper into Abyssinia on sighting the South African patrols entering the Dida Galgalla, only to return the next day.[16]
El Yibo
Before advancing into southern Abyssinia, General Brink was compelled to protect his western flank and to deny water sources to the Italians. For this reason, on 16 January the 1st Natal Mounted Rifles (of the 2nd Brigade), No 2 Armoured Car Company, 12 SA Field Battery and two irregular companies attacked the string of wells at El Yibo and El Sardu in the Kenyan Northern Frontier District. After three days of fighting, supported by the SAAF, the enemy withdrew from El Yibo on the night of 17 January and on the afternoon of 18 January, the 2nd Field Force Battalion, which had been moved up from the brigade reserve, entered an abandoned El Sardu. With the only water sources in the area in the hands of the South Africans, the advance into Abyssinia could commence.[17]
Gorai and Hobok
South Africans in Hobok Fort after its capture, 1941
2nd and 5th Brigades crossed the Abyssinian border north of Dukana late afternoon on 31 January 1941, moving in parallel columns to assault the Italian positions in the Mega-Moyale complex.[nb 4] The Italians had well established and entrenched advance positions at Goai Crater, El Gumu and Hobok – which were to be taken before the main forces at Mega-Moyale could be attacked. 2nd Brigade was assigned to attack Gorai on the right, while 5th Brigade was to assault El Gumu. The attack commenced early morning on 1 February and by 1600 both objectives had been secured. The armoured cars however failed to cut off the remnant Italian forces, and they retreated back towards Mega and Moyale. The next day, 3rd Transvaal Scottish and the armoured cars attacked Fort Hobok, sited on a ridge 30km west of El Gumu supported by artillery. The armoured cars again covered the flanks and tried to cut off any retreating forces. By afternoon, the fort had been captured. The 2nd Brigade now held Gorai and the 5th Brigade, Hobok (Map 1: Point 1). It was again hoped that these raids would ignite the Shifta uprising, but as with the previous occasion, this never materialised.
Battle for Mega
Map 1: The first foray into Ethiopia
Having two salients extending into Ethiopia, Cunningham and Brink decided to consolidate and to secure their lines of supply in face of the oncoming rainy season which would make the Chalbi desert impassable. The key to supply in the area were the towns of Mega and Moyale, overlooking the two major roads into Abyssinia from Kenya. These were to be taken in a two brigade assault, by first attacking Mega (Map 1: Point 2) and then Moyale (Map 1: Point 3).
The Italians inadvertently opened the offensive when one of their supply columns from Yavello drove into a 2nd Brigade detachment deployed to control the Yavello-Mega road. Poor defensive arrangements by the South Africans allowed the Italians and Banda (irregulars) to drive into the centre of the detachment. After much reactive manoeuvre and intervention by the armoured car company, the Italian supply column and supporting troops were destroyed. The South African positions now known to the Italians, they were attacked by a detachment of Italian light tanks on 16 February, which caused the armoured cars to flee westwards and allowed the tanks to descend on the unprotected infantry. After a brisk but fierce fire-fight, the Italian tanks returned to Mega, leaving the South African detachment dispersed and disorganised.[18]
Mega Fort, prior to the attack. 1941
This attack had compromised surprise – and the attack on Mega was now commenced in all urgency. The 1st SA Irish (Col. Dobbs) were tasked to take the ridges east of Mega fort while the 3rd Transvaal Scottish (Lt-Col. Walter Kirby) were to occupy the a series of hills west of the fort and were to advance in line with the SA Irish. 2nd Brigade was to launch a direct attack on the fort and the Mega defensive complex. Despite incoming artillery fire, the Irish and Scottish regiments advances progressed well – but there was no sign of the 2nd Brigade who had not yet crossed the start-line, threatening to undermine the planned attack. At noon, a torrential rainstorm erupted and a thick mist enveloped the heights around Mega and it became obvious that the fort would not be taken by nightfall. The next morning, cloud and mist prevented air support – and the Irish and Scottish battalions restarted their advance. It was only after the third day that the 2nd Brigade managed to reach their designated start-line due to poor navigation and the failure to identify serious terrain obstacles on their line of advance during reconnaissance. Clear skies on the third day permitted a coordinated attack with air support, artillery and the two brigades attacking together – leading to an Italian surrender late that afternoon (18 February).[19]
South Africans posing with a captured Italian flag at Moyale, after the Italian retreat. 1941
Mega fell with 1,000 Italian and African soldiers being captured on 22 February, and later that day one of the irregular companies attached to 2nd Brigade entered Moyale unopposed. The Italians had fled, leaving large quantities of logistical stores.[20] The division had attained its objective and had secured the access roads into southern Abyssinia before the onset of the seasonal rains.
Operations west of Lake Rudolf
West of Lake Rudolf, the 25th East African Brigade (Brig. W. Owen) marched on Namaraputh with the objective of taking the town of Kalam (Map 1: Point 4). Opposition from Merille tribesman in the area was so fierce, that the Brigade was compelled to cease its advance and to go over to the defensive. Any advance west of the lake would first require wide area operations to subdue these irregular forces.[20] By the time Moyale fell, allied forces had captured Mogadishu to the east and this success encouraged General Wavell to advise Cunningham that the South African division should be readied to deploy to Egypt at short notice.[21]Cunningham thus replaced 2nd and 5th Brigades with the 21st East African Brigade and withdrew them back into Kenya.[20]
Transfer to Egypt
The Division HQ, Division troops and 5 SA Infantry Brigade arrived in Suez, after an eleven-day voyage from Mombassa on 3 May 1941. The 2nd Brigade arrived in Suez on 8 June from Berbera and was forthwith assigned to 2 SA Infantry Division.[22] The 1st Brigade sailed from Massawa on 12 June 1941 to Egypt.[23] At the peak of operations in 1940, there were 77,000 troops in Kenya of which 27,000 were South African.[24]
During the time the division had spent in East Africa, the Desert War had progressed and by the time of their arrival in Egypt:
The initial advance by the Italians to the Egypt border had been checked (August 1940), with constant raids being launched across the border fence. The Italians were demoralised and had lost approximately three thousand men against British losses of little more than one hundred.[25]
By September the Italians had attacked and taken Sollum, Halfaya Pass, and Sidi Barrani and dug in around Sidi Barrani and established several fortified campsin the area, stopping eighty miles west of the British defences at Mersa Matruh.[25]
In December 1940, the Western Desert Force launched Operation Compass, the British counterattack. The Italians were caught completely off-guard and by 10 December, the British and Indian forces had taken more than 20,000 Italian prisoners. The following day, the British and Indian forces attacked Sollum. Sidi Barrani fell on the same day.[25]
The 4th Indian Division was replaced with the newly arrived Australian 6th Division. The Australians then pressed on to capture Bardia and Tobruk, with little or no opposition. In early February, the Italians were in headlong retreat along the coast, pursued by the Australians.[25]
An overland advance by the 7th Armoured Division through Mechili to Beda Fomm, cut off the Italian line of retreat. Combe Force, an ad hoc flying column was sent racing ahead of the tanks and they reached Beda Fomm just ahead of the Italians, and established a roadblock. After a hard and narrowly won battle on 6 February, the Italians surrendered 25,000 men, 200 artillery guns, 100 tanks and 1,500 vehicles. During the course of this battle, the Western Desert Force was renamed as XIII Corps.[25]
In early 1941, after the British and Commonwealth victory in Cyrenaica, the military position was soon reversed. Wavell ordered a significant portion of O'Connor's XIII Corps to support Greece as part of Operation Lustre and the Germans initiated their Operation Sunflower (Unternehmen Sonnenblume). This was the deployment of the newly formed German "Afrika Korps" (Deutsches Afrikakorps) as reinforcements to the Italians to prevent total collapse. The German corps included fresh troops with better equipment and a charismatic commander, General Erwin Rommel.[25]
Rommel quickly defeated the Allied forces at El Agheila on 24 March. He then launched an offensive which, by 15 April, had pushed the British back to the Egyptian border at Sollum, recapturing all of Libya except for Tobruk which was encircled and besieged with the front lines now stabilised at the Egyptian border.[25]
The Western Desert Force launched Operation Brevity in May 1941. This was an inconclusive attempt to secure more ground to launch the main effort to relieve Tobruk.[25]
Operation Battleaxe was launched in June. After the failure of Battleaxe, Wavell was replaced by Claude Auchinleck as Commander-in-Chief Middle East and the British forces were reinforced with XXX Corps.[25]
Deployed at Matruh and responsible for constructing defensive positions, the division was still not considered ready for operations by the end of June – having 90% of its allotted transport (many vehicles being those which had been used in the East Africa campaign) and 90% of its arms and equipment.[26] Severe administrative problems, as well as organizational issues related to integration of the division into the Western Desert Force, caused discontent and eventually lead Gen. Brink to raise the issues with Field-Marshal Smuts and the Chief of SA General Staff when they visited Cairo in early July.[27] Discussions indicated that Lt-Gen. Sir Alan Cunningham and Wavell were of the opinion that South Africa could not field two divisions[nb 5] for lack of resources. Smuts claimed that the manpower shortages were due to troops being retained for protection duties in East Africa and that a lack of shipping precluded the arrival of a further 3,000 men and he rejected the idea of reducing the South African forces into divisions of two brigade strength, as was recommended by Wavell.[28] In addition, Brink continued to express his displeasure at the fact that the 1st Division was being utilised to construct defensive positions, instead of training in order to prepare for operations.
Map 2: Cunningham's plan for Operation Crusader: 17 November 1941
Differences between British and South African administration were becoming more pronounced (and so too were differences between the South Africans and other Commonwealth troops.)[nb 6] The insistence by the Australian government to retain the Australians in the theatre (at Tobruk at that stage) as a unified corps, caused manpower shortages in other areas in the Western Desert. Brink feared that the division would be split up and deployed piece-meal to fill these gaps, as had happened in East Africa. His insistence in this regard to Auchinleck further widened the gap between the South Africans and the Army commander.[30][nb 7] At the end of October, Brink advised XXX Corps that 1st Division would not be ready to participate in the preparatory exercise as a prelude to Crusader– and that he required an additional 21 days for training. After consideration by Cunningham and Auchinleck, the division was permitted three days for training and was required to be available for the commencement of Crusader on 18 November, subject to Brink confirming that the division was ready for operations. Brink was faced with the dilemma of either committing untrained troops to battle, or holding back the division and having them replaced by the Indian Division – which would invariably relegate the division to defensive duties and a significant loss of prestige to the South Africans. He declared the division "ready" and 1 SA Division was deployed for Operation Crusader.[31]
This account only reflects the role of the 1st SA Infantry Division.
Operational plan
Following the costly failure of Operation Battleaxe, General Archibald Wavell was relieved as Commander-in-Chief Middle East Command and replaced by General Claude Auchinleck. The Western Desert Force was reorganised and renamed the Eighth Army under the command of Lieutenant-General Alan Cunningham and at this stage, the division comprised only two brigades. The plan for Operation Crusader (See Map 2) was to engage the Afrika Korps with the 7th Armoured Division while the 1st SA Division and the 22 Guards Brigade covered their left flank. Meanwhile, on their right, XIII Corps, supported by 4th Armoured Brigade (detached from 7th Armoured Division), would make a clockwise flanking advance west of Sidi Omar and hold position threatening the rear of the line of Axis defensive strongpoints which ran east from Sidi Omar to the coast at Halfaya. Central to the plan was the destruction of the Axis armour by 7th Armoured Division to allow the relatively lightly armoured XIII Corps to advance north to Bardia along the coast while XXX Corps continued northwest to Tobruk and link up with a planned break-out by the 70th Division.[32]
Advance
Map 3: The division's movement 18–21 November 1941. (Dispositions as at morning 21 November 1941)
The division advance commenced at 0600 on 18 November with uneventful progress through the empty desert, save for two air attacks by Italian aircraft (Point 1 on Map 3). Having steadily advanced northwards, 1 SA Division was advised on 20 November to "mask" Bir el Gubi and to prevent interference from the Ariete Div into the flank of 7 Armoured Div (Point 2 on Map 3). El Gubi had now become a lesser objective after the capture of Sidi Rezeg and early morning on 21 November, the 21st and 15th Panzer had withdrawn to the north-west, not aware of the Allied advance to their south[34] – creating the impression within the division, that the Axis forces had already been defeated.[35]
By noon, 22 November, the Sidi Rezeg area was clear of Axis formations[36] but by mid afternoon, German armour launched a violent attack on the area of the airfield. In this attack, 4th Armoured Brigade HQ had been destroyed (captured) and by nightfall, the SA 5th Brigade as well as the 6th New Zealand Brigade had been tasked to hurry in support of 7 Armoured Div at Sidi Rezeg (Advance 3 on Map 3), with the 5th SA Bde tasked to occupy Point 178, three miles south of Sidi Rezeg.[37] 1st SA Bde was to disengage from the Ariete at Bir el Gubi and to advance in a night march, north – in support of the 5th Brigade at Sidi Regez, being relieved by the 22nd Guards Brigade.[38]
By the 23rd, 5th Brigade had joined up with 7 Armoured Div, deploying straight from its advance into the centre of the armoured division area of deployment to the south of the airfield. The 1st SA Brigade was expected later the morning, from its night march from El Gubi.[39] Unbeknownst to the division – Rommel's plan was to attack 7 Armoured Division in a frontal assault with the Afrikakorps and to launch an attack into the rear of 7th Armoured Division with the armoured Ariette Division. The 5th SA Brigade was caught in the middle of this armoured attack.[40]
By late morning, the 15th Panzer had launched their attack with 150 tanks aimed to link up with the Ariette Division and panzers were cutting through the rear of 7th Armoured Division into the support B Echelons.[41] 5th SA Brigade had most of their transport and supplies destroyed in this action, but did destroy a number of German tanks.[42] After destroying significant logistical elements – the 15th Panzer withdrew so as to by-pass the 7 Armoured Division / 5th SA Brigade positions and to engineer a link-up with the Ariette Division.[43] They achieved this by 1235 and Gen Crüwell prepared for a decisive attack on the Allied armour. Advance elements of the 1st SA Brigade had now met elements of 5 Brigade, but the brigades never physically linked up.[44]
By 1315 a major tank battle was underway between Axis forces and 7 Armoured Division. At 1555 – 1st SA Division were passing a signal to 5 SA Brigade when the brigade interjected "wait....." Those were the last words received from the 5th SA Infantry Brigade.[45] Some units retained some form of unity and managed to escape east through the New Zealand and Indian fronts.[46] Against the German tanks, the South African infantry had no real means of defence with limited Anti-Tank capabilities, they were compelled to use 25-pounders in a direct fire role. By the time the panzers had broken into the rear of the brigade, the artillery had been subdued and all anti-tank capabilities had been destroyed. By nightfall, all that remained of 5 SA Brigade was "...little groups of disconsolate prisoners.....between frequent flares and the light of burning ammunition."[47] "The 5th SA Brigade had been caught by an overwhelming force in the open desert, quite unprepared and without inflicting any negligible damage on its opponents."[48][nb 9] The battle had resulted in a victory for the Afrikakorps, but the 7th Armoured and 1st South African Divisions had not been annihilated and the loss of the 5th SA Brigade was not enough to set off the loss of almost 50% of the Afrikakorps tanks which went into battle. At 0100 on 24 November, Brink reported to XXX Corps that 5th SA Brigade had "ceased to exist as a fighting formation".[49]
...the attack started well, but soon came up against a wide artillery and anti-tank gun screen, which the South Africans had formed at a surprising speed between Haiad and Muftah. Guns of all kind and sizes laid a curtain of fire in front of the attacking tanks and there seemed almost no hope of making any progress in the face of this fire-spewing barrier. Tank after tank split open in a hail of shells. Our entire artillery had to be thrown in to silence the enemy guns one by one. Gen. Erwin Rommel. Commenting on the defence of the 5th SA Brigade[50]
Aftermath
Knocked out German Panzer IIIs after the Sidi Rezeg battle.
Having failed to link up with 5 SA Brigade, 1st Brigade withdrew south to Bir Taieb el Esem and commenced to establish a strong-point to effect its own defence.[51] Between 24 and 26 November, elements of the 1st SA Brigade were deployed north east in attempts to support the New Zealand Division in their assault on Tobruk.[52] Attempts to join up with the New Zealanders were repeatedly blocked (at one stage Gen Norrie himself lead a combat group from the SA Brigade) by Axis actions.[53] On the 24th, 1st SA Brigade was attacked by the Ariete Armoured Division at Taib el Esem and were able to extricate themselves only after assistance from Gatehouse and the 4th Armoured Brigade.[54]
The same day, Rommel committed himself to a "dash for the wire" – with the intention of exploiting the disorganisation and confusion in the enemy's bases and cutting their supply lines. The Germans attacked towards Egypt to relieve his garrisons at Bardia and Sollum.[55] The advance came on a route that took the Afrikakorps in succession through the headquarters of XXX Corps, 7th Armoured Division, 1st SA Division, 7th Support Group and 7th Armoured Brigade.[56] By 1145 General Norrie stated that the "Matruh Stakes" had officially started – as 8th Army A and B Echelons hurriedly withdrew east (Point 5 Map 3).[56] However, fighting continued at El Duda north west of Sidi Regez, with the South Africans being involved in fierce battles in Die Kessel[nb 10] of Sidi Regez on 29 and 30 November.[57] But the pressure was too great and an eastward withdrawal was inevitable. Finally, the Afrikakorps stalled as it outran its supplies and met stiffening resistance. By early December, Rommel had withdrawn to a line of defences west of Tobruk at Gazala, and the division occupied defensive positions at Mersa Matruh.[58]
After the Sidi Regez battles, the division brigades were deployed in various offensive and defensive roles from Mersa Matruh, of which the following are noteworthy:
The Imperial Light Horse found an unprotected Axis tank repair depot on 9 December – and their attack resulted in the destruction of 38 tanks (Five Mk IVs, 26 Mk IIIs and five Mk Is);[59]
On 18 December 2 company of the 3rd Recce Bn of the armoured car regiment in cooperation with the 4/11 Sikhs destroyed 12 Ju 52 transports on the ground and took 300 prisoners and captured five 88mm AA guns when they attacked an airfield at Derna.[60]
Following the disaster there was a dire need to determine the cause of the 5 SA Brigade's defeat and to prevent it from happening again. Brink argued of the futility of sending infantry against armour but suggested that the task of the infantryman was to follow in the wake of armoured spearheads. The tactics he suggested in the wake of the 1 Division's defeat were taught in South Africa for the following twenty years.[61]
Preparing defences at Gazala and change of command
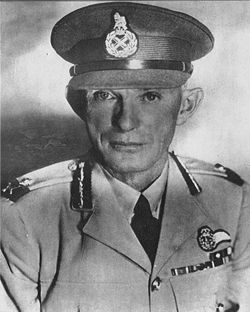
Maj-Gen Dan Pienaar. Assumed command of the division on 10 March 1942
By New Year, the 5th Brigade was re-forming at Mersa Matruh and the 2nd Brigade was earmarked for deployment to Tobruk and the 1st Brigade was to be deployed on operations outside of the division structure. The question re-arose, as to whether South Africa was capable of maintaining the division in the field. By 8 January 1942, the division was 5,570 men under-strength of the approved establishment of 23,187.[62] On 25 January the 1st Brigade was deployed to Tobruk, tasked to fight a delaying action with the 38th Indian Infantry Brigade against the Axis who had by now started a new advance from Msus.[62]
Although it had been agreed that Tobruk would no longer be "held at all costs" in the event of an Axis attack, it formed a critical forward base to protect the Gazala Line from air, land or sea attack.[63]Auchinleck recommended to Ritchie that the forthcoming battle was to be fought west of Tobruk, and not on the frontier. For this reason, 2nd Brigade was also moved forward to support the 1st.[63] By 10 February, the Gazala defences were organised on a two division basis, with the left (southern) sector occupied by the 4th Indian Division and the 1st SA Division taking responsibility for the right sector, reaching down to the sea.[64] On 10 March, Brink injured his back and was evacuated back to South Africa – he was replaced by Dan Pienaar from the 1st Brigade, who had now been promoted to Maj-General.[65]
On 26 May 1942, in his Order of the Day, Gen Pienaar warned the division (now, for the first time deployed with all three brigades under Division command) of an impending attack – directly aimed at their front.[66]
This account only reflects the role of the 1st SA Infantry Division.
"The Cauldron"
General Ritchie and his Corps Commanders during the Battle of the Gazala Line. Source: South African National War Museum
Rommel's advance, containing at least 10,000 vehicles[67] was headed south, to make a long sweeping right-hook around the southern end of the Allied line. The Afrika Korps diary speaks of a bright moonlit night where they advanced without having any contact with the enemy.[68] However the 4th SA Armoured Car Regiment had been tracking their advance and reporting the progress three to four times per hour.[68] The following morning, the German—Italian forces made contact with the 7th Armoured Division, east of Bir Hakeim where General Messervy of the 7th Armoured Division was taken prisoner. 7th Armoured as well as the Free French at Bir Hakeim held up the advance but by late morning, Axis forces had advanced well behind the southern flank and were now heading north behind the Allied lines. The 90th Light captured and held El Adem. With Allied forces now recovering and re-deploying into better assault positions, the Axis forces were caught in an area known as "The Cauldron" between Bir Hakeim to the south, Tobruk to the north east and the Allied minefields between the Axis and their supply lines to the west.[69] Three days armoured fighting ensued in the area of the Cauldron. To better secure his positions, Rommel then drove two Italian formations directly west, through the Allied minefields to re-establish his supply channels. All this time, opposite the 1st SA Division positions to the north of the Gazala Line, the German 15th Rifle Brigade (Brigade Stab zbv (mot) 15),[70] and the Italian Sabratha and Trento Divisions remained quiet.[71][nb 11]
By 12 June, the remaining Free French had been forced to withdraw from Bir Hakeim. At Bir el Hatmat, Rommel had dispersed the tactical HQs of the two British Divisions as well as the HQs of the 9th and 10th Indian Infantry Brigades and other smaller units and the 22nd Armoured Brigade had been forced from the battlefield by renewed attacks from 15th Panzer.[72] In "The Cauldron", three Indian infantry battalions, a reconnaissance regiment and four artillery regiments had been virtually destroyed. On the day before, Axis forces had pushed towards El Adem and had forced the 201st Guards Brigade to withdraw from the Knightsbridge Box on the Gazala Line back to the Tobruk perimeter. On the 14th, Auchinlek authorised Ritchie to withdraw from the Gazala line and the 1st SA and the 50th Northumbrian Divisions were ordered to withdraw along the coastal road back towards Tobruk.[73]
Retreat
While the 1st SA and 50th Divisions were preparing for their withdrawal on the Via Balbia, Axis forces were wreaking havoc on the escarpment amongst Allied forces[74] and Rommel directed his 170mm guns to open fire from the escarpment down onto the Via Balbia as the South Africans and British were destroying their ammunition dumps in the Gazala Line[75] Rommel tasked 15th and 21st Panzer with breaking north and severing the Via Balbia close to Elwet et Tamar, cutting off the two Divisions to the west.[74] With the road being unable to accommodate two divisions, elements of the 50th Division broke out in a south westerly direction in a wide sweep eventually turning back east towards the Allied lines. The South Africans withdrew to series of defensive boxes at Williams Post, Best Post, "Point 187," Commonwealth Keep and then Acroma.[76] The 21st and 15th Panzer attacks forced the 1st SA Division to fight a rearguard action and to withdraw through each of the respective boxes well into the night. Chased by Axis tanks, driving east on the Via Balbia, the first elements reached Tobruk during the night of 13/14 June. The division was now spread out between the original Gazala defences and Tobruk, as each element tried to make their way east.[77]
Gazala Gallop
By 1400 on 15 June, 1st SA Division and elements of the 50th Northumbian Division were close to Gambut, headed towards the Egypt frontier.[78] At the same time, Ritchie had ordered the balance of Eighth Army to withdraw to the defensive positions at Mersa Matruh, some 100miles east of the frontier, leaving Tobruk to hold out and threaten the Axis lines of communication in much the same way as in 1941 – This became known as the Gazala Gallop. At dawn on 21 June, the Tobruk Garrison surrendered to the Axis forces.[79] On the same day, 1st SA Division were ordered to withdraw a further 220miles east, to El Alamein.[80]
Having arrived back from the Gazala Line, the division spent two weeks improving defences on the El Alamein defences in the "Alamein Box". Auchenlik had issued an order instructing all surplus personnel to be sent back to the Delta, which greatly displeased Pienaar.[81] The division had been deploying two brigades of infantry, each accompanied by a battery of artillery to protect the areas west and south of the defensive box. Auchinlecks order effectively meant that Pienaar could only hold the box with one under-strength brigade[81] Before these troops could be returned, battle was joined with the 90th Light Infantry Division in the early morning hours of 1 July.[82]
At 0605 Axis transports were seen advancing to within 2,000yards of the 3rd Brigade positions and they were engaged with machine and anti-tank gun fire from the Imperial Light Horse. During the early morning hours, the 90th Light had lost direction and veered too far north, resulting in the clash with ILH.[82] While the Rand Light Infantry were driving off German towed artillery, South African Air ForceBoston light bombers bombed their supply columns. By 0730 the 90th Light had been halted and were pinned down by the South Africans, determined to avenge Gazala and the surrender of Tobruk.[83] The 90th Light only managing to extricate themselves under cover of a dust storm later in the day.[82] The Axis attack had been stopped all along the Allied line of defence.[84]
Cracks Widen
Cracks and fissures had again become visible between the 1st SA Div and the Army command.[85] 1st SA Brigade had been deployed on the flank, on Ruweisat Ridge and by this time they had become somewhat isolated during the previous days fighting and the Allied bombing missions of the previous night.[85] The Brigade had lost its Officer Commanding as well as its Brigade Major during the previous two days fighting and over 15,000 shells had fallen on their strongpoint, known as "Hotbox," from the area of the Trieste Division.[85] Pienaar advised Norrie that their position was "untenable" and Norrie replied that if that was the case, he would "..... relieve the Brigade, place it in reserve and replace it with another formation." Offended by this – Pienaar called 8th Army HQ and was advised by Dorman-Smith that the Brigade was to remain where it was.[85] Not satisfied, Pienaar insisted on speaking to Auchinleck, who ordered that the Brigade hold its ground – but offered to relieve the Brigade within two days when the 9th Australian Division reached El Alamein.[85] Pienaar's demands of the evening of 2 July shook the 8th Army command's confidence in the morale of the division and Auchinleck stated that the division could no longer be exposed to "undue operational strain," fearing that material losses to the division, especially after the surrender of the 2nd SA Division at Tobruk, would lead to political disaster.[86] Auchinleck deployed the 9th Australian Division to re-enforce the northern sector of the line held by the South Africans three days later.[87] Pienaar had also been falsely accused of supporting the retreat to the Delta and engaging the Axis from behind the Suez Canal – he remained resolved to fight, stating to an American war correspondent at Alam Halfa in July 1942 "....Here I stop, I've retreated far enough, whether we hold the damn thing or not!"[88]
Rommel launched one more assault on 31 August, aimed at Alam el Halfa ridge. The division responded by launching a number of successful raids at the enemy forces after last light, once they had stopped their advance for the night on 31 August. By noon on 1 September, 15th Panzer were immobilised by lack of fuel south of Alam Halfa. Pienaar re-organised the division to occupy the positions with one brigade and released two brigades as part of "battle groups" to act against the immobilised Axis division. The report that these forces were available was not welcomed at Corps and Army headquarters, and these mobile formations were not used.[89] After the counter-attack was eventually organised, the Axis had already started to withdraw and fighting was broken off on 7 September.[90]
Map 4: Force dispositions as at 23 October 1942 (South African positions shown as inset).
For what was to become the final South African assault on the Axis forces (Operation Lightfoot), the division was tasked attack on a two-brigade front to secure the southern end of Mieiriya Ridge. The Indian 4th and Northumbrian 50th Divisions were deployed to their south and to the north, was the 2nd New Zealand Division.[92] The South Africans were to attack towards the south west with 2nd SA Infantry Brigade (Brig. W.H.E. Poole) on the right and 3rd SA Infantry Brigade (Brig. R. Palmer) on the left. 1st SA Infantry Brigade was deployed further south and was responsible for creating an anti-tank screen to protect the left flank of the South African attack[93] (See Map 4). The Australians and Highlanders were to force a northern corridor through the Axis minefields while the New Zealanders and South Africans were to do the same in the southern sector.[94]
Break-In: Operation Lightfoot
Operation Lightfoot started at 2140 on 23 October with a five-hour fire plan, the start of which signified H-Hour for the infantry assault.[95] Pienaar had deployed each of the lead brigades, with on battalion leading for the first phase to the "red line" – after a pause of an hour and a quarter, the two trailing battalions would pass through to the final objective on Miteiriya Ridge. 1st Brigade – who was not part of the main advance was provided with a special force of armoured cars, machine guns and anti-tank guns to guard their and the division's left flank (Refer Map 4). They were also allocated a mobile element of the 8th Royal Tanks. The divisional artillery, reinforced by three troops from X Corps was to fire a fire-plan of timed concentrations – using smoke on the intermediate and final objectives to cover re-organisation and to help with direction finding.[96]
The two South African brigades advanced with 40mm Bofors guns marking the lines of advance between the respective battalions[94] and the first objectives on the Corps objective line called "Oxalic" were occupied by the Natal Mounted Rifles at 2350.[97] The Cape Town Highlanders were the last battalion to reach their individual unit objectives on Oxalic – and were established on Miteiriya Ridge by 0800 the following morning.[98] The fact that the 1st and 10th Armoured Divisions had not broken through into the open areas west of the line as originally planned, meant that Montgomery had to change his orders – moving to an attritional World War I type of battle, which Montgomery in a semblance of a novelty – dubbed "Crumbling Actions."[99] By the evening of 26 October (as from the H-Hour on the 23rd), the South Africans had suffered 600 casualties, as compared to 2,000 in the 51st Division, 1,000 Australians and a similar number of New Zealanders.[100]
"Crumbling Operations"
Memorial to South Africans at El Alamein Commonwealth Cemetery
During the night of 25/26 October, some South African and other elements which had not yet established themselves on their exact Oxalic objectives, made corrective moves and by dawn the entire XXX Corps was finally in their initial phase objectives.[101] The Australians and the 1st Armoured Division had launched attacks in the north, being the start of the "crumbling" process, while at the same time, there was much re-organisation and re-deployment to the south. On 26 October Leese issued orders for the 1st SA Division to "side-step" north in conjunction with a similar move by the 4th Indian Division and to extend their lines to occupy the area held by the New Zealand Division and the 9th Armoured Brigade. Once this move was completed, these relieved units were to be withdrawn into reserve.[102] During the order group to issue these instructions, Pienaar again voiced an objection to orders – on the grounds that he had insufficient transport to make the move in the required time. Freyberg, in a move to "spike his guns" asked Pienaar again, if the only limiting factor was transport? Pienaar confirmed – and when Freyberg offered him transport from the New Zealand Division, no more was heard of the matter and the re-deployment was executed.[103] The South Africans were now stretched on a wider front, between the Australians and 51st Division in the north and the Indian 4th Division on Ruweisat Ridge, with 5th SA Brigade on the right, 3rd SA Brigade on its left and 1st SA Brigade being pulled back as the divisional reserve.[104]
Break-Out: Operation Supercharge
On the night of 2/3 November, the Australians noticed signs of withdrawal by Axis units in the coastal salient and by 1000 Montgomery had received similar reports from the south.[105] Contrary to Hitler's instructions – Rommel had started to withdraw. The final plan to destroy the Axis forces, code named "Supercharge" was put into action. The 1st SA Division played no role in this phase of the operation – but the South African armoured cars attached to XXX Corps were actively involved in the attempted destruction and subsequent pursuit.[106]
At 0540 on 4 November, after repeated attempts at breaking through the Axis lines – Lt-Col Reeves-Moore lead the South African armoured cars into the rear of the Axis positions, "....the eager children of any mechanized pursuit... scampered at dawn into the open desert beyond the mines and trenches and guns, to make their exuberant mischief amid the disintegrating enemy".[107] They soon started causing the havoc for which they had been intended – A Sqn capturing two 88mm guns, two 105 mm guns, two 110mm guns, a Bredaportee, six trucks and 130 prisoners; while B Sqn captured five trucks, a staff car, one 105 mm and one 150 mm gun and 100 prisoners within a matter of hours.[107]
While the armoured cars were dashing west, the 1st SA Division had moved further north and over the previous two nights had relieved the 51st Highland Division. During the night of 3/4 November, the last unit to move into its new position was the 1st Cape Town Highlanders, who moved during a major artillery barrage in support of an attack by the 5th Indian Infantry Brigade. The regiment awoke on 4 November to silence and the absence of gunfire, save for the sound of Allied vehicles advancing west in pursuit of the retreating enemy. For the 1st South African Division, the war had ended.[108]
Disbandment
A Lockheed Lodestar, similar to the aircraft in which Gen Dan Pienaar was killed on 19 December 1942.
The Union Defence Force had finalised a decision to convert the 1st SA Infantry Division into an Armoured Division and the Axis withdrawal from El Alamein marked the end of fighting for the division in the Middle East. By 1 December, advance parties were already returning to South Africa to assist with the establishment of the intended armoured division and later in the month, General Dan Pienaar was recalled to South Africa to lead the formation of the new division.[109] He and eleven other officers boarded a Lockheed Lodestar on 17 December to fly back to South Africa. The aircraft stopped to re-fuel at Kisumu on the shores of Lake Victoria and on takeoff on 19 December, it plunged into the lake, killing all on board.[110][nb 12]
On 1 January 1943, the 1st SA Infantry Division embarked for home, with troops returning to their parent units in South Africa. The division had been dissolved and many of its former units were to be absorbed into the 6th South African Armoured Division.[112] The designation 1st South African Infantry Division was also used briefly by a successor formation in 1948–49.
↑Although officially part of 1st SA Div, the 1st SA Inf Brigade served most of its time in East Africa as an independent brigade, detached to formations other than 1st SA Division. For an account of the 1st Brigade actions in East Africa, see East African Campaign. It was only re-united with its parent formation in the Western Desert.
↑When a group of Springboks (South Africans) entered a bar in Cairo in October 1942, they were confronted by a group of Australians. An Australian stood up and offered the leading South African a chair – "Sit down cobber and take a drink. You look all in. What's the matter ..... just ran all the way from Tobruk?" What followed was one of the most spectacular bar fights in the Middle East, even taking into account the destruction of Shepherds Hotel Bar in the First World War. Latimer p. 146
↑The forces of the Dominions of Australia, New Zealand and South Africa were composed exclusively of troops from those countries and Eighth Army had no jurisdiction over disciplinary, training or administrative matters for these troops. The Australian and New Zealand formation commanders had the right to refer any matter which they did not agree with, back to their respective governments, circumventing the chain of command. Major-General Dan Pienaar and the 1st SA Division, did not have this right of referral to the Union of South Africa Government, but he retained independence in disciplinary, training or administrative matters. This gave the commanders of 9th Australian, 2nd New Zealand and 1st South African Divisions a very different constitutional arrangement in respect of the 8th Army command as well as with the respective Corps command structures. Barr, p. 46
↑"Death Sunday" in German, referring also to "All Saints Day" which was celebrated that day.
↑The 5th SA Infantry Brigade went into battle on 23 November 41 with a strength of 5,700 men. A month later, after all the survivors had been found in Mersa Matruh, total strength was 2,306. Only 5 field guns and two 2-pounders were got out to join the 1st SA Division. However, when compared to casualties sustained by Afrikakorps, they indicated sustained fighting. Agar-Hamilton, p. 271
↑It was at this time, conducting probing fighting patrols into the Italian positions that Sgt Q. Smythe lead his platoon under enemy fire, earning him the Victoria Cross. Refer section titled "Awards for Gallantry"
↑The court of enquiry found that the crash was due to (a.) the failure of the under-carriage to retract, (b.) controlled flight into ground [water] in a turn due to loss of airspeed from the lowered under-carriage; (c.) pilot fatigue.[111]
↑XIII Corps was known as the "Western Desert Force" until it formally became XIII Corps in October 1941
↑Armstrong was captured at Sidi Rezeg on 23 or 24 November 1941 and was flown directly from North Africa to Germany for interrogation. Matthews, D. Capt. With the 5th South African Infantry Brigade at Sidi Rezegh. South African Military History Journal – Vol. 10 No 6.
↑Bentz, Gustav (2012). "From El Wak to Sidi Rezegh: The Union Defence Force's First Experience of Battle in East and North Africa, 1940-1941". Scientia Militaria. 40: 196.
Agar-Hamilton, J. A. I.; Turner, L. F. C. (1957). The Sidi Rezeg Battles: 1941. Vol.I (1sted.). Cape Town: Oxford University Press. OCLC870086510.
Agar-Hamilton, J. A. I.; Turner, L. F. C. (1952). Crisis in the Desert: May – July 1942. Vol.II (1sted.). Cape Town: Oxford University Press. OCLC776803251.
Barnet, Correlli (1960). The Desert Generals. London: George Allen & Unwin.
Barr, Niall (2004). Pendulum of War: The Three Battles of El Alamein. London: Pimlico. View Preview at
Birkby, Carel (1950), The Saga of the Transvaal Scottish Regiment, 1932–1950, Cape Town: Howard Timmins for Hodder & Stoughton
Carver, Michael (1962). El Alamein. London: Bratsford.
Klein, Harry Lt-Col (1946). Springbok Record (Klein I in references). Johannesburg: White House.
Klein, Harry. Lt-Col. The Battle for Southern Abyssinia. Published in Reader's Digest Illustrated History of World War II: Volume I. 1969, Reader's Digest, Cape Town. (Referred to as Klein II in references)
Liddell Hart, B. H., ed. (1953). The Rommel Papers. London: Collins.
Orpen, N. (1968). East Africa and the Abyssinian Campaigns. South African Forces World War II. Vol.I. Cape Town: Purnell.
Orpen, N. (1971). War in the Desert. South African Forces World War II. Vol.III. Cape Town: Purnell.
Playfair, I.S.O. Maj-Gen (1954). The Mediterranean and Middle East: Early Successes Against Italy to May 1941. History of the Second World War, United Kingdom Military Series. Vol.I. Scotland: HMSO.
Playfair, Major-General I.S.O.; with Flynn, Captain F.C. (R.N.); Molony, Brigadier C.J.C. & Gleave, Group Captain T.P. (2004) [1st. pub. HMSO:1960]. Butler, Sir James (ed.). The Mediterranean and Middle East: British Fortunes reach their Lowest Ebb (September 1941 to September 1942). History of the Second World War, United Kingdom Military Series. Vol.III. Uckfield, UK: Naval & Military Press. ISBN978-1-84574-067-2.
Playfair, I.S.O. Maj-Gen. History of the Second World War: The Mediterranean and Middle East: The Destruction of the Axis Forces in Africa, Volume IV 1966. HMSO, Scotland. (Referred to as Playfair, IV in references)
Pollock, A.M. (1943). Pienaar of Alamein: The Life Story of a Great South African Soldier. Cape Town: Cape Tims.
Porch, Douglas (2004). Hitler's Mediterranean Gamble. London: Cassell.
Uys, Ian (1973). For Valour: The History of South Africa's Victoria Cross Heroes. Johannesburg: Ian S. Uys.
This page is based on this Wikipedia article Text is available under the CC BY-SA 4.0 license; additional terms may apply. Images, videos and audio are available under their respective licenses.