The second battle of Charleston Harbor, also known as the siege of Charleston Harbor, the siege of Fort Wagner, or the battle of Morris Island, took place during the American Civil War in the late summer of 1863 between a combined U.S. Army/Navy force and the Confederate defenses of Charleston, South Carolina.
After being repulsed twice while trying to take Fort Wagner by storm, Maj. Gen.Quincy Adams Gillmore decided on a less costly approach and began laying siege to the fort.
In the days immediately following the second battle of Fort Wagner, Union forces besieged the Confederate works on Morris Island with an array of military novelties. Union gunners made use of a new piece of artillery known as the Requa gun—25 rifle barrels mounted on a field carriage. While sappers dug zig-zag trenches toward Fort Wagner a second novelty was used—the calcium floodlight. Bright lights were flashed upon the defenders, blinding them enough to decrease accurate return fire while the Union gunners fired safely from behind the lights[5]
The Confederate defenders also had advantages. The ground the Union sappers were digging through was shallow sand with a muddy base. The trenching efforts also began to accidentally uncover Union dead from the previous assaults on Fort Wagner. Disease and bad water plagued soldiers on both sides.
"Map of Charleston Harbor Showing Union and Rebel Batteries to September 1863." Period map drawn by Robert K. Sneden.
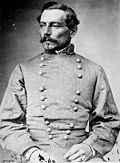
Garrison
The Union army maintained a constant rotation of soldiers to man the forward trenches of the "grand guard". During the evening of August 16, a Confederate artillery shell burst through the bombproof building serving as the headquarters for Colonel Joshua B. Howell, commanding officer of the grand guard that evening. A shell fragment struck Colonel Howell, wounding him severely in the head. Despite Howell's quick recovery, the incident prompted the Union commander to exclusively use veteran troops in the forward trenches.[6] The Confederates also kept a constant rotation of soldiers through Fort Wagner and Battery Gregg. During the night, rowboats would bring fresh troops from the mainland to replace the garrison. Even though they had won a substantial victory at Fort Wagner, the Confederates fully expected the campaign to continue.[7] Having a large garrison to draw from Gen.P.G.T. Beauregard was prepared to continue the campaign. Immediately in command of the Confederate forces surrounding Charleston was former career army officer and South Carolina businessman Roswell S. Ripley. Ripley's forces were spread throughout the fortifications surrounding Charleston Harbor and included a division of the local South Carolina militia. Gilmore and Admiral John A. Dahlgren requested reinforcements from General-in-Chief Henry Halleck. Halleck was reluctant but a division from the Army of the Potomac was transferred to the south under George H. Gordon. General John G. Foster, Union commander of the Department of North Carolina, enthusiastically sent a division of reinforcements telling Gilmore "Charleston is too important to be lost when so nearly won".[8]
Union troops of the 1st New York Volunteer Engineer Regiment digging a sap with a sap roller on Morris Island, 1863Fort Sumter, reduced to a shapeless pile of rubble, photographed by Haas & Peale across an active front (Note the Confederate flag flying above the parapet), soon after the evacuations of batteries Greg and Wagner on September 7, 1863The "Swamp Angel"Morris Island South Carolina, photographed by Haas & Peale showing USS New Ironsides in right background September 7, 1863Union ironclads bombarding Fort Moultrie taken Sept 8, 1863 by George S. Cook.
Despite the marshy conditions on Morris Island, Union forces had constructed powerful batteries to combat Fort Wagner. These batteries were often named in honor of fallen leaders such as Batteries Strong, Reynolds, Kearny and Weed. Others were named for high ranking army officers such as Batteries Rosecrans and Meade.
Inside Fort Wagner only one 10-inch Columbiad faced seaward and the few landward guns were in poor condition. During Colonel Lawrence M. Keitt's tenure in command of the Confederate garrison he established signal stations on Fort Wagner's west wall to coordinate with Confederate batteries on James Island. Keitt's replacement, General Johnson Hagood, made better use of sharpshooters and the few landward guns to impede the Union siege works upon the fort. The Confederates protected their own guns and bombproofs but exposed themselves to Union naval fire and in the end could only slow the Union trenches.[9]
Swamp Angel
On August 2 under the direction of Colonel Edward W. Serrell, Union engineers began constructing a battery further inland with the intention of bombing the city of Charleston directly. By August 17 the massive battery was ready for its armament. Lieutenant Charles Sellmer with a detachment of the 11th Maine Infantry was called in to man the 200-pound Parrott rifle now being referred to as the "Swamp Angel". On August 21 Gilmore sent an ultimatum to Beauregard to abandon Forts Wagner and Sumter or Charleston would be fired upon. When Gilmore received no reply by the following day the first shot was fired from the Swamp Angel into Charleston using the steeple of St. Michael's Church for a bearing.[10] On August 22 Confederate batteries tried in vain to silence the Swamp Angel.[11] Beauregard scorned Gilmore for turning his guns on a civilian city and demanded an opportunity to evacuate citizens. Gilmore complied with a day of cease-fire but also took the opportunity to express the fact that Charleston was a legitimate military target as an ammunition supply. The firing resumed but on the 36th shot the Swamp Angel burst and was not replaced during the campaign. It was the first time a civilian population was deliberately targeted for military purposes during the Civil War.[12]
Fort Sumter
Photo of a John R. Key painting, based on three half stereos taken by George S. Cook inside Fort Sumter on Sept. 8, 1863 and published in The Photographic History of The Civil War (1911). Note: The famous "exploding shell" photo falsely attributed to George Smith Cook is in reality a painting by C.S.A. Lt. John R. Key, based on three half stereos taken by Cook inside Fort Sumter on Sept. 8, 1863. Noted Civil War photo historian and author Bob Zeller of the Center for Civil War photography personally inspected the negative, which is the source for all known "exploding shell" prints, and is archived at the Valentine Richmond History Center. The negative had been carefully masked to show the Key painting only and not the parlor table it sat on, nor the three chairs behind it. Francis Miller's experts, in compiling The Photographic History of The Civil War, had obviously overlooked the fact that no camera of the time was capable of taking the wide angle depicted
Despite trenching difficulties, by mid-August Gillmore had his siege guns within range of Fort Sumter. On August 17, he opened fire and during the first day of the bombardment nearly 1,000 shells were fired.[13] By August 23, the masonry had been turned to rubble and Beauregard removed as many of the fort's guns as possible. Gillmore wired the War Department that "Fort Sumter is a shapeless and harmless mass of ruin".[14] However, the bombardment of Fort Sumter would continue in general until December 31, 1863.[15]
Fall of Fort Wagner
Attacks on rifle pits
Gillmore's attention returned to Fort Wagner. By now his forces were close enough to the Confederate works for the infantry to take action. On August 21 Colonel George B. Dandy led the 100th New York Infantry in a rush toward Fort Wagner's rifle pits. The New Yorkers quickly established a temporary picket line but their success was short lived. General Hagood ordered a counterattack which drove off Dandy's men.[16] Following Dandy's attack Confederate engineers began working to strengthen the rifle pits, hoping to force the Union army into mounting another costly assault. Before work could be completed Gilmore ordered division commander General Alfred H. Terry to capture the rifle pits. Terry prepared the 24th Massachusetts Infantry from Brigadier General Thomas G. Stevenson's brigade to lead the attack. In support was the 3rd New Hampshire Infantry. Each member of the 24th Massachusetts was equipped with an additional two shovels to immediately rebuild the rifle pits once taken. On the evening of August 25 General Stevenson personally led the attack forward covered by fire from the requa guns. The attack overran the 61st North Carolina Infantry, many of whom surrendered. Colonel George P. Harrison, the fort's commander, ordered an artillery counterattack but the rifle pits were already turning into a new siege line. On September 5, Gillmore and Admiral Dahlgren attacked with an intense bombing of Fort Wagner for 36 hours killing 100 of the remaining defenders.[17]
Evacuation
Conditions within the fort were becoming intolerable, and the garrison commander, ColonelLawrence M. Keitt, informed General Beauregard that he now had only 400 men capable of defending the fort. Therefore, on the evening of September 6–7, Beauregard ordered Confederate forces to abandon their positions on Morris Island. On September 7, Union troops occupied Fort Wagner.
Aftermath
Fort Wagner had withstood 60 days of constant bombing and held off a much larger Union army. Yet the Union army and navy had captured an important position at the mouth of Charleston Harbor and reduced its most formidable fortress to rubble. Despite this, the city of Charleston and Fort Sumter itself would remain in Confederate control until William T. Sherman's armies marched through South Carolina in 1865.
Additional operational maps
Gallery: the siege of Charleston Harbor from the Atlas to Accompany the Official Records of the Union and Confederate Armies.
Chaitin, Peter, and the Editors of Time-Life Books. The Coastal War: Chesapeake Bay to Rio Grande. Alexandria, VA: Time-Life Books, 1984. ISBN0-8094-4732-0.
U.S. War Department, The War of the Rebellion: a Compilation of the Official Records of the Union and Confederate Armies. Washington, DC: U.S. Government Printing Office, 1880–1901.
This page is based on this Wikipedia article Text is available under the CC BY-SA 4.0 license; additional terms may apply. Images, videos and audio are available under their respective licenses.