The crews were men from the United Kingdom, other Commonwealth countries, and occupied Europe, especially Poland, France, Czechoslovakia and Norway, as well as other foreign volunteers. While the majority of Bomber Command personnel were members of the RAF, many belonged to other air forces – especially the Royal Canadian Air Force (RCAF), Royal Australian Air Force (RAAF) and Royal New Zealand Air Force (RNZAF). Under Article XV of the 1939 Air Training Agreement, squadrons belonging officially to the RCAF, RAAF, and RNZAF were formed, equipped and financed by the RAF, for service in Europe. While it was intended that RCAF, RAAF, and RNZAF personnel would serve only with their respective "Article XV squadrons", in practice many were posted to units of the RAF or other air forces. Likewise many RAF personnel served in Article XV squadrons.
A total of 126 squadrons served with Bomber Command. Of these, 32 were officially non-British units: 15 RCAF squadrons, eight RAAF squadrons, four Polish squadrons, two French squadrons, two RNZAF/"New Zealand" squadrons,[a] and one Czechoslovak squadron.
Most aircrew were aged between 19 and 25, although some were as young as 16 (see "Aircrew Ages"below.)
In total 364,514 operational sorties were flown and 8,325 aircraft lost in action. Bomber Command aircrews suffered a high casualty rate: of a total of 125,000 aircrew, 57,205 were killed (a 46 percent death rate), a further 8,403 were wounded in action and 9,838 became prisoners of war. Therefore, a total of 75,446 airmen (60 percent of operational airmen) were killed, wounded or taken prisoner.[1] The RAF Bomber Command Memorial in Green Park, London was unveiled by Queen Elizabeth II on 28 June 2012 to highlight the heavy casualties suffered by the aircrews during the war.[2]
Training
Initial flight training
A flight of North American Harvard IIAs from No 20 Service Flying Training School being flown in formation by RAF trainee pilots participating in the Commonwealth Joint Air Training Programme at Cranborne, near Salisbury, Rhodesia
The risk of Luftwaffe attack on training bases in Great Britain coupled with the urgent need for larger numbers of well trained aircrew than the pre-war systems could produce brought about the British Commonwealth Air Training Plan (BCATP), often referred to as simply "The Plan".[3] It was a massive, joint military aircrew training program created by the United Kingdom, Canada, Australia and New Zealand, during the Second World War.[4] BCATP remains as one of the single largest aviation training programs in history and was responsible for training nearly half the pilots, navigators, bomb aimers, air gunners, wireless operators and flight engineers who served with the RAF, the Royal NavyFleet Air Arm (FAA), RAAF, RCAF and RNZAF during the war.[5] Under a parallel agreement, the Joint Air Training Scheme in South Africa and Southern Rhodesia operated training bases for aircrew. Multiple training schools also operated in the United States where bomber pilots, navigators and bomb aimers were trained.[6]
On completion of basic military training aircrew candidates would wear a white flash on the front of their service issue "side caps" denoting their "aircrew under training" status. No matter where they originated in Britain or the Commonwealth they could be shipped to the next available training course in any of those nations where pilots were trained to fly at Elementary Flying Training Schools and the other aircrew trades attended appropriate trade schools such as Air Navigation Schools or Bombing and Gunnery Schools.[7][8] Following completion of training at a graduation ceremony aircrew were presented with their aircrew brevet (the correct term is flying badge) and either handed their sergeant's stripes or commissioned as officers.[9]
Operational training and conversion
30 Operational Training Unit Wellingtons in September 1943
The next phase of training was usually in Britain at one of the Operational Training Units (OTU).[10] Aircrew memoirs repeatedly mention arriving at an OTU in large groups of mixed aircrew trades all assigned to the next course and being left to mingle in a large hall to form crews.[11][12] The process of forming a crew generally followed the pattern of one or two men who knew each other from training schools deciding to fly together then looking for other members from different trades to team up with.[13][14] Most crews were formed in this manner.[15][16] Instructors were usually experienced aircrew being "rested" after completing an operational tour and were tasked to lead the airmen for five or six weeks on night flying, navigation, bombing, cross country, all-weather and air gunnery/fighter affiliation practice operations in the types of aircraft they were likely to fly operationally. The process was hazardous and crashes due to inexperience cost over 8,000 casualties, including instructors who had joined a crew needing particular support or guidance.[17][18]
In the first half of the war completion of training at an OTU would mean each crew transferring to an operational squadron and beginning their operational tour. Assignment to a squadron was simply a process of making good recent losses and a squadron which had lost three or four crews in the previous week would expect the "feeder" OTUs to have replacement crews (known as freshmen or sprog crews)[11] ready in the system to cover the losses. This effectively meant that any crew could go to any squadron within Bomber Command. During 1942 particularly, any maximum effort attacks such as the thousand-bomber raids on Cologne on the night 30–31 May 1942 and Essen on 1–2 June 1942 required more aircraft and crews than Bomber Command had available in its operational squadrons so crews at OTUs who were near the end of their courses and were rated as efficient, participated in the operation.[19][20]
During mid-wartime many crews trained using "tired" Vickers Wellington bombers,[21] at OTUs and then had to convert,[22] learning to fly the four-engined heavies (Short Stirling, Handley Page Halifax or Avro Lancaster) which they would fly after joining their squadrons at Heavy Conversion Units.[23] At the HCU, each crew would be filled out with a flight engineer,[24] and an additional air gunner (to man the mid-upper gun turret although sometimes the gunners would agree to exchange turrets) to man the extra positions the heavies had over the Wellington.[25][26]
Bomber Command aircrew "trades" flying operationally in the early stages of the war were:[28][29]
Observer flying badge
Pilot – A qualified pilot flew the aircraft and in the Royal Air Force was usually the captain (function not rank) of the crew, making the key operational decisions even if his rank was junior to other members of the crew.[30] The pilot was often a commissioned officer but he could hold any rank from Sergeant up to Group Captain. Officers of higher rank did occasionally fly operationally but were discouraged from doing so due to concerns of them being taken prisoner. Captains were often informally referred to by their crews as Skipper or Skip. A pilot wore the traditional double-winged flying badge "pilot's wings" on his tunic above his left breast pocket.[31]
Second pilot – A fully qualified, usually less experienced pilot who assisted the captain, who might assist the Observer and was usually a sergeant or commissioned officer. A second pilot wore the traditional double-winged flying badge pilot's “wings” on his tunic above his left breast pocket.
Observer – The role was to navigate the bomber to the target using astral navigation, map reading, and wireless position fixes and then to release the payload onto the target. The observer was often a commissioned officer but could hold any rank from Aircraftman 2nd Class (until 27 May 1940) up to Group Captain. An observer wore a single-winged flying badge with a wreath containing the letter "O" on his tunic, above his left breast pocket denoting his trade specialisation. If the aircraft was operated by a Polish or French manned squadron the observer was often the senior ranking crew member aboard and was captain (function not rank) of the crew.[31]
Air Gunner flying badge
Wireless operator/air gunner – The role was to send and receive wireless signals during the flight, assisting the observer with triangulation "fixes" to aid navigation when necessary and if attacked to use the defensive machine gun armament of the bomber to fight off enemy aircraft. In the early stages of the war usually an enlisted man, he could hold any rank from aircraftman 2nd class (until 27 May 1940)[32] upwards but most often a sergeant. A wireless operator/air gunner wore a single-winged aircrew flying badge with a wreath containing the letters AG or S on his tunic, above his left breast pocket denoting his trade specialisation and a cloth arm patch featuring lightning bolts.[30]
Air gunner – The role was to defend the bomber using the aircraft's machine guns. In the early stages of the war usually an enlisted man, he could hold any rank from aircraftman 2nd class (until June 1940) upwards but most often a sergeant although some air gunners were commissioned officers of which a small number were considerably older than most aircrew and even veterans of World War I. An air gunner wore a single-winged aircrew flying badge with a wreath containing the letters AG on his tunic, above his left breast pocket denoting his trade specialisation and very early in the war might also have the brass "winged bullet" qualification badge of a pre-war air gunner on his sleeve.[31][33][34]
Operational aircraft and their crews
Typically when flying operationally the following aircraft were crewed as below:
Fairey Battle -most often used in daylight operations in a ground support role and crewed by three airmen, a pilot, an observer and a wireless operator/air gunner. The Battle-equipped squadrons were operational in the Battle of France and suffered catastrophic losses when they were intercepted by Luftwaffe fighters such as the Messerschmitt Bf 109 and the Messerschmitt Bf 110.[35]
Blenheim Mark IV of 21 Squadron at Bodney in August 1941
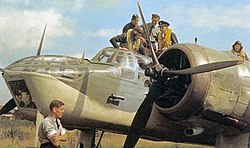
Bristol Blenheim – used in daylight or night operations and usually crewed by three airmen, a pilot, an observer and a wireless operator/air gunner in a dorsal power-operated gun turret. The Blenheim-equipped squadrons were in the front line from the day Britain declared war on Germany in a wide variety of roles but usually as bombers or maritime reconnaissance/attack aircraft and like the Fairey Battle it was extremely vulnerable to attacks by single German fighters let alone a determined attack by a flight of fighters co-operating.[35]
Handley Page Hampden
Handley Page Hampden – used normally in night operations and usually crewed by three or four airmen, a pilot, a second pilot or observer, a wireless operator/air gunner and an air gunner. The Hampden-equipped squadrons were operational from the day Britain declared war on Germany initially dropping propaganda leaflets but then usually in night time bombing attacks or mine-laying (sea mines) in known enemy shipping or U-boat transit routes or even in enemy harbours.[36]
The Merlin-engined Wellington Mark II. This aircraft belongs to No. 104 Sqn.
Vickers Wellington twin-engined medium bomber – used normally in night operations and crewed by five or six airmen, a pilot, (a second pilot in the earlier years), an observer, two wireless operator/air gunners and an air gunner in a power-operated rear-mounted turret in the tail section of the aircraft, the "rear gunner".[30] The structure and strength of the aircraft meant it could withstand heavy battle damage and still return home. It was affectionately known as the "Wimpey" by its crews. The Wellington-equipped squadrons were operational from the day Britain declared war on Germany initially dropping propaganda leaflets but then usually in night time bombing attacks or mine-laying (sea mines) in known enemy shipping or U-boat transit routes or even in enemy harbours. Daylight bombing operations attempted by formations of Vickers Wellingtons in December 1939 over Northern Germany resulted in such high losses that they were not repeated.[37]
Whitley Mark V
Armstrong Whitworth Whitley twin-engined medium bomber – used normally in night operations and usually crewed by five airmen, a pilot, a second pilot, an observer, a wireless operator/air gunner and an air gunner in a power-operated rear-mounted turret in the tail section of the aircraft, the "rear gunner". The Whitley-equipped squadrons were operational from the day Britain declared war on Germany initially dropping propaganda leaflets but then usually in nighttime bombing attacks or mine-laying (sea mines in known enemy shipping or U-boat transit routes or even in enemy harbours. The aircraft was reaching the end of its operational life and was phased out of night bombing operations by 1942.[38]
Later years
Development of the next RAF bombers had started pre-war, these came into service during the war with the first examples reaching squadrons in 1940. The four-engined Stirling was given operational status in January 1941, the Avro Manchester's first sorties were in February and the Halifax's first operations were in March. The twin-engined Manchester suffered from unreliable engines and the few built had a relatively brief operational service before being taken out of service. In November 1941, the fast twin-engined Mosquito light bomber was introduced and finally in March 1942 the four-engined Avro Lancaster - effectively a four-engine version of the Manchester - came into service[b].[39] The Vickers Wellington continued in service with RAF Bomber Command in Europe into 1943 although the squadrons were being converted to four-engined bombers.[citation needed] Towards the end of the war, the front line heavy bombers were the Halifax and Lancaster with the Stirling used on mining operations.
New trades and additional aircrew
Lancaster pilot at the controls, left, flight engineer at right
Lancaster wireless operator on duty.
The introduction of heavy bombers with four engines brought the necessity of engine management and a new trade entered service with these aircraft.[40][41][42] "Flight engineer" chosen specifically for mechanical aptitude. The flight engineer sat beside the pilot and assisted him particularly at takeoff, during the flight monitoring the engines and, most importantly, the fuel efficiency, pumping fuel between the tanks as required.[30] It was not unusual for these airmen to be a little older than their colleagues and they often had prior mechanical experience. The flight engineer was usually a sergeant; promotion tended to be slow. A flight engineer wore a single-winged aircrew brevet (actually a flying badge - the use of the word “Brevet” actually describes a certificate in French) with a wreath containing the letter 'E' on his tunic, above his left breast pocket denoting his trade specialisation. During the initial operational service of four-engined bombers second pilots were carried until sufficient flight engineers had been trained.[43]
The original trade of observer began to be phased out although those airmen who had qualified in that role early in the war continued to wear their Observer flying badge with great pride. It was replaced by two new trades.
Navigator at work. F/O Phil Ingleby of 619 Squadron was killed on his second tour in August 1944The bomb aimer on a Lancaster B Mark I at his position in the nose
"Navigator" who worked at his desk behind a curtain, operated any radar navigational aids and instructed the pilot on route and airspeed required throughout the operation in order to arrive on target within the expected time period in company with the other aircraft due to attack.[44] A navigator wore a single-winged aircrew flying badge with a wreath containing the letter N on his tunic, above his left breast pocket denoting his trade specialisation. At this stage of the war pilots and navigators were often commissioned on completion of training.[30][45]
"Air bomber" more normally called the "bomb aimer". He manned the nose-mounted gun turret (usually twin .303 machine guns) during the operation and provided assistance to the navigator.[30] To operate the bomb sight he would crawl into the bomb aimer's compartment in the lower section of the nose of the aircraft and release the bomb load onto the target at the appropriate time. During the "bombing run" when the bombs were about to be released he would instruct the pilot on minute adjustments to course in order to release the bombs as accurately as possible, the release of the bomb load activated a flash photograph to record the target below. The Bomb Aimer was usually often a commissioned officer, he wore a single-winged aircrew flying badge with a wreath containing the letter B on his tunic, above his left breast pocket denoting his trade specialisation.[46]
Mid-upper gun turret with twin .303 Browning machine guns, February 1943Gunner in the Nash & Thompson FN20 tail turret of a Lancaster
To protect the heavy bombers from a German Luftwaffenight fighter force which had evolved at great speed to become extremely effective, most of the new heavy bombers had three power-operated gun turrets usually sited in the nose, dorsal (mid-upper) and rear (tail) positions requiring an additional gunner. The traditional 'tail end Charlie' Rear Gunner continued in place facing rearwards with his quad mounted .303 Browning machine guns while an additional air gunner, known as the "Mid Upper" gunner climbed up into a sling harness to man a power-operated dorsal turret on the top of the fuselage.[47] Within crews some gunners preferred one turret to the other and would usually fly in that, in other crews the gunners might swap turrets regularly.[citation needed]
In the middle years of the war it became more usual to train airmen specifically as "wireless operators" and no longer add air gunnery training to their instruction. These men graduated training schools to earning a single-winged aircrew flying badge over a wreath containing the letters S on his tunic, above his left breast pocket denoting his trade specialisation as "signaller".[48]
As the war progressed it became common for airmen to "team up" and form the crew with whom they would fly operations while still at their Operational Training Unit before being posted to their squadrons. On joining the squadron their pilot would often be assigned to fly one or two operational missions as second pilot with an experienced crew in order to gain operational experience before taking his own crew into action. In this situation he would be referred to as a Second Dickie (second pilot).[49][50][51]
Typically when flying operationally the following aircraft carried seven aircrew while operating in the main force heavy bomber role, the exception being the de Havilland Mosquito:
Handley Page Halifax four-engined heavy bomber used primarily in night operations and usually crewed by seven airmen, a pilot, a flight engineer, a navigator, a bomb aimer, a wireless operator/air gunner, a mid-upper gunner and a rear gunner. Occasionally a second pilot might be aboard. Utilised primarily in night time bombing attacks or mine-laying (sea mines) in known enemy shipping or U-boat transit routes or even in enemy harbours. In late 1944 and 1945 daylight operations were possible as the Luftwaffe's ability to attack large formations was reduced and daylight "ops" (operations or missions) were flown.[52][53][54]
Short Stirling four-engined heavy bomber used primarily in night operations and usually crewed by seven airmen, a pilot, a flight engineer, a navigator, a bomb aimer, a wireless operator/air gunner, a mid-upper gunner and a rear gunner. Occasionally a second pilot might be aboard. Utilised primarily in night time bombing attacks or mine-laying (sea mines) in known enemy shipping or U-boat transit routes or even in enemy harbours. The Short Stirling was withdrawn from service with RAF Bomber Command in 1944 being used mainly thereafter for SOE support missions,[55] mine laying and towing gliders of airborne troops.[56][57][58]
Avro Lancaster four-engined heavy bomber used normally in night operations and usually crewed by seven airmen, a pilot, a flight engineer, a navigator, a bomb aimer, a wireless operator/air gunner, a mid-upper gunner and a rear gunner. Occasionally a second pilot might be aboard. Late in the war a 'Set Operator' flew within crews of a small number of specialised squadrons such as No. 101 Squadron RAF or those of No. 100 Group RAF who operated additional technical equipment for electronic countermeasures.[c] The Lancaster was used primarily in night time bombing attacks or mine-laying (sea mines) in known enemy shipping or U-boat transit routes or even in enemy harbours. In late 1944 and 1945 daylight operations were possible as Allied fighters had reduced the Luftwaffe's ability to attack large formations and daylight "ops" were flown.[59]
de Havilland Mosquito
The de Havilland Mosquito was a fast twin-engined aircraft used by RAF Bomber Command primarily in the role of Pathfinder Force marker after the formation of No. 8 Group RAF and later by the specialised Light Night Striking Force for nuisance and diversionary bombing raids. Some Mosquitos were used as intruder aircraft to hunt German nightfighters before they could attack the bomber stream. The aircraft was always crewed by a pilot and a navigator and was a multi-role combat aircraft suited for high speed low level marking, precision bombing, night fighting, photo reconnaissance and night-intruding to strike at Luftwaffe airfield runways to try to reduce night fighter activity.[60]
Late-war new crew additions
During the late period of World War II some bombers carrying out special duties began to carry additional specialised equipment for navigational and similar purposes. The equipment was more complex than that normally carried, and a specially trained "set operator" was carried to operate it and interpret the results. His equipment was usually referred to as "the gubbins", and he was regarded as a specially intelligent person, a "Gen kiddie".[61]
At the outbreak of war in Europe, all ranks of the Royal Air Force could be bomber command aircrew, from the most junior aircraftman 2nd class. Pilots were more likely to be commissioned officers than the other trades.[62] From 27 May 1940 the Royal Air Force introduced a minimum rank of sergeant for all aircrew, instantly promoting all aircrew holding lower rank to sergeant.[63] As the war progressed pilots and observers (later navigators and bomb aimers) were considerably more likely to be commissioned officers before the end of their operational tours, keeping pace with the enormous rate of losses; men could be promoted three times in a year.[64] Wireless operators, flight engineers and air gunners were more likely to be sergeants or flight sergeants at the end of their tours with occasional promotions to warrant officer rank and rare commissionings.[65] From the mid-war period pilots of crews posted from Operational Training Units to squadrons to commence their tours of operations had often already been commissioned, in some crews the navigator might also have been commissioned and occasionally the bomb aimer (trades regarded as more technically demanding). Promotion through the ranks was considerably quicker in Commonwealth Air Forces and advancement to commissioned rank was more likely for aircrew of the Royal Canadian Air Force and Royal Australian Air Force no matter what their aircrew trade particularly towards the end of the war.[66][67]
Nationalities of airmen
Sergeant Lincoln Lynch, a Jamaican rear gunner, who was awarded the DFM following a battle with a night fighter. He emigrated to US after the war and was later prominent in the civil rights movement.
At the outbreak of war bomber aircrew were almost completely Royal Air Force or Royal Air Force Volunteer Reserve or Auxiliary Air Force although a number of commissioned officers of the RAF were Canadians, Australians, New Zealanders, Rhodesians and South Africans. There were men from the Commonwealth amongst the enlisted men but they were relatively unusual.[68]
By 1941 bomber crews included men of the Royal Canadian Air Force, Royal Australian Air Force or Royal New Zealand Air Force and by 1942 there were entire squadrons of those Commonwealth Air Forces in which a very substantial percentage of the airmen were from the parent countries. Soon afterwards there were multiple Canadian and Australian bomber squadrons although both types almost always had British flight engineers as very few flight engineers were trained by those air forces. In all squadrons of Bomber Command there were British airmen and it was very common for a bomber crew, in any squadron, to consist of British, Canadian, Australian or New Zealand airmen.[69][70][71] A small number of pilots of the South African Air Force did fly with RAF Bomber Command, one earning a Distinguished Flying Cross and then a posthumous Victoria Cross, Captain Ted Swales, although the majority of South Africans flew in the North African, East African and Italian campaigns.[72]
Several Polish squadrons were formed in England after the Battle of France, comprising Polish personnel who wished to continue the fight against the Germans. The Polish squadrons were usually manned by only Polish airmen, with occasional British airmen attached. A small number of squadrons were formed from escaped Czech airmen, and also French bomber squadrons were formed in England after the Battle of France, comprising French personnel who wished to continue the fight against the Germans. These included Nos 346 and 347 Squadrons. The French squadrons were usually manned by mainly French airmen. Within English-speaking squadrons manned primarily by British or Commonwealth airmen men from Belgium, the Caribbean,[73] the US and a huge variety of returned expatriates could be found.[74][75]
One of RAF Bomber Command's oldest casualties in action was Flight Sergeant Kadir Nagalingam, a 48-year-old from Ceylon (now Sri Lanka), who was killed on the night 14–15 October 1944 while serving as a wireless operator aboard an Avro Lancaster of No. 166 Squadron RAF attacking a target at Duisburg in Germany.[76][77] The cold-war spy Peter Stevens was actually Georg Franz Hein, a German Jew who was shot down flying with No. 144 Squadron RAF. Taken prisoner under his false identity, he made repeated escape attempts and was decorated with the Military Cross for his bravery.[78] Another German-born casualty was a No. 101 Squadron RAF "Set Operator" aboard an Avro Lancaster lost on the night 12–13 August 1944, Sergeant Hans Heinz Schwarz (serving as Blake) who was a 19-year-old Jewish man taking enormous risks to fight for his adopted country.[79][80]Sergeant Walter Tixhon, an air gunner serving with No. 166 Squadron RAF when he was killed on 27–28 May 1944, was a Belgian from Antwerp a former member of the French Foreign Legion.[81][82] The pilot and second pilot of a Vickers Wellington of No. 12 Squadron RAF lost on the night of 31 August 1941 attacking German shipping in Boulogne harbour were both members of the Royal Indian Air Force, Pilot Officer C P Khosla[83] and Pilot Officer R N Dastur.[84]
Aircrew ages
William Wedgwood Benn in 1919
The majority of RAF Bomber Command aircrew were aged 19 through to their mid-twenties although younger and considerably older airmen have been identified. The average age is stated to have been 21.[85]
It is believed that William Wedgwood BennDSODFC, Secretary of State for India (1929-31), was the oldest man to fly operationally. Born in 1877, he had served in the Royal Flying Corps in First World War, ending the war with rank of captain. He rejoined as a pilot officer in 1940, rising to the rank of air commodore in 1944; he re-trained as an air gunner and flew operationally several times at the age of 67 until his age was recognised and he was officially grounded.[87]
Possibly the youngest member of aircrew to be killed serving with an operational bomber squadron is Flight Sergeant Edward James Wright, Royal Canadian Air Force, who was killed aboard an Avro Lancaster of No. 428 Squadron RCAF on 30 April 1945 apparently aged 16.[90][91]
A number of seventeen-year-olds were lost flying operationally with RAF Bomber Command during World War II, such
Sergeant Ronald Lewis serving as a wireless operator/air gunner aboard a No. 51 Squadron RAF Armstrong Whitworth Whitley was shot down on 20 July 1940,[92] and Sergeant Gerald Tickner serving as mid-upper gunner aboard a No. 640 Squadron RAFHandley Page Halifax shot down on 13 September 1944.[93][94]
Aircrew leadership
A "Main Force" heavy bomber squadron was commanded by an officer holding the rank wing commander who was usually a pilot by trade. Known as "the CO", or commanding officer, he had several flight commanders who reported to him. These men usually held the rank of squadron leader and many were in their early twenties.[95] Until mid-summer of 1943 most bomber squadrons comprised three flights, "A", "B" and "C", each of 7–10 aircraft. Each flight was commanded by a squadron leader who was usually a pilot but later in the war could be a navigator. During the expansion of RAF Bomber Command from the summer of 1943 many squadrons consisted of two flights, each having 8– 12 aircraft, after the new squadron formed around an existing "B" or "C" Flight transferred from an operational squadron.[96][97]
Trade group leadership within a squadron included a navigation leader who was responsible for the training, efficiency and any special pre-operation briefing requirements of the navigators. In a similar vein there was a bombing leader heading the bomb aimers, an engineer leader for the flight engineers, a signals leader for the wireless operators and a gunnery leader for the air gunners accomplishing the same tasks and results. The trade leaders were often flight lieutenants in rank but could be flying officers and were highly experienced officers usually on their second or third tours of operations. The leaders still flew operationally but not as frequently as the normal aircrew. If a crew had a member unable to fly due to illness or injury, sometimes his place might be taken by a "leader" if the crew was on the "battle order" for that night.[98]
Typical operational sortie
Aircrew would usually be aware that either "ops are on tonight" or "we're stood down" (in their own terminology) from at least mid-morning on a particular day.[99] A list referred to as a "battle order" would be posted on noticeboards at the airfield detailing all aircraft assigned to the night's attack and each member of crew for the particular aircraft.[100] A target had been identified at headquarters, the latest available photo reconnaissance and other intelligence had been reviewed, the meteorology officers had done their best to calculate wind directions and speeds, bomb loads had been specified suitable for the type of target and calculations done to ascertain the required fuel load to get the bomber to its target and home with a small margin for safety.[101]
Air test
Halifax bomber in flight.
During the day crews would briefly "air test" the aircraft assigned to them to ensure that it was working properly and that their personal equipment, oxygen supply, heated flight suits and machine guns were all ready.[102] Ground crew stood ready to correct any problems identified once the bomber landed. Crews who had survived several "ops" would often have a particular aircraft assigned to them whenever possible, that aircraft would have its own ground crew (known congenially as "erks") and if "their" aircraft was "D for Dog", "G for George", "F for Freddy", "K for King" or whatever, they would be protective of "the old girl" and would have feelings of considerable disquiet if their aircraft was unserviceable after the air test, meaning that they had to take a spare aircraft.[103][104]
Navigators at briefing.
As soon as the ground crew commenced preparing the aircraft, they would be able to estimate what the night's operation was likely to be based on the payload of bombs (or sea mines) coupled with the fuel load to be pumped into the wing tanks.[105] The bombers would be carefully "bombed up" and "fuelled up", ammunition was loaded and all jobs checked and double checked by the NCO in charge, the ground crew took enormous pride in their work and laboured in sometimes terrible weather conditions to ensure that maintenance was always completed to the highest possible standards.[106][107]
Briefings
Halifax bomber being bombed up.
Briefings usually commenced during the afternoons, and for reasons of security the bomber base would be closed down to all but the most necessary traffic in or out to reduce to a minimum any leakage of intelligence which might help to forewarn the enemy,[108] even public telephones were padlocked.[109] With RAF Police guarding the doors,[110] briefings commenced in large rooms with the airmen sitting in rows of seats/benches with trestle tables facing a low stage, behind which were large curtains similar to a cinema.
Typically the primary briefing was provided by the "C.O." (commanding officer) accompanied by his flight commanders, met officer (meteorologist), "spy" (intelligence officer) and attended by pilots and navigators.[102][111][112] The curtain would be drawn back to reveal a huge map of Europe with a line of coloured tape running from the position the bomber base in England out across the English Channel to a point from which a "dog leg" tape ran to the target and then back to base.[113][114] The dog leg was introduced to give the impression that a different target was the destination in the hope that the Luftwaffe night fighter controllers would concentrate their forces in the wrong location.[115]
Aircrew briefing.
Memoirs frequently describe the groans from the assembled airmen if the tapes arrived at a point in Happy Valley,[116] (the industrial Ruhr Valley) or "the Big City" Berlin,[117] where anti-aircraft defences, search light batteries and night-fighters would usually cause substantial casualties. Navigators took many notes on flight times, positions for course changes and with their pilots and bomb aimers would mark up their charts and maps adding notations for wind speeds and directions, the time the attack was expected to commence and locations of known heavy anti-aircraft batteries and other pertinent information.[118] Cross hatched areas of red celluloid covered sections of the map indicating known flak positions and green celluloid indicating searchlight batteries.[110]
Aircrew about to be ferried out to their aircraft.
Often it was practice for other aircrew trades such as bomb aimers, wireless operators, flight engineers and air gunners would join the assembled airmen later for the general briefing after completion of the Navigation briefing. The format of the briefing would be similar to the main briefing but with less navigational detail. After briefings had been completed aircrew would be permitted free time to prepare themselves, to write "just in case I don't get back" letters to parents, wives and children and to relax or sleep if they were able before their meal which was often referred to as "last supper".[108][119][120]
Suiting up and moving out to dispersal
Aircrew in their flying suits.
As the time approached crews collected their parachutes and Mae West life preservers from the Parachute Section,[121] and "suited up" in the "crew room" or locker room climbing into their flying suits ensuring that everything was comfortable ready for a flight which could be ten or twelve hours long,[122] memoirs mention that lucky charms were checked and double checked, some men were quieter while others were noisy and putting a brave face on to cover their uncertainty.[123] Airmen had to remove all personal effects from their pockets in case of capture in which event the intelligence value might
Halifax crew posing beside their bomber.
assist an enemy interrogator, bus tickets, cinema tickets and cash were all forbidden.[124] They made ready to climb aboard canvas topped trucks to be driven out by WAAFs to where their aircraft waited dispersed around the edge of the airfield's perimeter track.[125] On arrival the crew would check their aircraft over again before the pilot and flight engineer started the engines to "run them up",[126][127] following which he as captain of the crew, signed the ground crew chief's Form 700 on a clip board accepting responsibility for a fully serviceable bomber.[115]
Experienced aircrew knew flying conditions with regards to toilet breaks could be uncomfortable, especially when flying from 10,000 to 20,000 feet, when oxygen becomes sparse.[128] The toilet facilities on a plane could be anything from a bottle to urinate in, to an Elsan. An Elsan was generally hated by the crew and the ground staff who had to clean it.[128] Pre-flight lavatory relief was both physically and psychologically encouraged by the prospect of a long flight ahead.[128] During the war, the allied aircrews developed the superstition of "wheel pissing." The wheel pissing took place prior to any mission.[128] The crew would urinate on the tail wheel prior to each mission.[128] Many believed wheel pissing brought luck before the appropriate time they climbed aboard and took their positions ready for take off.[128][129] Most sorties were nighttime attacks and commenced with crews taking off at dusk or into the evening from bases in Lincolnshire, Yorkshire or Cambridgeshire.[130]
Take off
Lancaster taking off in the dusk.
Signalled in the darkness by an arrangement similar to traffic lights,[131] the crew awaited their turn to take off, wireless traffic was kept to an absolute minimum to avoid alerting the German wireless listening services.[132][133] If it was to be a distant target the aircraft fuel tanks might be topped-up by a fuel bowser immediately before taking off.[134] Each crew would taxi out to the runway in its pre-assigned order with the pilot checking over the intercom with each of his crew in turn that they were well and everything was working before they were signalled to take off,[135] and with the flight engineer standing beside the pilot to help manage the throttles they would go to full power and hope to pick up sufficient speed to get about 25 tons of bomber into the air before the end of the runway. A tyre blow out, a wheel running off the runway into soft grass or an engine failure at this point would mean disaster as the 2,000 gallons (up 8 tons) of aviation fuel, approximately 5 tons of bombs (high explosive and incendiary) and multiple thousands of rounds of ammunition crashed at over 130 miles per hour.[136] A crash at this stage usually killed all aboard.[137][138][139] Bombers usually took off with about 60 second intervals between them. The pilot would slowly climb to the designated height and head for the group's assembly point near the coast.[140] Once airborne every airman had to hope that his oxygen mask and supply functioned properly when it was switched on at 5,000 feet and did not suffer from icing in the frigid temperatures at high altitude; their electrically heated flying suits, boots and gloves were completely necessary to avoid frostbite throughout the year.[141]
Enemy coast ahead
Lancaster bombers heading towards their target.
Bombers operating from bases north of the River Humber usually crossed the English coast at Flamborough Head or Spurn Point and those from bases to the south of there would cross at Cromer.[142] On the outward-trip it was normal for crews to mention over the intercom any landmarks that they observed to assist the navigator and once over the North Sea the air gunners would be cleared to test their guns firing off brief bursts.[143] The heavy bombers flew as a bomber stream and banking on safety in numbers flew as a mass on their course.[144] Generally the first part of the flight was quiet, and it was not until the pilot or navigator announced "enemy coast ahead" over the intercom that a greater expectation of trouble was registered. The Dutch, Belgian or French coastline was often where flak ships (barges or ships armed with anti-aircraft guns) opened fire on the bombers.[145][146] From that point onwards bombers crews were aware that highly efficient Luftwaffe night fighters crews would be stalking them, some operating based on their own on-board radar, others working on directions from chains of radar stations.[147] The navigator would be taking readings from the stars and using any available wireless positioning assistance or reports of rivers or bridges below, to ensure that they were on course and on time constantly adding to his charts the positions reported by his crew of other bombers being shot down around them.[148][149] The bomb aimer manning the nose gun turret, the mid-upper gunner and the rear gunner would all be straining their eyes into the night sky hoping to see a night fighter approaching before it was able to open fire, or to see another bomber in time to take avoiding action before a collision occurred. Depending on the course to the target the bombers might overfly a number of belts of anti-aircraft artillery and search lights, radar assemblies and listening positions attracting barrages of fire and would be persistently pursued harried and attacked by night-fighters.[150] The Ruhr Valley was about 35 minutes flying time from the Dutch coast and here the first bombers in the stream would be met with intense anti-aircraft fire and extremely efficient searchlights working closely together.[151]
A Lancaster within the bomber stream dropping window – the crescent-shaped white cloud on the left of the picture
An often successful tactic to evade a determined night fighter pilot or after being caught by a searchlight(s)[152] was to "corkscrew",[153] a high speed spiral carried out while diving several thousand feet pulling high G-force sufficient to tear the wings off a fighter.[154][155]
Deception tactics
When possible RAF Bomber Command would arrange a diversionary attack, known as a "spoof raid", using a small secondary force, often aircraft from Operational Training Units, in an attempt to confuse the enemy night fighter controllers and draw the Luftwaffe night fighters of the Kammhuber line sufficiently far away from the main bomber stream that they would have expended so much fuel before the deception was identified that they would have to land to refuel and may be unable to intercept the main force.[156] A radar countermeasure comprising millions of small strips of aluminium foil known as "window",[157][158] was released along the inbound route; this effectively blinded the German radar.[159][160]
Target area
Photo taken during an attack on Essen.A Lancaster receives a direct hit and disintegrates.Lancaster which crash landed with battle damage on its return. The airfield is equipped with FIDO aka Fog Intense Dispersal Operation" or "Fog, Intense Dispersal Of"), hence the pipe running along the ground beneath the Lancaster
Upon arrival in the TA (Target Area), usually in the middle of a barrage of heavy anti-aircraft fire, avoiding the glare of searchlights trying to latch onto a bomber and illuminate it for the flak gunners while dodging night fighters, crews were expected to "stooge around",[161] (fly circuits) around the target and await radio instructions from the "Master Bomber",[162] based on the different coloured marker flares or target indicators dropped onto/over the target at low level by the Pathfinder Force. Once satisfied with the accuracy of one or more of the "markers", he would give the order to start the attack based on a particular marker,[163] and as the attack took place he would instruct bombers approaching to adjust their aim if the bombs were not landing as he required.[164] A particular danger was being "coned" (illuminated by multiple search lights) and blinded, to become the target of concentrated anti-aircraft fire.[108][165][166] Bombers would then approach at a pre-arranged height, the pilot taking instructions from his bomb aimer who would have sighted on the marker, the bomb aimer issuing frequent instructions such as "left, left, left a bit, steady... steady... steady... hold that, hold that.." and then "bombs gone" after he released the payload and the bomber lurched upwards several hundred feet,[167] relieved of the 5–9 tons of bombs.[168]
"There would be a huge photo-flash as the bombing target photo was taken to show lighting up the ground below and the falling bombs.[169] This was a highly dangerous period of time as the bomber had had to fly straight and level to bomb, making itself a perfect target for gunners on the ground or enemy fighter pilots. The bomber pilot would typically then turn sharply and dive before heading on a course for home as a countermeasure to avoid predicted anti-aircraft fire or night fighter attack".[170]
During some attacks markers could be obliterated by the bombing, causing the "Master Bomber" to call a halt on bombing while the markers were re-set and confirmed acceptable before bombing could restart. During this time bombers were under constant attack. Airmen's memoirs mention flying over target areas below which were like "Dante's Inferno",[171] with acres of red and orange flame punctuated by percussion shock waves as bombs exploded and, while sympathy with anybody on the ground is sometimes expressed, mention is usually made of the prior German Blitz bombing of Coventry and London.[168] Wartime reports and aircrew memoirs make regular mention of intense, brightly coloured violent explosions within the bomber stream which often showered clouds of sparks which aircrew referred to as "scarecrows" and believed were a type of pyrotechnic shell designed to scare aircrew. Post-war assessment confirmed that these were actually almost certainly bombers receiving direct anti-aircraft hits in their bomb bays, exploding in mid-air or from Schräge Musik cannon-equipped Luftwaffe night fighters shooting into bombers' wing fuel tanks or bomb bays.[172]
Homeward flight
Halifax bomber crew heading for debriefing.
After making their attack the crew would head away from the target area, making as much speed as possible on the track for home while avoiding known flak concentrations and fighter hot-spots. Night fighters continued to hunt along the returning bomber stream, claiming victims back towards the North Sea and out to sea. Vigilance had to be maintained or even increased; at a time when tiredness was beginning to increase some airmen would have taken their issued Benzedrine "wakey wakey" tablets to keep them vigilant.[173] On several occasions the Luftwaffe mounted night intruder raids and followed the bombers home over England, shooting them down before they were able to land.[174][full citation needed][175]
Landing and debriefing
On arrival back at base, the bombers were granted permission to land based on their fuel reserves, wounded crewmen and battle damage.[176] Crippled bombers flying on two or three engines or with wounded crewmen aboard sometimes could not make it back to base and would land at any available airfield they found; RAF Woodbridge was a recognised emergency landing place.[177][178]
Debriefing back at base.
Vigilance was always maintained as Luftwaffe night fighters flying as "night intruders" sometimes followed the bombers home and attacked as aircraft came into land.[179] If the conditions were foggy[180] or particularly poor on their return, it was not unusual for aircraft to be diverted to more distant bases which were clear.[181] Arriving back at base, crews were promptly ferried to de-briefing, where mugs of tea were distributed while each crew was interviewed and a detailed operational report[164] compiled before a generous bacon-and-egg breakfast could be claimed.[182]
Operational tour
Sergeant Parker of 467 Squadron with record of operations flown.
From the outbreak of war RAF Bomber Command aircrew were given the task of flying a required number of operations, an "operational tour", usually of about 30 operations (missions in USAAF terminology).[183][184] On completion of an operational tour the airman (and often his complete crew as they tended to remain very tight-knit, always flying together) would be "screened" (taken off operational flying) and split up as they received their future postings which would frequently be serving at Operational Training Units or Heavy Conversion Units preparing the next groups of young bomber crews for their postings to operational squadrons.[185] Between March 1943 and the early summer of 1944 the life expectancy for bomber crews was very short, with fledgling crews often being lost during their first 12 operations and even experienced crews being lost right at the end of their tours. A crew might expect to fly 30 "ops" in a period of 3–5 months, depending on the weather conditions and operational requirements.[186] Crews assigned a regular aircraft would often paint images on the nose of their aircraft signifying completed operations; these were usually in the form a bomb symbol, but at least one Australian crew painted a beer mug for every op. Only "ops" completed with the bombs dropped—later, those bringing back a target photograph—were allowed to count towards the crew's operational tour. An early return due to engine or equipment failure or crew sickness could result in an interview with the commanding officer to ensure that negligence or lack of fighting spirit were not involved.[187][188]
The mainly Australian crew of Phil Ryan (467 Squadron) all killed on their first tour 8 July 1944.
In the late spring of 1944, when operations were being flown to less distant targets, often in preparation for Operation Overlord – the D-Day invasion – RAF high command temporarily changed the length of an operational tour by counting some targets as a half of an operation,[189] on the basis that they regarded the target as less heavily defended than some in the German homeland.[18][190] The extension of airmen's tours was extremely unpopular with the aircrews and after a number of operations to targets which had been classified as "softer" actually cost unexpectedly high casualties, the original tour length was reinstated.[191] On completion of an instructional tour at Operational Training Unit or Heavy Conversion Unit, the airmen were sometimes "returned to ops", either at their own request or by routine postings, and would join a newly trained crew and commence another operational tour. The foundation of the Pathfinder Force brought with it a requirement for experienced aircrew.[184]
Pathfinder Force tour
To improve the accuracy of bombing RAF Bomber Command formed No. 8 Group RAF, Pathfinder Force from a cadre of highly experienced squadron and flight commanders supported by several highly experienced pilots, navigators and bomb aimers. The concept was for the highly experienced elite Pathfinder Force aircrews to fly a little ahead of the main force and drop marker flares known as "target indicators" directly on to the target as an aiming point for the less experienced crews following them. Pathfinders were awarded a special gilt metal Pathfinder wings to be worn on the tunic denoting their status.[192]
The Pathfinder wings worn beneath the aircrew flying badge by members of Pathfinder Force
The Pathfinder crews in turn released their target indicators on different marker flares laid for them by their leader, who flew minutes ahead in a de Havilland Mosquito light bomber to identify the precise target buildings at very low level. This Pathfinder leader was known as the master bomber and usually had a second-in-command flying in support in case he was shot down or failed to mark the target accurately and it required a second set of "markers".
On a very large attack there might be an officer in overall control; he was known as the "master of ceremonies".[193] Aircrews who had completed a substantial part of their tours and were regarded by their own squadrons as operationally keen and conscientious were liable to be "poached" by Pathfinder Force transferring to the elite Pathfinder squadrons to complete extended tours of 45 or more operations.[194] Other crews completing their tours of operations could transfer at that point to Pathfinder squadrons for a further 15 or more "ops" before being "screened"; several crews went on to complete up to 65 "ops".[195][196]
Multiple tours of operations
Some experienced airmen returned to operations repeatedly at their own request, and several are recorded to have flown 100–120 operations. Flight Lieutenant Ted Stocker DSO DFC, a flight engineer leader, flew 105 operations.[197] Squadron Leader Alec Cranswick DSO DFC, who was killed in action on 5 July 1944 flying with No. 35 Squadron RAF,[198] is reported to have flown more than 107 operations (missions) and possibly as many as 143.[199] Squadron Leader Daniel Everett DFC and 2 Bars, is reported to have flown more than 120 operations before being killed in action on 8 March 1945 flying with No. 35 Squadron RAF,[200] although elsewhere his total is given as 99.[201] Group Captain Willie Tait DSO*** DFC* flew at least 101 operations and survived. Squadron Leader Robert Anthony Maurice Palmer VC, DFC and Bar of No. 582 Squadron RAF and No. 109 Squadron RAF was returning from his 111th operation when he was killed.[202]
Attitude to losses
Reichswald Forest War Cemetery, the majority of graves are Bomber Command aircrews
Aircrew had to become accustomed very quickly to the casualty rate suffered by RAF Bomber Command squadrons because fellow crews were lost or in aircrew language, "bought the farm", "got the chop" or "failed to return" (FTR), frequently.[203]
Squadrons would normally be given the task of dispatching 12–25 aircraft on a night operation, and at least one of their crews would be expected to be lost every two night operations. Squadrons losing multiple crews on a single night was quite normal, and on several nights during World War II some squadrons lost five or six of their crews in a single night.[204][205][206]
Aircrew adopted a fatalistic attitude, and it was "not the done thing" to discuss losses of friends or roommates, although they would half-jokingly ask each other "can I have your bicycle if you get the chop" or "can I have your eggs and bacon at breakfast if you don't get back tomorrow?" or "if you don't get back can I have those black shoes" and similar comments. Airmen shared accommodation blocks, and it was normal to have spare beds or even a half-empty hut after a night operation.[207][208]
Casualties
An RAAF rear gunner's grave
A total of 57,205 members of RAF Bomber Command or airmen flying on attachment to RAF Bomber Command were killed or posted missing in World War II.[1] It was not unusual for the heavy bombers to complete their operational sortie and return home with members of their crew dead or dying aboard the aircraft,[209] or with the rear-gun turret blown off.[210] In the very last months of the war, aircrew who had been shot down were sometimes unfortunate enough to land safely by parachute, only to be mobbed and beaten to death by enraged German civilians. Rare cases are recorded where local Nazi Party leaders actively incited lynchings or permitted captured aircrew to be murdered almost immediately after they landed.[211]
Includes: 68 members of the United States Army Air Forces, 34 Norwegians, and 12 South Africans. While 311 Squadron was officially a "Czechoslovak" unit, its personnel were officially members of the RAFVR and are not counted separately.
231
Prisoners, evaders and escapers
Model of Stalag Luft III prison camp.
The majority of RAF Bomber Command aircrew lost over enemy-held territory or the sea were killed although 9,838 became prisoners of war.[213] During World War II 156 aircrew taken prisoner of war successfully escaped from German prisoner of war camps in Western Europe, and 1,975 airmen evaded capture, being hidden by local resistance groups after being shot down in Western Europe.[214] It is reported that more than half of the escapers and evaders were RAF Bomber Command airmen.[215] A recent specialised study of airmen "evaders" shot down over Western Europe states that a post-war summary prepared by British Military Intelligence (MI9) recorded that 695 officers and 1,270 enlisted men had evaded capture; however, the study identified and listed 2,198 airmen.[216] A number of evading aircrew were captured due to the duplicity of French collaborators who betrayed them to the Gestapo.[217]
Air CommodoreRonald Ivelaw-Chapman, a staff officer at No. 1 Group RAF, was the highest-ranking officer of RAF Bomber Command to be taken prisoner during the war while flying operationally; he was flying as second pilot aboard an Avro Lancaster of No. 576 Squadron RAF on the night 6–7 May 1944.[218]
Distinguished Flying Medal
The German Luftwaffe had responsibility for Allied aircrew taken prisoner in North West Europe, and it is on record in numerous biographies that the Luftwaffe personnel running the prisoner of war camps treated captured aircrew properly, with considerable patience and respect and provided food and shelter until the end of the war. Only if a member of aircrew escaped from a Luftwaffe prisoner of war camp was he at risk of falling into the hands of the German Gestapo (police forces were subordinated to the SS). Generally escapees were returned to prisoner of war camp, where they would spend time in a solitary confinement cell ("cooler") before being returned to the general population. After a mass escape in March 1944 from Stalag Luft III, a directive from Berlin resulted in the Stalag Luft III murders, an incident in which the Gestapo murdered 50 of the 76 escapees as an example to the Allied airmen that the huge amount of resources expended in searching for and recapturing escapers would not be tolerated.[219]
Aircrew escaping were rarely shot although a small number of incidents are recorded, and one airman was killed when he was hit by a railway train while dodging the Germans. Two incidents of individual escaped prisoners of war disappearing completely are recorded, Warrant OfficerGeorge Grimson, RAF[220] and Warrant Officer Roland Townsend-Coles, RAF.[221] Both were presumed murdered by the Gestapo on recapture after running or participating in successful organisations inside Germany, assisted by forced labourers or anti-Nazi Germans, to assist escaping prisoners of war.[222]
Awards and campaign medals
Gallantry awards
Some RAF Bomber Command airmen received awards for their gallantry in specific actions or for their sustained courage facing the terrible odds against their surviving a full tour of operations. Enlisted men could receive a Distinguished Flying Medal or Conspicuous Gallantry Medal (Flying). Commissioned officers and Warrant officers could receive a Distinguished Flying Cross. Commissioned officers, usually the more senior ranks, could receive a Distinguished Service Order which was sometimes awarded to junior officers for acts of exceptional bravery. All ranks were eligible for the award of a Victoria Cross if warranted.[223]
Campaign medals
Most aircrew who flew operationally received the 1939–45 Star, the Aircrew Europe Star and the War Medal 1939–45 for their service if they flew during the period September 1939 to late April 1944. If they commenced operational flying between late April 1944 and May 1945 they would receive the 1939–45 Star, France and Germany Star and War Medal 1939–45 instead.[224]
Any aircrew who had already qualified for the Aircrew Europe Star group of medals, who flew operationally after 6 June 1944 (D-Day) would have been entitled to a small metal bar with the words "France and Germany" to sew to the ribbon of the Aircrew Europe Star. Any of the airmen who had served over 3 years on the Home Front would also have earned a Defence Medal.[225]
Commonwealth aircrew received additional medals as the Canadian government awarded their personnel the Canadian Volunteer Service Medal 1939–47 with a silver maple leaf clasp for service overseas, the Australian government awarded their personnel the Australia Service Medal 1939–45, the New Zealand government awarded their personnel the New Zealand War Service Medal 1939–45, the South Africans, South Rhodesians and Newfoundlanders all received their own service medals also.[226][pageneeded][227]
Aircrew and superstition
A bomber crew prepare for ops and check their lucky mascot.
Many biographies and auto-biographies of aircrew record that, facing a very limited life expectancy, airmen frequently adopted mascots and superstitions, holding to a belief that if they adhered to a particular custom or carried a specific talisman with them, then they would "get home in time for breakfast".[116][125] Amongst those frequently mentioned are having a family photograph attached to their crew position inside the bomber, carrying a rabbit's foot or teddy bear, wearing a particular scarf around the neck,[228] urinating on the tail wheel of the aircraft before takeoff,[229] or always donning their flying kit on the same sequence. Such rituals were taken extremely seriously.[230] Having to fly in an unfamiliar bomber was highly unpopular; if a crew had a particular aircraft regularly assigned to them, many considered it unlucky to have to fly in another if their own was unserviceable.[103][231]
Either flying as a "spare bod" to cover for sickness in another crew or having a "spare bod" fly in their own crew was not popular.[232] Many crews were extremely tightly knit and would not consider being unable to fly as a complete crew; if a crew member was not fully healthy, quite often he would still fly in order to keep the crew together, believing that their absence might cause the loss of their crew on that night. The fear was not groundless, as a newly arrived airman from a training unit might be used as a temporary replacement for their highly experienced crewman, and a momentary hesitation in calling for evasive action in a pending night-fighter attack did result in bombers being lost.[233]
RAF Bomber Command was manned by volunteer aircrew without exception, but there were serious concerns amongst the most senior officers that some of the volunteers might change their minds about flying operationally once the terrible casualty rates became apparent to them. To try to keep such instances to an absolute minimum, a "one solution fits all" approach was introduced which was known amongst aircrew as "LMF" (lack of moral fibre).[234] If an airman refused to fly operationally he was stripped of his aircrew brevet and reduced to the lowest rank, aircraftman 2nd class, before being posted away and assigned the most menial of duties. Some C.O.s reportedly adopted a more sympathetic approach with aircrew who had flown a significant number of ops and quietly removed them from their crews to assign them to staff duties. In other cases their personnel file was reportedly rubber-stamped "LMF", and there was no option to return to flying. Usually, this was accomplished discreetly; however, at least two aircrew are reported to have had their flying badges and rank badges removed before a squadron parade. The RAF used the power of stigma as a method of control.[235]
The "LMF" label could be applied equally to a young man who, after completing training, did not have the courage to fly on his very first operation or to a highly experienced member of aircrew who had flown almost enough "ops" to complete his tour but had been wounded in action and after recovery did not wish to fly again. They received no treatment, even though enough had been learned following World War I.[236] One of Bomber Command's most brilliant and sympathetic leaders, Leonard Cheshire wrote "I was ruthless with LMF. I had to be. We were airmen, not psychiatrists. Of course we had concern for any individual whose internal tensions meant that he could no longer go on, but there was a worry that one really frightened man could affect others around him." Cheshire would take a crew member with confidence problems aboard his own aircraft till they sorted things out, but pilots he transferred out immediately.[237][238]
The process was considered harsh and was deeply resented by the aircrews themselves, who rarely spoke of "LMF" situations; even decades after the war, few memoirs give more than an occasional mention of the issue.[239]
Notes
↑While No. 75 Squadron was composed predominantly of personnel from New Zealand, it was not an Article XV squadron and it was not officially transferred to the RNZAF after the war ended.
↑Both the Halifax and Manchester were designed to the same original specification with two powerful engines. The Halifax was redesigned with four less-powerful engines in 1937 before entering production.
↑The group operated several types of aircraft, not just Lancasters
↑Giles, Nikki (16 October 2016). "Life as a RAF Navigator in RAF Bomber Command in WW2". Forces War Records forces-war-records.co.uk. Retrieved 10 December 2018. To illustrate the above point of how hazardous navigation was in the early years of war, if a navigator was given westerly winds of say 50 mph at 20,000ft, when in fact they were coming from the east, you would be pointing the aircraft in the wrong direction. You could therefore be 100 miles off your intended path of flight every hour. Aircraft were lost in the North Sea this way, off the coast of Scotland, instead of returning to Norfolk where they were based.
Phillips, J. Alwyn (1992). Valley of the Shadow of Death. Air Research. ISBN1-871187-13-3.
Potten, Charles (1986). "7 x X x 90" – The Story of a Stirling Bomber and Crew. K Gandy. ISBN0-9511567-0-5.
Raebel, Geoffrey W. (1997). The RAAF in Russia: 455 Squadron, 1942. Loftus, New South Wales: Australian Military History Publications. ISBN0-9586693-5-X.
Roberts, R.N. (1982). The Halifax File. Air Britain. ISBN0-85130-098-7.
Roberts, R.N. (1986). The Whitley File. Air Britain. ISBN0-85130-127-4.
Rolfe, Mel (2003). Gunning For The Enemy. Grub Street. ISBN1-904010-45-8.
www.lesfaircloth.co.uk – The story of Leslie Faircloth and crew of 12 Squadron Bomber Command who flew around 17 operations from RAF Wickenby, mostly in Lancaster ND424 'PH-G', during May and June 1944.
This page is based on this Wikipedia article Text is available under the CC BY-SA 4.0 license; additional terms may apply. Images, videos and audio are available under their respective licenses.