At the start of 1939, the British Army was, as it traditionally always had been, a small volunteer professional army. At the beginning of the Second World War on 1 September 1939, the British Army was small in comparison with those of its enemies, as it had been at the beginning of the First World War in 1914. It also quickly became evident that the initial structure and manpower of the British Army was woefully unprepared and ill-equipped for a war with multiple enemies on multiple fronts. During the early war years, mainly from 1940 to 1942, the British Army suffered defeat in almost every theatre of war in which it was deployed.
From late 1942 onwards, starting with the Second Battle of El Alamein, the British Army's fortunes changed and it rarely suffered another defeat. While there are a number of reasons for this shift, not least the entrance of both the Soviet Union and the United States in 1941, as well as the cracking of the Enigma code that same year, an important factor was the stronger British Army. This included better equipment, leadership, training, better military intelligence and mass conscription that allowed the army to expand. During the course of the war, eight men would be promoted to the rank of Field Marshal, the army's highest rank. By the end of the Second World War in September 1945, over 3.5 million men and women had served in the British Army, which had suffered around 720,000 casualties throughout the conflict.
Background
The main British Army campaigns in the course of the Second World War
The British Army was called on to fight around the world, starting with campaigns in Europe in 1940. After the Dunkirk evacuation of Allied Forces from France (May–June 1940), the army fought in the Mediterranean and Middle East theatres, and in the Burma Campaign. After a series of setbacks, retreats and evacuations, the British Army and its Allies eventually gained the upper hand. This began with victory in the Tunisian Campaign in North Africa in May 1943, followed by Italy being forced to surrender after the invasions of Sicily and the Italian mainland in 1943. In 1944 the British Army returned to France and with its Allies drove the German Army back into Germany. Meanwhile, in East Asia the Japanese Army were driven back by the Allies from the Indian border into eastern Burma. In 1945 both the German and Japanese Armies were defeated and surrendered within months of each other.
Impact of the First World War
High losses had been sustained by the British Army during the First World War and many soldiers returned embittered by their experiences. The British people had also suffered economic hardships after the war and with the onset of the Great Depression in the 1930s had contributed to a widespread antipathy to involvement in another war. One of the results was the adoption of a doctrine of casualty avoidance,[citation needed] as the British Army knew that British society, and the soldiers themselves, would never again allow them to recklessly throw away lives.[1] The British Army had analysed the lessons of the First World War and developed them into an inter-war doctrine, at the same time trying to predict how advances in weapons and technology might affect any future war.[2]
Developments were constrained by the Treasury. In 1919, the Ten Year Rule was introduced, which stipulated that the British Armed Forces should draft their estimates "on the assumption that the British Empire would not be engaged in any great war during the next ten years". In 1928, Winston Churchill, who was Chancellor of the Exchequer from 6 November 1924 to 4 June 1929 (and who later became Prime Minister), successfully urged the British Government to make the Rule self-perpetuating so that it was in force unless specifically countermanded (Cabinet abandoned the rule in 1932)[3]
In the 1920s, and much of the 1930s, the General Staff tried to establish a small mechanized professional army, using the Experimental Mechanized Force as a prototype. The structure of the British Army had been organized to sacrifice firepower for mobility and removed from its commanders the fire support weapons that were needed to advance over the battlefield. The army had been equipped and trained to win quick victories using superior mechanised mobility and technology rather than manpower. It also adopted a conservative tendency to consolidate gains on the battlefield rather than aggressively exploiting successes. However, with the lack of any identified threat, the Army's main function was to garrison the British Empire.[4]
During this time, the army suffered from a lack of funding. The Royal Navy, being the first line of defence, received the major proportion of the defence budget. Second priority was the creation of a bomber force for the Royal Air Force (RAF) to retaliate against the expected attacks on British cities. The development of radar in 1935, which had the ability to track enemy aircraft, resulted in additional funding being provided for the RAF to build a fighter aircraft force. The army's shortage of funds, and no requirement for large armoured forces to police the Empire, was reflected in the fact that no large-scale armoured formations were formed until 1938. The effectiveness of the British Army was also hampered by the doctrine of casualty avoidance.[5]
Alan Brooke the CIGS from November 1941 complained several times in the earlier entries in his private diary about the lack of suitable officers for command positions, which he puts down to high losses in the First World War[6]
It is lamentable how poor we are regards Army and Corps Commanders. We ought to remove several, but heaven knows where we shall find anything much better. Postwar addition: This shortage of real leaders was a constant source of anxiety to me during the war. I came to the conclusion that it was due to the cream of the manhood having been lost in the First World War. It was the real leaders, in the shape of platoon, company and battalion commanders, who were killed off. These were the men we were short of now. I found this shortage of leaders of quality applied to all three fighting services, and later I was able to observe that the same failing prevailed among politician and diplomats. (8 October 1941)
Most of the morning was spent sorting out and adjusting senior officers .... There were at least 3 Corps Commanders that must be changed, and possibly 4! .... The dearth of suitable higher commanders is lamentable. I cannot quite make out to what it must be attributed. The only thing I feel can account for it is the fact that the flower of our manhood was wiped out some 20 years ago and it is just some of those that we lost then that we require now.(23 October 1941)
Furthermore (the situation) is made worse by the lack of good military commanders. Half our Corps and Divisional Commanders are totally unfit for their appointments, and yet if I were to sack them I could find no better! They lack character, imagination, drive and power of leadership. The reason for this state of affairs is to be found in the losses we sustained in the last war of all our best officers, who should now be our senior commanders. I wonder if we shall muddle through this time .... (31 March 1942)
At the beginning of the war, the War Cabinet was in overall command of all three branches of the armed forces: the army, navy and air force. When Churchill was elected Prime Minister in May 1940, he formed an additional Inner War Cabinet in which he could act directly with the military commanders, who together formed the Chief of Staffs Committee. Overall command of the British Army was vested in the Army Council, which consisted of a number of civilian and military members, seven (later ten) in total. These included: The Secretary of State for War, Secretaries of State and members of the Civil Service. Although all orders were given in the name of the Army Council and not by a single person, the Secretary of State for War was solely responsible to the War Cabinet for all Army matters.[7]
Recruiting
At the outbreak of the Second World War, only two armoured divisions (the 1st and 7th) had been formed,[8] in comparison to the seven armoured divisions of the German Army.[9] In September 1939, the British Army had a total of 892,697 officers and men in both the full-time regular army and part-time Territorial Army (TA). The regular army could muster 224,000 men, who were supported by a reserve of 173,700 men. Of the regular army reservists, only 3,700 men were fully trained and the remainder had been in civilian life for up to 13 years.[10] However, much of the regular army was in India or scattered in small garrisons around the world, so additional forces had to be built up at home. In March 1939, it was decided to double the size of the Territorial Army, and in May with the Military Training Act 1939 conscription for the male population between the age of 20 to 22 was reintroduced.[7][11]
In April 1939, an additional 34,500 men had been conscripted into the regular army and had only completed their basic training on the eve of war. The regular army was built around 30 cavalry or armoured regiments and 140 infantry battalions. The Territorial Army numbered 438,100, with a reserve of around 20,750 men.[10]
When the UK declared war on Germany on 3 September 1939, the National Service (Armed Forces) Act 1939 was rushed through Parliament that required all fit men between the ages of 18 and 41 years to register for training (except for those in exempted industries and occupations).[12]
The total strength of the Army on September 3, 1939 was 1,065,000 and by the summer of 1944 almost 1/3 of the able-bodied male population was serving in the three branches of the armed forces. The size of the British Army peaked in June 1945, at 2.9 million men. By the end of the Second World War some three million people had served.[13][7]
In 1944, the United Kingdom was facing severe manpower shortages. By May 1944, it was estimated that the British Army's strength in December 1944 would be 100,000 less than it was at the end of 1943. Although casualties in the Normandy Campaign, the main effort of the British Army in 1944, were actually lower than anticipated, losses from all causes were still higher than could be replaced. Two infantry divisions and a brigade (59th and 50th divisions and 70th Brigade) were disbanded to provide replacements for other British divisions in the 21st Army Group and all men being called up to the Army were trained as infantrymen.
Furthermore, 35,000 men from the RAF Regiment and the Royal Artillery were transferred to the infantry and were retrained as rifle infantrymen, where the majority of combat casualties fell.[14][15]
In addition, in the Eighth Army fighting in the Italian Campaign of the Mediterranean theatre several units, mainly infantry, were also disbanded to provide replacements, including the 1st Armoured Division and several other smaller units, such as the 168th Brigade, had to be reduced to cadre, and several other units had to be amalgamated.
The process of allocating men would remain ad hoc at the start of the war. The army would be without the quotas of men required from skilled professions and trades, which modern warfare demanded. With the British Army being the least popular service compared to the Royal Navy and RAF, a higher proportion of army recruits were said to be dull and backwards.[16] The following memorandum to the executive committee of the Army Council highlighted the growing concern.
"The British Army is wasting manpower in this war almost as badly as it did in the last war. A man is posted to a Corps almost entirely on the demand of the moment and without any effort at personal selection by proper tests."[17]
Only with the creation of the Beveridge committee in 1941, and their subsequent findings in 1942, would the situation of skilled men not being assigned correctly be addressed. The findings led directly to the creation of the General Service Corps that remains in place today.[18]
Training
Infantry
The 6-week basic training (General Military Training, GMT) was conducted in the Primary Training Centers (PTC). The training included physical training, drill, map reading and tactics. As the army grew, so did the need for officers. At the beginning of the war, it was customary to create small officer cadet units spread throughout the country. After two years, however, it was realized that these officer units had to become more homogeneous and should be better controlled by a common doctrine from a military training department in the War Ministry. Potential officers were usually selected during their time at the Corps Training Center and sent to the War Department Selection Board. If the officer candidate was selected, he was sent to pre-officer cadet training where the final decision was made. Once a candidate was deemed suitable, they were sent to the officer cadet training unit (OCTU) where they received 17 to 30 weeks of training.[19]
Tank Driver
The training to become a tank driver for the Royal Armored Corps (RAC) lasted 36 weeks. The first five weeks consisted of drill and fitness training. This was followed by 13 weeks of driving training and maintenance. This was followed by six weeks of gunnery training. The remaining weeks were spent putting the finishing touches to the troop. This included the use of small-caliber weapons, ceremonial drill and drill parades. In Britain, with the outbreak of war, the small Royal Tank Corps training center at Bovington - now the Army Armoured Fighting Vehicles School - began a massive expansion into a nationwide organization that had to train both instructors and recruits for the entire Royal Armoured Corps. The first step involved the formation of a militia training squadron for each regular unit of the Cavalry and Royal Tank Corps, which then took in recruits on a regular basis. These training squadrons became the nucleus of the RAC training regiments. By the end of the second year of the war, eleven of these regiments had been formed (the 51st and 56th at Catterick, the 52nd and 58th at Bovington, the 53rd, 59th, 60th and 61st at Tidworth, the 54th at Perham Down, the 55th at Farnborough and the 57th at Warminster). Tank ranges were established or enlarged at Castlemartin, Redesdale, Kirkcudbright, Warcop, Lulworth and Minehead.[20]
Artillery
There were a total of 7 regiments with 8 weeks of field training (and 12 weeks for specialists). These regiments produced 120 men every 2 weeks. Another regiment was responsible for the training of medium and heavy artillery, which also lasted 8 to 12 weeks. Here 200 men were trained every 2 weeks. A total of 3 regiments were responsible for anti-tank defence, which lasted 8 weeks and produced 100 men every 2 weeks. 5 regiments were responsible for signal training, which lasted 18 weeks.[21]
During the war, the British Army raised 43 infantry divisions.[citation needed] Not all of these existed at the same time, and several were formed purely as training or administrative formations. Eight regular army divisions existed at the start of the war or were formed immediately afterwards from garrisons in the Middle East. The Territorial Army had 12 "first line" divisions (which had existed, generally, since the raising of the Territorial Force in the early 1900s), and raised a further 12 "second line" divisions from small cadres. Five other infantry divisions were created during the war, either converted from static "county" divisions or specially raised for Operation Torch or the Burma Campaign.
Infantry Division Structure.
The 1939 infantry division had a theoretical establishment of 13,863 men. By 1944, the strength had risen to 18,347 men. This increase in manpower resulted mainly from the increased establishment of a division's subunits and formations; except for certain specialist supporting services, the overall structure remained substantially the same throughout the war. A 1944 division typically was made up of three infantry brigades; a Medium Machine Gun (MMG) battalion (with 36 Vickers machine guns, in three companies, and one company of 16 4.2-inch mortars); a reconnaissance regiment; a divisional artillery group, which consisted of three motorised field artillery regiments each with twenty-four 25-pounder guns, an anti-tank regiment with forty-eight anti-tank guns and a light anti-aircraft regiment with fifty-four Bofors 40 mm guns; three field companies and one field park company of the Royal Engineers; three transport companies of the Royal Army Service Corps; an ordnance field park company of the Royal Army Ordnance Corps; three field ambulances of the Royal Army Medical Corps, a signals unit of the Royal Corps of Signals; and a provost company of the Royal Military Police.[22] During the war, the Royal Electrical and Mechanical Engineers was formed to take over the responsibility of recovering and repairing vehicles and other equipment. A division generally had three workshop companies, and a recovery company from the REME.
There were very few variations on this standard establishment. For example, the 52nd (Lowland) Infantry Division was converted to a Mountain Division, with lighter equipment and transport. Other differences were generally the result of local exigencies. (A "Lower Establishment" existed for divisions stationed in Britain or inactive theatres, which were not intended to take part in active operations.) With all cavalry and armoured regiments committed to armoured formations in the early part of the war, there were no units left for divisional reconnaissance, so the Reconnaissance Corps was formed in January 1941. Ten infantry battalions were reformed as reconnaissance battalions. The Reconnaissance Corps was merged into the Royal Armoured Corps in 1944.[23]
The Infantry brigade typically had a HQ company and three infantry battalions. Fire support was provided by the allocation of an MMG company, anti tank battery, Royal Engineer company and/or field artillery regiment as required.[24]Brigade Groups, which operated independently, had Royal Engineer, Royal Army Service Corps, Royal Army Medical Corps and Royal Electrical and Mechanical Engineers units permanently assigned. Brigade groups were also formed on an ad-hoc basis and were given whatever resources was needed to complete an objective. However, it was intended before the war that the division was the lowest formation at which support (particularly artillery fire) could be properly concentrated and coordinated. Lieutenant-General Montgomery reimposed and reinforced this principle when he assumed command of the Eighth Army in North Africa in 1942, halting a tendency to split divisions into uncoordinated brigades and "penny packets".[25]
The infantry battalion consisted of the battalion Headquarters (HQ), HQ company (signals and administration platoons), four rifle companies (HQ and three rifle platoons), a support company with a carrier platoon, mortar platoon, anti tank platoon and pioneer platoon. The rifle platoon had a HQ, which included a 2-inch mortar and an anti tank weapon team, and three rifle sections, each containing seven riflemen and a three-man Bren gun team.[26]
At the start of the war, the British Army possessed only two armoured divisions: the Mobile Division, formed in Britain in October 1937, and the Mobile Division (Egypt), formed in the autumn of 1938 following the Munich Crisis,[27][28] These two divisions were later redesignated the 1st Armoured Division, in April 1939,[29] and 7th Armoured Division, in January 1940, respectively.[30] During the war, the army raised a further nine armoured divisions, some of which were training formations and saw no action.
Three were formed from first-line territorial or Yeomanry units. Six more were raised from various sources. As with the infantry divisions, not all existed at the same time, as several armoured divisions were disbanded or reduced to skeleton establishments during the course of the war, as a result of battle casualties or to provide reinforcements to bring other formations up to full strength. The structure of British armoured divisions changed several times before and during the war. In 1937, the Mobile Division had two cavalry brigades each with three light tank regiments (note: a British cavalry or armoured 'regiment' is the equivalent of a US battalion in size), a tank brigade with three medium tank regiments, and a "Pivot Group" (later called the "Support Group") containing two motorised infantry battalions and two artillery regiments.[29] The Mobile Division (Egypt) had a light armoured brigade, a cavalry brigade, a heavy armoured group of two regiments and a pivot group. [30]
By 1939, the intention was for an Armoured Division to consist of two armoured brigades, a support group and divisional troops. The armoured brigades would each be composed of three armoured regiments with a mixture of light and medium tanks, with a total complement of 220 tanks, while the support group would be composed of two motorised infantry battalions,[31] two field artillery regiments, one anti–tank regiment and one light anti–aircraft regiment.[32]
Valentine tank in the desert, carrying an infantry section.
In late 1940, following the campaign in France and Belgium in the spring, it was realised that there were insufficient infantry and support units, and mixing light and cruiser tanks in the same brigade had been a mistake. The armoured divisions' organisation was changed so that each armoured brigade now incorporated a motorised infantry battalion, and a third battalion was present within the Support Group. In the winter of 1940–41, new armoured regiments were formed by converting the remaining mounted cavalry and yeomanry regiments. A year later, 33 infantry battalions were also converted to armoured regiments. By the Second Battle of El Alamein, in late 1942, the British Army had realised that an entire infantry brigade was needed within each division, but until mid 1944, the idea that the armoured and motorised infantry brigades should fight separate albeit coordinated battles persisted.[33]
By the Battle of Normandy in 1944, the divisions consisted of two brigades: an armoured brigade of three armoured regiments and a motorised infantry battalion, and an infantry brigade containing three motorised infantry battalions. The division's support troops included an armoured car regiment, an armoured reconnaissance regiment, two field artillery regiments (one of which was equipped with 24 Sexton self-propelled 25-pounder guns), one anti–tank regiment (with one or more batteries equipped with Archer or Achilles tank destroyers in place of towed anti–tank guns) and one light anti–aircraft regiment, with the usual assortment of engineers, mechanics, signals, transport, medical, and other support services.[34][35][36]
The armoured reconnaissance regiment was equipped with medium tanks, bringing the armoured divisions to a strength of 246 medium tanks[37] (roughly 340 tanks in total) [34] and by the end of the Battle of Normandy the divisions started to operate as two brigade groups, each of two combined arms teams, each in turn of one tank regiment and one infantry battalion (The armoured reconnaissance regiment was matched with the armoured brigade's motor battalion to provide the fourth group).[38][39]
Armoured Division Structure 1944.
In 1944, the division's armoured regiments comprised 78 tanks.[34] The regimental headquarters was equipped with four medium tanks, an anti–aircraft troop with eight Crusader Anti–Aircraft tanks, and the regiment's reconnaissance troop with eleven Stuart tanks.[40][a] Each regiment also had three Sabre squadrons; generally comprising four troops each of four tanks, and a squadron headquarters of three tanks. The Sabre Squadrons contained three close support tanks, 12 medium tanks, and four Sherman Fireflys.[b] Additionally, 18 tanks were allocated to the armoured brigade's headquarters and a further ten to the division's headquarters.[34]
The Royal Artillery was a large corps, responsible for the provision of field, medium, heavy, mountain, anti-tank and anti-aircraft units. (Some field regiments, particularly self-propelled regiments in the later part of the war, belonged to the prestigious Royal Horse Artillery, but were organised similarly to those of the RA.) The main field artillery weapon throughout the war was the 25-pounder, with a range of 13,400 yards (12,300m) for the Mk II model, Employed in a direct fire role it was also the most effective anti–tank weapon until the 6-Pounder anti–tank gun became available. One shortcoming of using the 25-pounder in this role was it effectiveness above 1,200 yards (1,100m) was limited and it deprived the army of indirect fire support.[43] Only 78 25-pounders had been delivered when the war began, so old 18-pounders, many of which had been converted to using 25-pounder ammunition as 18/25-pounders, were also employed.[44]
Each field artillery regiment was originally organised as two batteries, each of two troops of six guns.[45] This was changed late in 1940 to three batteries each of eight guns.[46] Perhaps the most important element of a battery was the Forward Observation Officer (FOO), who directed fire. Unlike most armies of the period, in which artillery observers could only request fire support, a British Army FOO (who was supposedly a captain but could even be a subaltern) could demand it, not merely from his own battery, but from the full regiment, or even the entire field artillery of a division if required. The artillery's organisation became very flexible and effective at rapidly providing and switching fire.[47]
The medium artillery relied on the First World War vintage guns until the arrival, in 1941, of the 4.5-inch Medium gun, which had a range of 20,500 yards (18,700m) for a 55 pounds (25kg) shell. This was followed in 1942 by the 5.5-inch Medium gun, which had a range of 18,600 yards (17,000m) for an 80 pounds (36kg) shell.[48] The heavy artillery was equipped with the 7.2-inch Howitzer, a modified First World War weapon that nevertheless remained effective. During the war, brigade–sized formations of artillery, referred to as Army Group Royal Artillery (AGRA), were formed.[49] These allowed control of medium and heavy artillery to be centralised. Each AGRA was normally allocated to provide support to a corps,[50] but could be assigned as needed by an Army HQ.[51]
Although infantry units each had an anti-tank platoon, divisions also had a Royal Artillery anti-tank regiment. This had four batteries, each of twelve guns. At the start of the war, they were equipped with the 2-pounder. Although this was perhaps the most effective weapon of its type at the time, it soon became obsolete as tanks became heavier with thicker armour.[52] Its replacement, the 6-pounder, nevertheless did not enter service until early 1942. Even before the 6-pounder was introduced, it was felt that even heavier weapons would be needed, so the 17-pounder was designed, first seeing service in the North African Campaign in late 1942.[53]
Each division also had a light anti-aircraft regiment. Initially, batteries were organised in troops of four guns, but combat experience showed that a three-gun troop was as effective, shooting in a triangular formation, so the batteries were reorganised as four troops of three guns.[54] The troops were subsequently increased in size to six guns, so the regiment then had three batteries each with eighteen Bofors 40mm guns. This equipment and organisation remained unchanged throughout the war.[55]
The Royal Artillery also formed twelve Anti–aircraft divisions, equipped with heavier weapons.
These were mainly the 3-inch and 3.7-inch anti–aircraft guns, but also the 4.5-inch and 5.25-inch guns where convenient. These divisions were organised into Anti-Aircraft Command, which was commanded throughout the war by Lieutenant-General Sir Frederick Alfred Pile. Each Anti-aircraft division was also responsible for searchlight and barrage balloon units within its assigned area.[56]
The first raiding forces formed during the war were the ten Independent Companies, which were raised from volunteers from Second-Line TA division.[57]They were intended for raiding and reconnaissance behind German lines in the Norwegian Campaign, but were disbanded after the campaign was abandoned. The remaining personnel carried out Operation Collar against German-occupied France, before being merged into the Commandos. Later in 1940, the British Commandos were formed following Winston Churchill's call for "specially trained troops of the hunter class, who can develop a reign of terror down the enemy coast."
By 1941, the Commandos were carrying out raids on the German-occupied Norwegian coast in Operation Claymore and Operation Archery and in 1942, they formed the assault troops for the St Nazaire Raid. They eventually formed 30 battalion-sized commando units (including 8 Royal Marines units), some of which were organised within four brigades; 1st, 2nd, 3rd, and 4th Commando brigades.[58] Impressed by the German Fallschirmjäger, Winston Churchill called for the formation of a similar elite corps of troops.[59]The Parachute Regiment was created and by the end of the war it possessed 17 battalions.[59] Their first action was the Bruneval Raid in 1942.
The Parachute battalions formed the core of the 1st and 6th airborne divisions and the 2nd Independent Parachute Brigade.[60] In 1945, they also supplied battalions for the 50th and 77th Indian Parachute brigades.[61] Units that operated as smaller bodies included the Long Range Desert Group, which was formed in North Africa to report on movements and activities behind the German and Italian lines. The Special Air Service was formed in 1941 for raiding missions behind the lines,[62] and later the Special Air Service Brigade was formed to support the Normandy landings.[63]Popski's Private Army, formed in August 1942, was also tasked with missions behind the lines to gather intelligence, blow up installations and ambush small patrols.[64]
The Special Interrogation Group was a unit formed from anti-Nazi Germans and Palestinian Jews of German origin under British officers, they wore German equipment, spoke German and lived everyday life as members of the Africa Corps. The Special Boat Service was formed from the Folboat Section later the Special Boat Section of No 8 Commando.[65] A little known force that never saw combat were the Auxiliary Units, a specially trained and secret organisation that, in the event of an invasion, would provide resistance behind the lines.
Auxiliary Units were well equipped and supplied with food for 14 days, which was their expected lifespan. Selected for aptitude and local knowledge, men were mostly recruited from the Home Guard, which also provided a cover for their existence. In addition, the Special Duties Section was recruited to provide an intelligence gathering service, spying on enemy formations and troop movements. Reports were to be collected from dead letter drops and relayed by radio operators of the Royal Corps of Signals from secret locations.[66]
Auxiliary Territorial Service Searchlight Unit
Auxiliary Territorial Service
The Auxiliary Territorial Service (ATS) was the women's branch of the British Army during the Second World War. Formed in September 1938, enlistment was open to women aged 18 upwards who could enlist for general or local service (Local service they served in their own local area, General service they could be sent where they were needed and could be anywhere in the country).[67] The ATS served in non-combat roles as cooks, clerks and storewoman.[68] Large numbers of ATS also served with the artillery divisions as crews for the guns, searchlights and barrage balloons.[69] One notable ATS member was No. 230873 Second SubalternElizabeth Windsor, who trained as a driver and mechanic, drove a military lorry, and rose to the rank of Junior Commander.[70] She was the last serving head of state who served in uniform during the Second World War.[71]
The Local Defence Volunteers (LDV) was formed in May 1940 and renamed the Home Guard in July 1940. Civilians aged between 17 and 65, who were not in military service, were asked to enlist in the LDV. The response was 250,000 volunteers attempting to sign up in the first seven days and reached 1.5million volunteers by July.[72] The LDV had achieved official legal status on 17 May when the Privy Council issued the Defence (Local Defence Volunteers) Order in Council, and orders were issued from the War Office to regular Army Headquarters throughout Britain explaining the status of LDV units. Volunteers would be divided into sections, platoons and companies but would not be paid and leaders of units would not hold commissions or have the power to command regular forces.The issue of weapons to LDV and then Home Guard units was solved when emergency orders were placed for First World War vintage Ross Rifles from Canada and Pattern 1914 Enfield and M1917 Enfield rifles from the United States.[73] The Home Guard were stood down on 3 December 1944 and disbanded on 31 December 1945.
The British tank force consisted of the slow and heavily armed infantry tank, together with the faster and lighter cruiser tank. The cruiser tanks were intended to operate independently of the slow-moving infantry and their heavier infantry tanks. The British doctrine at the time did not foresee the armoured division having a role in its own right and was assigned the traditional cavalry role. They would then deploy independent tank brigades equipped with the infantry tanks to operate with the infantry.[5] German panzer and light divisions were equipped with the latest Panzer III and Panzer IV tanks, which could outgun all British tanks.[75] By 1942, American Grant and Lend-Lease Sherman tanks entered British service.
These tanks, with a 75mm gun, and the ability to fire high explosive and anti-tank rounds, were better than any other tank then in British service.[76] A British development of the Sherman led to the Sherman Firefly, which was the only tank able to defeat German Panther, Tiger I and Tiger II tanks at range, until the Comet tank entered service in late 1944.[77] The British divisional anti-tank weapon was the Ordnance QF 2-pounder, which had three times the range of the German 3.7 cm PaK 36.[78] After its introduction in May 1942 the more powerful 6-pounder replaced the 2-pounder during the second part of the war. Its small size and light weight provided excellent mobility and at the same time it was also capable of defeating most German tanks. But only with the development of the 17-pounder anti-tank gun in 1943, did the artillery have the ability to knock out the heavily armoured Tiger and Panther tanks at a maximum range of 1 mile (1.6km).[79]
The other British artillery guns in 1939 were the 6-inch howitzer left over from the First World War, and the 25-pounder. In the evacuation from France, the artillery left behind 1,000 field and 600 anti-tank guns. Much of what was lost was obsolete and the re-equipment programme produced the mass of artillery that proved decisive from 1942 onwards. Self propelled artillery guns used were the German Wespe and Hummel against the Allied Bishop, Deacon, Priest and Sexton.[80]
For the infantry the German MP 38/40submachine gun took the British by surprise, and the army issued an urgent requirement for its own submachine gun. The Thompson submachine gun was effective, but heavy, and initially hard to obtain because of its American patent.[81] The crude but simple to manufacture Sten gun was accepted and between 1941 and 1945, some 3,750,000 were produced.[82] The British Bren light machine gun with a rate of fire of 500 rounds a minute and 30 round magazine, came up against the German MG 42 which had a rate of fire of 1,500 rounds per minute and ammunition belts of 200 rounds.[83] The standard British rifle was the bolt actionLee–Enfield Rifle, No. 4 Mk I that was comparable to the standard German rifle of the war, the Karabiner 98k; later German rifles included the Semi-automatic riflesGewehr 41, Gewehr 43 and the first assault rifle, the StG 44.[84] The British medical services had better staffing, equipment and medicines; it enabled the British Army to keep a higher proportion of troops in the field than its opponents.[85] In April 1940 a standardised system of markings for British vehicles was introduced to take account of the mass mechanisation of the army.
Wartime training
The Military Training Pamphlet (MTP) contained most of the theory by which the army operated, the series covering most of the trades and specialisms of the army. In 1941, the intended audience was stipulated with codes under which higher operations were distributed to unit commanders and above and manuals on minor tactics to corporals and above, lower ranks not being included. Pre-war manuals were produced by committees and published by the Army Council but this was a slow, bureaucratic process. In late 1939 writing was transferred to officers chosen by the Directorate of Military Training, under the CIGS, rather than the Army Council but this was still slow; a manual for the infantry division in defence published in March 1943 had taken 15 months to write.[c] Quickly to circulate new tactics and revised thinking derived from experience, Army Training Memoranda (ATM) were produced by the War Office to circulate to officers, with short pieces on tactics, administration and training. In the first year of the war ATM appeared monthly, then intermittently with 29 issues being published by the end of the war. ATM 33 was published on 2 July 1940, only eleven days after the report contained the findings of the Bartholomew Committee on the lessons of the debacle in France was written.[87]
The Army Training Instruction (ATI) was used by the War Office to issue new or revised thinking without the delays of editorial review required for MTPs. The first ATI was published in January 1941 and on 19 May ATI 3 Handling of an Armoured Division appeared, based on work in January and March. ATIs were provisional and superseded by an MTP, except for ATI 2 The Employment of Army Tanks in Co-operation with Infantry, which was an addition to MTP 22. ATI 2 covered occasions when infantry tank units had to be used as substitutes for armoured brigades as well as support infantry advances.
The pamphlet endorsed a more ambitious form of infantry support but this proved disastrous in practice and in May 1943 a revised version was published. ATI 3 reflected experience in France against German tanks and of the Western Desert Force against the Italian army. The swift increase in the number of British tank formations created great demand for information and in 1943, MTP 41 replaced ATI 3 but technological and tactical change rapidly made written instructions obsolete, which rebounded on forces being trained in Britain.[88]
In 1942, Notes from Theatres of War (NTW) and Current Reports from Overseas (CRO) began, to communicate experience of recent operations, NTW 1 of 19 February contained lessons from Operation Crusader and NTW 1 and 2 (7 March) covered events in Cyrenaica from November to December 1941 and operations in Russia in January.
Later issues took longer and covered longer periods, NTW 6 covered Cyrenaica from November 1941 to January 1942 and was published in July 1942. NTWs became the official line on lessons learned and were issues to the level of the company and its equivalents; by mid-1945, the series had reached NTW 21.[89][d]
Lessons from overseas were sometimes peculiar to the environment and NTWs carried a warning to bear this in mind. The CRO series contained findings before they had been endorsed by the War Office to give unit commanders and training school Commandants quick access to information with the proviso that if the details contradicted accepted theory, this would usually take precedence. CROs were not circulated below brigade headquarters until April 1944, when battalion HQs were included and after May 1943 appeared weekly until June 1945.[90]
The MTPs, ATM, ATI, NTW and CRO provide a picture of military theory as it evolved before D Day. Reports after 6 June show changes in theory and show the flaws in Home Forces and 21st Army Group training. There is little evidence in the documents of a frank acknowledgement of the failings of British tanks in North Africa and material criticising equipment is absent perhaps because the War Office and higher commands thought that admitting inadequacies would affect morale.[91] On 25 June 1944, Montgomery stopped the circulation of after-action reports because they were "unduly influenced by local conditions", a euphemism for accurate reports on the challenges faced by the British in Normandy. A report by Lieutenant-Colonel A. H. Pepys of 19 June, included comment that German Tiger and Panther tanks outclassed Cromwell and Sherman tanks as badly as Panzer III and IV tanks against Crusaders and Honeys in 1941. The passage was suppressed before the report was passed to the War Office and SHAEF. The effect of the censorship was limited because word of mouth was unstoppable; when the 107th RAC, part of the 34th Tank Brigade reached Normandy, visitors from the 11th Armoured Division said that even their Churchills were outclassed by German tanks and CROs resumed in late July.[92]
The Eighth Army was formed from the Western Desert Force in September 1941, under the command of Lieutenant-General Sir Alan Cunningham. Over time the Eighth Army would be commanded by Neil Ritchie, Claude Auchinleck, Bernard Montgomery, Oliver Leese and Richard McCreery In the early years of the war Eighth Army suffered from poor leadership and repeated reversals of fortune until the Second Battle of El Alamein when it advanced across Libya into Tunisia and joined the First Army in the 18th Army Group. The Eighth Army, under 15th Army Group command, later took part in the Allied invasion of Sicily, the Allied invasion of Italy and the Italian Campaign, where progress was slow and casualties were heavy.[100]
The Twelfth Army was originally formed for Operation Husky, codename for the Allied invasion of Sicily but was never used. It was reformed in May 1945, to take control of operations in Burma from the Fourteenth Army. The army Headquarters was created by redesignating the Headquarters of the Indian XXXIII Corps, under Lieutenant-General Sir Montagu Stopford.[102]
Fourteenth Army
The Fourteenth Army was a multinational force comprising units from Commonwealth countries. As well as British units, many of its units were from the Indian Army and there were also significant contributions from 81st, 82nd and 11th African Divisions. It was often referred to as the "Forgotten Army" because its operations in the Burma Campaign were overlooked by the contemporary press, and remained more obscure than those of the corresponding formations in Europe for long after the war. It was formed in 1943, under the command of Lieutenant-General Sir William Slim.
The 11th Army Group was activated in November 1943 to act as the land forces HQ for the newly formed South East Asia Command. Its commander was General George Giffard, who had formerly been Commander-in-Chief West Africa Command and Commander of Eastern Army in India.[103] In November 1944, 11th Army Group was redesignated Allied Land Forces South East Asia, under command of Lieutenant-General Sir Oliver Leese.[104]
Fifteenth Army Group
The 15th Army Group was activated in May 1943, after the surrender of all Axis forces in Tunisia. The commander was Field Marshal Harold Alexander and was responsible for mounting the Allied invasion of Sicily in July 1943. It had control of two armies: Eighth Army under command of Montgomery and U.S. Seventh Army under command of Lieutenant GeneralGeorge S. Patton. After Sicily, and in preparation for the allied invasion of Italy, the Seventh Army headquarters were replaced by those of the U.S. Fifth Army, under Mark Clark.[105]
Eighteenth Army Group
The 18th Army Group was activated in early 1943, when the Eighth Army advancing from the east and First Army from the west came close enough to require coordinated command during the Tunisia Campaign. It was commanded by General Sir Harold Alexander.[106]
Twenty First Army Group
The 21st Army Group initially controlled all ground forces in Operation Overlord.[107] The 21st Army Group main components were the British 2nd Army and the First Canadian Army. Also included were Polish units and from Normandy onwards and small Dutch, Belgian, and Czech units. However the Lines of Communications units were predominantly British. Other Armies that came under command of 21st Army Group were the First Allied Airborne Army, the U.S. First Army for Overlord,[108] and the U.S. Ninth Army; as a result of the disruption to the chain of command during the Battle of the Bulge and as reinforcement for the drive to the Rhine, Operations Veritable and Grenade.[109] The U.S. Ninth Army again and the U.S. XVIII Airborne Corps were under command for the Rhine river crossings Operations Plunder and Varsity.[110]
After the German surrender, 21st Army Group was converted into the headquarters for the British zone of occupation in Germany. It was renamed the British Army of the Rhine (BAOR) on 25 August 1945, and eventually formed the nucleus of the British forces stationed in Germany throughout the Cold War.[111]
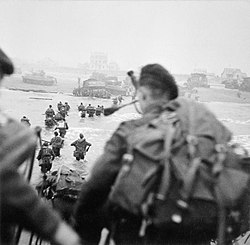
In April, more reinforcements in the form of two further Territorial divisions arrived. These were the 42nd (East Lancashire) and 44th (Home Counties) Infantry Divisions. A further three Territorial divisions, all 2nd Line and poorly trained and without their supporting artillery, engineer and signals units, arrived later in the same month. They were the 12th (Eastern), 23rd (Northumbrian) and 46th Infantry Divisions, sent to France on labour duties. In May, elements of the 1st Armoured Division also arrived.[117] The German Army invaded in the West on 10 May 1940. By that time the BEF consisted of 10 divisions, a tank brigade and a detachment of 500 aircraft from the RAF. During the Battle of France the speed of the German advance pushed them back, and after a brief armoured counterattack by the 5th and 50th Divisions, plus 74 tanks from the 1st Army Tank Brigade at Arras on 21 May, most of the BEF withdrew to Dunkirk. Evacuation from Dunkirk began on 26 May, with over 330,000 British and French troops withdrawn by 4 June. A further 220,000 were evacuated from other French ports. The majority of the BEF was saved, but had to leave much of its equipment behind. The BEF sustained around 68,000 casualties, which included around 40,000 who were taken prisoner, including most of the 51st (Highland) Infantry Division.[118] France, however, was not the British Army's first encounter with the Germans during the Second World War; that had been in the Norwegian Campaign, following the German invasion on 9 April 1940. The British had responded by sending troops, consisting mainly of Territorials of the 146th and 148th Infantry Brigades of the 49th (West Riding) Infantry Division (originally intended to be sent to France), along with regulars of the 15th Infantry Brigade (detached from the 5th Division in France) and the 24th Guards Brigade, to Åndalsnes, Namsos, and Narvik.
After the German invasion of the Low Countries the following month, with British military resources in Norway unable to be supported, the British troops in Norway had to be evacuated on 8 June.[119] The occupation of Norway led to a possible German presence in Iceland. This, along with the island's strategic importance, alarmed the British.[120] On 10 May 1940, British troops carried out the invasion of Iceland "to insure the security of Iceland against a German invasion".[121] An initial force of Royal Marines was replaced on 17 May by the 147th Infantry Brigade, followed by most of the rest of the 49th (West Riding) Infantry Division.[122] In operations happening elsewhere at this time, after Italy declared war in June 1940, British forces in Somaliland were put under the command of Arthur Reginald Chater, of the Somaliland Camel Corps.[123] At the start of August, Chater had about 4,000 soldiers from the Somaliland Camel Corps, 2nd (Nyasaland) Battalion, King's African Rifles (KAR), 1st Battalion, Northern Rhodesia Regiment, 3rd Battalion, 15th Punjab Regiment, 1st Battalion, 2nd Punjab Regiment, 1st Battalion, 2nd Punjab Regiment and 2nd Battalion, Black Watch (Royal Highland Regiment).[124][125][126]The East African campaign started in August 1940, when the Italians attacked British Somaliland. The British were defeated after a brief campaign when faced with the Italian force of 23 colonial battalions in five brigades.[127] The British Official History records total British casualties were 260 and Italian losses were estimated at 2,052.[128]
These troops had to defend both Egypt and the Suez Canal against an estimated 215,000 Italian troops in Libya, and an estimated 200,000 troops in Italian East Africa.[129] The British responded to the invasion of Egypt by launching Operation Compass in December, with the 4th Indian Infantry Division, 7th Armoured Division and, from 14 December, troops of the 6th Australian Infantry Division, which replaced the 4th Indian Division (the 4th had, by this stage, begun the process of redeploying to Sudan).[132]
1941
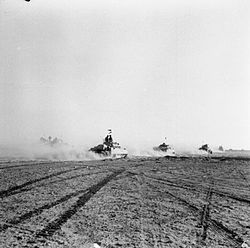
Matilda tank hidden near the front in the Western Desert June 1941.
Operation Compass was a success and the Western Desert Force advanced across Libya capturing Cyrenaica, 115,000 Italian soldiers, hundreds of tanks and artillery pieces and more than 1,100 aircraft with very few casualties of their own.[133] Following the operation the Western Desert Force, now renamed XIII Corps and reorganised under HQ Cyrenaica Command, adopted a defensive posture, to free up formations for redeployment to Greece.[134] Over the next few months O'Connor became commander of British Troops, Egypt, while Lieutenant-General Henry Maitland Wilson became military governor of Cyrenaica. Two experienced divisions were redeployed to Greece and the 7th Armoured Division was withdrawn to the Nile Delta for refitting.[135][136]
During the offensive, Lieutenant-General Philip Neame and Lieutenant-General Richard O'Connor were captured, and the British command structure had to be reorganised. HQ Cyrenaica was dissolved on 14 April and its command functions taken over by the reactivated HQ Western Desert Force, under Lieutenant-General Noel Beresford-Peirse. The Australian 9th Division fell back to the port of Tobruk,[143] and the remaining British and Commonwealth forces withdrew a further 100 miles (160km) east to Sollum on the Libyan–Egyptian border.[144]
In May, the 22nd Guards Brigade and elements of the British 7th Armoured Division launched Operation Brevity.[145] It was conceived as a rapid blow in the Sollum area, and intended to create advantageous conditions from which to launch Operation Battleaxe, the main offensive that was planned for June. Brevity's objectives were to recapture the Halfaya Pass, drive the enemy from the Sollum and Capuzzo areas, and deplete Rommel's forces. A secondary objective was to advance towards Tobruk, although only as far as supplies would allow, and without risking the force committed to the operation. However the operation was inconclusive and only succeeded in retaking the Halfaya Pass.[146][147]
The followup to Brevity was Operation Battleaxe, involving the 7th Armoured Division, 22nd Guards Brigade and 4th Indian Infantry Division from XIII Corps, commanded by Lieutenant-General Noel Beresford-Peirse. Battleaxe was also a failure, and with British forces defeated, Churchill wanted a change in command, so Wavell exchanged places with General Claude Auchinleck, as Commander-in-Chief, India.[148] The desert force was now reorganized into XXX Corps and XIII Corps and renamed the Eighth Army under the command of Lieutenant-General Alan Cunningham.[149] Their next attack, Operation Crusader, launched late in 1941, was a success; Rommel withdrew to the defensive line at Gazala, and then all the way back to El Agheila, at the western edge of Cyrenaica. Crusader was the first victory over the Germans by British-led forces in the war.[150]
In operations elsewhere in 1941, previously, on 11 December 1940, General Wavell had ordered the 4th Indian Infantry Division to withdraw from Operation Compass to take part in an offensive against Italian forces in Italian East Africa alongside the 5th Indian Infantry Division. [151] Both divisions faced vastly superior Italian forces (ten divisions in total) that threatened the Red Sea supply routes to Egypt, as well as the Suez Canal itself.[129] The East African campaign culminated in March 1941 with a British victory in the Battle of Keren.[152]
In the Mediterranean, having guaranteed to come to the aid of Greece in the event of war, Britain became involved in the Battle of Greece, and on 2 March Operation Lustre began, which saw some 62,000 British and Commonwealth troops redeployed, mostly from North Africa, to Greece.[153] The Commonwealth force comprised the Australian and New Zealand Divisions withdrawn from the desert, and the British 1st Armoured Brigade.[154] 'W' Force, as they became known after their commander, Lieutenant-General Sir Henry Maitland Wilson, was too small: it could not stop the Axis advance and was subsequently ordered to evacuate, many troops being withdrawn to Crete. The evacuation of the Greek mainland began on 24 April and by 30 April about 50,000 troops had been withdrawn. The remaining 7–8,000 troops were captured by the Germans.[155]
A group of British soldiers in a trench with fixed bayonets, Crete, May 1941.
The Battle of Crete followed. The Allied force consisted of the original 14,000 strong British garrison, plus another 25,000 Commonwealth troops evacuated from Greece (nearly half these personnel were not combat troops).[156] The units involved were the British 14th Infantry Brigade, 2nd New Zealand Division (less the 6th Brigade and division headquarters), and the 19th Australian Brigade Group. In total, about 15,000 British and Commonwealth infantrymen, reinforced by about 5,000 non-infantry personnel, and one composite Australian artillery battery, were involved in combat operations.[157] After a brief campaign that the Allies lost, 15,000 men were evacuated by the Royal Navy, leaving some 12,000 Allied troops behind, most taken as prisoners of war.[156] In operations in Arabia, the British in the Anglo-Iraqi War had to contend with the four infantry divisions of the Royal Iraqi Army (RIrA).The campaign lasted from 2–31 May, with the British forces grouped together in Iraqforce.[158]
In the Far East, Malaya Command defended stubbornly but was gradually pushed back, until the battle of Singapore, which surrendered on 15 February 1942. About 100,000 British and Commonwealth troops became prisoners of war during the Battle of Malaya.[166]Winston Churchill called the fall of Singapore the "worst disaster" and "largest capitulation" in British history.[167] The Japanese conquest of Burma started in January. It was soon apparent that the British and Indian troops in the Burma Campaign were too few in number, wrongly equipped and inadequately trained, for the terrain and conditions. The force of about 60,000 Commonwealth troops retreated 1,000 miles (1,600km), reaching Assam in India in May.> In spite of their difficulties, the British mounted a small-scale offensive into the coastal Arakan region of Burma, in December. The offensive under General Noel Irwin was intended to reoccupy the Mayu peninsula and Akyab Island. The 14th Indian Infantry Division had advanced to Donbaik, only a few miles from the end of the peninsula, when they were halted by a smaller Japanese force, the halt leading to the entire offensive being a total failure.[168]
In North Africa, Axis forces attacked in May, defeating the Allies in the Battle of Gazala in June and capturing Tobruk and 35,000 prisoners.The Eighth Army retreated over the Egyptian border, the British losing the minor port of Mersa Matruh, only stopping the German advance in the First Battle of El Alamein. Claude Auchinleck, who had assumed command of the Eighth Army following the defeat at Gazala, was sacked and replaced by GeneralSir Harold Alexander, who became C-in-C Middle East, at the same time Lieutenant-General Bernard Montgomery was given command of the Eighth Army.[169] The Axis forces made a new attempt to break through to Cairo in August, in the Battle of Alam el Halfa but were stopped after the British fought a purely defensive battle. The much-reinforced Eighth Army then launched a new offensive in October, the Second Battle of El Alamein, decisively defeating the Axis forces. Eighth Army then advanced westward, capturing 10,000 German and 20,000 Italian prisoners, 450 tanks and 1,000 guns.[170]
In France, the Dieppe Raid was carried out in August, the main assault made by the 2nd Canadian Infantry Division, supported by British Commandos. The landing failed to capture any German strong points and resulted in heavy casualties.[171] The raid was justified by arguing that lessons learned at Dieppe were put to good use later in the war.[172]The Chief of Combined OperationsLouis Mountbatten later claimed, "I have no doubt that the Battle of Normandy was won on the beaches of Dieppe. For every man who died in Dieppe, at least ten more must have been spared in Normandy in 1944."[173] Following their experiences at Dieppe, the British developed a whole range of specialist vehicles, nicknamed Hobart's Funnies. These vehicles were used successfully by the 79th Armoured Division in the British and Canadian landings in Normandy in 1944.[174]
January 1943, in North Africa German and Italian troops retreating westwards reached Tunisia. The Eighth Army stopped around Tripoli for reinforcements to catch up.[179] In the West, the First Army had received three more British divisions, the 1st, 4th and 46th Infantry Divisions, joined the 6th Armoured and 78th Infantry Divisions. By late March a second Corps headquarters, IX Corps, under Lieutenant-General John Crocker, had arrived to join V Corps, under Lieutenant-General Charles Walter Allfrey, in controlling the expanded army.[180] During the first half of January the First Army kept up the pressure on the Axis forces, with limited attacks and by reconnaissance in strength.[181]
The First Army came under attack at Faïd Pass on 14 January and the U.S. II Corps, under Major GeneralLloyd Fredendall, at Kasserine Pass on 19 January, with the 1st Guards Brigade of the British 6th Armoured Division, engaging the 21st Panzer Division. The Americans retreated in disarray until heavy Allied reinforcements blunted the Axis advance on 22 January. General Sir Harold Alexander arrived in Tunisia in late February to take charge of the 18th Army Group, created to control both the First and Eighth Armies and the Allied forces already fighting in Tunisia. The Axis forces attacked again on 6 March, (Operation Capri), but were easily repulsed by the Eighth Army.[179][106]
The First and the Eighth Armies attacked in March (Operation Pugilist) and April (Operation Vulcan). Hard fighting followed, and the Axis supply line was cut between Tunisia and Sicily. On 6 May, during Operation Vulcan, the British took Tunis, and American forces reached Bizerte. By 13 May the Axis forces in Tunisia had surrendered, leaving 230,000 prisoners behind.[182]
British troops pass bomb damaged buildings in Syracuse, Sicily. The port had fallen to the British on 10 July.
The Italian Campaign followed the Axis surrender in North Africa, first the Allied invasion of Sicily in July, followed by the Allied invasion of Italy in September. The Eighth Army, along with the American Seventh Army, under Lieutenant GeneralGeorge S. Patton, landed in Sicily in what was the largest amphibious landings of the war, with 150,000 troops landed on the first day, and 500,000 by the end of the campaign. The Eighth Army landed almost unopposed on the South Eastern coast of Sicily, but became bogged down after a few days. The original plan had called for the Eighth Army to advance on Messina, but because they could not make any headway being stuck on the slopes of Mount Etna, the U.S. Seventh Army were released. They advanced West then along the North coast to reach Messina first. One consequence of the British failure to break out was the escape of most of the Axis forces and their equipment to mainland Italy.[183]
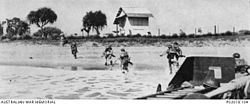
British troops from the 5th Infantry Division go aboard landing craft at Catania, Sicily, in preparation for the invasion of the Italian mainland, 2 September 1943.
On 3 September Montgomery's Eighth Army landed on the toe of Italy directly opposite Messina, and Italy surrendered on 8 September. The main landing of Lieutenant General Mark W. Clark's U.S. Fifth Army, with the British X Corps under Lieutenant-General Richard McCreery under command, took place at Salerno on 9 September. The landings were fiercely opposed by the Germans who had brought up six divisions during the delay between the capture of Sicily and the invasion of Italy, and at one point consideration was given to an evacuation.[184] A third landing, Operation Slapstick at Taranto on the heel of Italy, was carried out by the British 1st Airborne Division, landing not by air but by sea.[185]
One consequence of the Eighth Army's landing on the toe of Italy was that they were now 300 miles (480km) away from the main landings at Salerno, and in no position to offer any assistance. It was not until 16 September that forward patrols from the Eighth Army made contact with the U.S. 36th Infantry Division.[186] 16 September is also notable for the Salerno Mutiny by about 600 men of the 50th (Northumbrian) and 51st (Highland) Infantry Divisions. They had sailed from Tripoli, on the understanding that they were to join the rest of their units, which were then based in Sicily. Instead, once aboard ship, they were told that they were being taken to Salerno, to join the British 46th Infantry Division.[187]Naples was reached on 1 October 1943 by the 1st King's Dragoon Guards, and the U.S. Fifth Army, which now consisted of five American and three British divisions, reached the line of the Volturno River on 6 October. This provided a natural defensive barrier, which secured Naples, the Campanian Plain and the vital airfields on it from a German counterattack. Meanwhile, on the Adriatic coast, the Eighth Army had advanced to a line from Campobasso to Larino and Termoli on the Biferno river, but by the end of the year were still 80 miles (130km) short of the Italian capital of Rome.[184]
British troops crossing a pontoon bridge over the Volturno river, 15 October 1943.
The Dodecanese Campaign was an attempt by the British to liberate the Italian held Dodecanese islands in the Aegean Sea following the surrender of Italy, and use them as bases against the German controlled Balkans. The effort failed, with the whole of the Dodecanese falling to the Germans within two months, and the Allies suffering heavy losses in men and ships.[188][189][190] (see Battle of Kos and Battle of Leros for further details).
A Chindit column crosses a Burmese river during Operation Longcloth.
In Burma, BrigadierOrde Wingate, and the 77th Indian Infantry Brigade, or the Chindits as they were better known, infiltrated the Japanese lines in February, marched deep into Burma in Operation Longcloth. The initial aim was to cut the main North–South railway in Burma. Some 3,000 men entered Burma in columns and caused some damage Japanese communications, and cut the railway. But by the end of April, the surviving Chindits had crossed back over the Chindwin river, having marched between 750 and 1000 miles. Of the 3,000 men who had begun the operation, 818 men had been killed, taken prisoner or died of disease, and of the 2,182 men who returned, about 600 were too debilitated from their wounds or disease to return to active service.[191][192]
German prisoners of war being paraded through the street of Antwerp, Belgium, 5 September 1944.
On 17 September, Operation Market Garden began. British XXX Corps, under Lieutenant-General Brian Horrocks, provided the ground forces and the British 1st Airborne Division was part of a major airborne assault to take place in the Netherlands. The plan was for three airborne divisions (the British 1st and American 82nd and 101st, all under British I Airborne Corps command, under Lieutenant-General Frederick Browning) of the First Allied Airborne Army to take the bridges at Eindhoven (U.S. 101st Airborne Division), Nijmegen (U.S. 82nd Airborne Division), and Arnhem (British 1st Airborne Division) and for XXX Corps to use them to cross the Rhine and on into Germany.[201] XXX Corps was constantly delayed by German opposition while travelling up just one single road, managing to reach all but the 1st Airborne Division at Arnhem who had been dropped 8 miles (13km) from their bridge, and during the Battle of Arnhem were prevented from advancing into the town,The 1st Airborne Division was effectively destroyed, with three-quarters of the unit missing when it returned to England, including two of the three brigade commanders, eight of the nine battalion commanders and 26 of the 30 infantry company commanders. Just over 2,000 troops out of 10,000 returned to friendly territory.[203]
In an effort to use the port of Antwerp, the Canadian First Army including Lieutenant-General John Crocker's I Corps, began the Battle of the Scheldt and the Battle of Walcheren Causeway in October and November.[204] After clearing the southern bank of the Scheldt, British and Canadian forces took the island of Walcheren after an amphibious assault.[204]
The final battle in North West Europe during 1944, was the Battle of the Bulge. The Germans planned to attack through the Ardennes, splitting the American–British armies and capturing Antwerp.[205] The Battle of the Bulge was ostensibly an American battle, but XXX Corps, under Lieutenant-General Brian Horrocks, provided Britain's contribution, and Montgomery was the overall commander of the Northern sector.[109]
A Bren gun team of the 4th Battalion, Welch Regiment, 53rd (Welsh) Division, keep watch on the west bank of the Maas river, 30 November 1944.
During the Allied campaign in Italy, some of the hardest fighting of the entire war now took place. This was not helped by the withdrawal of forces for the Allied landings in Northern France. Operations carried out included: the long stalemate on the Winter Line (also known as the Gustav Line), and the hard-fought Battle of Monte Cassino. In January, the Anzio landings, codenamed Operation Shingle, were an attempt to bypass the Gustav Line by sea. (see Anzio order of battle for British forces involved). Landing almost unopposed, with the road to the Italian capital of Rome open, the U.S. VI Corps commander, Major GeneralJohn P. Lucas, felt that he needed to consolidate the beachhead before breaking out. This gave the Germans time to concentrate their forces against him. Another stalemate ensued, with the combined Anglo-American force facing stiff resistance, suffering severe losses and almost being driven back into the sea. When the stalemate was finally broken in the spring of 1944, with the launching of Operation Diadem, they advanced towards Rome, instead of heading north east to block the line of the German retreat from Cassino, thus prolonging the campaign in Italy. Progress was rapid, however, and, in August, the Allies came up against the Gothic Line and, by December, had reached Ravenna.[206]
An infantry section on patrol in Burma, 1944.
The 1944 campaign in Burma started with Operation Thursday, a Chindit force now designated 3rd Indian Infantry Division, were tasked with disrupting the Japanese lines of supply to the northern front. Further South the Battle of the Admin Box started in February, in preparation for when the Japanese Operation U-Go offensive. Although total Allied casualties were higher than the Japanese, the Japanese were forced to abandon many of their wounded. This was the first time that British and Indian troops had held and defeated a major Japanese attack. This victory was repeated on a larger scale in the Battle of Imphal (March–July) and the Battle of Kohima (April–June), giving the Japanese their largest defeat on land during the war. From August to November, the Fourteenth Army, under Lieutenant-General William Slim, pushed the Japanese back to the Chindwin River.[207][208][209]
In Germany the 21st Army Group offensive towards the Rhine began in February. The Second Army pinned down the Germans, while the Canadian First and the U.S. Ninth Army made pincer movements piercing the Siegfried Line.[110] On 23 March, the Second Army crossed the Rhine, supported by a large airborne assault (Operation Varsity) the following day.[210] The British advanced onto the North German Plain, heading towards the Baltic Sea. The Elbe was crossed by VIII Corps, under Lieutenant-General Evelyn Barker, and the Elbe bridgehead expanded, Bremen fell on 26 April, Lübeck and Wismar on 2 May and Hamburg 3 May.[211] On 4 May, all German forces in Denmark, Netherlands, and north west Germany surrendered to Montgomery.[212]
In the Italian campaign, the poor winter weather and the massive losses in its ranks, sustained during the autumn fighting, halted any advance until the spring.[213] The Spring 1945 offensive in Italy commenced after a heavy artillery bombardment on 9 April. By 18 April, the Eighth Army, now commanded by Lieutenant-General Sir Richard McCreery, had broken through the Argenta Gap and captured Bologna on 21 April. The 8th Indian Infantry Division, reached the Po River on 23 April. The British V Corps, under Lieutenant-General Charles Keightley, traversed the Venetian Line and entered Padua in the early hours of 29 April, to find that partisans had locked up the German garrison of 5,000 men. The Axis forces, retreating on all fronts and having lost most of their fighting power, were left with little option but surrender. General Heinrich von Vietinghoff signed the surrender on behalf of the German armies in Italy on 29 April formally bringing hostilities to an end on 2 May 1945.[214]
In Burma the Battle of Meiktila and Mandalay started in January, despite logistical difficulties, the British were able to deploy large armoured forces in Central Burma. Most of the Japanese forces in Burma were destroyed during the battles, allowing the Allies to capture the capital, Rangoon on 2 May. The British Army fought its last pitched land battle of the war when the remaining Japanese attempted to break out eastwards in July, to join other troops retreating from the British. The breakout however ending in early August, resulted with a crushing defeat for the Japanese, with some formations being wiped out. The Japanese were still in control of Malaya but they surrendered on 14 August along with Hong Kong.[215]
Casualties
On 29 November 1945, the British Government stated that for the period of 3 September 1939 – 14 August 1945, the empire suffered a total of 1,246,025 casualties, with 755,257 of these casualties being from the United Kingdom. Of these, the British military suffered 244,723 killed, 53,039 reported missing, 277,090 wounded, and 180,405 men were taken as prisoners of war. This report included men from Newfoundland and Southern Rhodesia within the British figure, but did not break down the losses by service branch.[216][e] In 1961, the House of Lords reported that the British Army (including men from Newfoundland and Southern Rhodesia) suffered a total of 569,501 casualties between 3 September 1939 and 14 August 1946, and as reported up to 28 February 1946. This figure included 144,079 killed, 33,771 missing, 239,575 wounded, and 152,076 captured.[218][f]
↑The Armoured Reconnaissance Regiment was issued 30 Stuart tanks instead of 11.[41]
↑While Fireflys were issued one per four-tank troops, as the war progressed some units were able to field two per troop.[42]
↑In the new Infantry Training manual for the Army Council, the officer who wrote Infantry Training Part VIII Fieldcraft, Battledrill, Section and Platoon Tactics began in April 1942 and took until October 1943; the pamphlet was published in March 1944. The 1937 edition had become obsolete on platoon organisation within a year but GHQ Home Forces published an interim The Instructors' Handbook on Fieldcraft and Battle Drill of 190 pages, 58 more than Infantry Training Part VIII, the handbook was written in fewer than ten months, free from the cumbersome validation procedure.[86]
↑NTWs contained material assembled by the War Office and endorsed by the theatre HQ. NTW 16 October 1943 covered the Tunisian Campaign from a document produced by Alexander and endorsed by Eisenhower. The document covered systematically the campaign with a description of the terrain, climate and characteristics of the Allied and German forces, an Outline of Operations, General Lessons, Lessons by Arms, Administrative Lessons and Enemy Methods.[90]
↑The Commonwealth War Graves Commission's 2019–2020 Annual Report provided a revised figure of 245,004 overall British killed, during the course of the war. Like the 1945 government figure, it does not break down the dead by military branch.[217]
↑The overall figure breaks down the losses by general theater, the war against Germany and the war against Japan. The war against Germany: 121,484 killed, 29,255 missing, 224,427 wounded, and 119,764 captured. The War against Japan: 22,595 killed, 4,516 missing, 15,148 wounded, and 32,312 captured. The report also lists the casualties of the other military branches: The Royal Navy suffered 73,642 casualties (50,758 killed, 820 missing, 14,663 wounded, and 7,401 captured), the Royal Air Force suffered 112,296 casualties (69,606 killed, 6,736 missing, 22,839 wounded, and 13,115 captured), the Women's Auxiliary Services suffered 1,486 casualties (624 killed, 98 missing, 744 wounded, and 20 captured), the Women's Royal Naval Service suffered 124 casualties (102 killed, and 22 wounded), the Auxiliary Territorial Service, which included army nursing services, suffered 751 casualties (335 killed, 94 missing, 302 wounded, and 20 captured), the Women's Auxiliary Air Force suffered 611 casualties (187 killed, 4 missing, and 420 wounded), and the Merchant Navy suffered 45,329 casualties (30,248 killed, 4,654 missing, 4,707 wounded, and 5,720 captured). The report noted that the missing figures include 6,244 who were still missing as of 28 February 1946, and 39,835 people who had since rejoined their units.[218]
↑"British Empire War Casualties". Written Answers (Commons). Vol.416. Parliament of the United Kingdom: House of Commons. 29 November 1945. p.cc1735-6W.
Blaxland, Gregory (1979). Alexander's Generals (the Italian Campaign 1944–1945). London: William Kimber. ISBN0-7183-0386-5.
Brooke, Alan (2001). War Diaries 1939–1945. London: Phoenix Press. ISBN1-84212-526-5.
Buckley, John (2006) [2004]. British Armour in the Normandy Campaign 1944. Abingdon: Taylor & Francis. ISBN0-415-40773-7. OCLC154699922.
Brayley, Martin; Chappell, Mike (2001). British Army 1939–45 (1): North-West Europe. London: Osprey Publishing. ISBN1-84176-052-8.
Brayley, Martin; Chappell, Mike (2002). The British Army 1939–45 (3): The Far East. London: Osprey Publishing. ISBN1-84176-238-5.
Breuer, William B (2001). Daring missions of World War II. New York: John Wiley and Sons. ISBN0-471-40419-5.
Buckley, John, ed. (2007) [2006]. The Normandy Campaign 1944: Sixty Years on. London: Routledge. ISBN978-0-415-44942-7.
Buell, Thomas B; Bradley, John N; Dice, Jack W; Griess, Thomas E (2002). The Second World War: Europe and the Mediterranean. Garden City Park: Square One Publishers, Inc. ISBN0-7570-0160-2.
Bull, Stephen; Dennis, Peter; Delf, Brian; Chappell, Mike; Windrow, Martin (2004). World War II Infantry Tactics. London: Osprey Publishing. ISBN1-84176-663-1.
J. R. M. Butler (1971). Grand Strategy September 1939-June 1941. History of the Second World War United Kingdom. Vol.II. London: H.M. Stationery Office. ISBN0-11-630095-7.
J. R. M. Butler, J. M. A. Gwyer (1964). Grand Strategy June 1941-August 1942. History of the Second World War United Kingdom. Vol.III. London: H.M. Stationery Office. OCLC220100151.
Cadiou, Yves; Richard, Alphonse; Pleasance, Simon (1977). Modern firearms. London: Routledge & Kegan Paul. ISBN0-7100-8424-2.
Carter, R.M.P. (2005) [1988]. The History of the 4th Armoured Brigade. Merriam Press. ISBN1-57638-018-1.
Chappell, Mike (1987). British battle insignia (2): 1939–1940. Men-At-Arms. London: Osprey Publishing. ISBN0-85045-739-4.
Chant, Christopher (1986). The Encyclopedia of Code Names of World War II. London: Routledge & Kegan Paul. ISBN0-7102-0718-2.
Martin Gilbert (1983). Finest Hour 1939–1941. Winston S. Churchill. Vol.VI. London: Heinemann. OCLC185198161.
Copp, Terry (2004). Fields of Fire: The Canadians in Normandy. Toronto: University of Toronto Press. ISBN0-8020-3780-1.
Courtney, G B (1993). Silent Feet: The History of 'Z' Special Operations 1942–1945. R. J. and S. P. Austin. ISBN978-0-646-12903-7.
Crang, Jeremy (2000). The British army and the People's War, 1939–1945. Manchester: Manchester University Press. ISBN0-7190-4741-2.
David, Saul (2005). Mutiny at Salerno 1943: An Injustice Exposed. Conway. ISBN1-84486-019-1.
Dennis, Peter (1972). Decision by default: peacetime conscription and British defence, 1919–1939. Taylor & Francis. ISBN0-7100-7263-5.
Devlin, Gerard M. (1979). Paratrooper – The Saga of Parachute And Glider Combat Troops During World War II. Robson Books. ISBN0-312-59652-9.
John Ehrman (1956). Grand Strategy August 1943-September 1944. History of the Second World War United Kingdom. Vol.V. London: H.M. Stationery Office. OCLC1180908217.
John Ehrman (1956). Grand Strategy August 1943-September 1944. History of the Second World War United Kingdom. Vol.VI. London: H.M. Stationery Office. OCLC1046384316.
Ellis, L.F. (2009) [1954]. Butler, J.R.M (ed.). The War in France and Flanders 1939–1940. History of the Second World War United Kingdom Military Series. Naval & Military Press Ltd. ISBN978-1-84574-056-6.
Ellis, L.F.; Allen, G.R.G. Allen; Warhurst, A.E. & Robb, James (2004) [1st. pub. HMSO 1962]. Butler, J.R.M (ed.). Victory in the West, Volume I: The Battle of Normandy. History of the Second World War United Kingdom Military Series. Naval & Military Press Ltd. ISBN1-84574-058-0.
French, David (2000). Raising Churchill's Army: The British Army and the War against Germany 1919–1945. Oxford University Press. ISBN0-19-924630-0.
Ford, Ken; Gerrard, Howard (2004). Cassino 1944: Breaking the Gustav Line. Osprey Publishing. ISBN1-84176-623-2.
Fortin, Ludovic (2004). British Tanks in Normandy. Histoire & Collections. ISBN2-915239-33-9.
Forty, George (1998), British Army handbook, 1939–1945, Stroud: Phoenix Mill, ISBN0-7509-1403-3
Forty, George (2004), Tank warfare in World War II: an oral history, London: Magpie, ISBN9781841198644
Gardner, W.J.R, ed. (2000) [First published 1949]. The Evacuation of Dunkirk: Operation Dynamo. London: Routledge. ISBN978-0-7146-5120-0.
Hack, Karl (2001). Defence and decolonisation in Southeast Asia: Britain, Malaya and Singapore, 1941–1968. London: Routledge. ISBN0-7007-1303-4.
Hack, Karl; Blackburn, Kevin (2004). Did Singapore have to fall? Churchill and the impregnable fortress. London: Routledge. ISBN0-415-30803-8.
Harrison, Mark (2004). Medicine and Victory: British Military Medicine in the Second World War. Oxford: Oxford University Press. ISBN978-0-19-926859-7.
Hart, Stephen (2000). Montgomery and Colossal cracks, 21st Army Group in Northwest Europe 1944–45. Greenwood. ISBN0-275-96162-1.
Hart, Stephen A; Laurier, Jim; Gerrard, Howard (2007). Sherman Firefly Vs Tiger: Normandy 1944. London: Osprey Publishing. ISBN978-1-84603-150-2.
Heathcote, Tony (1999). The British Field Marshals 1736–1997. Pen & Sword Books. ISBN0-85052-696-5.
Michael Howard (1972). Grand Strategy August 1942-September 1943. History of the Second World War United Kingdom. Vol.IV. London: H.M. Stationery Office. OCLC489795431.
Jackson, Ashley (2006). The British Empire and the Second World War. Continuum International Publishing Group. ISBN1-85285-417-0.
Brett-James, Anthony (1951). Ball of fire; the Fifth Indian Division in the Second World War. Aldershot: Gale & Polden. OCLC4275700.
Jentz, Thomas L. (1998). Tank Combat in North Africa: The Opening Rounds, Operations Sonnenblume, Brevity, Skorpion and Battleaxe, February 1941 – June 1941. Schiffer Publishing Ltd. ISBN0-7643-0226-4.
Kennedy, Paul (2004). The Rise and Fall of British Naval Mastery. Penguin.
Latimer, Jon (2001). Tobruk 1941: Rommel's Opening Move. Osprey. ISBN0-275-98287-4.
Lawlor, Sheila (1994). Churchill and the Politics of War, 1940–1941. Cambridge University Press. ISBN0-521-46685-7.
Long, Gavin (1986) [1953]. Series 1 Army Volume II: Greece, Crete and Syria. Australia in the War of 1939–1945. Angus & Robertson. ISBN0-00-217489-8.
Lowry, Bernard; Taylor, Chris; Boulanger, Vincent (2004). British Home Defences 1940–45. Osprey Publishing. ISBN1-84176-767-0.
Lynan, Robert; Gerrard, Howard (2006). Iraq 1941: the battles for Basra, Habbaniya, Fallujah and Baghdad. Osprey Publishing. ISBN1-84176-991-6.
MacDonell, George S (2002). One Soldier's Story 1939–1945: from the Fall of Hong Kong to the Defeat of the Japan. Dundurn Press Ltd. ISBN1-55002-408-6.
Mackenzie, Compton (1951). Eastern Epic: September 1939 – March 1943: Defence. Vol.I. London: Chatto & Windus. OCLC59637091.
Madsen, Chris (1998). The Royal Navy and German naval disarmament, 1942–1947. Taylor & Francis. ISBN0-7146-4373-4.
Mead, Richard (2007). Churchill's Lions: A biographical guide to the key British generals of World War II. Stroud (UK): Spellmount. ISBN978-1-86227-431-0.
Middlebrook, Martin (1994). Arnhem 1944: The Airborne Battle. Viking. ISBN0-670-83546-3.
Mockler, Anthony (1984). Haile Selassie's War: The Italian-Ethiopian Campaign, 1935–1941. New York: Random House. ISBN0-394-54222-3.{{cite book}}: CS1 maint: publisher location (link)
Molony, C.J.C.; Flynn, F.C.; Davies, H.L. & Gleave, T.P. (2004) [1973]. Butler, Sir James (ed.). The Mediterranean and Middle East: The Campaign in Sicily 1943 and The Campaign in Italy 3rd September 1943 to 31st March 1944. History of the Second World War. Vol.V. Uckfield, UK: Naval & Military Press. ISBN1-84574-069-6.
Moreman, Timothy Robert (2005). The jungle, the Japanese and the British Commonwealth armies at war, 1941–45: fighting methods, doctrine and training for jungle warfare. Routledge. ISBN0-7146-4970-8.
Moreman, Timothy Robert (2006). British Commandos 1940–46. London: Osprey. ISBN1-84176-986-X.
Moreman, Tim; Anderson, Duncan (2007). Desert Rats: British 8th Army in North Africa 1941–43. Osprey Publishing. ISBN978-1-84603-144-1.
Pemberton, A. L. (1951). The Development of Artillery Tactics and Equipment. London: War Office.
Perry, Frederick William (1988). The Commonwealth armies: manpower and organisation in two world wars. Manchester University Press ND. ISBN0-7190-2595-8.
Phillips, Lucas (1965). Alamein. London: Pan Books. ISBN0-330-30011-3.
Place, T. H. (2000). Military Training in the British Army, 1940–1944: From Dunkirk to D-Day. Cass Military History and Policy (pbk.ed.). London: Frank Cass. ISBN978-0-7146-8091-0.
Playfair, I.S.O.; Stitt, G.M.S.; Molony, C.J.C. & Toomer, S.E. (2004) [1954]. Butler, J.R.M (ed.). The Mediterranean and Middle East, Volume I The Early Successes Against Italy (to May 1941). History of the Second World War, United Kingdom Military Series. Naval & Military Press. ISBN1-84574-065-3.
Playfair, I.S.O.; Flynn, F.C.; Molony, C.J.C. & Toomer, S.E. (2004) [1956]. Butler, J.R.M (ed.). The Mediterranean and Middle East, Volume II The Germans come to the help of their Ally (1941). History of the Second World War, United Kingdom Military Series. Naval & Military Press. ISBN1-84574-066-1.
Playfair, I.S.O.; Molony, C.J.C.; Flynn, F.C. & Gleave, T.P. (2004) [1966]. Butler, Sir James (ed.). The Mediterranean and Middle East, Volume IV: The Destruction of the Axis Forces in Africa. History of the Second World War, United Kingdom Military Series. Uckfield, UK: Naval & Military Press. ISBN1-84574-068-8.
Pitt, Barrie (1989). Crucible of War: Western Desert 1941. Paragon House. ISBN978-1-55778-232-8.
Reynolds, Michael (2001) [1997]. Steel Inferno: I SS Panzer Corps in Normandy. Da Capo Press Inc. ISBN1-885119-44-5.
Richter, Heinz A. (1998). Greece in World War II (in Greek). transl by Kostas Sarropoulos. Athens: Govostis. ISBN978-960-270-789-0.
Riddick, John F (2006). The history of British India. Greenwood Publishing Group. ISBN0-313-32280-5.
Rogers, Anthony (2007). Churchill's Folly: Leros and the Aegean: The Last Great British Defeat of World War II. Athens: Iolkos. ISBN978-960-426-434-6.
Rottman, Gordon L (2006). US Airborne Units in the Mediterranean Theater 1942–44. Osprey Publishing. ISBN1-84176-920-7.
Shortt, Angus; McBride, Angus (1981). The Special Air Service: and Royal Marines Special Boat Squadron. Osprey Publishing. ISBN0-85045-396-8.
Suermondt, Jan (2004). Infantry Weapons of World War II. David & Charles. ISBN0-7153-1925-6.
Summerfield, Penny; Peniston-Bird, Corinna (2007). Contesting Home Defence: Men, Women, and the Home Guard in the Second World War. Manchester University Press. ISBN978-0-7190-6202-5.
Sylvan, William C; Smith, Francis G; Greenwood, John T; Hodges, Courntney H (2008). Normandy to Victory: The War Diary of General Courtney H. Hodges and the First U.S. Army. University Press of Kentucky. ISBN978-0-8131-2525-1.
Tugwell, Maurice (1971). Airborne To Battle – A History Of Airborne Warfare 1918–1971. William Kimber & Co Ltd. ISBN0-7183-0262-1.
Trew, Simon; Badsey, Stephen (2004). Battle for Caen. Battle Zone Normandy. Faber and Faber. ISBN0-7509-3010-1.
Watson, Graham; Rinaldi, Richard A (2005). The British Army in Germany: An Organizational History 1947–2004. Tiger Lily Publications. ISBN0-9720296-9-9.
Weigley, Russell F (1981). Eisenhower's Lieutenants. Bloomington: Indiana University Press. ISBN0-253-13333-5.{{cite book}}: CS1 maint: publisher location (link)
Zabecki, David T (1999). Title World War II in Europe: an encyclopedia. Taylor & Francis. ISBN0-8240-7029-1.
Barker, Rachel. Conscience, Government, and War: Conscientious objection in Great Britain 1939–1945 (1982).
Churchill, Winston. The Hinge of Fate. Published 1950.
Field, Geoffrey G. Blood, Sweat, and Toil: Remaking the British Working Class, 1939-1945 (2011) ch 7 "A Citizens' Army" DOI:10.1093/acprof:oso/9780199604111.003.0008 online
Goulty, James. The Second World War Through Soldiers' Eyes: British Army Life 1939-1945 Casemate Publishers, 2016).
Hughes, David and James Broshot. The British Armies in World War II: An Organisational History, Volume One: British Armoured and Cavalry Divisions (1999).
Hughes, David and David A. Ryan. The British Armies in World War Two: An Organizational History, Volume Three: British Infantry, mountain, Reserve and County Divisions (2001).
Smalley, Edward. The British Expeditionary Force, 1939-40 (Springer, 2015).
Smith, Greg. "British Strategic Culture And General Sir Alan Brooke During World War II" Canadian Military Journal (2017) 1: 32–44. Online free
Snape, Michael. God and the British soldier: Religion and the British army in the First and Second World Wars (Routledge, 2007).
Vernon, P. and J. B. Parry. Personnel Selection in the British Forces (HMSO, 1949), official history.
Williams, Philip Hamlyn. War on Wheels: The Mechanisation of the British Army in the Second World War (2016).
Wylie, Neville. Barbed Wire Diplomacy: Britain, Germany, and the Politics of Prisoners of War 1939-1945 (Oxford UP, 2010).
This page is based on this Wikipedia article Text is available under the CC BY-SA 4.0 license; additional terms may apply. Images, videos and audio are available under their respective licenses.