The Battle of Bayonne (14 April 1814), the last major battle of the Peninsular War, ensued when the French garrison of Bayonne led by General of DivisionPierre Thouvenot launched a sortie against a besieging force of British, Portuguese, and Spanish troops commanded by Lieutenant GeneralJohn Hope. It was fought after unofficial news of the abdication of French emperor Napoleon on 4 April had reached the opposing forces. Thouvenot's reasons for initiating the sortie are not clear; there was apparently nothing for the French to gain by fighting. After initial success for the French, Allied forces drove them back inside Bayonne with heavy losses on both sides.
The Allies had initiated the siege of Bayonne by mounting a complex land-sea operation that bridged the Adour estuary downstream from Bayonne. Allied positions already faced the south side of Bayonne, so crossing the Adour allowed Hope's troops to also close off the north side of Bayonne, completely investing the city. Once Bayonne was surrounded, the siege was pursued lethargically on both sides until the sortie. The fighting of 14 April involved heavy hand-to-hand combat but did not lift the siege, and on 17 April the French field army under MarshalJean-de-Dieu Soult signed an armistice with Arthur Wellesley, Marquess of Wellington. Thouvenot continued to resist until Soult directly ordered him to observe the ceasefire.
Background
Operations
A week after the Battle of the Nive ended on 14 December 1813, heavy rains began in the region around Bayonne. Although the outposts of each army around Bayonne were in close proximity to one another, neither army attempted any operations. Although urged by his Russian ally to continue the campaign, the Marquess of Wellington refused to do so as long as the bad weather persisted. He pointed out that ordering his army to march in heavy rains would be "a useless waste of men". The static situation continued until mid-February 1814.[1] Obeying orders from Emperor Napoleon, Marshal Soult sent two infantry divisions and half his cavalry to the campaign in northeast France. Soult tried to motivate the local French civilians to start guerrilla warfare against the Allied army. This effort failed and Allied troops moved about in relative security within occupied French territory.[2]
Soult anticipated that Wellington might try to besiege Bayonne by crossing the Adour River upstream (east) of the city. To prevent this move, the French marshal posted three divisions on the north bank of the Adour between Bayonne and Port-de-Lanne. With four additional divisions, Soult held the line of the Joyeuse River, which runs south to north.[2] A line of cavalry outposts connected the divisions on the Joyeuse to the French-held fortress of Saint-Jean-Pied-de-Port in the foothills of the Pyrenees. Soult's headquarters were located at Peyrehorade. In fact, Wellington had no intention of crossing the Adour upstream from Bayonne. Instead, he planned to move two corps to the east in order to draw Soult away from Bayonne. With Soult's main army out of the way, the corps of John Hope would lay siege to Bayonne. Wellington began moving his cavalry regiments from their winter pastures in Spain to the front.[3]
By 14 February 1814, the weather cleared and Wellington's troops began moving east, prompting the French to fall back behind the Bidouze River. The next day, Rowland Hill's corps defeated a French division at the Battle of Garris. On 16 February, Wellington's other corps under William Beresford began moving east. Between his two corps, Wellington's army numbered 42,000 infantry and 3,000 cavalry. After sending the division of Louis Jean Nicolas Abbé to reinforce the garrison of Bayonne, raising its strength to 14,000 men, Soult's field army counted 32,000 infantry and 3,800 cavalry. On 19 February, Wellington rode back to Saint-Jean-de-Luz to see how the plans for his next operation were proceeding.[4]
Investment of Bayonne
By 18 February, Soult's field army had been pushed back behind the Gave d'Oloron River where both armies would remain immobile on 19–23 February. This was far enough east so that the French army could not easily interfere with Allied operations against Bayonne. Wellington planned for Hope's corps to cross the Adour near its mouth—that is, downstream from Bayonne—and invest the city.[5] Over 50 luggers, (known locally as chasse-marées) had been collected in the harbor at Saint-Jean-de-Luz and loaded with wood planks and rope cables. They were to sail into the mouth of the Adour and be used to form a floating bridge. Meanwhile, a masked battery was prepared in a wood near the river; it would provide covering fire for an assault crossing. However, on 19 February and the following day, the strong wind was foul and the vessels were unable to sail from the port. Wellington returned to the field army on 21 February, leaving Hope to carry out the operation.[6]
Thouvenot's French infantry consisted of the 5th and 27th Light Infantry Regiments, and the 64th, 66th, 82nd, 94th, 95th, 119th and 130th Line Infantry Regiments.[7] Hope's 29,500-man corps included Kenneth Howard's 1st British (6,800)[7] and Charles Colville's 5th British Divisions,[8][note 1]Matthew Whitworth-Aylmer's Independent British Brigade (1,900), the Portuguese brigades of Thomas Bradford (1,600) and Archibald Campbell (2,500), Carlos de España's Spanish Division (4,000).[7] and Ormsby Vandeleur's light cavalry brigade.[9] Hope's corps was soon joined by Manuel Freire de Andrade's 10,000 Spanish troops; these soldiers were later sent away to join Wellington's army in time to fight at the Battle of Toulouse on 10 April.[7] The Spanish troops at Bayonne were distributed as follows. From Freire's 4th Army, España's 2nd Division (3,963) was at Bayonne; half of Del Barco's 3rd Division (4,991) was at Bayonne and half was at Toulouse; half of Porlier's 5th Division (3,729) was at Bayonne and half was at Toulouse; artillery and sappers (965) were at Bayonne except for 200 at Toulouse. From Pedro Agustín Girón's Army of the Reserve of Andalusia, Virue's 1st Division (5,008) and Juan Creagh's 2nd Division (4,286) were ordered to march to Bayonne in late February.[10]
The bridge of boats across the Adour.
On the afternoon of 22 February, the wind moderated and the luggers left the port of Saint-Jean-de-Luz, bound for the mouth of the Adour. At midnight, the 1st Division began marching to the rendezvous point. Dawn on 23 February found the troops of the 1st Division at the selected crossing place on the south bank of the Adour. However, the luggers were nowhere in sight, having been blown out to sea by a contrary wind. Anxious that the French would discover his plans, Hope ordered Aylmer's and Campbell's brigades and España's division to launch probing attacks along Bayonne's southern front. These demonstrations completely fooled Thouvenot, who believed he was about to undergo a major assault. Meanwhile, 18-pounder long guns were mounted in the masked battery and when they opened fire, they drove off the French corvetteSapho and several gunboats.[11] At 11:00 am, Hope boldly began sending his troops across the Adour, using five small boats. Securing a hawser to both banks, the British were able to send soldiers across in 50-man rafts. By 5:00 pm, five companies of British Guards and two companies of riflemen of the 5th/60th Foot were on the north bank with their brigade commander Edward Stopford. The French had 2,700 soldiers in Bayonne's citadel, but incredibly, Thouvenot made no serious attempt to wipe out the 500 British troops on the north bank. Instead, the citadel commander sent about 700 infantry to reconnoiter at dusk; these troops were hit by an accurate salvo of Congreve rockets and retreated.[12]
The lugger Corentin is a replica chasse-marée.
By dawn of 24 February, more Anglo-Allied soldiers made it across to the north bank and the flotilla of luggers and several Royal Navy warships were visible outside the mouth of the Adour. Ship's boats soon discovered a channel across the bar at the mouth of the river, but by this time the tide was ebbing and it was impossible for the luggers to enter the river. By late afternoon, the tide turned and 34 luggers entered the Adour, with the loss of one lugger and two ship's boats wrecked and about 35 sailors drowned. Meanwhile, the buildup of the north bank bridgehead continued, using rafts and rowboats, so that 3,000 men were across by noon. By nightfall, the entire 1st Division was across the Adour plus a portion of Campbell's Portuguese brigade, a total of 8,000 troops entrenched. The bridgehead was now secure against anything the French could throw at it.[13]
Construction of the bridge started on 25 February and lasted until afternoon of the next day. There were 26 luggers anchored side-by-side with their bows pointing upstream in a place where the Adour was only 300yd (274m) wide. The vessels were lashed together and secured by five cables to capstans on one bank and to heavy cannon barrels on the other. The besieging force was rearranged so that the British 1st Division, Bradford's and Campbell's Portuguese brigades, España's Spanish division, and two squadrons of Vandeleur's cavalry brigade were on the north bank, a total of 15,000 men. The 16,000-strong south bank force included the British 5th Division, Aylmer's British brigade, and the three newly-arrived Spanish divisions.[14] Though the French remained surprisingly passive while Hope reinforced his bridgehead, when the Allies tried to seize the Saint-Étienne suburb, they had a bitter fight on their hands costing almost 400 casualties.[15] On 27 February, the Allies on the north bank captured Saint-Étienne in house-to-house fighting. The British Guards and the Portuguese had minor losses, but three King's German Legion (KGL) battalions sustained 328 casualties in the struggle, while the French lost 55 killed, 103 wounded, and 30–40 captured.[14] Also on 27 February, Wellington's army defeated Soult's army at the Battle of Orthez.[16]
Except for a weak sortie on 1 March, Thouvenot left the Allied siege lines undisturbed. Hope's engineers built a barrier upstream from the new bridge; this was intended to catch any fire ships launched to destroy the bridge. Yet, the French never attempted any such thing. Wellington wanted to use the Adour estuary as a supply port, but merchant vessels proved unable to get across the bar at the mouth of the river. At the beginning of March, the Allied line of communication ran from the port of Saint-Jean-de-Luz north and across the new bridge. From there, the line turned east, passed around the besieged fortress of Bayonne, and followed the north bank of the Adour to Port-de-Lanne.[8]
Battle
John Hope
Hope conducted the siege in a way that was "leisurely to the point of apathy."[17] Wellington wanted Hope to mount a formal siege operation against Bayonne. The attack would be directed at the citadel on the north bank, because the low-lying city could be easily bombarded once the citadel fell. However, Hope mistakenly believed that the garrison of Bayonne would soon be starved into surrender and only carried out Wellington's orders slowly. In fact, the city had enough food to hold out for many weeks. Meanwhile, the picket lines were quiet because officers on both sides discouraged sniper fire.[18] French and British soldiers fraternized and exchanged goods and letters.[19] On 10 April, the same day as the Battle of Toulouse, Hope reported to Wellington that he did not plan to start digging siege parallels until 27 April. Also on 10 April, Hope received information that Napoleon had been deposed, but decided not to share it with Thouvenot until he received permission from Wellington. Nevertheless, this information leaked into Bayonne and an increasing number of French deserters came into the Allied lines.[20]
Pierre Thouvenot
On 12 April Thouvenot received unofficial news of Napoleon's abdication.[17] Even though this meant that the war was virtually over, the French governor decided to attack, "in a fit of spite and frustration".[21] By this time, desertion and illness diminished Thouvenot's garrison to 12,000 men. The French general gathered Abbé's division and several of the best battalions from the rest of the garrison, a total of 6,000 soldiers. Thouvenot planned to seize the Saint-Étienne suburb, with the first two columns issuing from the north and northeast sides of the citadel and the third column from the Saint-Esprit suburb. On the night of 13 April, a French deserter gave the Allies notice of the planned sortie, but the strength of the attack would take them by surprise.[22]
On the north bank of the Adour, the Allies were deployed as follows, from left (east) to right flank (west): Bradford's brigade at the settlement of Hayet on the river above Bayonne, Henry de Hinuber's KGL brigade, Stopford's Guards brigade, and Peregrine Maitland's Guards brigade at the hamlet of Saint-Bernard on the river below Bayonne. Most of Andrew Hay's brigade of the 5th Division was posted to the west at Le Boucau, to defend the bridge of boats. However, the pickets of Hay's brigade were deployed at Saint-Étienne, between the brigades of Stopford and Hinuber, and Hay was general officer of the day.[23]
The attack was delivered in mass at 3:00 am on a moonless night.[23] A feint attack was made against Anglet and Bellevue, while the main assault which numbered over 3,000 men, was launched north from the citadel. The Allied pickets were taken by surprise and soon overwhelmed. The eastern-most column from Saint-Esprit assaulted the village of Saint-Étienne.[24] The French captured the barricaded houses one by one and Hay was killed vainly defending the village church. Saint-Étienne was rapidly seized except one building where soldiers from the 38th Foot held out and the walled Jewish cemetery on the Bordeaux road. The two columns from the citadel overran Stopford's picket line, capturing many men, and drove the Guards brigade to the north. When Hope and his staff galloped from Le Boucau toward Saint-Étienne, they unwittingly took a route that the French troops had just seized. Hope and two of his staff officers were wounded and captured. French guns mounted in the citadel shelled the area indiscriminately and ineffectually. Meanwhile, French sappers began demolishing barricades and loopholed buildings.[25]
With Hope a prisoner, the task of organizing resistance fell to subordinates. Warned by the French deserter, Hinuber had placed his five KGL battalions on high alert that night.[26] Hinuber, who acted on his own initiative, rallied the troops and launched a counter-attack with the support of two Portuguese battalions. These drove the French out and recaptured Saint-Étienne.[24] At the same time the left-hand French column, supported by gunboats on the river, attacked Saint-Bernard. Maitland's 1st Guards Brigade occupied the heights around the village and the convent. With a destructive fire from the Guards, the French were repulsed and Maitland ordered a counter attack.[27] After finding Maitland's defenses intact, Howard rallied some of Stopford's troops and counterattacked the French near the Jewish cemetery. Hit by Stopford's men on one side and by Hinuber's KGL on the other, the French troops recoiled.[26]
The Allied counterattack soon intensified and the French bridgehead north of the citadel was now under attack from both east and west. Men of Howard's 1st Division with the bayonet began to dislodge the French from emplacements along the crossroads near Saint-Étienne. At this point, Thouvenot ordered his troops to withdraw.[27] As the Allies pursued their antagonists, in a few places the French became jammed together in the dark and made an easy target for Allied musketry. Thouvenot later claimed his troops withdrew in good order, but the French suffered heavy casualties.[26] By 8:00 am the Allies had recovered all lost territory with minimal damage to fortifications as the siege guns had not been deployed in the battery positions.[24] The commander of the British 5th Division, Colville assumed command of Hope's corps for the remainder of the siege.[26]
Aftermath
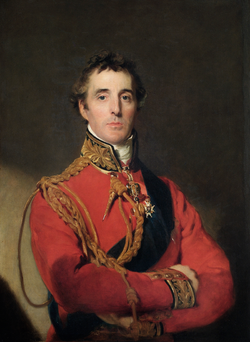
Wellesley as the Duke of Wellington
The Allies lost 838 men, 150 of whom were killed, including Major General Hay, 455 wounded and 233 captured including Hope.[28][29][30][21] Historian Charles Oman suggested that the Allies' unusual 1:3 killed-to-wounded ratio could be due to most of the 233 recorded as captured having been wounded, then taken prisoner when the picket lines were overrun. The French reported losing 11 officers and 100 men killed, 42 officers and 736 men wounded, and 16 men missing, a total of 905 casualties.[30] Total losses in the siege, including the battle on 14 April, were 1,600 French killed and wounded, plus 400 captured. The Allies lost a total of 1,700 killed and wounded, and 300 captured.[29] Gaston Bodart gave losses for the battle and siege as 2,000 on each side. According to Bodart, the Allies employed 25,000 troops during the siege while the French defenders numbered 14,000.[31]Digby Smith credited Hope's corps with 29,500 troops[7] while Oman wrote that Hope had 31,000 at the end of February.[32] Late on 12 April 1814, two officers, one French and one British, arrived at Wellington's headquarters at Toulouse to inform him that Napoleon had been deposed. The envoys were sent to Soult's headquarters where they arrived the following day and presented official documents. However, Soult refused to accept the legitimacy of the papers, but asked for an armistice from Wellington which was refused. Meanwhile, the French officer proceeded to Marshal Louis-Gabriel Suchet's headquarters where the documents were immediately accepted as legitimate; Suchet submitted to the new government and requested an armistice from Wellington. On 17 April, after Soult received a message from Marshal Louis-Alexandre Berthier that Napoleon had abdicated, Soult submitted and signed an armistice with Wellington.[33]
After the 14 April battle, Colville sent Thouvenot some Paris newspapers announcing that Napoleon was deposed. Thouvenot refused to accept the news and congratulated his troops on their sortie in the name of Emperor Napoleon. He refused to end the fighting unless he received a direct order from a superior. On 27 April, Thouvenot finally received Soult's copy of the 17 April armistice and the message that Soult submitted to the new government.[34] This compelled Thouvenot to hand the fortress of Bayonne over to the British.[35]
In fact, the Battle of Bayonne was not the last fighting of the Peninsular War. Pierre-Joseph Habert and a French garrison continued to defend Barcelona. On 16 April, Habert sent a column to forage for supplies in Gràcia. This expedition met strong resistance and suffered 200 casualties including 30 men captured. On 19 April, a spy brought Habert news of Napoleon's abdication. Nevertheless, Habert made his soldiers swear an oath to serve Napoleon. On 25 April a French colonel arrived at Barcelona bringing official news that Napoleon was deposed. At this, Habert became so enraged at the colonel that his staff had to restrain him. It took him two more days before he calmed down enough realize that France had lost the war in Spain, and to discuss the terms of evacuation.[36]
Commentary
Charles Colville
While Habert was unaware that the war was over when he launched his expedition on 16 April, Thouvenot had no such excuse. He was responsible for causing over 1,700 pointless casualties in a war that he knew was lost.[34] Wellington called Thouvenot a "blackguard" because he believed the Frenchman knew that war was over and deliberately attacked when the Allies had relaxed their guard. Colville thought Thouvenot was "well intentioned" but influenced by fanatical subordinates. After agreeing to the armistice, Thouvenot announced, "I will not have the English treated like demi-gods, as they have been at Bordeaux, and I have put a stop to the foolish demonstrations which might have taken place here".[37]
Oman considered that there are four situations in which the governor of a besieged fortress might justifiably attack the besiegers. (1) If the commander sees that surrender is inevitable, but there is a chance for the garrison to escape. This was successfully carried out by Antoine François Brenier de Montmorand's French garrison at the Blockade of Almeida in 1811. (2) When the commander believes that an attack will drive away the besiegers. This was successfully done by the Spanish garrison at the Second siege of Girona in 1808. (3) If the commander sees that the besieging force is making progress, he can launch a sortie for the purpose of wrecking the siege works and damaging the artillery. This was done by Louis Emmanuel Rey's French garrison during the Siege of San Sebastián in 1813. (4) When the commander believes that terrain that was not part of the original fortress can be seized and fortified. According to Oman, none of the four situations applied to the Bayonne sortie. Thouvenot was not attempting to break out, nor did he have any chance of driving away Hope's corps. Thouvenot could not try to damage the siege works because no batteries were armed with cannons. Finally, Thouvenot did not intend to hold any ground outside the fortress. The sortie was a pointless and costly exercise.[38]
Notes
Footnotes
↑Smith's order of battle listed Andrew Hay's brigade of 5th Division, but omitted Colville's other two brigades and Vandeleur's cavalry.
Clodfelter, Micheal (2017). Warfare and Armed Conflicts: A Statistical Encyclopaedia of Casualty and Other Figures, 1492–2015 (4ed.). McFarland. ISBN9780786474707.
Esdaile, Charles J (2016). Napoleon, France and Waterloo: The Eagle Rejected. Pen and Sword. ISBN9781473870840.
Fletcher, Ian (2016). Voices from the Peninsula: Eyewitness Accounts by Soldiers of Wellington's Army, 1808–1814. Frontline Books. ISBN9781473884793.
Gates, David (2002). The Spanish Ulcer: A History of the Peninsular War. Da Capo Press. ISBN0-306-81083-2.
Glover, Michael (2001) [1974]. The Peninsular War 1807–1814. Penguin. ISBN0-14-139041-7.
This page is based on this Wikipedia article Text is available under the CC BY-SA 4.0 license; additional terms may apply. Images, videos and audio are available under their respective licenses.