Regulatory signs inform drivers of traffic laws and banned actions. Road users must obey all instructions on prohibitory signs or risk getting a fine and points deducted from their licence. [9] Local councils may have local restrictions relating to parking times, which would be shown on or near the sign.
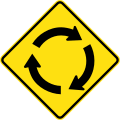
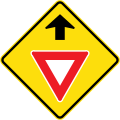
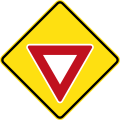
(R1-3) Give way at roundabout
(R1-4) Stop when Traffic signals are off or flashing (used in
New South Wales)
(R1-V6) Give Way to Stock (used in
Victoria)
(R2-2) One Way (left)
(R2-2) One Way (right)
(R2-3) Keep Left
(R2-3) Keep Right
(R2-7) No Turns (Straight Only)
(R2-9) Left Lane Must Turn Left
(R2-9) Right Lane Must Turn Right
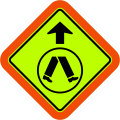
(R2-10) Give Way to Pedestrians
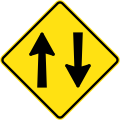
(R2-11) Two-way Traffic
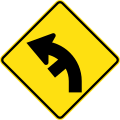
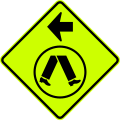
(R2-14) Turn Left
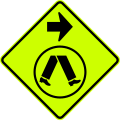
(R2-14) Turn Right
(R2-15) U-turn Permitted
(R2-16) Turn Left at Any Time with Care
(R2-17) One Way (forward)
(R2-19) Left Lane Must Exit
(R2-20) Left Turn on Red Permitted after Stopping
(R2-21) Right Turn from Left Only (used in
Victoria,
South Australia and
New South Wales)
(R2-V21-1) Right Turn from Left Ahead (used in
Victoria)
(R2-22) No
hook turn by Bicycles
(R2-Q02) Through Traffic Keep Left (used in
Queensland)
(R2-V115) U-turn Must Give Way (used in
Victoria)
(R2-V122) Keep Left at Islands (used in
Victoria)
(R2-V124) Give Way to Merging Tram (used in
Victoria)
(R3-1) Pedestrian Crossing
(R3-1) Pedestrian Crossing (with target board, used in
Queensland)
(R3-3) Children Crossing (flags are displayed near crossings around schools, orange variant, excluding
the Northern Territory)
(R3-3) Children Crossing (flags are displayed near crossings around schools, pink variant, used in
the Northern Territory)
(R3-4) Children Crossing Speed Limit when Lights Flashing
(R3-5) Pedestrians may Cross Diagonally (left)
(R3-5) Pedestrians may Cross Diagonally (right)
(R3-V102) Pedestrians use Overpass (used in
Victoria)
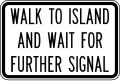
(R3-Q01) Walk to Island and Wait for Further Signal (used in
Queensland)
(MR-RP-8) No Pedestrian Crossing (used in
Western Australia)
(R4-1) 10 km/h Speed Limit
(R4-1) 20 km/h Speed Limit
(R4-1) 25 km/h Speed Limit
(R4-1) 30 km/h Speed Limit
(R4-1) 40 km/h Speed Limit
(R4-1) 50 km/h Speed Limit
(R4-1) 60 km/h Speed Limit
(R4-1) 70 km/h Speed Limit
(R4-1) 80 km/h Speed Limit
(R4-1) 90 km/h Speed Limit
(R4-1) 100 km/h Speed Limit
(R4-1) 110 km/h Speed Limit
(R4-1) 130
km/h Speed Limit (used in the
Northern Territory)
(R4-2) Speed De-restriction
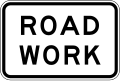
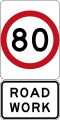
(R4-3) Road Work
(R4-4) Shared Zone
(R4-5) End of Shared Zone
(R4-6) Local Traffic Area
(R4-10) 20 km/h Speed Limit Zone Area
(R4-10) 30 km/h Speed Limit Zone Area
(R4-10) 40 km/h Speed Limit Zone Area
(R4-10) 50 km/h Speed Limit Zone Area
(R4-10) 60 km/h Speed Limit Zone Area
(R4-11) End of 20 km/h Speed Limit Zone Area
(R4-11) End of 30 km/h Speed Limit Zone Area
(R4-11) End of 40 km/h Speed Limit Zone Area
(R4-11) End of 50 km/h Speed Limit Zone Area
(R4-11) End of 60 km/h Speed Limit Zone Area
(R4-12) End of 10 km/h Speed Limit
(R4-12) End of 20 km/h Speed Limit
(R4-12) End of 25 km/h Speed Limit
(R4-12) End of 30 km/h Speed Limit
(R4-12) End of 40 km/h Speed Limit
(R4-12) End of 50 km/h Speed Limit
(R4-12) End of 60 km/h Speed Limit
(R4-12) End of 70 km/h Speed Limit
(R4-12) End of 80 km/h Speed Limit
(R4-12) End of 90 km/h Speed Limit
(R4-12) End of 100 km/h Speed Limit
(R4-12) End of 110 km/h Speed Limit
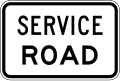
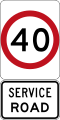
(R4-V100) Service Road (used in
Victoria)
(R4-V105) 40
km/h Speed Limit School Zone (used in
Victoria)
(R4-V105) 60
km/h Speed Limit School Zone (used in
Victoria)
(R4-V106) 40
km/h Speed Limit School Zone (used in
Victoria)
(R4-V106) 60
km/h Speed Limit School Zone (used in
Victoria)
(R4-V111) New Speed Limit Ahead (used in
Victoria and
Western Australia)
(R4-V114-1) 40
km/h Speed Limit with time of operation (used in
Victoria)
(R4-V114-2) 40
km/h Speed Limit with multiple times of operation (used in
Victoria)
(R4-V122) 60
km/h Community Gateway Speed Limit (used in
Victoria)
(R4-V119) New Limit (used in
Victoria)
(R4-201) On Bridge (used in
New South Wales)
(R4-205) State Speed Limit (used in
New South Wales)
(R4-212) 20
km/h Roadwork Speed Limit (used in
New South Wales)
(R4-212) 40
km/h Roadwork Speed Limit (used in
New South Wales)
(R4-212) 60
km/h Roadwork Speed Limit (used in
New South Wales)
(R4-212) 80
km/h Roadwork Speed Limit (used in
New South Wales)
(R4-220) End of Truck and Bus Speed Limit (used in
New South Wales)
(R4-225-1) Speed Limit Ahead (used in
New South Wales)
(R4-229) Truck and Bus Speed Limit (used in
New South Wales)
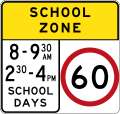
(R4-230) School Zone (used in
New South Wales)
(R4-230-1) School Zone (used in
New South Wales)
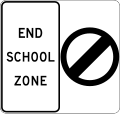
(R4-231) End of School Zone (used in
New South Wales)
(R4-235) School Zone (Non-standard school operating hours, used in
New South Wales)
(R4-235-1) School Zone (Non-standard school operating hours, used in
New South Wales)
(R4-239) Speed Limit unless Raining (used in
New South Wales)
(R4-242) Bus Speed Limit (used in
New South Wales)
(R4-243) End of Bus Speed Limit (used in
New South Wales)
(R4-244-1) School Zone Ahead (used in
New South Wales)
(R4-246) Speed Limits per Category (used in
New South Wales)
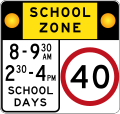
(R4-Q01) School Zone (used in
Queensland)
(R4-Q03) School Zone Ahead (used in
Queensland)
(R4-Q04) School Zone (used at T-junctions) (used in
Queensland)
(R4-Q05) Road Train Speed Limit (used in
Queensland)
(R4-Q06) End of Road Train Speed Limit (used in
Queensland)
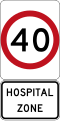
(R4-Q07) Hospital Zone (used in
Queensland)
(MR-RS-20) End of Speed Limit Area (used in
Western Australia)
(R5-1) Parking Permitted: 1 Hour (1 time of parking)
(R5-2) Parking Permitted: 2 Hours (2 times of parking)
(R5-10) Parking Permitted: No Limit
(R5-12) Parking Permitted: 2 Minutes
(R5-13) Parking Permitted: 5 Minutes
(R5-14) Parking Permitted: 10 Minutes
(R5-15) Parking Permitted: 15 Minutes
(R5-16) Parking Permitted: Half Hours
(R5-17) Parking Permitted: 1 and a Half Hours
(R5-20) Bus Zone
(R5-21) Taxi Zone
(R5-22) Permit Zone
(R5-23) Loading Zone
(R5-24) Truck Zone
(R5-25) Works Zone
(R5-26) Mail Zone
(R5-35) No Stopping
(R5-35) No Stopping (used in the
Australian Capital Territory)
(R5-36) No Stopping at times
(R5-36) No Stopping (School times)
(R5-39) Tow-Away Area
(R5-40) No Parking
(R5-40) No Parking (used in the
Australian Capital Territory)
(R5-41) No Parking at Times
(R5-45) Clearway
(R5-46) Clearway at times
(R5-51) End Clearway
(R5-58) Emergency Stopping Lane Only
(R5-61) 2 Hour Parking Area
(R5-62) 2 Hour Parking Area
(R5-63) End of 2 Hour Parking Area
(R5-64) Area Parking Control Ahead
(R5-65) Park in Bays Only
(R5-71) No Stopping Area
(R5-72) No Stopping Area
(R5-73) End of No Stopping Area
(R5-81) No Parking Area
(R5-82) No Parking Area
(R5-83) End of No Parking Area
(R5-V103) New Clearway Times (used in
Victoria)
(R5-V104) New Times (used in
Victoria)
(R5-400) No Stopping (used in
New South Wales)
(R5-405) No Stopping (Taxis Excepted) (used in
New South Wales)
(R5-406) Taxi Pick-up Point (used in
New South Wales)
(R5-Q01) Tow-Away Zone (used in
Queensland)
(R5-Q04) Loading Zone (Maximum of 2 Minutes for Passengers) (used in
Queensland)
(R5-Q05) Loading Zone (Maximum of 20 Minutes for Commercial Vehicles) (used in
Queensland)
(R6-1) No Overtaking or Passing (used at bottlenecks)
(R6-2) No Overtaking on Bridge
(R6-3) Bridge Load Limit
(R6-4) Gross Load Limit
(R6-5) End Load Limit
(R6-6) Stop Here on Red Signal
(R6-7) Hand Held Stop Sign (for children crossings)
(R6-8) Hand Held Stop Sign (for roadworks)
(R6-9) Stop on Red Signal
(R6-10-1) No Buses
(R6-10-2) No Trucks
(R6-10-3) No Bicycles
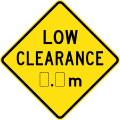
(R6-11) Low Clearance Marker
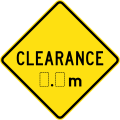
(R6-12) Clearance Marker
(R6-13) Prohibited on Freeways
(R6-14) Stop Here on Red Arrow
(R6-15) No Pedestrians
(R6-17) Bridge Load Limit (Per Axle Group)
(R6-18) Buses Must Enter (Checking stations and weighbridges are set up on roads for buses to check their weight and length)
(R6-19) Start Freeway
(R6-20) Freeway Entrance
(R6-21) End Freeway
(R6-19) Start Motorway
(R6-20) Motorway Entrance
(R6-21) End Motorway
(R6-V19-2) Start Tollway (used in
Victoria)
(R6-V20-2) Tollway Entrance (used in
Victoria)
(R6-V21-2) End Tollway (used in
Victoria)
(R6-22) Trucks & Buses Must Use Low Gear
(R6-23) End Truck & Bus Low Gear Area
(R6-24) Railway Crossing
(R6-25) Railway Crossing (with red backing board)
(R6-26) Tramway Crossing (with red backing board) (used in Adelaide and Melbourne)
(R6-27) Trucks Must Enter (Checking stations and weighbridges are set up on roads for trucks to check their weight and length)
(R6-28) Trucks Use Left Lane
(R6-29) Keep Left Unless Overtaking
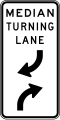
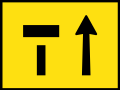
(R6-30) Median Turning Lane
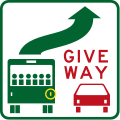
(R6-31) Give Way to Buses (Attached to a bus)
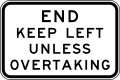
(R6-32) End Keep Left Unless Overtaking
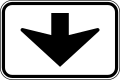
(R6-33) Overall Length Limit
(R6-249) Wet weather speed limit ahead
(R6-256) Stop Here On Red Arrow, Otherwise turn left with care
(R6-V106) Truck restriction ends (used in
Victoria)
(R6-Q01) Prohibited on Motorways (used in
Queensland)
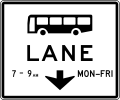
(R7-1-1) Bus Lane
(R7-1-3) Truck Lane
(R7-1-4) Bicycle Lane
(R7-1-5) Tram Lane
(R7-2) Ahead (used with bus, transit or truck lane signs)
(R7-3) Left Lane (used with bus, transit or truck lane signs)
(R7-4) End
(R7-5) Lane Clearance
(R7-7-1) T2 Transit Lane (you must have 2 or more people in the vehicle)
(R7-7-2) T3 Transit Lane (you must have 3 or more people in the vehicle)
(R7-7-3) T2 Transit Lane Restriction (2 people or more (1 driver, 1 passenger))
(R7-7-4) T2 Transit Lane Restriction (2 people or more (1 driver, 1 passenger))
(R7-7-5) T3 Transit Lane Restriction (3 people or more (1 driver, 2 passengers))
(R7-7-6) T3 Transit Lane Restriction (3 people or more (1 driver, 2 passengers))
(R7-8) Buses Only
(R7-9-1) End of T2 Transit Lane
(R7-9-2) End of T3 Transit Lane
(R7-V9) End of Transit Lane (used in
Victoria)
(R7-Q01) Ahead on Side Road (left) (used with bus, transit or truck lane signs) (used in
Queensland)
(R7-Q01) Ahead on Side Road (right) (used with bus, transit or truck lane signs) (used in
Queensland)
(R7-Q04) Bus Lane Ahead (used in
Queensland)
(R7-V101-1) Part Time Tram Lane (used in
Victoria)
(R7-V104) Tram Lane Ahead (used in
Victoria)
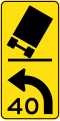
(R7-V132) Merge left with times (used before a part-time tram lane) (used in
Victoria)
(R7-V133) Tram Only (used in
Victoria)
(R8-1) Bicycles Only
(R8-2) Shared Path
(R8-3) Separated Path
(R9-1-1) Time of Operation (Single time) (used with No u-turn, No left turn, No right turn or No turns signs)
(R9-1-2) Time of Operation (Double times) (used with No u-turn, No left turn, No right turn or No turns signs)
(R9-1-3) At All Times
(R9-2) Buses Excepted
(R9-3) Bicycles Excepted
(R9-4) Authorised Vehicles Excepted
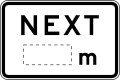
(R9-6-1) Distance (in metres) (used with No u-turn, No left turn, No right turn or No turns signs)
(R9-6-2) Distance (in metres) (used with No u-turn, No left turn, No right turn or No turns signs)
(R9-7-1) Distance (in kilometres) (used with No u-turn, No left turn, No right turn or No turns signs)
(R9-7-2) Distance (in kilometres) (used with No u-turn, No left turn, No right turn or No turns signs)
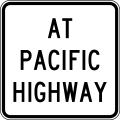
(R9-8) At Street Name (used with No u-turn, No left turn, No right turn or No turns signs)
(R9-9) One Lane
(R9-233) Narrow Lanes (used in
New South Wales)
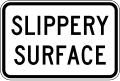
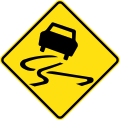
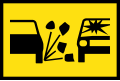
(R9-234) Slippery Surface (used in
New South Wales)
(R9-236) Railway Crossing (used in
New South Wales)
(R9-V101-2) Buses, Taxis, VHA/B/C Excepted (used in
Victoria)
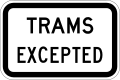
(R9-V106) Trams Excepted (used in
Victoria)
(R9-Q01) Buses and Taxis Excepted (used in
Queensland)
(R9-Q02) Trucks Excepted (used in
Queensland)
(R9-Q03) Police Excepted (used in
Queensland)
Ramp Speed (used in
Queensland)
Speed Limit in my Street (used in
Queensland and some
Victorian councils)