On the peninsula, an enclave of Japanese troops had established itself after withdrawing north following earlier engagements in the centre of the island throughout 1944–45. Coming up against heavy resistance along Tsimba Ridge, the Australians' advance was halted for three weeks as they fought to wrest control of the ridge from the defending Japanese from the 81st Infantry Regiment, whose strength was roughly equal to that of the Australians. The main Australian attack took place on 6 February, but it was not until 9 February that the Japanese completely withdrew from the position. Small-scale fighting in the surrounding area continued until 22 February. The next stage of the campaign saw the Australians take Ratsua as they sought to establish a defensive line across the base of the Bonis Peninsula between Ratsua and Ruri Bay.
Background
Strategic situation
Some key locations in the Bougainville campaign.
Japanese forces had landed on Bougainville in early 1942, capturing it from the small force of Australians garrisoning the island. They had subsequently developed several airbases on the island, using it to conduct operations in the northern Solomon Islands and to attack the Allied lines of communication between the United States, Australia, and the Southwest Pacific Area.[3] These bases also helped protect Rabaul, the major Japanese garrison and naval base in Papua New Guinea; throughout 1943, Allied planners determined that Bougainville was vital for neutralising the Japanese base around Rabaul.[4]
US Marines conducted an amphibious landing at Cape Torokina, on the western coast of Bougainville, north of Empress Augusta Bay, in November 1943. After an initial counter-attack that was repulsed, the marines had been replaced by a garrison of US Army troops who began consolidating their position around Torokina, establishing a strong perimeter. In March 1944, the Japanese launched a heavy counter-attack, which was turned back with many casualties. After this, the situation on Bougainville became largely static, as the Japanese focused primarily on subsistence, and the US forces chose to adopt a mostly defensive posture aimed at maintaining the perimeter around Torokina.[5][6]
In November–December 1944, the Australian II Corps—consisting of militia troops from the 3rd Division and the 11th Brigade—under Lieutenant General Stanley Savige took over responsibility for Allied operations on Bougainville from the American XIV Corps as part of a plan to free up the US troops for the Philippines campaign. Mistakenly believing that the Japanese forces on the island numbered just 17,500 men,[7] it was decided that the Australians should pursue an aggressive campaign to clear the Japanese from Bougainville.[8] After taking over the US perimeter that had been established around Torokina, the Australian campaign developed into three separate drives: in the north, it was planned that Japanese forces would be forced into the narrow Bonis Peninsula and contained; in the centre, the seizure of Pearl Ridge would give the Australians control of the east–west avenues of approach, as well as affording them protection against further counter-attacks, while also opening the way for a drive to the east coast; and the main campaign in the south, where the bulk of the Japanese forces were concentrated.[9] Allied estimates of Japanese strength were later found to be grossly inaccurate and, after the war, it was found that the Japanese alive on the island at this time numbered closer to 40,000.[10]
Preliminary moves
On 31 December 1944, Savige ordered Brigadier John Stevenson, commander of the 11th Brigade, to begin clearing operations along the northwest coast of the island towards Soraken Harbour,[11] as the Australians attempted to drive the Japanese in the sector on to the narrow Bonis Peninsula. At the time the Australians believed there were around 390 Japanese defending the area surrounding the Genga River—considered to be the main Japanese defence line in the northern sector—but it was later determined to be closer to 900 men from the 81st Infantry Regiment, under the command of Lieutenant Colonel Shinzo Nakamura.[2]
Nakamura, who, according to Peter Charlton, was considered to be a "master of jungle warfare",[12] had been ordered to prevent the Australian advance along the coast. He had perceived the likelihood of stopping the Australians well forward of the Genga as being unlikely and had therefore decided that he would concentrate his defence around the river itself, establishing a strong position on Tsimba Ridge, about 400 metres (440yd) south of the river.[13] Described by war correspondent Fred Aldridge as a "horseshoe volcanic feature with steep jungle-clad sides...each toe [of the ridge ended] close to the sea, forming a natural amphitheatre by the beach",[14] it was a "textbook fortress".[15] According to Aldridge, it was a "maze of dugouts, trenches, [and] foxholes",[14] and was well camouflaged and heavily defended by snipers, machine guns and artillery, while supporting elements had been placed to the north, in depth, behind the Genga, near Kunamatoro.[12]
Taking over control of the northern sector from the 7th Brigade, which was subsequently transferred to the southern sector to take part in the main offensive,[16] the 11th Brigade advanced along the coast from Kuraio Mission, sending out patrols into the interior to flush the Japanese out of their positions in the mountains as they went.[11] The 31st/51st Infantry Battalion, under the command of Lieutenant Colonel Joseph Kelly[17][Note 2] and roughly 800-strong, formed the vanguard of the advance, its main body moving along the coast road towards Amun, Sipaai and Rukussia, while patrols were sent inland from Totokei towards Lalum and Soraken, both of which were considered key Japanese positions. By 16 January 1945, the lead company of the 31st/51st reached Rukussia, having encountered no Japanese up until that point.[11][19]
Battle
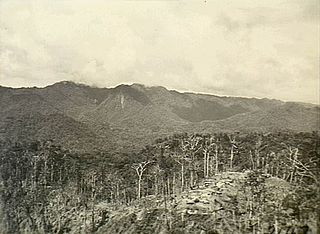
Location of the battle in north-west Bougainville.
The first contact came on 17 January when the 31st/51st Infantry Battalion's advanced elements—drawn mainly from 'D' Company, under Captain Thomas Titley—moved north from Rukussia and proceeded towards the Genga River.[19] Reaching a clearing 1,000 yards (910m) north of Puto, a platoon-sized patrol came across several huts in a cleared area and proceeded to attack it.[20] One Japanese was killed in the initial assault but, as the Australians took the huts and pushed beyond them, the Japanese engaged them from entrenchments 100 yards (91m) in front of them. The Japanese then launched a counter-attack using light and heavy machine guns. In response, the Australians brought up another platoon and, over the course of two days, repulsed the counter-attack, with six to eight Japanese estimated to have been killed and others wounded, while two Australians were wounded.[11][20]
During the engagement, the Japanese had opened up with the artillery that they had brought up in support of the main defensive position on Tsimba Ridge,[Note 3] firing for the first time in the sector. This barrage was largely ineffective, inflicting only one casualty,[20] as many of the shells proved to be faulty and did not detonate.[11] The Australians also came across a large camp, including a field hospital, which they captured intact. Another group of huts was also discovered, from where they gained intelligence identifying the Japanese troops in the area as belonging to the 81st Infantry Regiment. They also managed to capture two 70mm guns and ammunition for them.[20][22]
On 19 January, the 31st/51st Infantry Battalion's 'A' Company, under Captain Clyde Downs, sent a platoon-sized patrol out to outflank the Japanese forward positions; this patrol moved first to the right flank and then north along the jungle tracks around Totokei and Goton. Discovering evidence of Japanese movement in the area, they proceeded to the village of Kunamatoro, about 1 mile (1.6km) north of Junapopo.[20] Here they encountered a force of around 30 to 50 Japanese and, after the initial contact, in which the Australian platoon commander was wounded, the patrol attacked the village. Within 10 minutes the battle was over: 14 Japanese had been killed and five wounded, while one Australian was killed, one wounded, and one missing. As darkness fell, the Australian patrol withdrew from the village.[11]
The following day—20 January—the advanced elements of the Australian force pressed on towards Tsimba Ridge.[23] A formation about 200 yards (180m) long and about 60 feet (18m) in height, and stretching westerly to the Genga River where a steep cliff fell to the southern bank of the river, the ridge blocked the Australian advance across the river, while its south-easternmost protrusion (later known to the Australians as the "Pimple") was separated by a shallow saddle. On top of the ridge, dense jungle provided good concealment, while most of the approaches to the ridge were open to observation.[24] As the Australians approached the ridge, one of their platoons captured a 47mm gun positioned along the coast about 1,000 yards (910m) south of the ridge, while another platoon contacted a lone Japanese soldier, who was killed in the subsequent firefight as they entered a garden that curved along the southern approach to the ridge, and which became known as the "Amphitheatre".[23] After the initial contact, the platoon's advance through the garden was prevented by an intense burst of fire from the ridge, but the Australians managed to scale the high ground that rose to their east and were able to occupy the south-eastern tip of the Pimple, capturing two 75mm guns in the process.[23]
Reports had been received from locals that the Japanese had brought reinforcements down from Soraken, Taiof Island and Tarlena,[23] and at this point the Australians realised that the Japanese were concentrated in far greater numbers than anticipated and had in fact established their line of resistance in the sector upon the ridge.[11] This was confirmed later after the Australians moved forward once more on 21 January, moving to within 800 yards (730m) of the Genga River, where the track upon which they were advancing opened into a large garden that curved around the edge of Tsimba Ridge, from where the Japanese defenders had an excellent line of sight.[22] Subsequent patrols determined the extent of the Japanese position, reporting that they had constructed a well-fortified position with a continuous trench along the crest of ridge, weapons pits and pill boxes, all with clear fields of fire, stretching up to 150 yards (140m).[22]
The Australian commander, Kelly, ordered 'B' Company to move up and take the ridge and over the course of a week between 21 and 28 January they made several attempts against various parts of the ridge, approaching from the south, southeast and the north.[25] These proved fruitless, although one platoon managed to encircle the position from the north before being engaged with heavy machine gun fire. On 23 January, the Australians established fire support in the form of guns from the 2nd Mountain Battery. Another three unsuccessful attempts were made on 24 January, and on 25 January 'C' Company carried out a movement to the flank in an attempt to get around behind the ridge and attack from the north. Crossing the crocodile-infested waters of the Genga about 600 yards (550m) from the ridge, the Australians established a bridgehead across the river with a line of communications back to the Pimple, which they kept open by constantly patrolling along it.[26]
A 4.2-inch mortar of the 101st Brigade Support Company in action during the 31st/51st Infantry Battalion's attack on 6 February
Over the following six days, the Japanese attacked the bridgehead,[27] launching a series of assaults that, in the words of Robert Burla, bordered upon suicidal.[26] These attacks were repulsed and the Australians began to launch patrols in all directions around the ridge. On 29 January, the Japanese launched a large-scale attack on 'C' Company's positions and although the Australians resisted, the attack succeeded in breaking through one part of the perimeter and managed to roll up the position all the way to the main battalion position around Puto before it was turned back. The Australian counter-attack, organised by the 'C' Company's commander, Captain Alwyn Shilton, and supported by accurate artillery fire, came on 1 February and resulted in over 30 Japanese killed or wounded.[27]
Over the next few days the Japanese made further probes, which were also repulsed, and the Australians consolidated their positions prior to an assault on the ridge. Preparations included the manhandling of a mountain gun from Puto to a position 150 yards (140m) from the Pimple, from where it could fire directly upon the Japanese positions on the ridge, while aircraft from No. 5 Squadron, Royal Australian Air Force, carried out reconnaissance. To maintain the secrecy of these preparations, mortar fire was brought down upon the Japanese positions to mask the sounds of digging and movement while fire from Vickers machine guns kept the Japanese defenders from being able to leave their shelter and observe.[28]
After a day-long artillery barrage,[14] the main attack took place on 6 February. Supported by a barrage of over 500 artillery shells and mortar bombs, and airstrikes from Australian Wirraways and New Zealand Corsairs,[29] three platoons from Captain Millett Harris's 'B' Company assaulted the ridge from different points in an effort to encircle the defenders. Following the preparatory artillery fire, the attack began at 09:00 hours when two platoons—10 and 11 Platoons—along with company headquarters formed up south-east of the amphitheatre and began to advance to the north-west 200 yards (180m) to attack the ridge from behind, while another force—12 Platoon—attacked from the garden, moving around the Pimple before assaulting the ridge from the east.[30] From the north-west, 10 Platoon, in the centre, managed to capture its objectives by 09:25 hours; however, 12 Platoon came under intense fire and after suffering several casualties stopped their advance. By 11:30 hours the northernmost Australian platoon, 11 Platoon, had reached the high ground on the north-western side of the ridge, completing the encirclement of the Japanese. The defenders subsequently withdrew from their forward positions, but refused to give up the position, occupying the reverse slope on the western side of the ridge.[14][30] The attack cost the Australians nine killed and 20 wounded.[31]
Throughout the night, Japanese artillery was very active, firing down on the Australian positions around The Pimple, after which a "banzai attack" was launched early on 7 February.[14] Although repulsed, it enabled the Japanese to maintain a small pocket of resistance on the western tip of the ridge. On the evening of 7 February, Captain Kawakami's 10th Company from the III Battalion, 81st Infantry Regiment, withdrew.[32] Nevertheless, a small Japanese force remained until 9 February when the Australians called down an airstrike upon the position and the defenders withdrew from the feature.[33][32] One of the Australians, Private Colin Jorgensen, was awarded the Military Medal for charging a Japanese weapon pit and knocking it out of action during the final assault.[32][27]
Aftermath
Fighting around the Genga River continued for the next couple of days, with clashes occurring until the Australians had cleared the northern and southern banks by 11 February, during which time Japanese artillery opened up on the Australians, causing several casualties.[33] In securing the ridge, the Australians captured a large amount of Japanese equipment, including four field and six anti-tank guns, nine machine guns and 86 rifles. Japanese casualties were estimated at 66 killed,[33] while Australian casualties in the Tsimba area were 12 killed and 20 wounded. Within the context of the campaign, these losses were considered heavy by the Australians,[34] and an Australian newspaper report from shortly after the battle described it as the "bloodiest battle of the campaign",[15] while another described it as "fiercest" fought on Bougainville up to that point.[35] From documents captured after the war, it was shown that the Japanese believed that these losses would slow the Australian advance. At the time they did not perceive the loss of Tsimba Ridge to be a defeat. They had been prepared to hold the position, and had the numbers to do it; however, Nakamura had decided to withdraw from the ridge when the morale of his troops had fallen due to lack of ammunition and food, and rising casualties from tropical diseases.[36] The real size of the force holding Tsimba Ridge was also revealed by documents captured after the war, highlighting the gross underestimation of Japanese strength by Australian intelligence sources.[2]
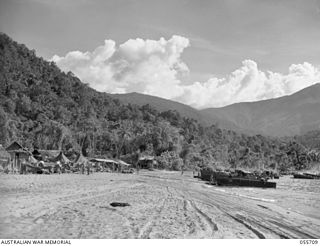
Soldiers from the Australian 31st/51st Infantry Battalion patrol around Tsimba Ridge after the main fighting, 17 February 1945
After the fall of Tsimba Ridge, fighting continued around the Genga River for the next couple of weeks. By 10 February the area south of the Genga had been cleared of Japanese and the Australians began to patrol along the northern bank. Several minor clashes occurred, the most serious of which saw three Japanese killed and three Australians wounded when the Australians managed to capture a Japanese 37mm gun.[33] As the Japanese were forced to withdraw from a position along the track which ran 150 yards (140m) from the river, the Japanese artillery intensified and several men from the 31st/51st Infantry Battalion became casualties.[37]
The 31st/51st Infantry Battalion continued operations around the Genga River until 26 February, by which time three companies had reached the Gillman River, while another had struck inland, fighting a short engagement around Kunamatoro, before pressing on towards a ridge near the Soraken Plantation. Throughout the final weeks of February, 'A' Company of the 31st/51st, under Downs, fought the Japanese defenders off the position, which was subsequently named "Downs' Ridge" by the Australians. On 26 February, the 31st/51st was relieved by Lieutenant Colonel Bernard Callinan's 26th Infantry Battalion, who continued the advance north towards the Soraken Peninsula, while the 55th/53rd Infantry Battalion advanced on Ratsua as the Australians sought to establish a defensive line across the base of the Bonis Peninsula between Ratsua and Ruri Bay.[38][39] The 31st/51st would later take part in the failed landing at Porton Plantation in June, where they would suffer heavy casualties, including Downs, who was killed leading his company.[40] In total, the Australians lost 34 killed and 91 wounded in the fighting around the Genga River, while it was estimated that the Japanese lost 148 killed.[2] For its involvement in taking Tsimba Ridge, the 31st/51st Infantry Battalion was awarded the battle honour "Tsimba Ridge".[41]
Notes
Footnotes
↑ The main fighting around Tsimba Ridge took place between 17 January and 9 February, however, fighting in the area around the ridge along the Genga River continued until 22 February.[2]
The Markham Valley, Ramu Valley and Finisterre Range campaigns were a series of battles within the broader New Guinea campaign of World War II. The campaigns began with an Allied offensive in the Ramu Valley, from 19 September 1943, and concluded when Allied troops entered Madang on 24 April 1944. During the campaign, Australian forces – supported by Australian and US aircraft – advanced through the Markham Valley and Ramu Valleys during which there were minor clashes with Japanese forces, which withdrew towards their main defensive line in the Finisterre Range.
The Battle of the Shaggy Ridge was part of the Finisterre Range campaign, consisting of a number of actions fought by Australian and Japanese troops in Papua New Guinea in World War II. Following the Allied capture of Lae and Nadzab, the Australian 9th Division had been committed to a quick follow up action on the Huon Peninsula in an effort to cut off the withdrawing Japanese. Once the situation on the Huon Peninsula stabilised in late 1943, the 7th Division had pushed into the Markham and Ramu Valleys towards the Finisterre Range with a view to pushing north towards the coast around Bogadjim, where they would meet up with Allied forces advancing around the coast from the Huon Peninsula, before advancing towards Madang.
The Battle of Piva Forks, also known as the Battle of Numa–Numa Trail, was an engagement that took place during the Bougainville campaign in World War II. Occurring between 18 and 25 November 1943 on Bougainville Island in the South Pacific, the battle involved troops from the United States Marine Corps and the United States Army fighting against Imperial Japanese Army forces and took place amidst the context of the expansion of a beachhead that US forces had established around Torokina on the western side of the island.
The Battle of Slater's Knoll was fought between Australian and Japanese forces on Bougainville Island during the Second World War. Part of the Bougainville campaign, the battle occurred as a force of about 3,300 Japanese from the Japanese 6th Division, including artillery and other supporting elements, launched a counterattack against the main Australian offensive which had been pushing south towards Buin, concentrating their attacks on Slater's Knoll near the Puriata River. The Australian troops belonged to the 7th Brigade, with the 25th Infantry Battalion being the most heavily engaged, although the 9th Infantry Battalion and the 61st Infantry Battalion also took part in the fighting.
The Battle of the Koromokina Lagoon was fought between the United States Marine Corps and Imperial Japanese Army forces on Bougainville Island. It took place on 7–8 November 1943 during the Bougainville campaign of the Pacific War.
The Landing at Nassau Bay was an amphibious landing by Allied forces at Nassau Bay during the New Guinea campaign of World War II that took place between 30 June and 6 July 1943. The operation was undertaken so that Allies could secure a beachhead to establish a supply point to shorten their supply lines for the proposed attack on Salamaua as part of the Salamaua–Lae campaign and resulted in a battalion-sized force of US infantry and supporting elements being landed largely unopposed on the south-eastern flank of the battle zone.
The Papuan Infantry Battalion (PIB) was a unit of the Australian Army raised in the Territory of Papua for service during the Second World War. Formed in early 1940 in Port Moresby to help defend the territory in the event of a Japanese invasion, its soldiers were primarily Papuan natives led by Australian officers and non-commissioned officers. Following the outbreak of the Pacific War, the PIB served in many of the Allied campaigns in New Guinea; however, due to the nature of its role its sub-units mainly operated separately, attached to larger Australian and US Army units and formations. Slow in forming, the first members of the PIB were not officially posted in until March 1941. By 1942 it consisted of only three companies, all of which were under-strength and poorly equipped. It was subsequently employed on scouting, reconnaissance and surveillance patrols against the Japanese, where the natural bushcraft of its native soldiers could be used to their advantage. The PIB was sent forward in June 1942 to patrol the northern coast of Papua and was dispersed over a wide area. These small parties were the first to make contact with the Imperial Japanese forces upon their landing in Papua, before participating in the Kokoda Track campaign. As part of Maroubra Force, the PIB fought alongside the Australian 39th Battalion at Kokoda, Deniki, and Isurava as the Japanese forced them back along the Kokoda track, but was withdrawn before the campaign finally turned in favour of the Australians.
The 1st New Guinea Infantry Battalion was a battalion of the Australian Army during World War II. One of four infantry battalions raised in New Guinea, 1 NGIB was formed in March 1944. In late 1944, the battalion began deploying company-sized elements in support of combat operations on Bougainville, New Britain and on mainland New Guinea. It later became part of the Pacific Islands Regiment before being disbanded in June 1946.
The 31st Battalion, Royal Queensland Regiment was a Reserve infantry battalion of the Australian Army. Although it was officially formed as 31 RQR in 1965 the battalion can trace its lineage back to units formed in 1881 as part of the colonial defence forces of the state of Queensland.
The 31st/51st Battalion was an infantry battalion of the Australian Army, which served during World War II. Raised for service as part of the Militia in 1943 through the amalgamation of two previously existing battalions, the 31st/51st Battalion undertook garrison duties in Dutch New Guinea in 1943–44 before taking part in the Bougainville Campaign in 1944–45. Following the end of the war, the battalion served in the Pacific overseeing the transfer of Japanese prisoners of war and re-establishing law and order until mid-1946 when it returned to Australia and was disbanded.
The 2/31st Battalion was an infantry battalion of the Australian Army that served during World War II. It was raised in June 1940 and was assigned to the 25th Brigade, 7th Division. It initially served in the United Kingdom where it undertook defensive duties before being moved to the Middle East in 1941. After taking part in the fighting in Syria and Lebanon, the battalion undertook garrison duties around Tripoli before being transferred back to Australia in 1942. In late 1942 the battalion was sent to New Guinea to fight against the Japanese along the Kokoda Track. They subsequently fought a number of battles throughout 1942, 1943 and early 1944. Their last campaign came in mid-1945 when they landed on Borneo. After the war the battalion was disbanded in March 1946.
The Battle of Porton Plantation took place near the village of Soraken on Bougainville Island, in the Solomon Islands archipelago during World War II. Involving forces from Australia, New Zealand and Japan, the battle was part of the wider Bougainville campaign, which had begun in late 1943 and lasted until the end of the war in August 1945. The battle formed part of Australian efforts to liberate the northern part of Bougainville.
The Battle of Pearl Ridge was an engagement of the Second World War fought between Australian and Japanese forces on Bougainville Island. Part of the wider Bougainville Campaign, the battle took place in the central sector of the island, shortly after the Australians had taken over responsibility from the Americans. Believing that the ridge was held by less than a company of Japanese, on 30 December the Australian 25th Infantry Battalion launched a four-pronged attacked the ridge. The defending force, however, had been greatly reinforced by elements of the 38th Independent Mixed Brigade and was closer to a battalion in strength. After being held up on the right of their advance, the Australians dug in overnight and repulsed a strong Japanese counterattack before resuming the attack on 31 December. By late in the afternoon, the Japanese had been swept off the ridge. The Australians later established an observation post on the ridge, which had commanding views of the whole island, and throughout the remainder of the campaign used it to control artillery fire as they advanced towards Japanese enclaves in the north and south of the island.
The Battle of the Hongorai River took place during the Second World War and involved Australian, New Zealand and Japanese forces. Part of the wider Bougainville Campaign of the Pacific theatre, the battle was fought in the southern sector of Bougainville Island. Coming after the Battle of Slater's Knoll in which a strong Japanese counterattack was defeated, the battle occurred in two distinct periods between 17 April and 22 May 1945, as elements of the Australian 15th Brigade advanced south along the Buin Road.
The Battle of Ratsua occurred during the Second World War and involved Australian and Japanese forces. Part of the wider Bougainville Campaign of the Pacific theatre, the battle took place in the northern sector of Bougainville between June and August 1945. The main forces that took part in the fighting were the Australian 23rd Brigade and the Japanese 87th Naval Garrison Force.
The Battle of the Pimple was part of the Markham and Ramu Valley – Finisterre Range campaign, which consisted of a number of battles fought by Australian and Japanese troops in Papua New Guinea in World War II. Fought on 27 and 28 December 1943, the battle took place as the Australians advanced towards the Japanese strong hold around Shaggy Ridge, and was a preliminary phase in their eventual capture of that position in January 1944. Supported by artillery, mortars, machine guns and fighter-bomber aircraft, the assault was made across a narrow frontage, which was usually not much wider than a single section. Two companies of Australian infantry were committed to the attack, with one securing the initial crest, while the other exploited the position and secured several other smaller features throughout the two days of fighting. In the aftermath, Japanese artillery harassed the Australians holding the position, and subjected them to several counter-attacks, which were eventually defeated.
The Battle of Hellzapoppin Ridge and Hill 600A consisted of a series of engagements fought in mid-December 1943 on Bougainville between forces of the United States Marine Corps and the Imperial Japanese Army. Although minor in terms of casualties and in comparison to other battles in the Bougainville campaign, the battle was the last significant action undertaken by the 3rd Marine Division on the island before they were replaced by United States Army soldiers from XIV Corps. It resulted in the capture of the two positions by the Marines with the support of artillery and aircraft, and the withdrawal of the Japanese forces as the American perimeter, which had been established around Torokina in November, was expanded towards the Torokina River.
The Battle of John's Knoll–Trevor's Ridge was fought from 12–13 October 1943 during World War II. The battle was part of the Markham and Ramu Valley – Finisterre Range campaign, which consisted of series of actions fought by Australian and Japanese troops in the Territory of New Guinea as the Australian 7th Division advanced through the foothills of the Finisterre Range from Dumpu towards Bogadjim, near Madang on the northern coast, following the capture of Lae in mid-September 1943.
The Battle of Lababia Ridge was fought from 20–23 June 1943 in the Territory of New Guinea during World War II. Part of the Salamaua–Lae campaign, the battle involved Australian and Japanese troops who clashed on the ridge, which was about 20 kilometres (12 mi) south of Salamaua, near Mubo, over the course of several days. The battle was fought in conjunction with several other actions in the region as the Allies attempted to draw Japanese attention away from Lae, where they launched seaborne landings in mid-September 1943, in conjunction with airborne landings around Nadzab. The fighting around Lababia Ridge took place at the same time as the Battle of Mubo, after two battalions of Japanese infantry launched a counter-attack on a depleted Australian company. The Australians, supported by Royal Australian Air Force fighter-bombers, managed to hold off the initial Japanese attacks before being reinforced by another depleted company. Fighting continued over the course of three days before the Japanese withdrew.
The Battle of Mubo was a series of actions in the Mubo area of the Territory of New Guinea between Australian and Japanese forces which took place between 22 April and 14 July 1943, during World War II. The battle formed part of the wider Salamaua–Lae campaign, and was fought in the early stages of the campaign. The battle followed the successful defence of the airfield around Wau by the Australians in late January 1943, after the Japanese had attempted to infiltrate the Australian positions with two infantry battalions.
Bradley, Phillip (2012). Hell's Battlefield: The Australians in New Guinea in World War II. Crow's Nest, New South Wales: Allen & Unwin. ISBN9781742372709.
Burla, Robert (2005). Crossed Boomerangs: The History of All the 31 Battalions. Loftus, New South Wales: Australian Military Publications. ISBN978-1-876439-67-5.
Charlton, Peter (1983). The Unnecessary War: Island Campaigns of the South-West Pacific 1944–45. South Melbourne, Victoria: The MacMillan Company of Australia. ISBN0-333-35628-4.
Grey, Jeffrey (2008). A Military History of Australia (3rded.). Melbourne, Victoria: Cambridge University Press. ISBN978-0-521-69791-0.
James, Karl (2012). The Hard Slog: Australians in the Bougainville Campaign, 1944–45. Port Melbourne, Victoria: Cambridge University Press. ISBN978-1-107-01732-0.
James, Karl (2016). "More Than Mopping Up: Bougainville". In Dean, Peter J. (ed.). Australia 1944–45: Victory in the Pacific. Port Melbourne, Victoria: Cambridge University Press. pp.232–251. ISBN978-1-107-08346-2.
Klintworth, Wayne (2008). "Formation of the Royal Australian Regiment: Australia and Japan, 1948–50". In Horner, David; Bou, Jean (eds.). Duty First: A History of the Royal Australian Regiment (2nded.). Crows Nest, New South Wales: Allen & Unwin. pp.40–56. ISBN978-1-74175-374-5.
Long, Gavin (1963). The Final Campaigns. Australia in the War of 1939–1945, Series 1—Army. Vol.VII (1sted.). Canberra, Australian Capital Territory: Australian War Memorial. OCLC1297619.
Maitland, Gordon (1999). The Second World War and its Australian Army Battle Honours. East Roseville, New South Wales: Kangaroo Press. ISBN0-86417-975-8.
Shindo, Hiroyuki (2016). "Holding on to the Finish: The Japanese Army in the South and Southwest Pacific, 1944–45". In Dean, Peter J. (ed.). Australia 1944–45: Victory in the Pacific. Port Melbourne, Victoria: Cambridge University Press. pp.51–76. ISBN978-1-107-08346-2.
Tanaka, Kengoro (1980). Operations of the Imperial Japanese Armed Forces in the Papua New Guinea Theater During World War II. Tokyo: Japan Papua New Guinea Goodwill Society. OCLC9206229.
"Tsimba Ridge". War history. Australian War Memorial. Retrieved 13 December 2009.
"Tsimba Ridge Victory". Geraldton Guardian and Express. Geraldton, Western Australia: Trove. 17 February 1945. p.3. OCLC221567090. Retrieved 18 April 2016.
This page is based on this Wikipedia article Text is available under the CC BY-SA 4.0 license; additional terms may apply. Images, videos and audio are available under their respective licenses.