1747: 204,000[4] 120,000[5][c] 127,000[d] 55,000[8] 1742: 30,000[2] 1745 naval strength 110 ships of the line[3] 34 ships of the line[3]
Casualties and losses
France: 158,400 killed and wounded[9][e] Prussia: 23,100 killed and wounded[9] Spain: 3,000 killed and wounded[9][f]
Habsburg monarchy: 148,000 killed and wounded[9] Great Britain: 26,400 killed and wounded[9][g] Dutch Republic: 14,630 killed and wounded[9] Savoy-Sardinia: 7,840 killed and wounded[9]
Fighting began when Prussia occupied the wealthy Austrian province of Silesia in December 1740. Neither side was able to achieve a decisive victory and despite success in the Austrian Netherlands, by early 1748 France was close to bankruptcy due to the cost of the war and a crippling British naval blockade. This led to the Treaty of Aix-la-Chapelle in October which confirmed Maria Theresa in her titles, but many signatories were unhappy with the terms. In return for vast expenditure, France gained very little, although their Spanish ally made minor gains in Italy and repelled a British invasion of South America.
British insistence that Austria cede Silesia to Prussia as part of the peace undermined the long-standing Anglo-Austrian Alliance, as Austria felt it had received little benefit from the enormous British subsidies paid to it during the war. This led to the realignment known as the Diplomatic Revolution, and ultimately the outbreak of the Seven Years' War in 1756.
Background
The immediate cause of the war was the death of Emperor Charles VI in 1740 and the inheritance of the Habsburg monarchy, often collectively referred to as Austria. The 1703 Mutual Pact of Succession provided that if the Habsburgs became extinct in the male line, these possessions would go first to Maria Josepha and Maria Amalia, daughters of Emperor Joseph I, then to those of Charles, his younger brother. Since Salic law excluded women from the inheritance, this agreement required approval by the various Habsburg territories and the Imperial Diet.[11]
After Joseph died in 1711, he was succeeded by Charles, who in 1713 issued the Pragmatic Sanction, which confirmed the principle of female inheritance. However, it also modified the 1703 agreement by placing the rights of his own children first. After Maria Theresa was born in 1717, Charles' internal and external policy was dominated by ensuring her succession ahead of his two nieces.[12] Prior to their respective marriages to Frederick Augustus of Saxony and Charles Albert of Bavaria in 1719, both nieces were obliged to formally renounce their rights to the inheritance. Charles assumed the rivalry between Saxony and Bavaria would secure his daughter's throne, since neither would be prepared to allow the other to inherit, but instead he gave his two greatest rivals a claim to the Habsburg lands.[13]
Charles was also seeking to ensure the succession of Maria Theresa to not just her family lands but also to the titles and powers of the Holy Roman Emperor.[citation needed] Although held by a Habsburg for over 300 years, it was an elective position and could not be held by a woman. The problem was exacerbated by tensions within the Empire, caused by dramatic increases in the size and power of Bavaria, Prussia, and Saxony, mirrored by the post-1683 expansion of Habsburg power into lands previously held by the Ottoman Empire. These geopolitical tensions led to a war that reshaped the traditional European balance of power; the various legal claims were largely pretexts and seen as such.[14]
Bavaria and Saxony refused to be bound by the decision of the Imperial Diet, while in 1738 France agreed to back Bavaria's 'just claims' despite previously accepting the Pragmatic Sanction in 1735.[15] Attempts to offset this involved Austria in the 1733–1735 War of the Polish Succession and the Russo-Turkish War (1735–1739), and it was weakened by the losses incurred. The situation was compounded by a failure to prepare Maria Theresa for her new role, and many European statesmen were skeptical Austria could survive the contest that would follow Charles' death, which finally came in October 1740.[16]
Strategies
Maria Theresa, whose succession was the proximate cause of the war
On land, the fighting focused on three main theatres; Central Europe, Italy, and the Austrian Netherlands, along with a wider naval conflict. The war itself can be divided into three separate but connected conflicts, the first being the Silesian Wars between Prussia and Austria. In the second, Austria and Sardinia defeated Spanish attacks in Northern Italy, while the third featured an increasingly global contest between Britain and France. In the end, French conquest of the Austrian Netherlands gave them clear dominance on land, while Britain's victories at sea cemented its place as the dominant naval power.
For much of the 18th century, French military strategy focused on potential threats on its eastern and northern borders, which required a strong land army.[17] Its colonies were left to fend for themselves, or given minimal resources, anticipating they would likely be lost anyway.[18] This strategy was driven by a combination of geography and the superiority of the British navy, which made it difficult for the French navy to provide significant supplies and support to French colonies.[19] The expectation was military victory in Europe would compensate for any colonial losses; in 1748, France recovered possessions like Louisbourg, in return for withdrawing from the Austrian Netherlands.[20]
The British, as a matter of policy, tried to avoid large-scale commitments of troops on the Continent.[21] They sought to offset the disadvantage this created in Europe by allying themselves with one or more Continental powers whose interests were antithetical to those of their enemies, particularly France. In the War of the Austrian Succession, the British were allied with Austria; by the time of the Seven Years' War, they were allied with its enemy, Prussia. In contrast to France, once Britain became engaged in the war, it took advantage of the Royal Navy to expand it into the colonies.[22] The British pursued a dual strategy of naval blockade and bombardment of enemy ports, and also utilized their ability to move troops by sea to the utmost.[23] They would harass enemy shipping and attack enemy outposts, frequently using colonists from nearby British colonies in the effort. This plan worked better in North America than in Europe, but set the stage for the Seven Years' War.
Frederick II succeeded his father Frederick William as king of Prussia on 31 May 1740 at the age of 28. Although Prussia had increased in importance over the prior few decades, its disparate and scattered territories limited its power, a reality Frederick intended to change.[24] The death of Emperor Charles VI on 20 October 1740 provided him with an ideal opportunity to acquire resource-rich land in Silesia,[25] but he needed to do so before Augustus of Saxony and Poland could pre-empt him.[26]
With a population of 16million, Austria had an authorised standing army of 157,000, although financial restraints meant its true size was considerably less than that in 1740.[27] Since they had a much greater area to defend, their army was more of "a sieve" than a shield against foreign invasion.[28] In contrast, the Prussian Army was better trained and led than its opponents, while its standing army of 80,000 was disproportionately large, at around 4% of its 2.2million population.[29] To add to these advantages, in April 1739 Frederick ensured Austria faced war on two fronts when Louis XV of France agreed to attack from the west, while Prussia did so from the north.[30]
In early December 1740, the Prussian army assembled along the river Oder and on 16 December invaded Silesia without a formal declaration of war.[31] Since Austrian military resources were concentrated in Hungary and Italy, they had fewer than 3,000 troops in Silesia, although this increased to 7,000 shortly before the invasion. They held on to the fortresses of Glogau, Breslau, and Brieg, but abandoned the rest of the province and withdrew into Moravia, with both sides taking up winter quarters.[32] In under two weeks Prussia had occupied one of the richest provinces in the Holy Roman Empire, containing a population of over one million, and the commercial centre of Breslau along with mining, weaving and dyeing industries.[33] However, Frederick underestimated Maria Theresa's determination to reverse her loss, while the retention of Austrian fortresses in Southern Silesia meant a quick victory could not be achieved.[34]
Campaign of 1741
Early in the year, an Austrian army under von Neipperg relieved Neisse, and marched on Brzeg, and on 10 April, the two armies met at Mollwitz. Frederick made a series of mistakes in his first battle, and came so close to defeat, he left the battlefield to avoid capture. His deputy von Schwerin managed to drag out a narrow Prussian victory, both sides losing nearly 5,000 men each.[35]
Linz
Brzeg
Vienna
Prague
Neisse
Budapest
Mollwitz
Tábor
Munich
Tyrol
Central European campaign, 1741
On 5 June, Frederick signed an alliance against Austria with France, and in August a combined Franco-Bavarian force marched along the Danube towards Vienna, capturing Linz on 14 September.[36][37] Joined by a Saxon force of 20,000, they advanced on Prague from three different points, initially meeting little resistance. A hastily assembled Austrian army concentrated near Tábor, while Neipperg was recalled from Silesia to defend Vienna.[38]
Apparently close to defeat, on 21 September Maria Theresa made an emotional speech to the Diet of Hungary, who approved the raising of additional troops, an assertion of loyalty long remembered.[39] Her position soon improved due to deep divisions among her opponents and Frederick's own duplicity.[40] Hoping to weaken Saxony, on 9 October he signed the Klein–Schnellendorf agreement with Neipperg. In a memorable act of diplomatic subterfuge, the Austrians promptly surrendered Neisse, which under the prevailing rules of war gave the garrison unimpeded passage to the nearest friendly territory, allowing them to be used against Prussia's allies elsewhere.[41]
Khevenhüller incorporated these men into an army for a winter offensive to retake Upper Austria, and attack Bavaria.[42] While Frederick completed his conquest of Silesia, the French under Maurice de Saxe took Prague on 26 November 1741, allowing the Bavarian elector, Charles Albert, to be crowned King of Bohemia, a title usually held by the emperor. The year ended with Khevenhüller advancing up the Danube towards Linz, while a second column under Johann Bärenklau moved through the Tyrol, towards Munich.[42]
Campaign of 1742
On 17 January, von Khevenhüller defeated a Bavarian army at Schärding while seven days later 10,000 French soldiers surrendered at Linz. On 12 February, Charles Albert of Bavaria was crowned Emperor Charles VII, the first non-Habsburg to hold the position in 300 years, although Bärenklau captured Munich the same day. Although technically all allies, Prussia, Saxony and Bavaria had no desire to see France established in the Empire, nor to see one another gain relative ground. Maria Theresa ended Austria's secret truce with Frederick, first releasing the details. The Austrians assembled a second army of 28,000 to retake Prague, under Charles of Lorraine.[43]
Prague
Schärding
Zahájí
Chotusice
Kutná Hora
Židlochovice
Olomouc
Kłodzko
Bohemia and Moravia, 1742
News of the secret truce badly damaged the relationship between Frederick and his allies, but Emperor Charles asked him to relieve the pressure by invading Moravia. Frederick had used the interval to reorganise his cavalry, previously neglected in favour of the infantry, and who performed poorly at Mollwitz; they would prove more effective in the 1742 campaign.[44]
In December 1741, von Schwerin had captured Olmütz; Frederick took Glatz, before moving onto Groß Seelowitz in March 1742. This allowed him to threaten Vienna; a few Prussian patrols even appeared in the suburbs, before withdrawing.[45] In early May, he took the offensive, and moved into north-east Bohemia; by 16 May, he had 10,000 infantry at Kuttenberg, and another 18,000 men under Leopold of Anhalt-Dessau a day's march behind.[46]
On the afternoon of 16 May, Charles of Lorraine's cavalry ran into Leopold's rearguard. Leopold recognized he was in contact with the Austrian main force and so accelerated his march ahead to close the gap with Frederick. At 2:00am on 17 May, his exhausted troops stopped at the small village of Chotusitz, still three hours from Kutná Hora.[47] Fought later the same day, the Battle of Chotusitz was inconclusive, but technically a Prussian victory, since the Austrians withdrew. On 24 May, French Field Marshal de Broglie won a minor action at Sahay. The two victories left the strategic situation unchanged, since Charles was still able to move against Prague, while the Prussian presence in Moravia remained a threat to Vienna.
However, Habsburg policy was generally to avoid fighting on too many fronts at the same time; Prussia was the most dangerous, and most difficult to defeat. Although recovering Silesia remained a priority for decades, Maria Theresa was willing to agree a temporary truce with Prussia to improve her position elsewhere.[48] This suited Frederick, who was short of money and men and also suspected France was preparing a separate peace. In June, the Treaty of Breslau ended the First Silesian War; Prussian troops withdrew from Bohemia, and Austria recaptured Prague in December.[49]
Campaign of 1743
Mainz
Dettingen
Vienna
Prague
Simbach
Budapest
Worms
Milan
Munich
Augsburg
Key locations, 1743
At the beginning of the year, Louis XV insisted Broglie be given command of the Franco-Bavarian forces, creating tension with the Bavarians and their general von Seckendorff.[50] With most of his lands occupied by the Austrians, Charles VII fled to Augsburg, from where he initiated talks with Vienna and London, feeling he had been abandoned by his French allies.[51] Divided at the top, and their troops weakened by disease, the Franco-Bavarian forces offered limited resistance to the Austrian advance; on 9 May, the Bavarians were defeated outside Simbach, by Charles of Lorraine.[52]
In mid-June, the Pragmatic Army arrived at Aschaffenburg, on the north bank of the river Main. Here they were joined by George II, who was attending the enthronement of a new Elector of Mainz in Wiesbaden.[52] By late June, the Allies were running short of supplies and withdrew towards the nearest supply depot at Hanau, the road to which ran through Dettingen, now a part of Karlstein am Main, where 23,000 French troops blocked the road. Despite a strong position, mistakes made by their commander Gramont, allowed the Allies to win a narrow victory.[53] This was the last time a British monarch would personally lead troops in battle.
While the Pragmatic Army were able to continue their retreat, they had to abandon their wounded, and although reinforced by Charles of Lorraine were unable to agree on what to do next. Charles later described Allied headquarters as a 'republic', while Adrien Maurice de Noailles told Louis XV he was 'heavily indebted to the irresolutions of George II.' They ended by doing nothing, and in October, took up winter quarters in the Netherlands.[54]
Frederick had responded to the outcome of the Battle of Dettingen by renewing his search for allies and building up his army once again. In July, the Russian court discovered an alleged plot to overthrow Empress Elizabeth, and restore three-year-old Ivan VI, with his mother, Grand Duchess Anna Leopoldovna, as his regent.[55] Whether this amounted to anything more than drunken gossip is disputed; one suggestion is that it was a fabrication by Frederick, designed to remove anti-Prussian opponents, chiefly Chancellor Bestuzhev-Ryumin.[56]
Anna Bestuzhev, wife of his brother Mikhail, and her friend Natalia Lopukhina, confessed to the plot after 25 days of torture; they were publicly flogged, and had their tongues removed before being exiled to Siberia. Fredrick's supporters referred to it as the "Botta Conspiracy", alleging the involvement of Austrian envoy Antoniotto Botta Adorno.[57] When Tsarina Elizabeth demanded Botta be punished, Maria Theresa refused, and the episode poisoned the relationship between Austria and Russia. Frederick managed to divide his two main opponents, but Alexey Bestuzhev-Ryumin remained in place, leaving the overall position unchanged.[56]
On 13 September, Charles Emmanuel III of Sardinia, Maria Theresa and Britain agreed the Treaty of Worms, intended to expel Spain from Italy. In return for Sardinian support in Lombardy, the Austrians ceded all their territories west of the river Ticino and Lake Maggiore, along with lands south of the Po. In return, Charles Emmanuel renounced his claim to the strategic Duchy of Milan, guaranteed the Pragmatic Sanction, and provided 40,000 troops, paid for by Britain.[58]
France and Spain responded with the Second Pacte de Famille in October, and Louis XV began plans to invade the Austrian Netherlands. The year ended with Saxony agreeing a pact of mutual defence with Austria, leaving Prussia isolated, and facing a renewed offensive as Maria Theresa sought to regain Silesia.[59]
Under the 1743 Treaty of Fontainebleau, Louis XV and his uncle, Philip V of Spain agreed on joint action against Britain. This included a proposed invasion of Britain, aimed at restoring the exiled Stuarts. Over the winter, 12,000 French troops and transports were assembled at Dunkirk.[60]
In the February of 1744, the Battle of Toulon, a combined Franco-Spanish fleet fought an indecisive action with a Royal Navy squadron commanded by Thomas Mathews. Although Mathews prevented them exiting the Mediterranean and supporting the invasion attempt, he was forced to retreat, which led to his dismissal.[61] Success allowed Spain to land troops in Northern Italy, and in April they captured the important port of Villefranche-sur-Mer, then part of Savoy.[62]
However, storms sank or severely damaged many French ships, while most of Louis' ministers opposed what they considered an expensive and futile diversion of resources. The invasion was cancelled on 11 March, Louis formally declared war on Britain, and in May, a French army invaded the Austrian Netherlands.[63] As in 1744, they were greatly helped by divisions between the Pragmatic Allies, which made it very difficult to formulate a consistent strategy. The British and Hanoverians detested each other, Austrian resources were focused on Alsace, while the Dutch were reluctant to declare war, and tried to negotiate a French withdrawal.[64]
When the latter refused, Isaac Cronström argued seeking battle was the only way to protect the Barrier fortresses. However, George Wade, overall commander of Allied forces in Flanders, had strict orders from the British government not to jeopardise his connection to Ostend, or risk British or Hanoverians troops becoming prisoners of war. This was because they feared another French-backed Jacobite uprising and wanted to be able to recall their troops if needed.[65]
As a result, the French made rapid progress, quickly capturing most of the Dutch-held Barrier fortresses along the border, including Menen and Ypres. When an Austrian army under Prince Charles of Lorraine invaded Alsace in early June, Louis went on the defensive in the Southern Netherlands, and travelled to Metz to meet this threat. In early August, he fell dangerously ill with smallpox, and although he later recovered, his absence temporarily paralysed the French command system.[66]
With the bulk of the Austrian army occupied in Eastern France, Frederick launched the Second Silesian War on 15 August, and by the end of the month, all 80,000 of his troops were in Bohemia.[67] Although Maria Theresa's main objective was to regain Silesia, the speed of the Prussian advance took the Austrians by surprise. On 23 August, Prince Charles withdrew from Alsace to defend Bohemia, with little interference from the French due to Louis' illness.[68]
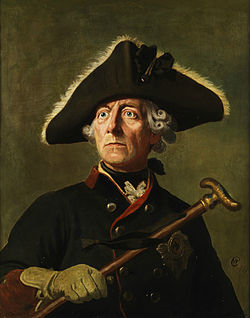
Frederick the Great, by Wilhelm Camphausen; his position at the end of 1744 was extremely precarious
By mid-September, Frederick had captured Prague, Tábor, Budweis and Frauenberg; he now advanced up the river Moldau, hoping to catch the Austrians between his forces, and the Franco-Bavarian army he assumed was in pursuit. However, the Bavarians contented themselves with re-occupying Munich, while the French settled down to besiege Freiburg im Breisgau, a town of far less importance to Maria Theresa than Bohemia.[69]
Frederick was left dangerously exposed, a situation worsened in early October when Saxony joined the coalition against him as an active belligerent. Under pressure from Charles of Lorraine and a combined Austro-Saxon force under Count Traun, the Prussians were forced to retreat; by the time they entered Silesia in late November, Frederick's army was reduced to 36,000, half of whom then died of dysentery.[70]
Despite the surrender of Freiburg, and French advances in the Southern Netherlands, Austria seemed well-positioned at the end of 1744. Frederick's retreat damaged his reputation and weakened his army, but the most significant impact was on Franco-Prussian relations, with Louis accused of failing to support Prussia.[71]
In Italy, an Austrian attack on the Kingdom of Naples was unsuccessful, largely due to the incompetence of their commanders. In the north, arguments over strategy, and Spanish accusations of French cowardice at Toulon prevented them from taking full advantage of their victories earlier in the year. This was offset by similar divisions among their opponents; Charles Emmanuel was reluctant to see the Bourbons expelled from Italy, leaving the Habsburgs as the dominant power, while his territorial ambitions could only be achieved at Austrian expense. As a result, neither side could make significant progress in this area.[72]
Campaign of 1745
Maria Theresa's husband, Francis I, elected Holy Roman Emperor on 13 September 1745
Frederick's position continued to deteriorate, when on 8 January 1745, Austria, Britain, the Dutch Republic and Saxony signed the Treaty of Warsaw, which was clearly aimed at Prussia.[73] This was accompanied by signs of Russian military activity in Livonia, followed by the death of Emperor Charles VII on 20 January. Since Maria Theresa's husband, Grand Duke Francis, was the best-supported candidate to replace him, this was a major setback for the Franco-Prussian alliance.[74]
Charles' son and heir, Maximilian III Joseph made one last effort to drive the Austrians out of Bavaria, but his demoralised and ill-equipped army was out-manoeuvered by Count Batthyány, while a Franco-Bavarian army was defeated at Pfaffenhofen on 15 April.[75] With most of his electorate once again occupied, on 22 April he signed the Treaty of Füssen, in which he agreed to vote for Francis Stephen as Emperor, and made peace with Austria.[76] Prussia was now isolated; attempts by Frederick to divide his opponents by supporting Frederick Augustus of Saxony for Emperor were unsuccessful, while neither Britain or Russia was willing to mediate for him with Austria.[77]
Bavaria's exit allowed France to focus on the Low Countries, which Saxe persuaded Louis XV provided the best opportunity of defeating Britain, whose financial backing was crucial to the Pragmatic Alliance. He proposed to attack Tournai, a vital link in the trading network for Northern Europe, and strongest of the Dutch Barrier Forts, this forcing the Allies to fight on ground of his own choosing.[78] On 11 May, he won a hard-fought victory at Fontenoy, a success that established French dominance in the Netherlands, and caused bitter disputes between the British and Dutch.[79]
On 4 June, Frederick won a major victory at Hohenfriedberg, but despite this, Austria and Saxony continued the war. Prussian requests for French support were ignored; Louis had been warned by his ministers state finances were increasingly strained, making it important to focus their efforts. One area was the Netherlands, particularly after British troops were recalled to deal with the Jacobite rising of 1745. The other was Italy, where a Franco-Spanish army under Maillebois and Infante Philip defeated the Sardinians at Bassignano on 27 September, then captured Alessandria, Valenza and Casale Monferrato.[80]
Victory at Fontenoy in May 1745 re-established French confidence
As a result, France made no effort to block the election of Duke Francis, who was proclaimed Emperor Francis I on 13 September.[81] Bolstered by this significant political victory, Maria Theresa continued her attempts to regain Silesia, only to be defeated once again at the Battle of Soor on 30 September.[82] On 15 December, Prussian victory at Kesseldorf led to the Treaty of Dresden on 25th. Under these terms, Austria accepted the loss of Silesia, Saxony paid an indemnity of one million crowns, while in return, Frederick accepted the Pragmatic Sanction, acknowledged Francis as Emperor, and evacuated Saxony.[83]
Germany ceased to be an active military theatre, since although Frederick knew Maria Theresa still intended to regain Silesia, both sides needed time to re-organise. French objectives were less clear; for centuries, the central plank of its foreign policy was weakening the Habsburgs, but it began the war due to concern at British commercial growth post-1713. Since the war in Italy was largely fought on behalf of Spain, this left the Netherlands as the only theatre where France could achieve strategic victory.[84]
Another significant development was the start of the realignment of alliances that became the Diplomatic Revolution in 1756. Under the August 'Convention of Hanover', Frederick and George II mutually guaranteed the borders of Hanover and Prussia, and British diplomats tried to persuade Austria to end the Second Silesian War. Franco-Prussian relationships were marked by mutual distrust, while Maria Theresa resented British attempts to persuade her to accept the loss of Silesia.[85]
Supported by the Duke of Modena, in 1741 the Spanish and their Neapolitan allies assembled 40,000 men to capture Milan, a Spanish possession from 1556 to 1707. However, their commander José Montemar was out-manoeuvered by his Austrian counterpart von Traun, and Modena forced to make peace.[38]
Despite its failure, the threatened offensive led Maria Theresa to ally with Charles Emmanuel III of Savoy in the February 1742 Convention of Turin.[86] The arrival of a British naval squadron outside Naples in August forced Montemar to detach 10,000 troops to help defend the city. This left him too weak to conduct offensive operations, and at the end of the year, he was replaced by Count Gages.[87] On 8 February 1743, the Spanish and Austrians fought an indecisive battle at Campo Santo, the only other incident of note during the year being a skirmish outside Castelfondo in October.[88][89]
Piacenza
Velletri
Cuneo
Naples
Milan
Genoa
Bassignano
Modena
Villefranche
Italian campaigns 1741 to 1747; key locations in text
In 1744, Spanish and French forces, usually referred to as the Gallispan army, planned an ambitious offensive aimed at conquering northern Italy, although this was hampered by personal conflicts between the respective commanders, Conti and La Mina. They crossed the Alps in June, hoping to unite with Gages on the lower Po.[90] However, under pressure from Austrian troops led by Prince Lobkowitz, the latter withdrew towards the Neapolitan frontier, before winning the Battle of Velletri on 16/17 June.[91]
Elsewhere, fighting continued in the north, where Gallispan troops under Conti captured Villefranche in April 1744, then entered Piedmont on 5 July.[92] Over the next few months, Conti fought a series of battles, culminating in a major victory outside Cuneo on 30 September.[93] However, he was unable to link up with Gages, and crossed the Alps into the Dauphiné for the winter, leaving the Austro-Savoyard army between them. Lobkowitz was subsequently replaced by Schulenburg, while Conti switched with Maillebois.[94]
Concerned by the prospect of diplomatic isolation, Genoa secretly allied with France and Spain, and on 26 June 1745, declared war on Savoy.[95] This enabled Maillebois to connect with Gages in mid-July near Tanaro, and on 27 September their combined force of around 80,000 defeated the Sardinians at Bassignano.[96] However, Maillebois was again unable to exploit his victory, and in early 1746 Austrian troops captured Genoa, then Milan in March.[97].[98]
With much of northern Italy under Austrian control, Maillebois retreated into Liguria, before once again linking up with his Spanish allies. Although their combined force was narrowly defeated at Piacenza on 16 June, Maillebois managed to extricate his army, then won a minor victory at Rottofreddo on 12 August.[99]
Exhausted and short of supplies, the Austrians were driven out of Genoa in December 1746, while an attempt to retake it was abandoned in August.[100] For different reasons, neither side was anxious to continue fighting, and last significant military action was a French defeat at Assietta in July 1747.[100]
The Dutch, British and Austrians withdrew from Fontenoy in good order but Tournai was lost, while Ghent, Oudenaarde, Bruges, and Dendermonde soon followed. By the end of July, the French stood on the threshold of Dutch Flanders, the south-western corner of the Dutch Republic.[101] In August, the French-backed Jacobite rising forced the British to transfer troops from Flanders allowing the French to seize Ostend and Nieuwpoort, threatening Britain's links to mainland Europe.[102]
During 1746, the French continued their advance into the Austrian Netherlands, taking Antwerp and then clearing Dutch and Austrian forces from the area between Brussels and the Meuse. After defeating the Jacobite Rebellion at Culloden in April, the British launched a diversionary raid on Lorient in an unsuccessful attempt to divert French forces, while the new Austrian commander, Prince Charles of Lorraine, was defeated by Saxe at the Battle of Rocoux in October.[103]
The Dutch Republic itself was now in danger. In April 1747, the French began reducing the Barrier Fortresses along the border with the Austrian Netherlands and invaded Dutch Flanders, which they swiftly captured. This prompted an Orangist revolution, which resulted in the appointment of William IV, Prince of Orange as stadtholder and head of the Dutch military.[104] The strategic situation, however, failed to change and at Lauffeld on 2 July 1747, Saxe won another victory over a British and Dutch army under the Prince of Waldeck and Cumberland; the French then besieged Maastricht and Bergen op Zoom, which fell in September.[103] Although the Dutch States Navy was in the poorest condition it had ever been in, its positioning in the estuaries and rivers of Zeeland and Holland, however, prevented French incursions into those provinces.[105]
The French advance lent greater urgency to ongoing peace talks at the Congress of Breda, which took place to the sound of French artillery firing on Maastricht. Following their 1746 alliance with Austria, an army of 30,000 Russians marched from Livonia to the Rhine, but arrived too late to be of use. Maastricht surrendered on 7 May and on 18 October 1748, the war ended with the signing of the Peace of Aix-la-Chapelle.[106]
Negotiations between Britain and France had been taking place at Breda since June 1746; the terms they agreed were then imposed on the other parties at Aix-la-Chapelle. Despite their victories in Flanders, French Finance Minister Machault repeatedly warned of the impending collapse of their financial system. The British naval blockade led to the collapse of French customs receipts and caused severe food shortages, especially among the poor; after Cape Finisterre in October, the French Navy could no longer protect their colonies or trade routes.[107]
This was followed in November by a convention between Britain and Russia; in February 1748, a Russian corps of 37,000 arrived in the Rhineland.[108] Although the Dutch city of Maastricht surrendered to French forces in May 1748, ending the war was increasingly urgent. Louis XV therefore agreed to return the Austrian Netherlands, whose acquisition had cost so much. Few of his countrymen understood this decision; combined with the lack of tangible benefits for helping Prussia, it led to the phrase "as stupid as the Peace".[109]
A commission to negotiate competing territorial claims in North America was set up, but made very little progress. Britain regained Madras, in return for restoring Louisbourg, in Nova Scotia, much to the fury of British colonists. Neither of the two main protagonists appeared to have gained much for their investment and both viewed the Treaty as an armistice, not a peace.[110]
Europe in the years after the Treaty of Aix-la-Chapelle in 1748
In Austria, reactions were mixed; Maria Theresa was determined to regain Silesia and resented British support for Prussia's occupation.[111] On the other hand, the Treaty confirmed her right to the Monarchy, while the Habsburgs had survived a potentially disastrous crisis, regained the Austrian Netherlands without fighting and made only minor concessions in Italy.[33] Administrative and financial reforms made it stronger in 1750 than 1740, while its strategic position was strengthened through installing Habsburg allies as rulers of key territories in Northwest Germany, the Rhineland and Northern Italy.[112]
Of the other combatants, Spain retained its predominance in Spanish America and made minor gains in Northern Italy, gaining the Duchy of Parma and Piacenza for Infante Philip. With French support, Prussia doubled in size with the acquisition of Silesia but twice made peace without informing their ally; Louis XV already disliked Frederick and now viewed him as untrustworthy.[113] In the Dutch Republic the signing of the peace terms, the elevation of the Prince of Orange and the birth of his son caused great joy, but dissatisfaction towards the ruling regime remained. William IV had changed little, did not reckon with his political opponents and, like them, was accused of French sympathies. Many began to think that improvements would not be obtained unless they were violently demanded; and so riots arose.[114] The war confirmed the decline of the Dutch Republic, and the dismantlement of the Barrier fortresses marked the end of its period as a great power; combined with a sense they received little value for the subsidies paid to Maria Theresa, Britain moved to align itself with Prussia, rather than Austria, in order to protect Hanover from French aggression.[113]
These factors led to the realignment known as the 1756 Diplomatic Revolution and the 1756 to 1763 Seven Years' War, which was even grander in scale than its predecessor.
View of the British landing on the island of Cape Breton to attack the fortress of Louisbourg, 1745The French West Indies; the huge profits associated with sugar production made this area highly significant.
The war was also conducted in North America and India. In North America the conflict was known in the British colonies as King George's War, and did not begin until after formal war declarations of France and Britain reached the colonies in May 1744. The frontiers between New France and the British colonies of New England, New York, and Nova Scotia were the site of frequent small scale raids, primarily by French colonial troops and their Indian allies against British targets, although several attempts were made by British colonists to organise expeditions against New France. The most significant incident was the capture of the French Fortress of Louisbourg on Cape Breton Island (Île Royale) by an expedition (29 April–16 June 1745) of colonial militia organised by Massachusetts Governor William Shirley, commanded by William Pepperrell of Maine (then part of Massachusetts), and assisted by a Royal Navy fleet. A French expedition to recover Louisbourg in 1746 failed due to bad weather, disease, and the death of its commander. Louisbourg was returned to France in exchange for Madras, generating much anger among the British colonists, who felt they had eliminated a nest of privateers with its capture.
The war marked the beginning of a powerful struggle between Britain and France in India and of European military ascendancy and political intervention in the subcontinent. Major hostilities began with the arrival of a naval squadron under Mahé de la Bourdonnais, carrying troops from France. In September 1746 Bourdonnais landed his troops near Madras and laid siege to the port. Although it was the main British settlement in the Carnatic, Madras was weakly fortified and had only a small garrison, reflecting the thoroughly commercial nature of the European presence in India hitherto. On 20 September, only six days after the arrival of the French force, Madras surrendered after a brief bombardment.[115] The terms of the surrender agreed by Bourdonnais provided for the settlement to be ransomed back for a cash payment by the British East India Company. However, this concession was opposed by Dupleix, the governor general of the Indian possessions of the Compagnie des Indes. When Bourdonnais was forced to leave India in October after the devastation of his squadron by a cyclone Dupleix reneged on the agreement. The Nawab of the CarnaticAnwaruddin Muhammed Khan intervened in support of the British and advanced to retake Madras, but despite vast superiority in numbers his army was defeated by the French at the Battle of Adyar, one of the earliest demonstrations in the gap in quality that had opened up between European and Indian armies.[116]
The French now turned to the remaining British settlement in the Carnatic, Fort St. David at Cuddalore, which was dangerously close to the main French settlement of Pondichéry. The first French force sent against Cuddalore was surprised and defeated nearby by the forces of the Nawab and the British garrison in December 1746. Early in 1747 a second expedition laid siege to Fort St David but withdrew on the arrival of a British naval squadron in March. A final attempt in June 1748 avoided the fort and attacked the weakly fortified town of Cuddalore itself, but was routed by the British garrison.
With the arrival of a naval squadron under Admiral Edward Boscawen, carrying troops and artillery, the British went on the offensive, laying siege to Pondichéry. They enjoyed a considerable superiority in numbers over the defenders, but the settlement had been heavily fortified by Dupleix and after two months the siege was abandoned.[117]
The peace settlement brought the return of Madras to the British company, exchanged for Louisbourg in Canada. However, the conflict between the two companies continued by proxy during the interval before the outbreak of the Seven Years' War, with British and French forces fighting on behalf of rival claimants to the thrones of Hyderabad and the Carnatic.[118]
The naval operations of this war were entangled with the War of Jenkins' Ear, which broke out in 1739 in consequence of the long disputes between Britain and Spain over their conflicting claims in America.[119] The war was remarkable for the prominence of privateering on both sides. It was carried on by the Spaniards in the West Indies with great success, and actively at home. The French were no less active in all seas. Mahé de la Bourdonnais's attack on Madras partook largely of the nature of a privateering venture. The British retaliated with vigour. The total number of captures by French and Spanish corsairs was in all probability larger than the list of British—as the French wit Voltaire drolly put it upon hearing his government's boast, namely, that more British merchants were taken because there were many more British merchant ships to take; but partly also because the British government had not yet begun to enforce the use of convoy so strictly as it did in later times.[120]
War on Spain was declared by Great Britain on 23 October 1739, which has become known as the War of Jenkins' Ear. A plan was laid for combined operations against the Spanish colonies from east and west. One force, military and naval, was to assault them from the West Indies under Admiral Edward Vernon. Another, to be commanded by Commodore George Anson, afterwards Lord Anson, was to round Cape Horn and to fall upon the Pacific coast of Latin America. Delays, bad preparations, dockyard corruption, and the squabbles of the naval and military officers concerned caused the failure of a hopeful scheme. On 21 November 1739, Admiral Vernon did, however, succeed in capturing the ill-defended Spanish harbour of Porto Bello in present-day Panama. When Vernon had been joined by Sir Chaloner Ogle with massive naval reinforcements and a strong body of troops, an attack was made on Cartagena de Indias in what is now Colombia (9 March–24 April 1741). The delay had given the Spanish under Sebastián de Eslava and Blas de Lezo time to prepare. After two months of skilful defence by the Spanish, the British attack finally succumbed to a massive outbreak of disease and withdrew having suffered a dreadful loss of lives and ships.[121]
The war in the West Indies, after two other unsuccessful attacks had been made on Spanish territory, died down and did not revive until 1748. The expedition under Anson sailed late, was very ill-provided, and less strong than had been intended. It consisted of six ships and left Britain on 18 September 1740. Anson returned alone with his flagship the Centurion on 15 June 1744. The other vessels had either failed to round the Horn or had been lost. But Anson had harried the coast of Chile and Peru and had captured a Spanish galleon of immense value near the Philippines, completing a circumnavigation of the world. His cruise was a great feat of resolution and endurance.[120]
After the failure of the British invasions and a Spanish counter invasion of Georgia in 1742, belligerent naval actions in the Caribbean were left to the privateers of both sides. Fearing great financial and economic losses should a treasure fleet be captured, the Spanish reduced the risk by increasing the number of convoys, thereby reducing their value. They also increased the number of ports they visited and reduced the predictability of their voyages.[citation needed]
In 1744, a British force of 300 men accompanied by two privateers from Saint Kitts successfully captured the French half of neighbouring Saint Martin, occupying it until the 1748 Treaty of Aix-la-Chapelle. In late May 1745 two French royal frigates of 36 and 30 guns respectively under Commodore La Touché, plus three privateers in retaliation sailed from Martinique to invade and capture the British colony of Anguilla but were repelled with heavy loss in the Battle of Anguilla.
The last year of the war saw two significant actions in the Caribbean. A second British assault on Santiago de Cuba which also ended in failure and a naval action which arose from an accidental encounter between two convoys. The action unfolded in a confused way with each side at once anxious to cover its own trade and to intercept that of the other. Capture was rendered particularly desirable for the British by the fact that the Spanish homeward-bound fleet would be laden with bullion from the American mines.[120] The advantage lay with the British when one Spanish warship ran aground and another was captured but the British commander failed to capitalise and the Spanish fleet took shelter in Havana.
While Anson was pursuing his voyage round the world, Spain was mainly intent on the Italian policy of the king. A squadron (led by General Commander Rywick) was fitted out at Cádiz to convey troops to Italy. It was watched by the British admiral Nicholas Haddock. When the blockading squadron was forced off by want of provisions, the Spanish admiral Don Juan José Navarro put to sea. He was followed, but when the British force came in sight of him Navarro had been joined by a French squadron under Claude-Élisée de Court de La Bruyère (December 1741). The French admiral told Haddock that he would support the Spaniards if they were attacked and Haddock retired. France and Great Britain were not yet openly at war, but both were engaged in the struggle in Germany—Great Britain as the ally of the Queen of Hungary, Maria Theresa; France as the supporter of the Bavarian claimant of the empire. Navarro and de Court went on to Toulon, where they remained until February 1744. A British fleet watched them, under the command of Admiral Richard Lestock, until Sir Thomas Mathews was sent out as commander-in-chief and as Minister to the Court of Turin.[121]
Sporadic manifestations of hostility between the French and British took place in different seas, but avowed war did not begin until the French government issued its declaration of 30 March, to which Great Britain replied on 31 March. This formality had been preceded by French preparations for the invasion of England, and by the Battle of Toulon between the British and a Franco-Spanish fleet. On 11 February, a most confused battle was fought, in which the van and centre of the British fleet was engaged with the Spanish rear and centre of the allies. Lestock, who was on the worst possible terms with his superior, took no part in the action. Mathews fought with spirit but in a disorderly way, breaking the formation of his fleet, and showing no power of direction, while Navarro's smaller fleet retained cohesion and fought off the energetic but confused attacks of its larger enemy until the arrival of the French fleet forced the heavily damaged British fleet to withdraw. The Spanish fleet then sailed to Italy where it delivered a fresh army and supplies that had a decisive impact upon the war. The mismanagement of the British fleet in the battle, by arousing deep anger among the people, led to a drastic reform of the British navy.[121]
Northern waters
The French scheme to invade Britain was arranged in combination with the Jacobite leaders, and soldiers were to be transported from Dunkirk. In February 1744, a French fleet of twenty sail of the line entered the English Channel under Jacques Aymar, comte de Roquefeuil, before the British force under Admiral John Norris was ready to oppose him. But the French force was ill-equipped, the admiral was nervous, his mind dwelt on all the misfortunes which might possibly happen, and the weather was bad. De Roquefeuil came up almost as far as The Downs, where he learnt that Sir John Norris was at hand with twenty-five sail of the line, and thereupon precipitately retreated. The military expedition prepared at Dunkirk to cross under cover of De Roquefeuil's fleet naturally did not start. The utter weakness of the French at sea, due to long neglect of the fleet and the bankrupt state of the treasury, was shown during the Jacobite rising of 1745, when France made no attempt to profit by the distress of the British government.[121]
The Dutch, having by this time joined Great Britain, made a serious addition to the naval power opposed to France, though the Dutch Republic was compelled by the necessity for maintaining an army in Flanders to play a very subordinate part at sea. Not being stimulated by formidable attack, and having immediate interests both at home and in Germany, the British government was slow to make use of its latest naval strength. Spain, which could do nothing of an offensive character, was almost neglected. During 1745 the New England expedition which took Louisburg (30 April–16 June) was covered by a British naval force, but little else was accomplished by the naval efforts of any of the belligerents.[121]
In 1746, a British combined naval and military expedition to the coast of France—the first of a long series of similar ventures which in the end were derided as "breaking windows with guineas"—was carried out during August and October. The aim was the capture of the French East India Company's dockyard at Lorient, but it was not attained.[122][121]
From 1747 until the close of the war in October 1748, the naval policy of the British government, without reaching a high level, was more energetic and coherent. A closer watch was kept on the French coast, and effectual means were taken to intercept communication between France and her American possessions. In the spring information was obtained that an important convoy for the East and West Indies was to sail from Lorient.[121] The convoy was intercepted by Anson on 3 May, and in the First Battle of Cape Finisterre, British admiral George Anson's fourteen ships of the line wiped out the French escort of six ships of the line and three armed Indiamen, although in the meantime the merchant ships escaped.
On 14 October, another French convoy, protected by a strong squadron, was intercepted by a well-appointed and well-directed squadron of superior numbers—the squadrons were respectively eight French and fourteen British—in the Bay of Biscay. In the Second Battle of Cape Finisterre which followed, the French admiral, Henri-François des Herbiers, Marquis de l'Estenduère, succeeded in covering the escape of most of the merchant ships, but Hawke's British squadron took six of his warships. Most of the merchantmen were later intercepted and captured in the West Indies. This disaster convinced the French government of its helplessness at sea, and it made no further effort.[121]
In the East Indies, attacks on French commerce by a British squadron under Curtis Barnett in 1745 led to the despatch of a French squadron commanded by Mahé de la Bourdonnais. After an inconclusive clash off Negapatnam in July 1746, Edward Peyton, Barnett's successor, withdrew to Bengal, leaving Bourdonnais unopposed on the Coromandel Coast. He landed troops near Madras and besieged the port by land and sea, forcing it to surrender on 10 September 1746. In October the French squadron was devastated by a cyclone, losing four ships of the line and suffering heavy damage to four more, and the surviving ships withdrew. French land forces went on to make several attacks on the British settlement at Cuddalore, but the eventual replacement of the negligent Peyton by Thomas Griffin resulted in a return to British naval supremacy which put the French on the defensive. Despite the appearance of another French squadron, the arrival of large-scale British reinforcements under Edward Boscawen (who considered but did not make an attack on Île de France on the way) gave the British overwhelming dominance on land and sea, but the ensuing siege of Pondichéry organised by Boscawen was unsuccessful.
The War of the Austrian Succession, like most European wars of the eighteenth century, was fought as a so-called cabinet war in which disciplined regular armies were equipped and supplied by the state to conduct warfare on behalf of the sovereign's interests. Occupied enemy territories were regularly taxed and extorted for funds, but large-scale atrocities against civilian populations were rare compared with conflicts in the previous century.[125]Military logistics was the decisive factor in many wars, as armies had grown too large to support themselves on prolonged campaigns by foraging and plunder alone. Military supplies were stored in centralised magazines and distributed by baggage trains that were highly vulnerable to enemy raids.[126] Armies were generally unable to sustain combat operations during winter and normally established winter quarters in the cold season, resuming their campaigns with the return of spring.[123]
↑Tucker, Spencer C., ed. (2009). A Global Chronology of Conflict: From the Ancient World to the Modern Middle East. Santa Barbara (CA): ABC-CLIO. p.746. ISBN978-1-851-09667-1.
↑Dalrymple, William (2019). The Anarchy: The Relentless Rise of the East India Company. Great Britain: Bloomsbury Publishing. pp.50–51. ISBN978-1-5266-1850-4.
↑George W. Forrest, "The Siege of Madras in 1746 and the action of La Bourdonnais." Transactions of the Royal Historical Society 2 (1908): 189–234. DOI: https://doi.org/10.2307/3678377
↑Jean Sutton, The East India Company's Maritime Service, 1746–1834: Masters of the Eastern Seas (Boydell & Brewer, 2010).
↑Jack M. Sosin, "Louisburg and the Peace of Aix-la-Chapelle, 1748." William and Mary Quarterly (1957): 516–535.
Clodfelter, Micheal (2017) [2002]. Warfare and Armed Conflicts: A Statistical Reference to Casualty and Other Figures 1500–1999. McFarland & Co. ISBN978-0-7864-1204-4.
Coxe, William (2010) [1847]. History of the House of Austria. Nabu Publishing. ISBN978-1-148-32947-5.
Colussi, Paolo (2012). "Chronology of Milan". Storia di Milano. Storiadimilano, di Paolo Colussi e Mariagrazia Tolfo. Retrieved 24 February 2025.
Hanlon, Gregory (1997). The Twilight of a Military Tradition: Italian Aristocrats And European Conflicts, 1560–1800. Routledge.
Harding, Richard (2013). The Emergence of Britain's Global Naval Supremacy: The War of 1739–1748. Boydell Press. ISBN978-1-84383-823-4.
Hochedlinger, Michael (2003). Austria's Wars of Emergence, 1683–1797 (Modern Wars in Perspective). Routledge. ISBN978-0-582-29084-6.
Holborn, Hajo (1982). A History of Modern Germany, Vol. 2: 1648–1840. Princeton University Press. ISBN978-0-691-00796-0.
Horn, David Bayne (1929). "Saxony in the War of the Austrian Succession". The English Historical Review. 44 (173): 33–47. doi:10.1093/ehr/XLIV.CLXXIII.33. JSTOR552493.
Lee, Stephen J. (1984). Aspects of European History, 1494–1789. London: Routledge. ISBN978-0-416-37490-2.
Lincoln, W. Bruce (1981). The Romanovs: Autocrats of All the Russias. New York: The Dial Press.
Vego, Milan N. (2003). Naval Strategy and Operations in Narrow Seas. Frank Cass. ISBN978-0-7146-5389-1.
Van Nimwegen, Olaf (2002). De Republiek der Verenigde Nederlanden als grote mogendheid: Buitenlandse politiek en oorlogvoering in de eerste helft van de achttiende eeuw en in het bijzonder tijdens de Oostenrijkse Successieoorlog (1740–1748) (in Dutch). De Bataafsche Leeuw. ISBN90-6707-540-X.
Ingrao, Charles (2000). The Habsburg Monarchy, 1618–1815 (New Approaches to European History). Cambridge University Press. ISBN978-0-521-78034-6.
Jomini, General Baron Antoine Henri de (2015) [1865]. Treatise on Grand Military Operations; a Critical and Military History of the Wars of Frederick the Great, Volume 1. Creative Media Partners, LLC. ISBN978-1-298-62742-1.
Mahan, J. Alexander (1932). Maria Theresa of Austria. New York: Thomas Y. Crowell Pub.
McNally, Michael (2017). Fontenoy 1745: Cumberland's bloody defeat. Osprey. ISBN978-1-4728-1625-2.
Rodger, Brendan (2005). The Command of the Ocean: A Naval History of Britain 1649–1815. W.W. Norton & Company. ISBN978-0-393-06050-8.
This page is based on this Wikipedia article Text is available under the CC BY-SA 4.0 license; additional terms may apply. Images, videos and audio are available under their respective licenses.